By Design Bundles
Cricut Tutorials6 min
How to Use Hide Contour in Cricut Design Space
In this tutorial, we will learn how to hide individual pieces of our design. This will allow us to create a whole different look using the Hide contour feature in Cricut Design Space. You can also select pieces in your design that you no longer would like cut out. This is a great option when you love the design but just don't have all the time to weed.
To begin, log in to Cricut Design Space and open a new project. Next, upload your SVG design. We have a full tutorial on uploading SVG files to Design Space if needed. For this tutorial, we will be uploading and using a turtle mandala SVG from Design Bundles.
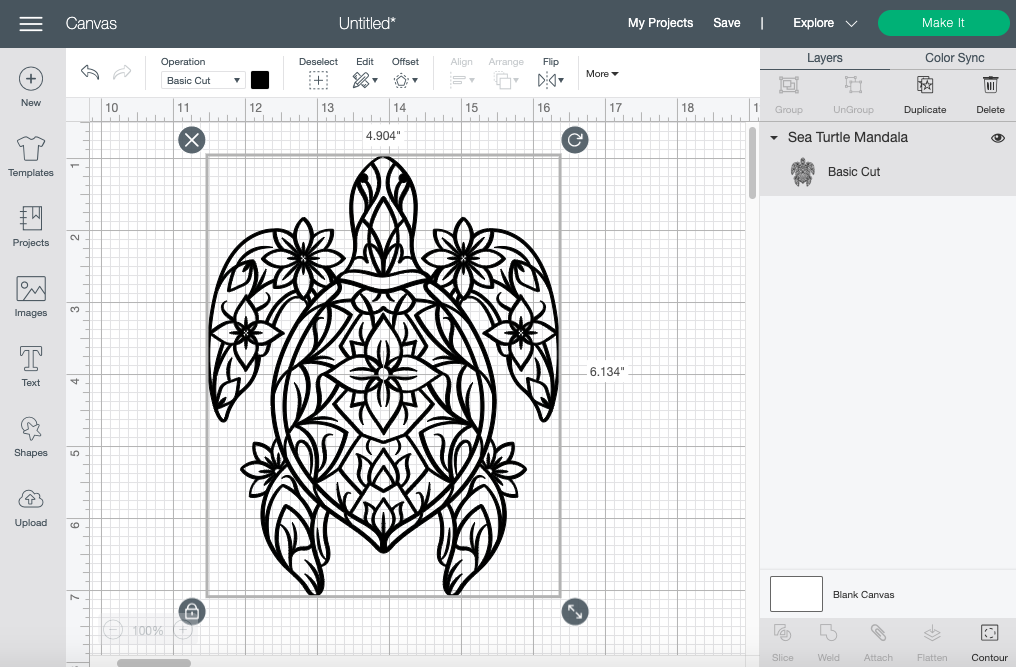
Please note that you may need to ungroup your design if it contains multiple layers. You can do this by clicking the Ungroup icon under the layers panel. After ungrouping the design, select the layer you will like to contour.
With the layer selected click the Contour icon on the lower right-hand side of your screen.
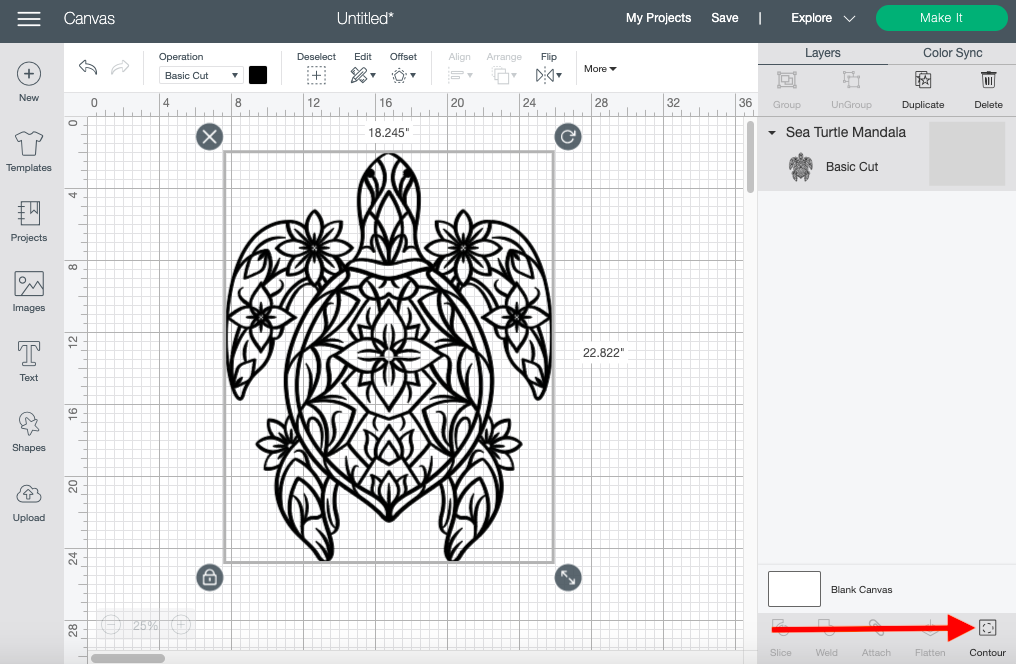
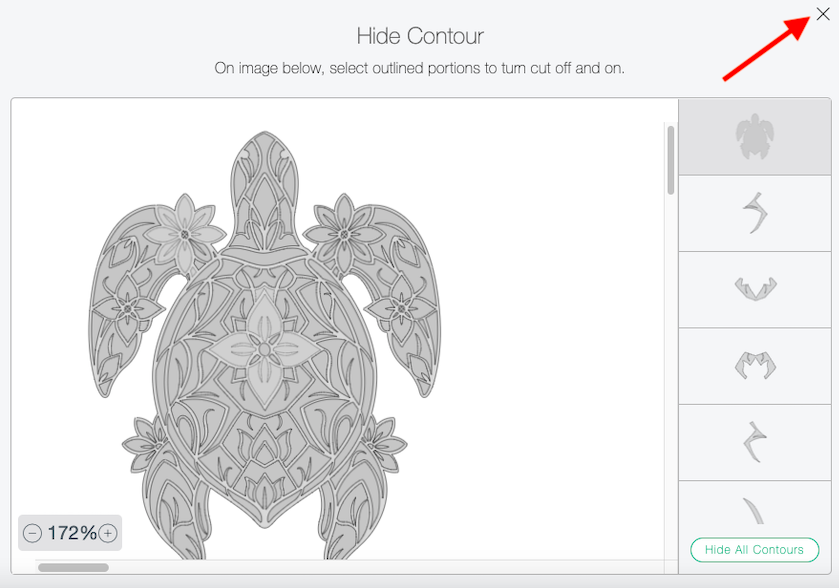
A new window will appear called the Hide Contour window. In this window, you will be able to select the pieces within the image that you would like to hide. Once selected, the piece will turn a lighter grey which means it is now hidden. To deselect, just click on the piece again.
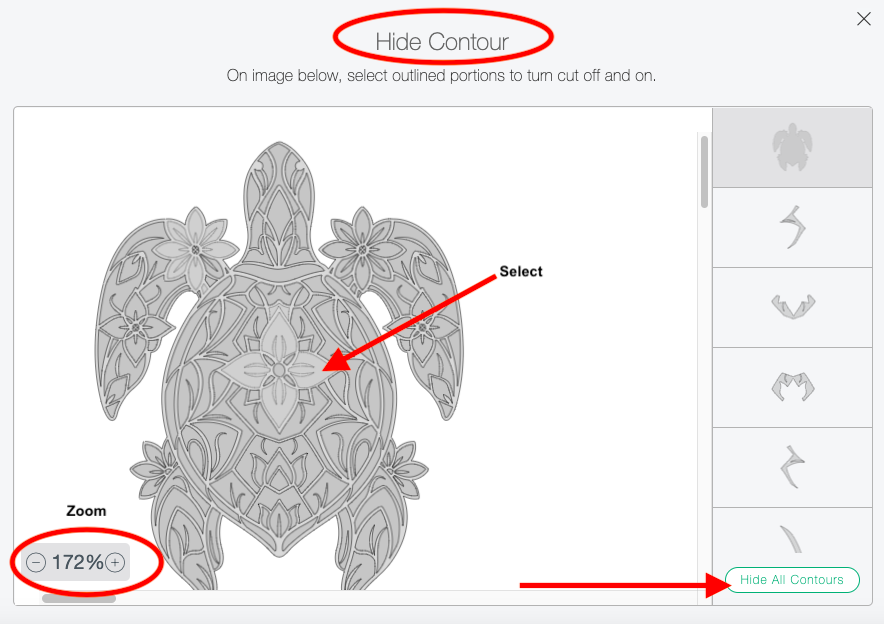
If you have smaller pieces that need selecting, use your Zoom Feature on the bottom of the window. You can also select the entire image and its pieces by clicking Hide All Contours on the lower right-hand corner.
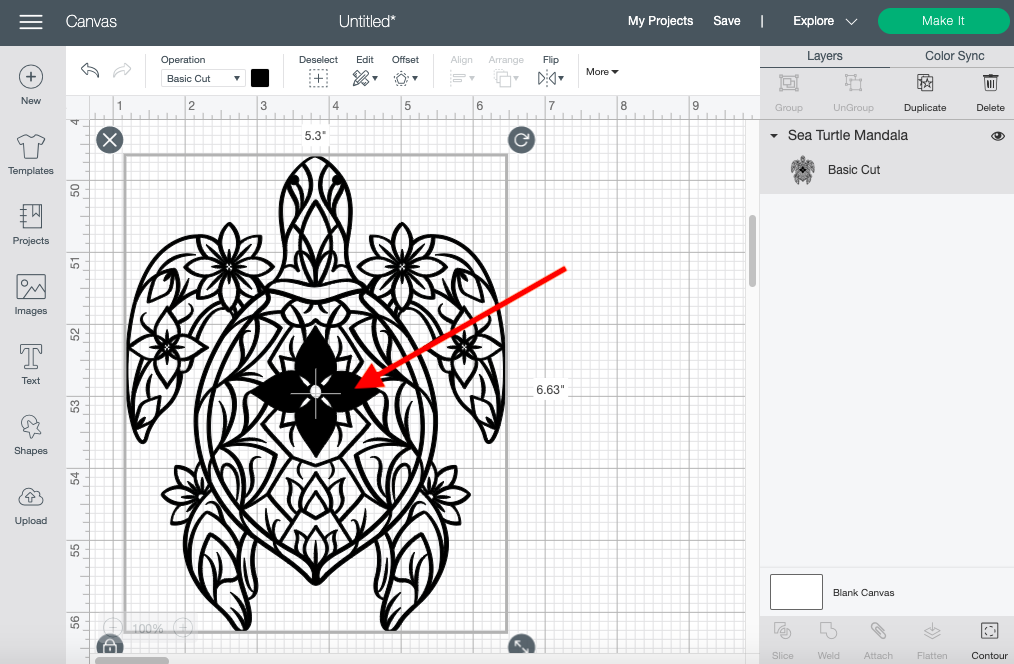
After selecting all your pieces click the small “X” on the upper right-hand corner to exit out of the Contour window. You will now be able to view your final product on the canvas screen.
Continue the contour process until you are satisfied with the new look. This is an easy way to change an already beautiful design to something new and fresh.
If you like this tutorial, make sure to check out our other tutorials such as how to create a layered image and how to edit default material settings in Cricut Design Space.
Step 1 - Upload SVG Design
To begin, log in to Cricut Design Space and open a new project. Next, upload your SVG design. We have a full tutorial on uploading SVG files to Design Space if needed. For this tutorial, we will be uploading and using a turtle mandala SVG from Design Bundles.
Please note that you may need to ungroup your design if it contains multiple layers. You can do this by clicking the Ungroup icon under the layers panel. After ungrouping the design, select the layer you will like to contour.
Step 2 - Open “Hide Contour” Window
With the layer selected click the Contour icon on the lower right-hand side of your screen.
A new window will appear called the Hide Contour window. In this window, you will be able to select the pieces within the image that you would like to hide. Once selected, the piece will turn a lighter grey which means it is now hidden. To deselect, just click on the piece again.
If you have smaller pieces that need selecting, use your Zoom Feature on the bottom of the window. You can also select the entire image and its pieces by clicking Hide All Contours on the lower right-hand corner.
After selecting all your pieces click the small “X” on the upper right-hand corner to exit out of the Contour window. You will now be able to view your final product on the canvas screen.
Continue the contour process until you are satisfied with the new look. This is an easy way to change an already beautiful design to something new and fresh.
If you like this tutorial, make sure to check out our other tutorials such as how to create a layered image and how to edit default material settings in Cricut Design Space.
Related Tutorials
Cricut Tutorials
How To Use The Slice Tool In Cricut Design Space To Split Images
Learn how easily to Split Images in Cricut Design Space using the Slice Tool.
Cricut Tutorials
How to Use a PDF File in Cricut Design Space
In this tutorial we guide you through the steps on using a PDF file in Cricut Design Space.
Cricut Tutorials
How to use Glyphs in Cricut Design Space
Discover how to use font glyphs/alternate characters in Cricut Design Space.
Silhouette Tutorials
How to Use Silhouette Files in Cricut Design Space
Discover how you can use your Silhouette Studio file in Cricut Design Space.
Cricut Tutorials
How to use Fonts In Cricut Design Space
Learn how to successfully use Fonts in Cricut Design Space with this step-by-step tutorial.
Cricut Tutorials
How to Use Pattern Fill in Cricut Design Space
Learn how to use the pattern fill feature in Cricut Design Space with this beginner tutorial.