
By Design Bundles
Geometric Flower in Illustrator
There are many different ways you can make a geometric flower vector. In this tutorial, we will show you how to make a basic geometric flower in Illustrator with a stem and leaves. We’ll take you step-by-step and use some of our favorite tools like rotate and the Pathfinder in Illustrator.
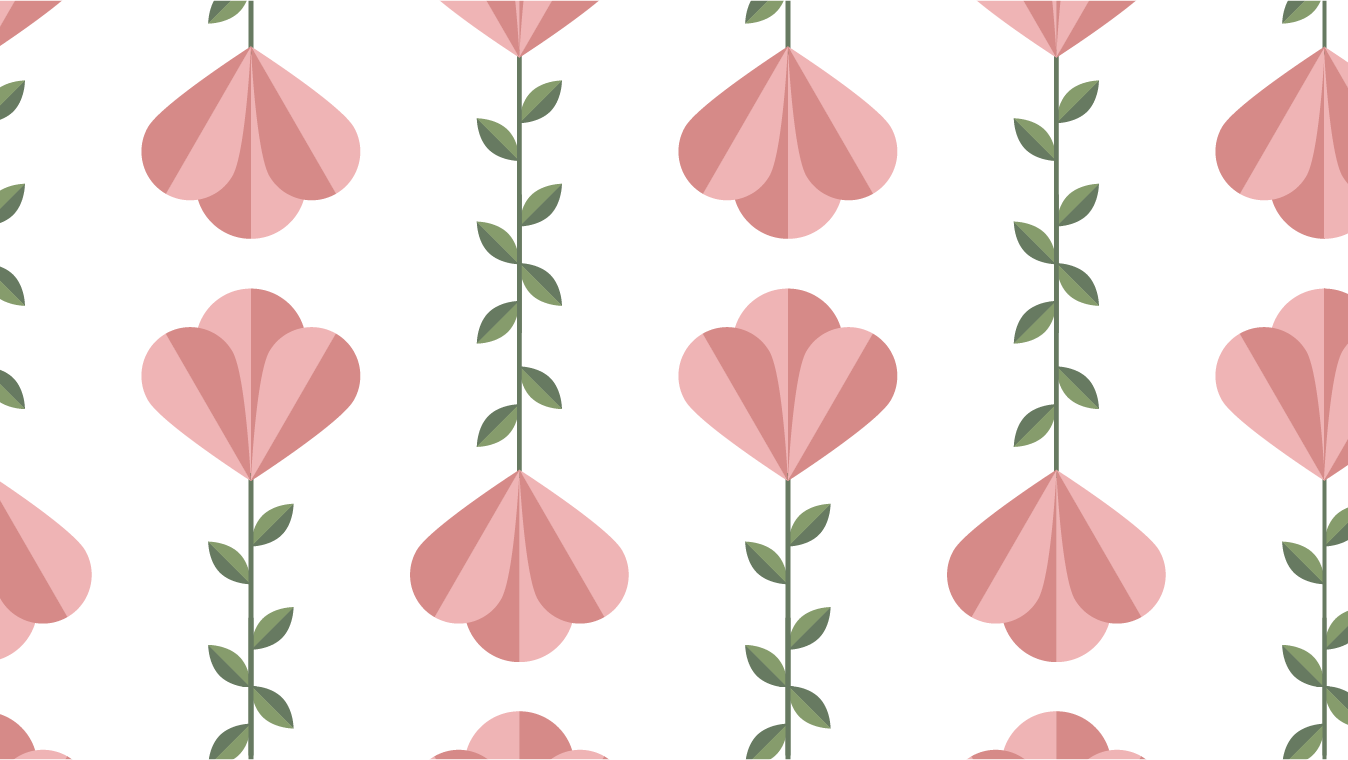
Create the Petal Shape
Let's begin the geometric flower vector by creating the petal shape. Start off by using the “Ellipse Tool” (L) and holding down Shift to create a perfect circle.
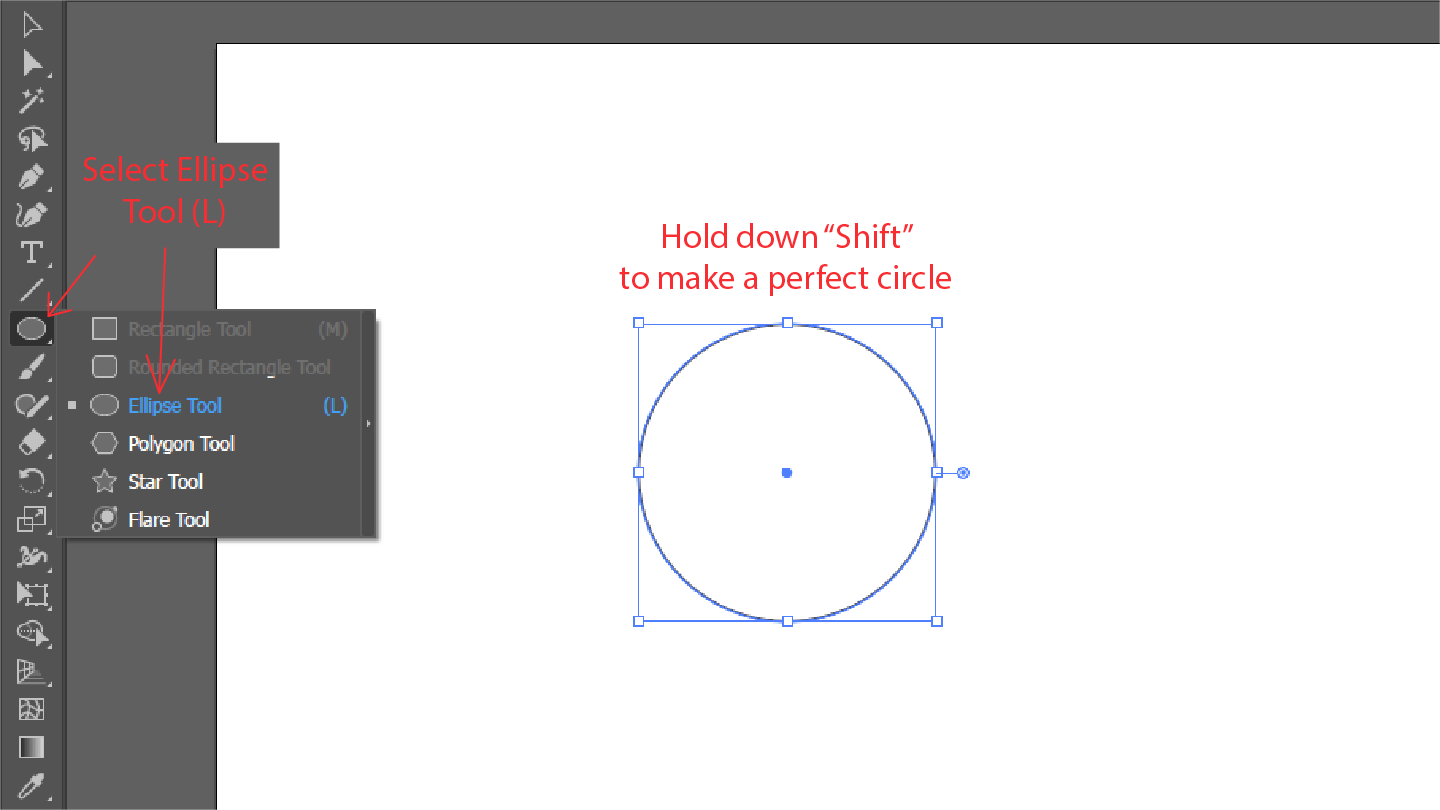
Step 1 - Create a Teardrop shape
Next, use the “Direct Selection Tool” (A) and select the anchor point at the bottom of your circle. Holding down on the anchor point, drag it downward. This is the base of the petal. The further down you drag the anchor point the longer your petal will be.

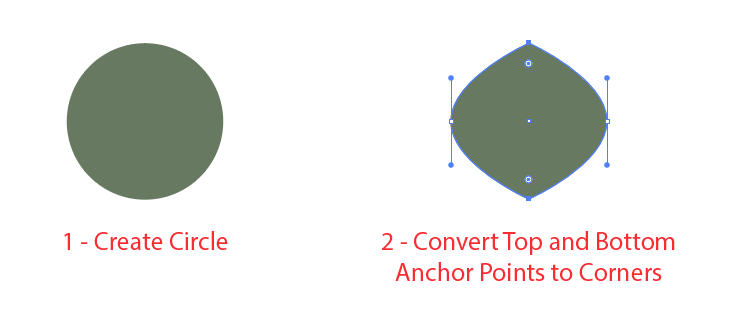
With the anchor point still selected, go to the “Anchor Point” panel > Convert, and select “Convert selected anchor points to corners”. Your petal will look like an upside-down teardrop shape.

Step 2 - Split the Petal in Half
Next, you are going to split the petal shape in half. To do this, select the “Line Segment Tool” (\) and make a vertical line through the petal.

Using the Selection Tool (V) select both the line and shape then go to the “Pathfinder” panel. Now, below the Pathfinder section select “Divide”. You can find the pathfinder panel by going to “Window” > “Pathfinder”.

Make the flower design
We need to duplicate then rotate the petal to create the flower. Select the petal, then enable the “Rotating Tool” on the left side toolbar. Alternatively use the keyboard shortcut (R).

Step 1 - Right Petal Rotation
In this step, we want to rotate the petal to the right. First, we need to set the rotate reference point at the bottom of the petal. Now, ALT-click (Windows) or Option-click (Mac OS) on the bottom anchor point.
The “Rotate” options window will pop up and you can set how far you want to rotate the petal. We set our angle to -30° for the right placement then clicked “Copy”.

Step 2 - Left Petal Rotation
Repeat the rotation once more but for the opposite side. This time our angle was set to 30°, which placed the petal on the left. We went ahead and selected our copies on the left and right. Then resized them just a bit smaller than our main center petal.
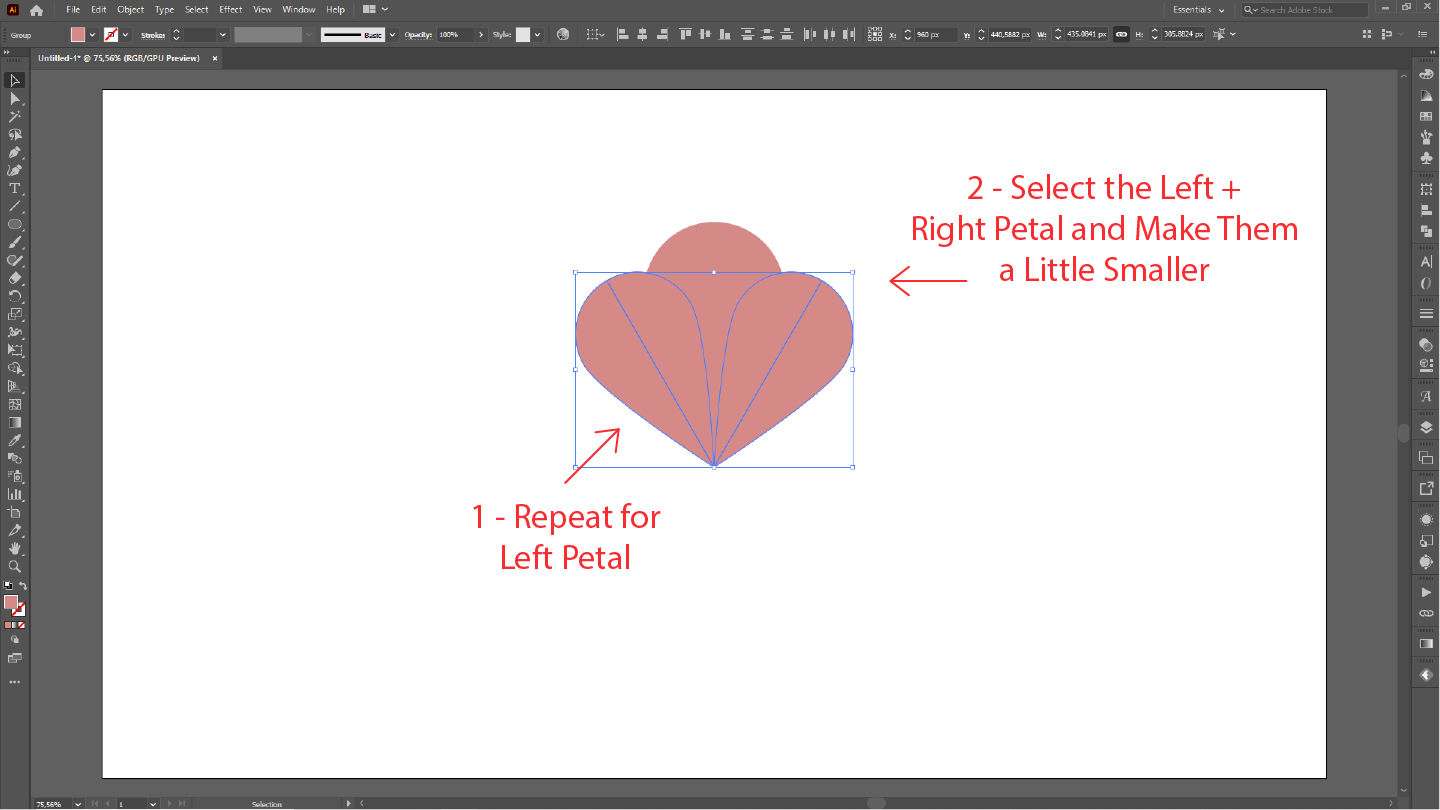
Step 3 - Color the Petals
Once done, select all petals and ungroup them by right-clicking > Ungroup. Using your colors of choice, color one-half of each petal a different color. You can use the image below as a reference.
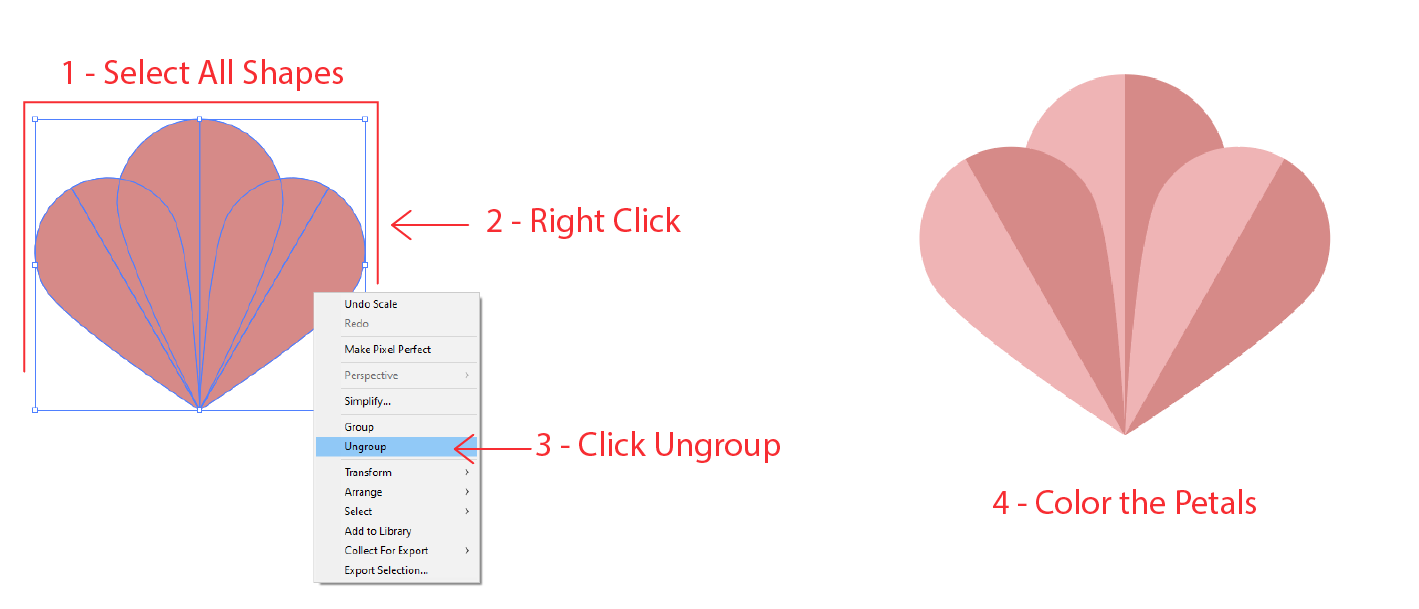
Add a Stem and Leaves
There are many ways you can finish off your geometric flower vector. You can use it with just the petals or add in some foliage. To complete our geometric flower we will make a stem and add in leaves.
Step 1 - Add a Stem
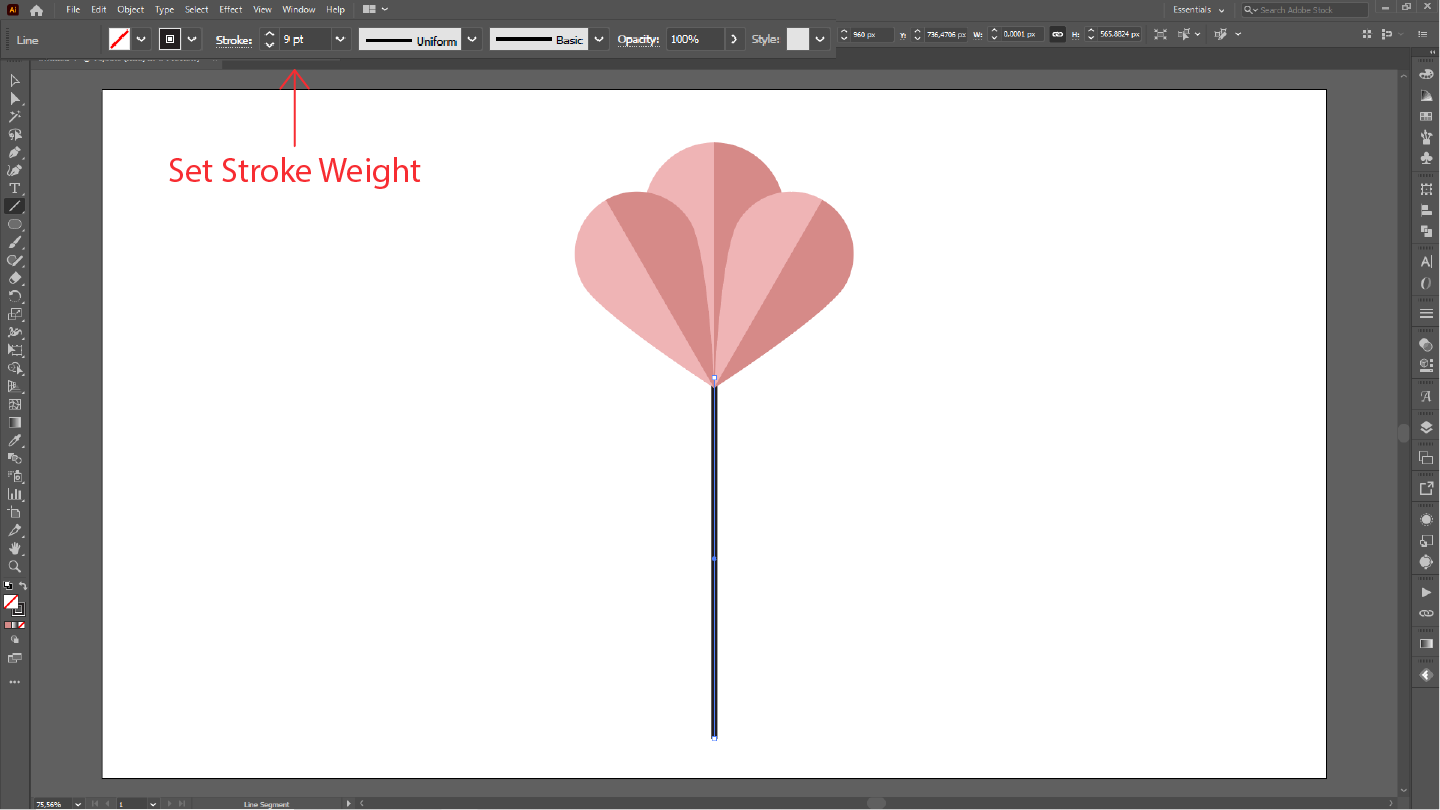
For the stem use the “Line Segment Tool” (\). Draw a line leading down from the petals while holding shift for a straight line. Adjust the “Stroke” weight to the thickness that you want (ours is 9pt) and color it.
Step 2 - Create the Leaf Shape
For the leaves, we are going to use the “Ellipse Tool” (L) again and make a circle. Next, use the “Direct Selection Tool” (A). Convert the top and bottom anchors to corners like we did with the petal.
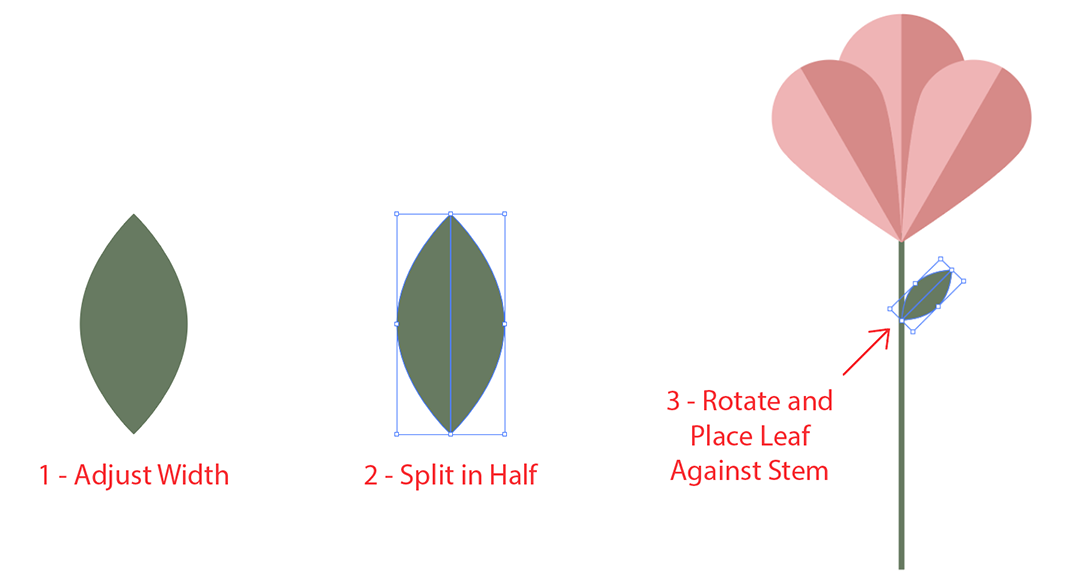
With the “Selection Tool” (V), adjust the width of the leaf. Using the same process as before with the petal, split the leaf in half using “Pathfinder”. You can make adjustments to the size of the leaf and rotate it. Place the leaf against the stem as seen in the image below.
Step 3 - Duplicate Leaves
We duplicated our leaf and placed the copy further down the stem. To quickly duplicate the leaf, select and drag + hold Alt (Windows) or Options (Mac OS). Next, select both leaves and right-click, from the options select “Transform” > “Reflect”.

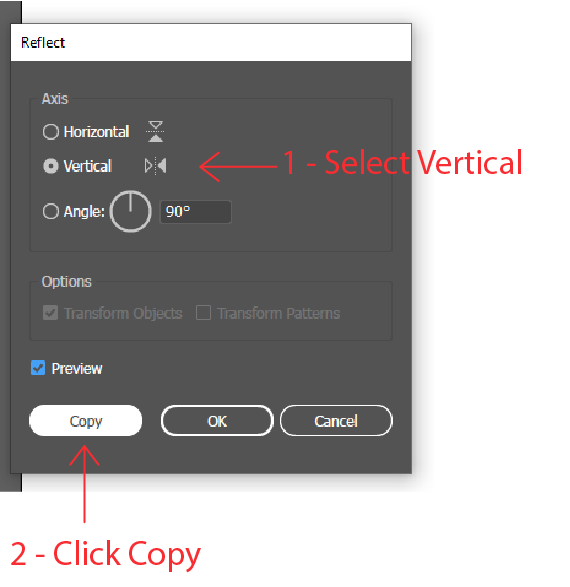
We are going to do a vertical axis reflection to tilt the leaves to the left. Then we can place them on the left side of the stem. We used the settings below.
- Axis: Vertical
- Angle: Leave at 90 degrees
- Click “Copy”
Drag the leaves to the opposite side of the stem and place them.
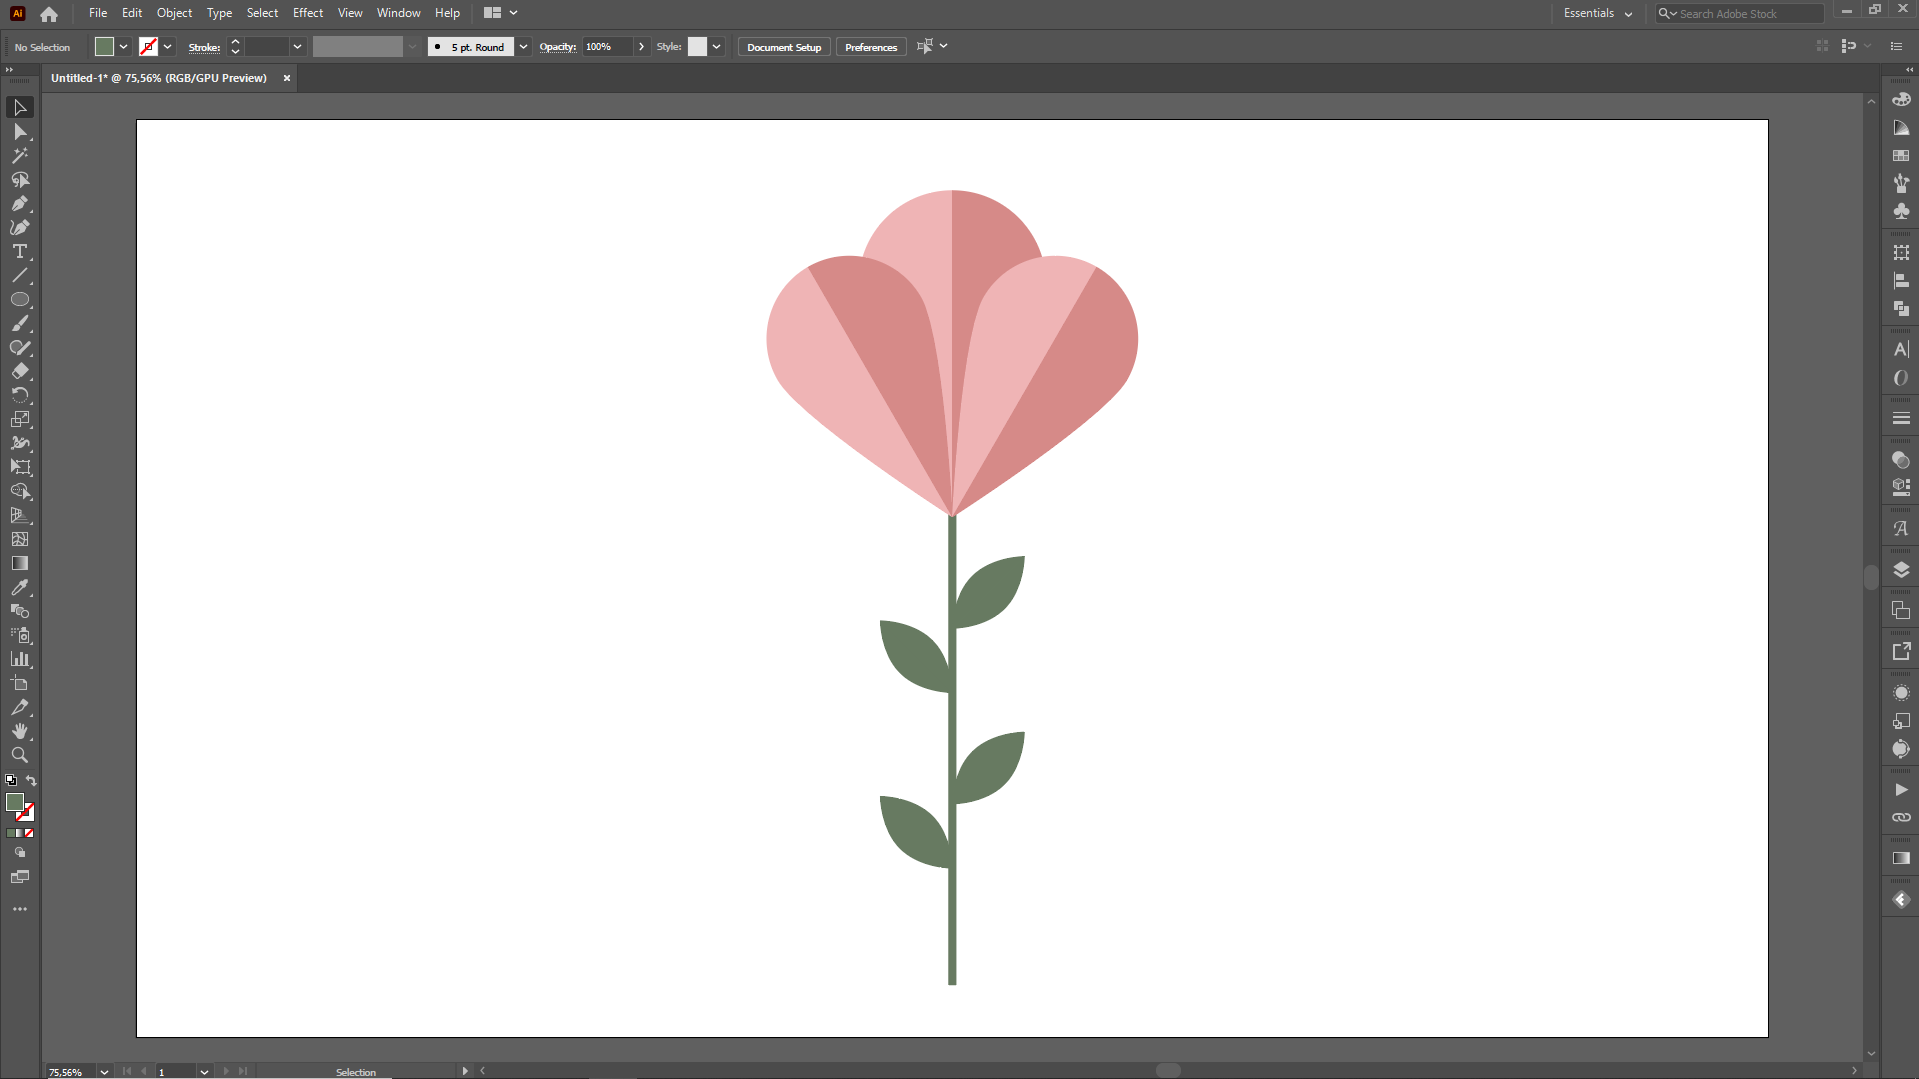
We are just about done creating a geometric flower vector in Illustrator. All that’s left now is to ungroup and color the leaves.

There you have it! You can make geometric flowers in Illustrator using different shapes and even play around with different foliage styles.