By Lorna Cana
How to Embed All Images in Illustrator
In this tutorial, we will learn how to embed images in Illustrator. This is particularly helpful if you need to send your files to other users without any image being misplaced. We will also do a brief overview of the differences between linking and embedding files, how to convert linked files into embedded files, and how to unembed or relink files.
We placed some floral stickers inside our document to illustrate the techniques used.
Linking vs. Embedding
When you place a file into an Illustrator document, what you see is a preview at screen resolution, but the actual image may be linked or embedded.
Linked files are connected but remain independent from the document they are placed into. So if you move the original file from its location, the link will be broken, and you will no longer be able to view it in your document.
To avoid this, you can embed files when using the Place command or embed already linked files, so they are placed (or stored) directly within your document (as a part of it). Take into consideration that embedding will increase the size of your document since the files are copied at full resolution.
To see if an image is linked or embedded, you can use the Links panel (Window > Links). There, you can also change its status from one to another, which we will cover later in this tutorial.
In the Links panel, the file will show an embedded-link icon on the right side of its thumbnail if it’s embedded.

Also, linked files have an X crossing their bounding box when selected, while embedded files don’t have the X crossing their bounding box when selected.
Embedding Files While Placing Them
As you place images into the document, you can embed them instead of linking them.
Step 1 - Open the Place Window
First, go to File > Place.

Step 2 - Select the Image and Uncheck the Link Box
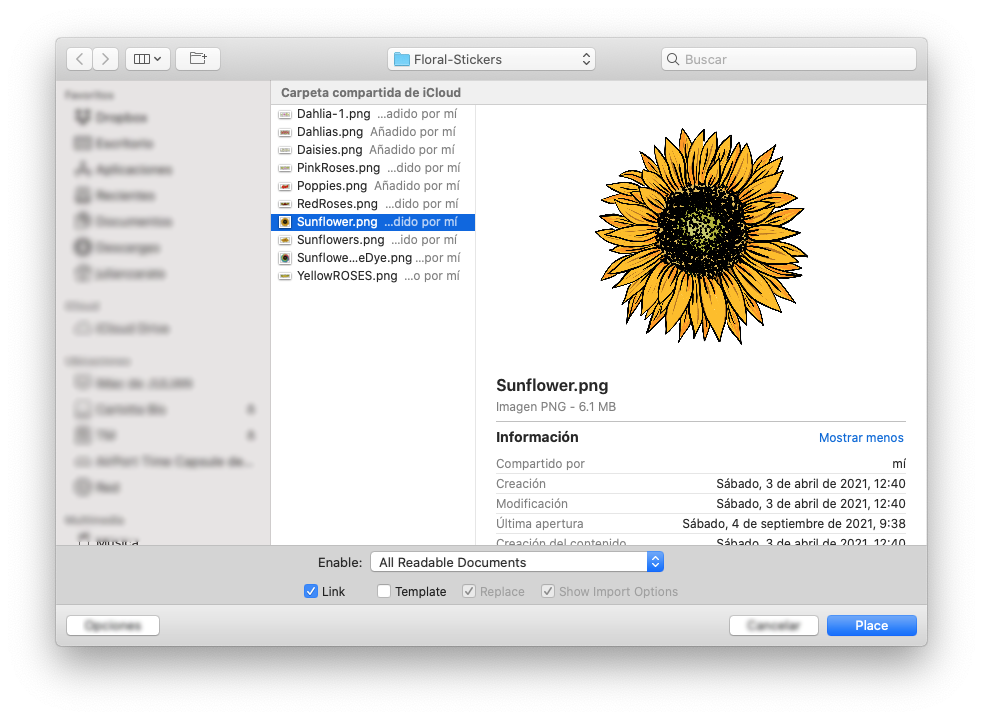
Then, navigate to where the image you want to bring into the document is saved and select the image. Uncheck the Link box at the bottom of the Place window, then click the Place button to import the image into your document.

Step 3 - Place the File in your Document
Click inside your canvas to place it. The image is now embedded in the document instead of linked.

Convert Linked Files Into Embedded Files
There are two ways you can embed your files if they have already been linked inside the document. The first one is by selecting the image and, in the Control panel in the top toolbar, clicking the Embed button.

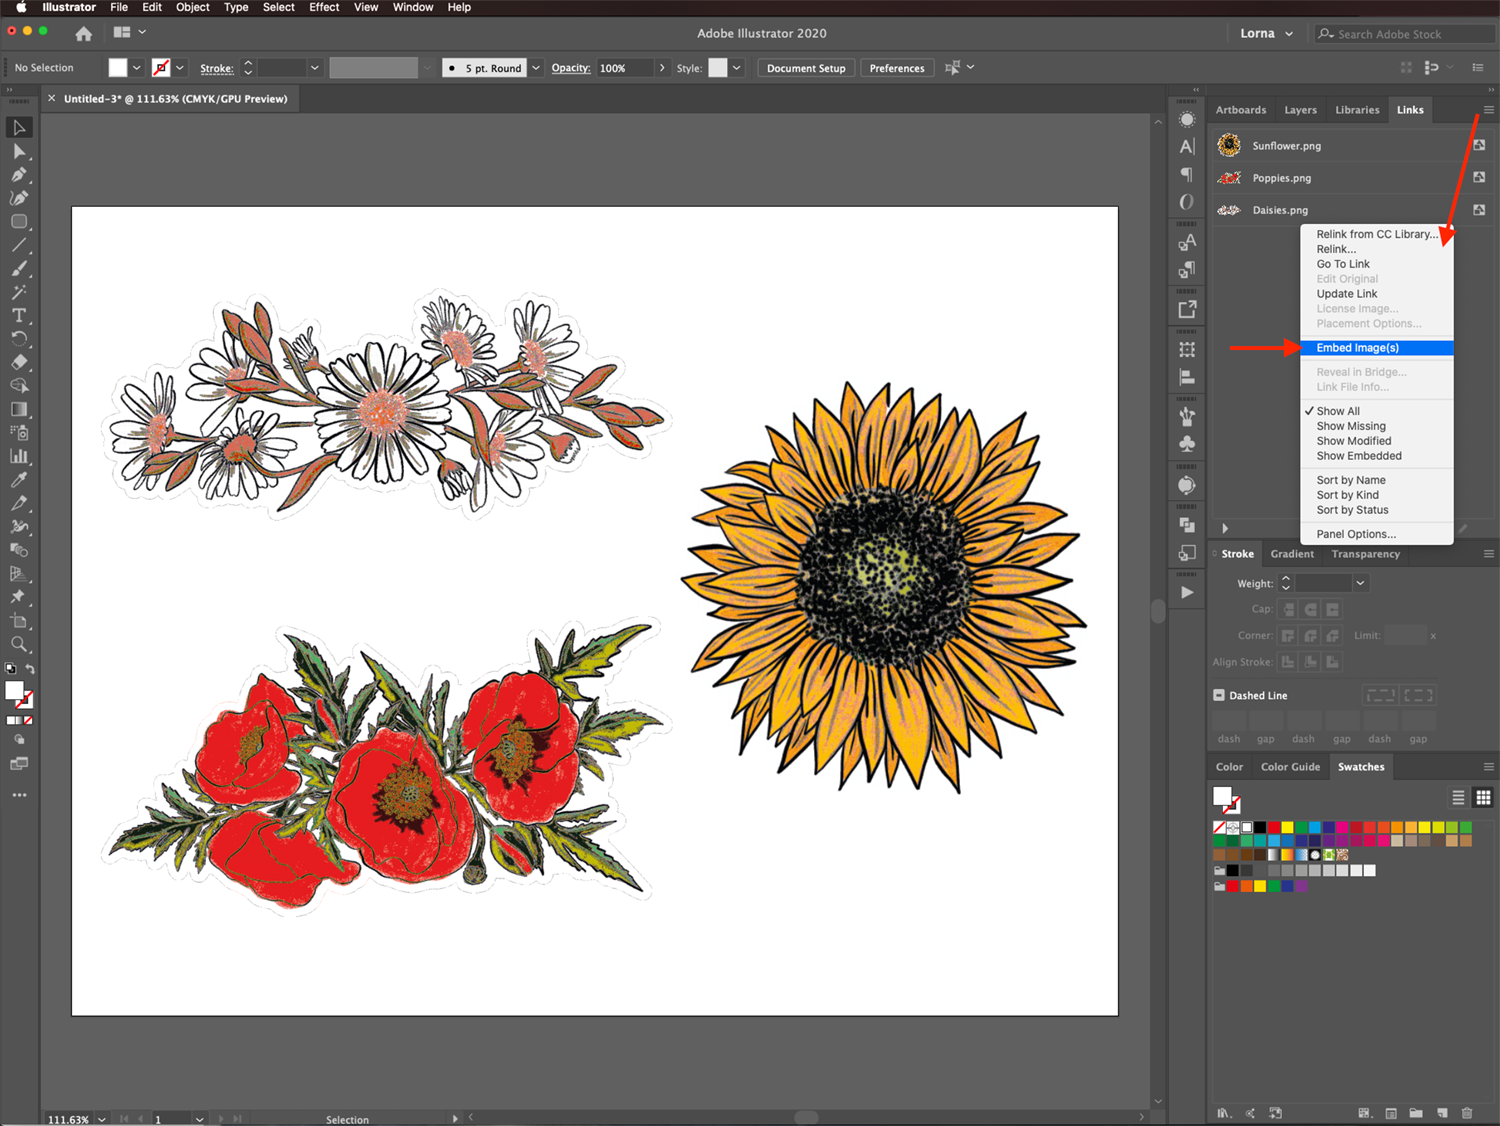
And, the second way is by selecting the filename from the Links panel, clicking on the small menu icon on the top right side, and choosing Embed Image(s).
Unembedding or Relinking Files
If by any chance you want to unembed or relink a file, either to have it available outside Illustrator or to slim down your document, you can use the following methods.
Unembed the File
To unembed, select the image and click the Unembed button of the Control panel in the top toolbar. You can also choose this option from the Links panel menu.

This will open the Unembed dialog box for you to choose the location where you want to save your file and the file format (TIFF or PSD only) you want it to save it in. After clicking Save, the file will then be unembedded and linked to your document.

Relink the File
Or, if you want to relink the file, you can select the file name and click Relink (chain icon) at the bottom of the Links panel.

The Place window will appear, and you will be prompted to navigate to where the original file is saved. Then, select it, making sure that the Link box is checked, and click Place.
We hope that you found this tutorial helpful. We also have a number of other great Illustrator tutorials you won't want to miss, including how to vectorize artwork, how to recolor artwork, and how to create a knockout design.