By Design Bundles
Illustrator Tutorials20 min
How to Make a Seamless Pattern in Illustrator
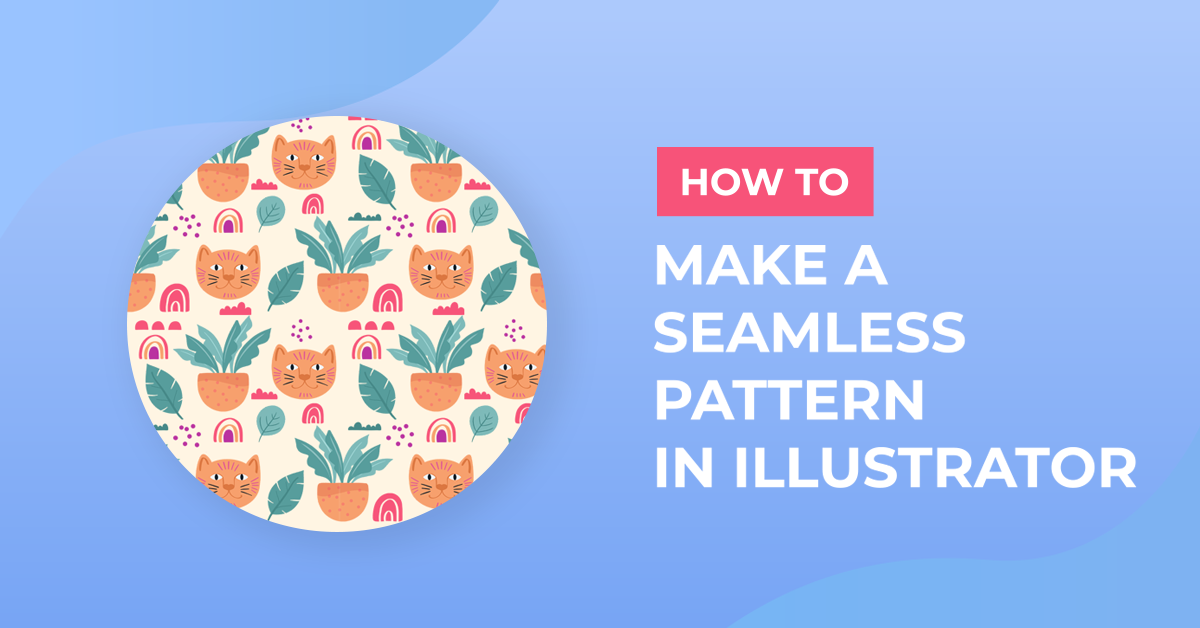
Seamless Patterns are very useful design elements. They can have multiple applications like fabric for cushions and other home decor items, tote bags, or phone cases, and even as web elements. In this tutorial we will show you how to make a seamless pattern in Illustrator.
There are two types of Patterns in Illustrator, Fill and Stroke patterns, in this case, we will be focusing on Fill Patterns. Fill patterns can be geometrical or irregular.
The more complex the Pattern is the smallest should be the artwork used to make it. But keep in mind that the smallest the tile is, the more copies of it are needed to create the Pattern. Prefer that Pattern tiles be of an even dimension that is dividable by 2 but this is more for convenience and not a rule.
Patterns in Illustrator are saved as Swatches in the Swatches Panel, where you can click on them to apply and even double-click on them to edit.
What makes your Pattern seamless is that the design elements on the edges mirror each other so when they tile together they will join and form a smooth transition. You need to keep that in mind when you create the base design. But, depending on your base design and on the tweaking of the Pattern Options you may not need to worry about this part too much.
The settings of the document, as well as the size of the Background and/or Artboard, depends on the desired usage for the Pattern. Bear in mind that if you use vectors, you will be able to resize them without losing resolution but if you use bitmaps of any kind (or rasterize objects) then, you won't be able to enlarge the Pattern that much.
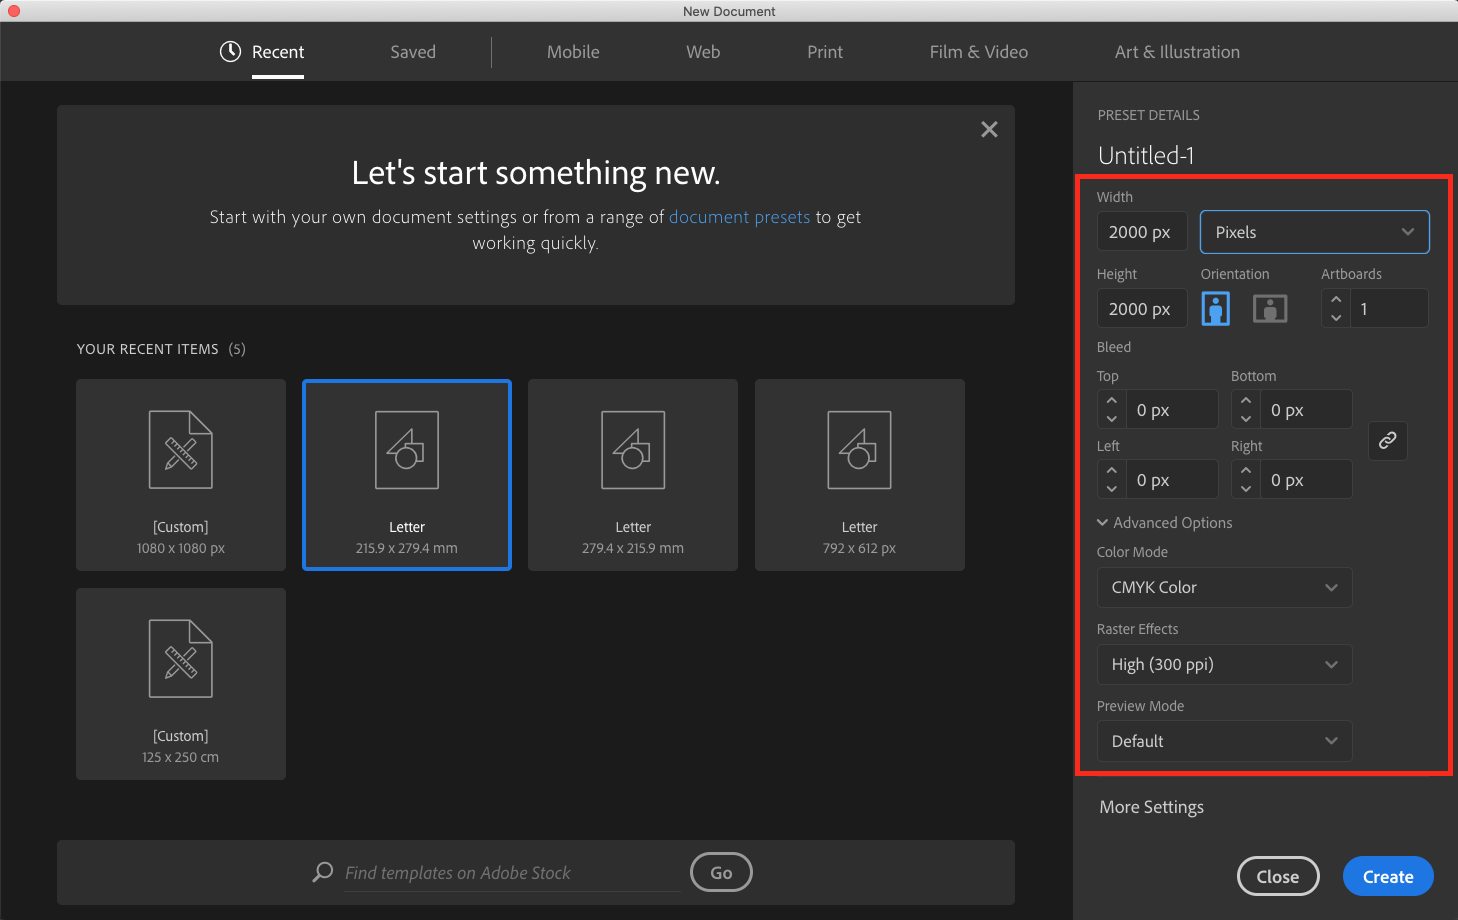
Create a New Document. We are using 2000 x 2000 px, CMYK Color Mode, and High (300 ppi) Raster Effects as the settings for this one.
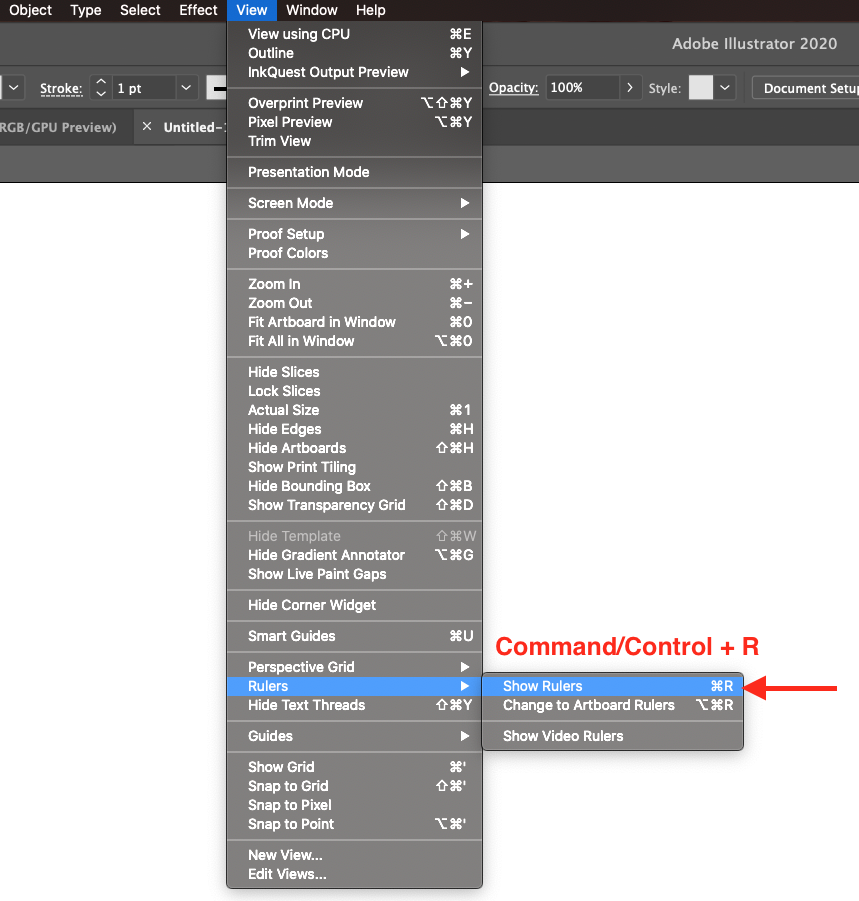
Turn On the Rulers (Command/Control + R).
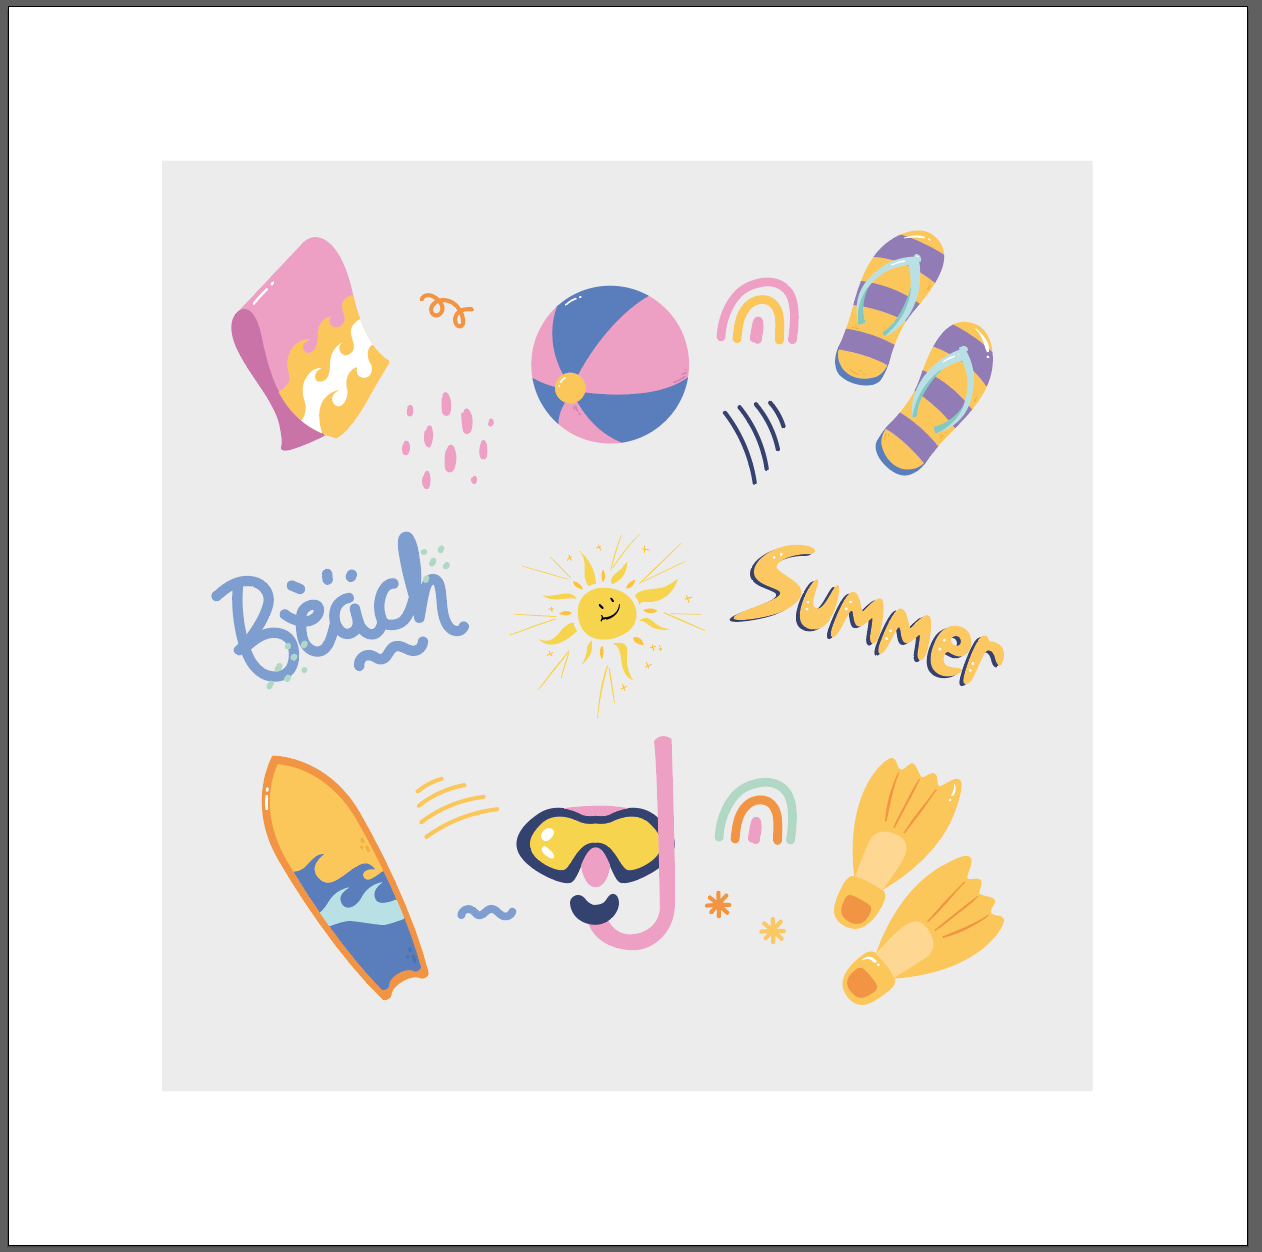
The base design can be made from scratch or you can use something similar like vector clipart. For our base design, we decided to go with this cute summer holiday clipart from Design Bundles.
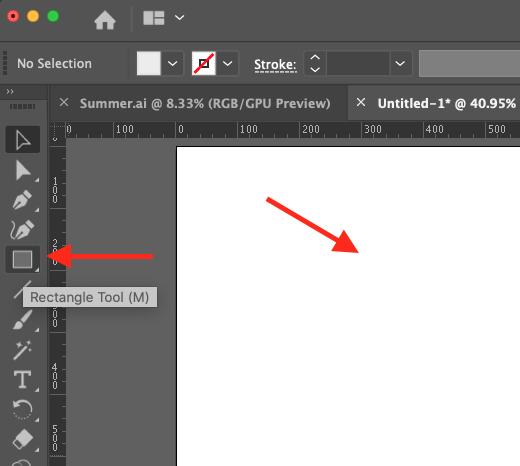
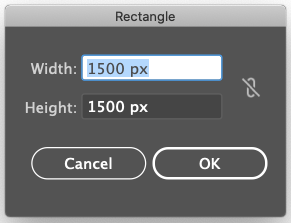
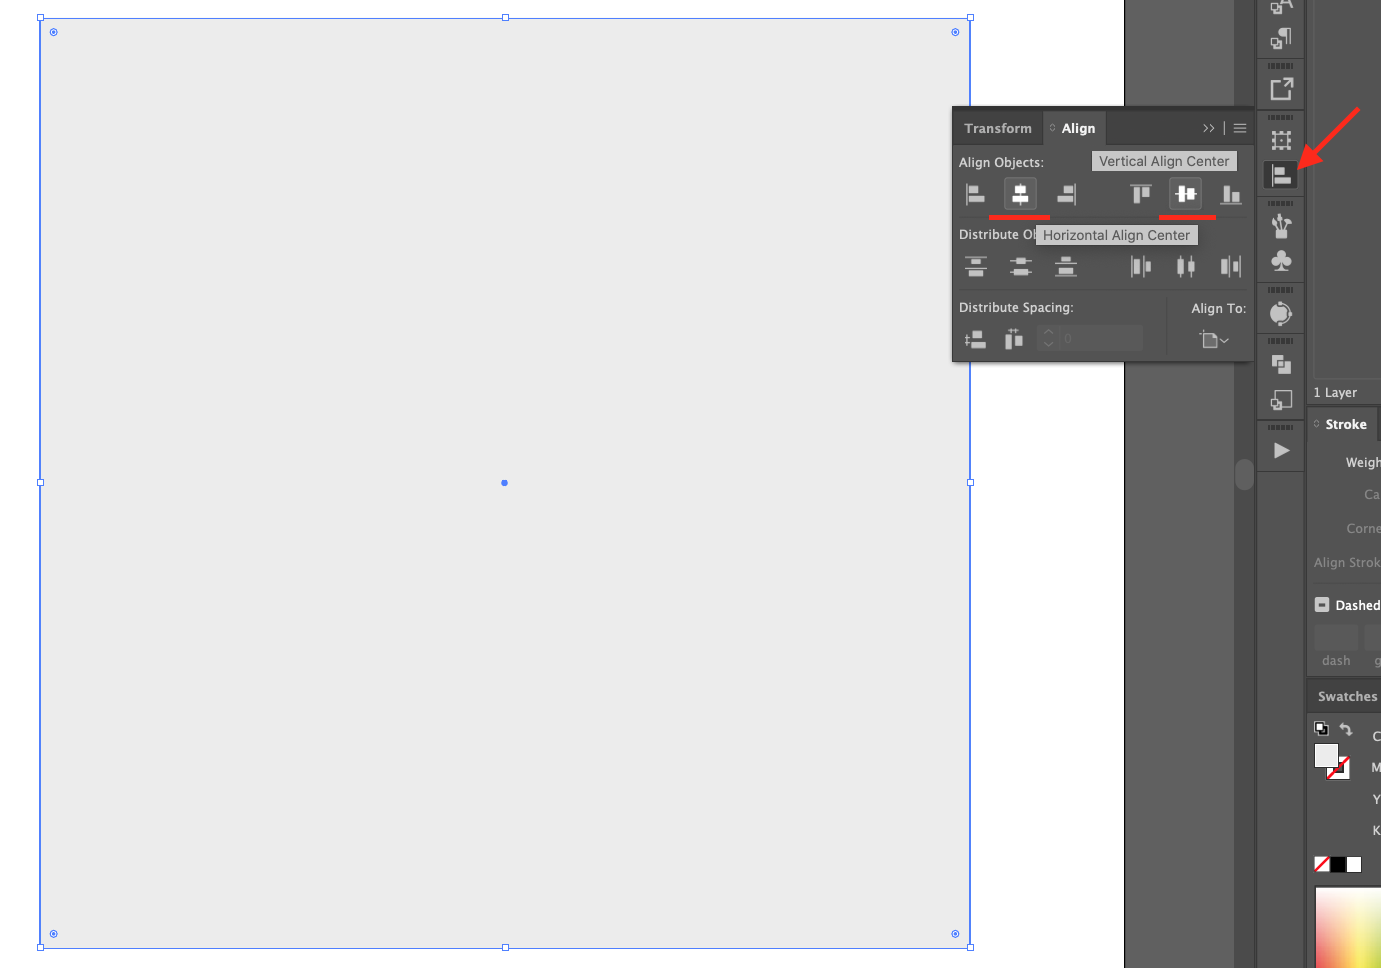
Select the Rectangle Tool, click on your Canvas, and create a 1500 x 1500 px square, Center it and give it a contrasting Fill color so it won’t get confused with the Canvas.
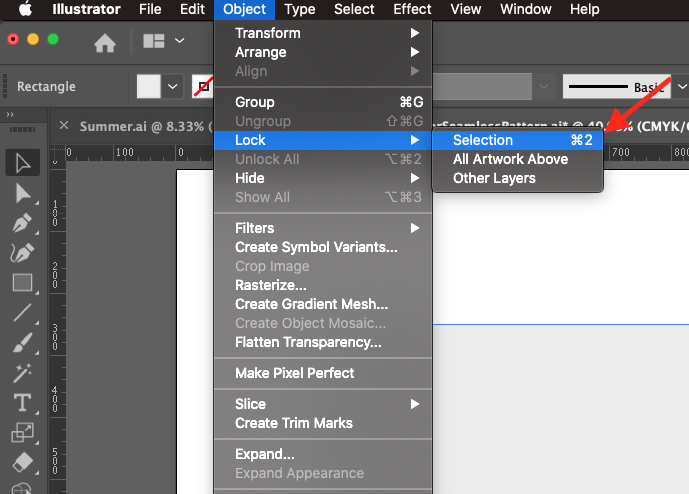
You may need to Lock (Command/Control + 2) the square to avoid moving it while doing the Pattern.
Now, start adding the Design elements. First, arrange ones inside your square.
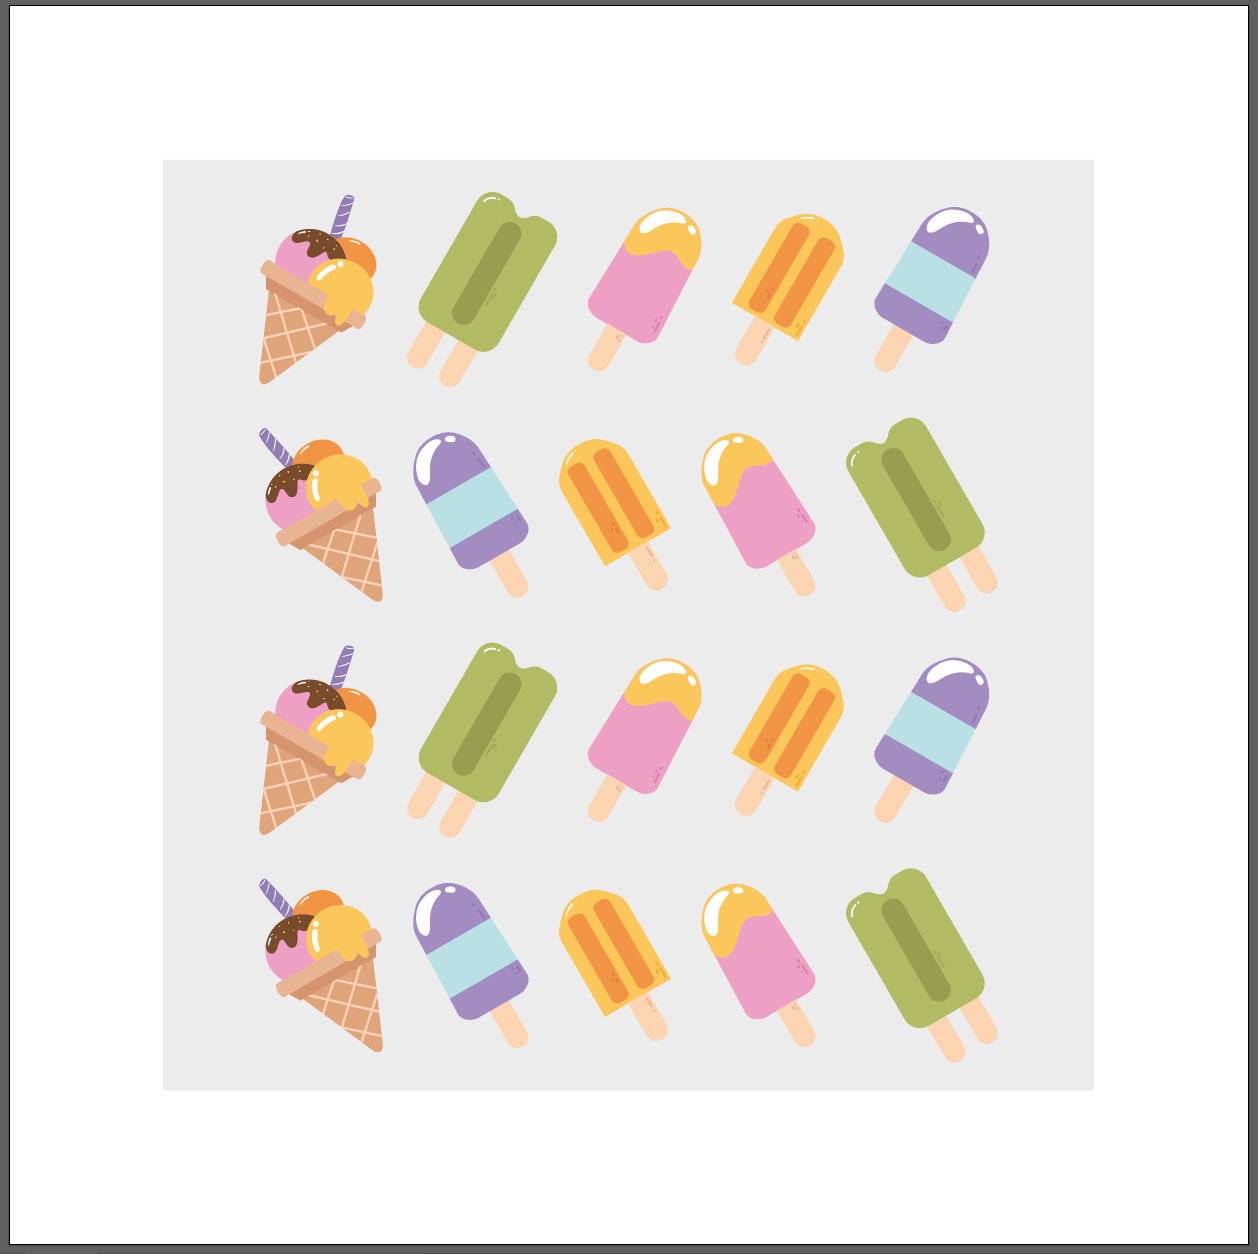
To add the ones at the edges, check the size of the Width and/or Height of the design elements and write them down somewhere. You can check them in the Transform Panel. You also may need to keep in mind the distance between elements (if it is a fixed one) so you can add it later.
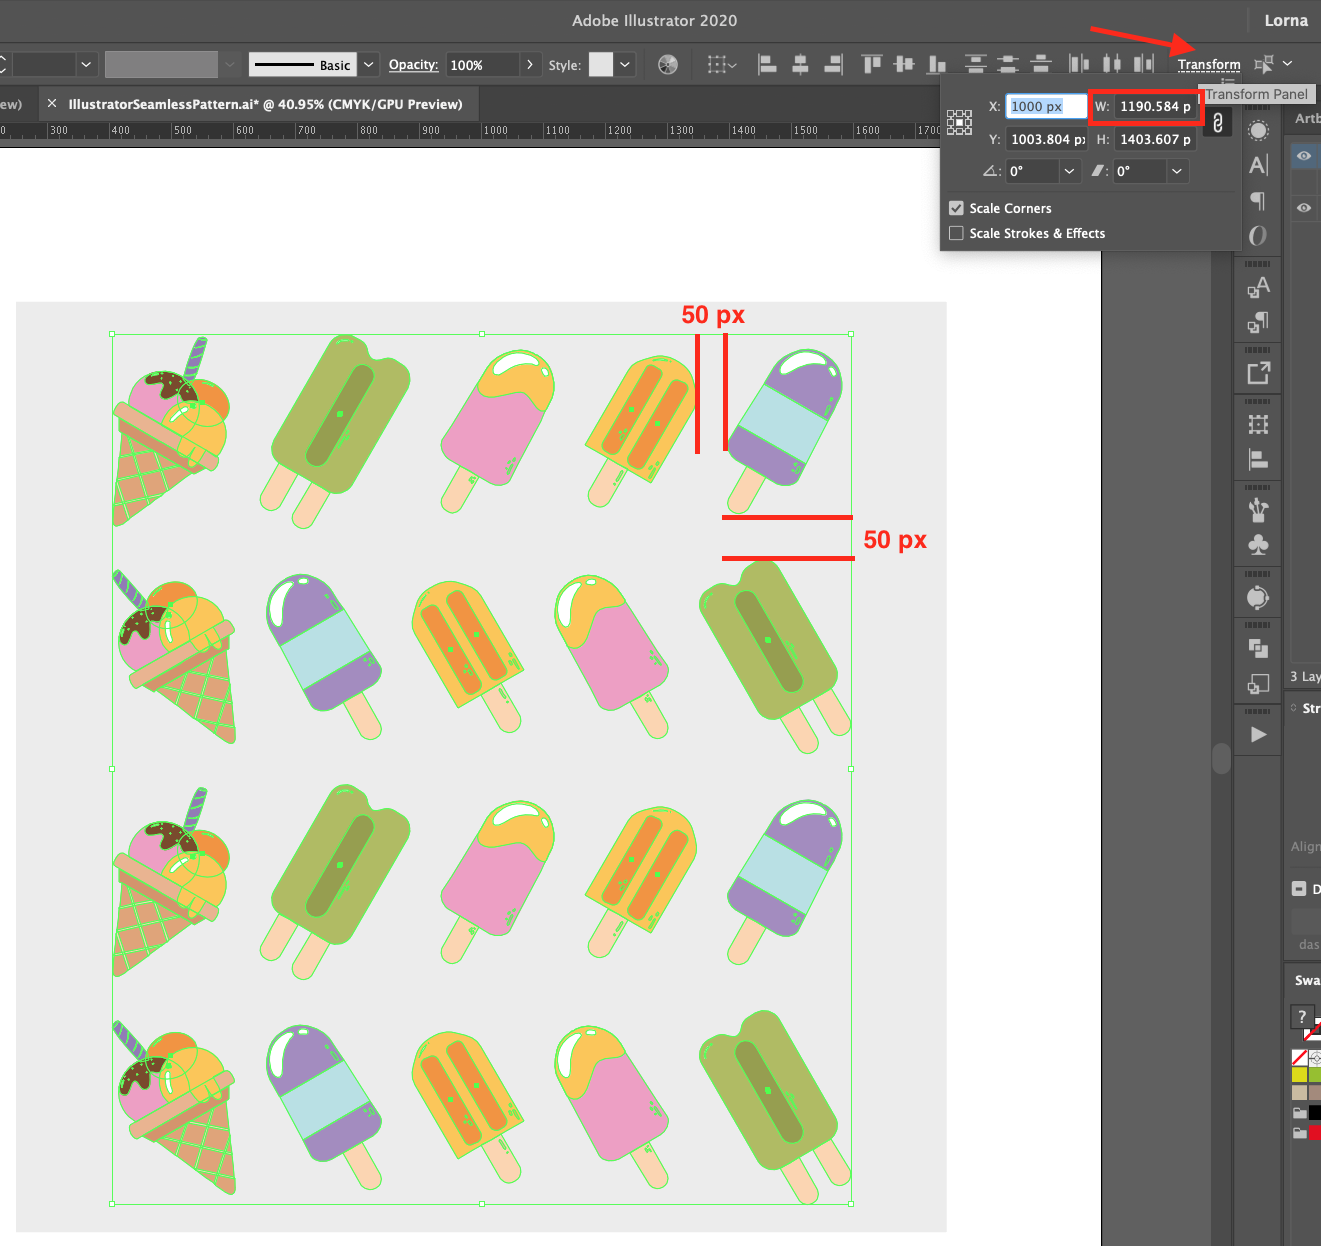
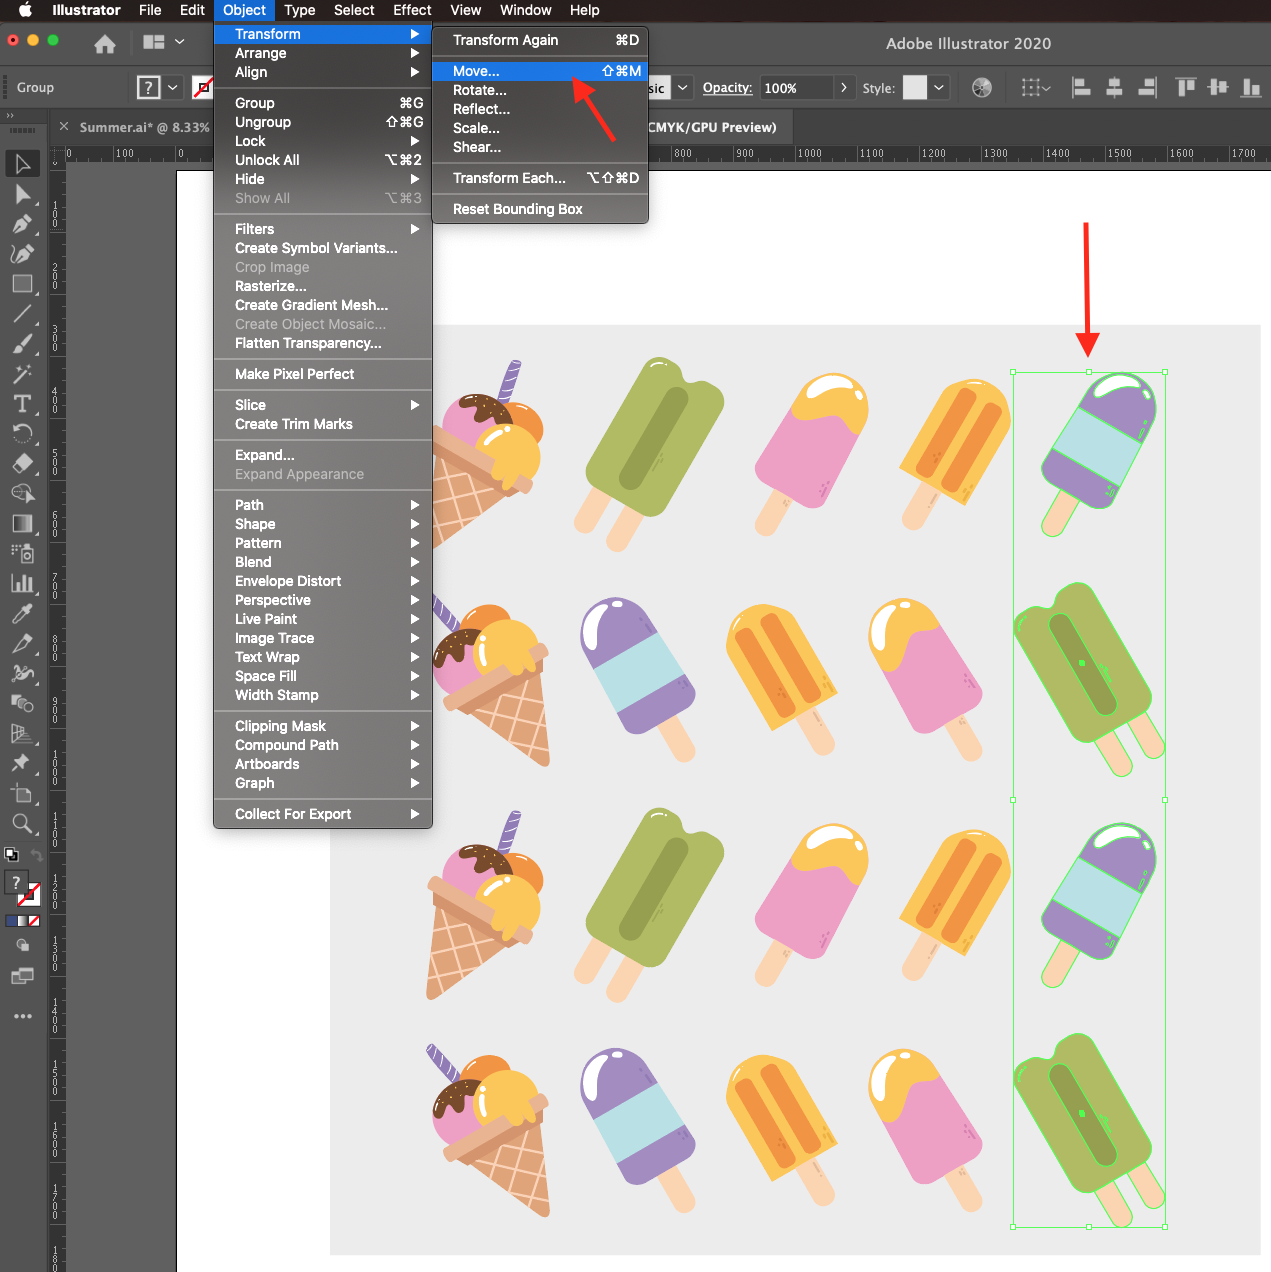
To reproduce a vertical column of objects, for example, select the ones you want to use and go to Object > Transform > Move (Shift + Command/Control + M) and input the Width measurement you noted before + the one of the distance between elements (in our case it was 1190.854 + 50 = 1240.854). Since we are moving the elements to the left we should add a - (minus) sign before the number. Click Copy instead of OK to create a duplicate. Check the Preview box to make sure you are getting things right.
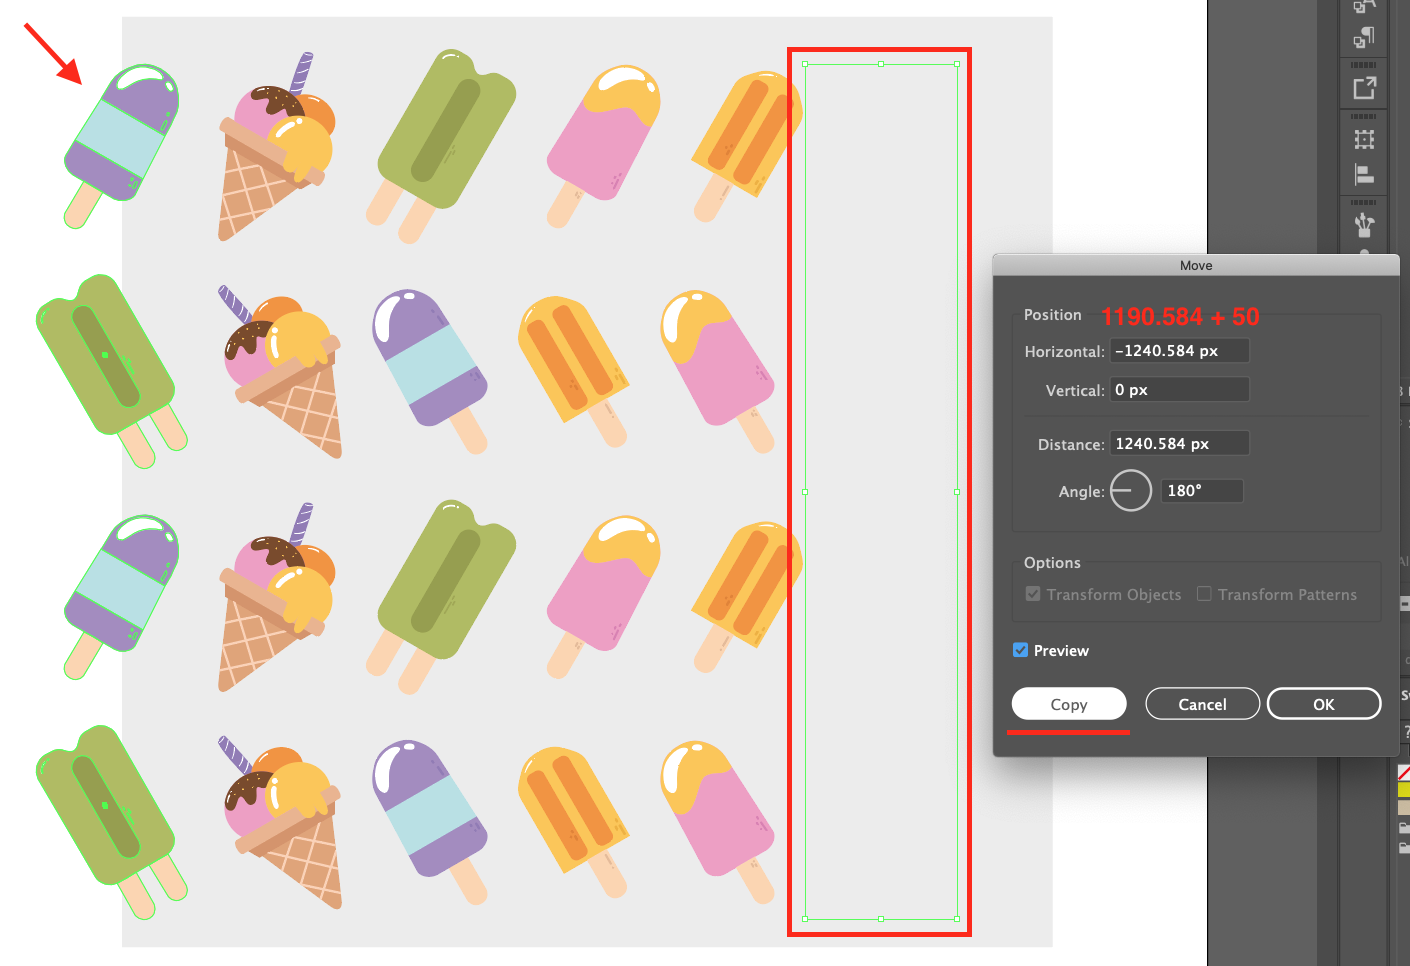
Repeat for the right side edge side but remember to recalculate the Horizontal Move amount if needed and to remove the - (minus) sign before the number since we are moving the items to the right.
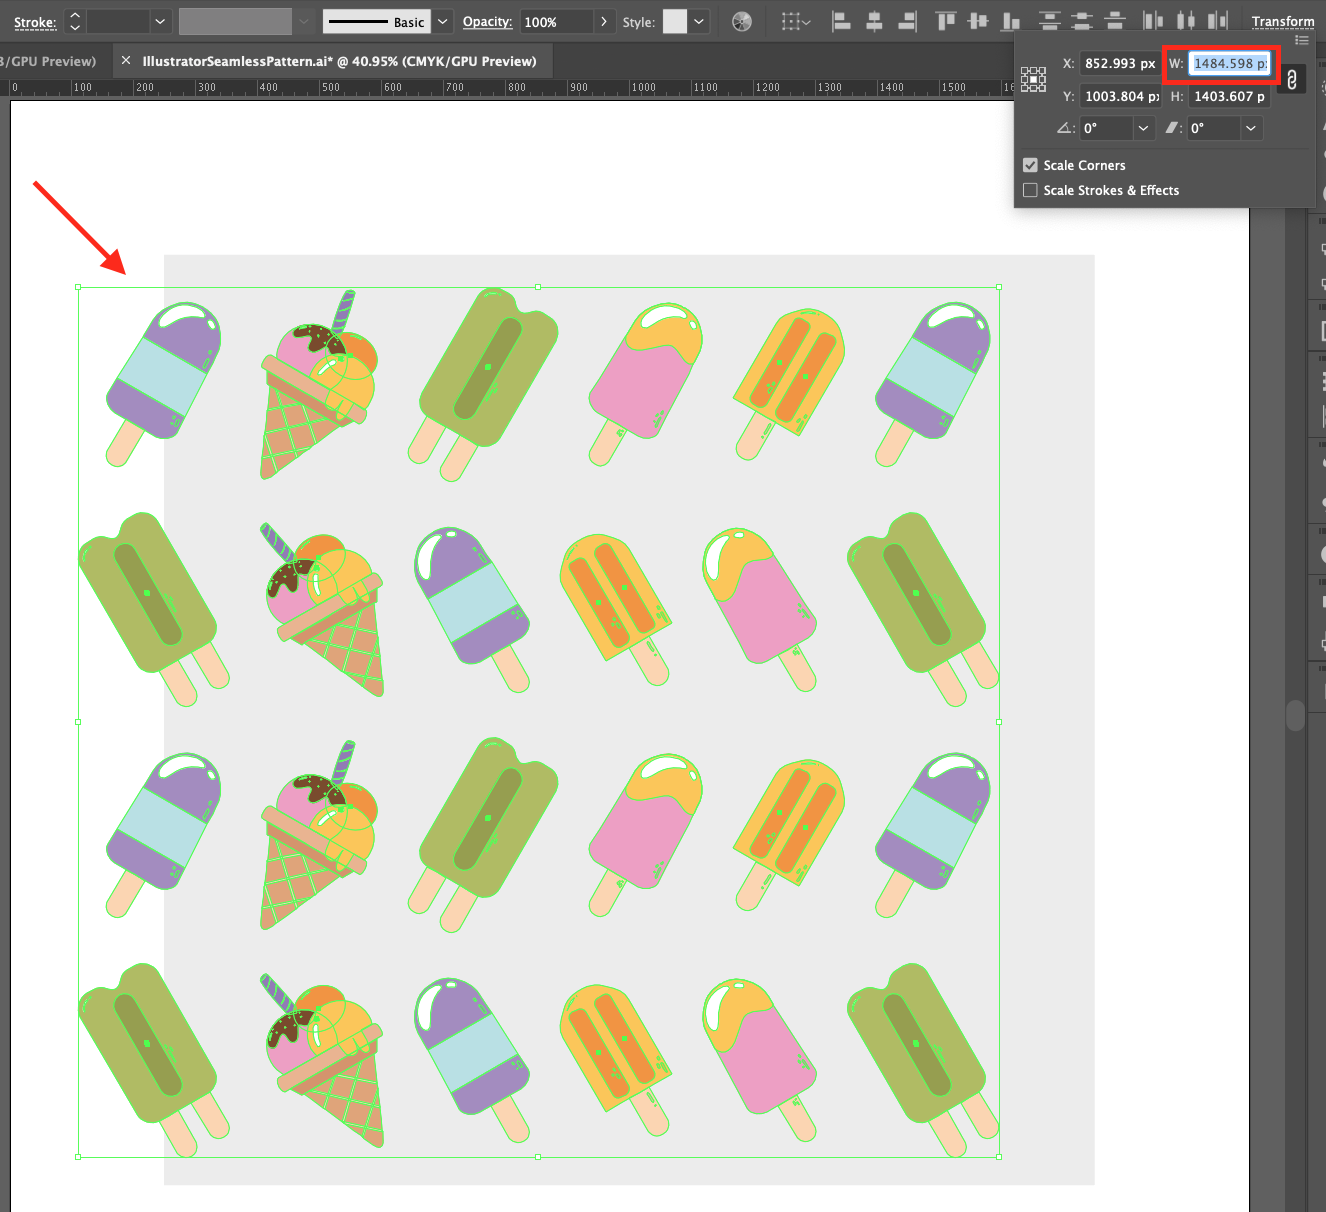
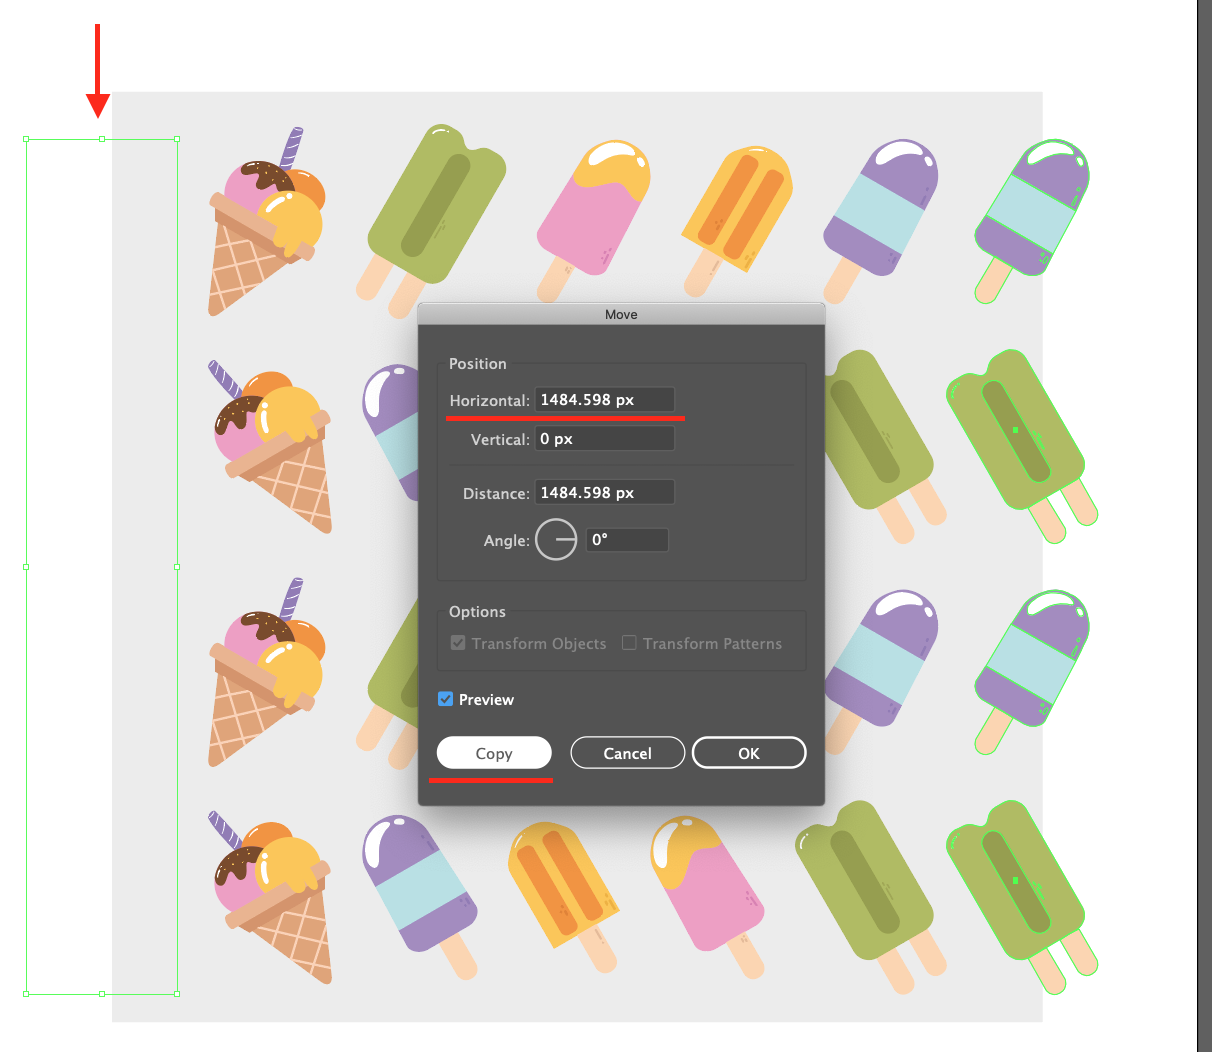
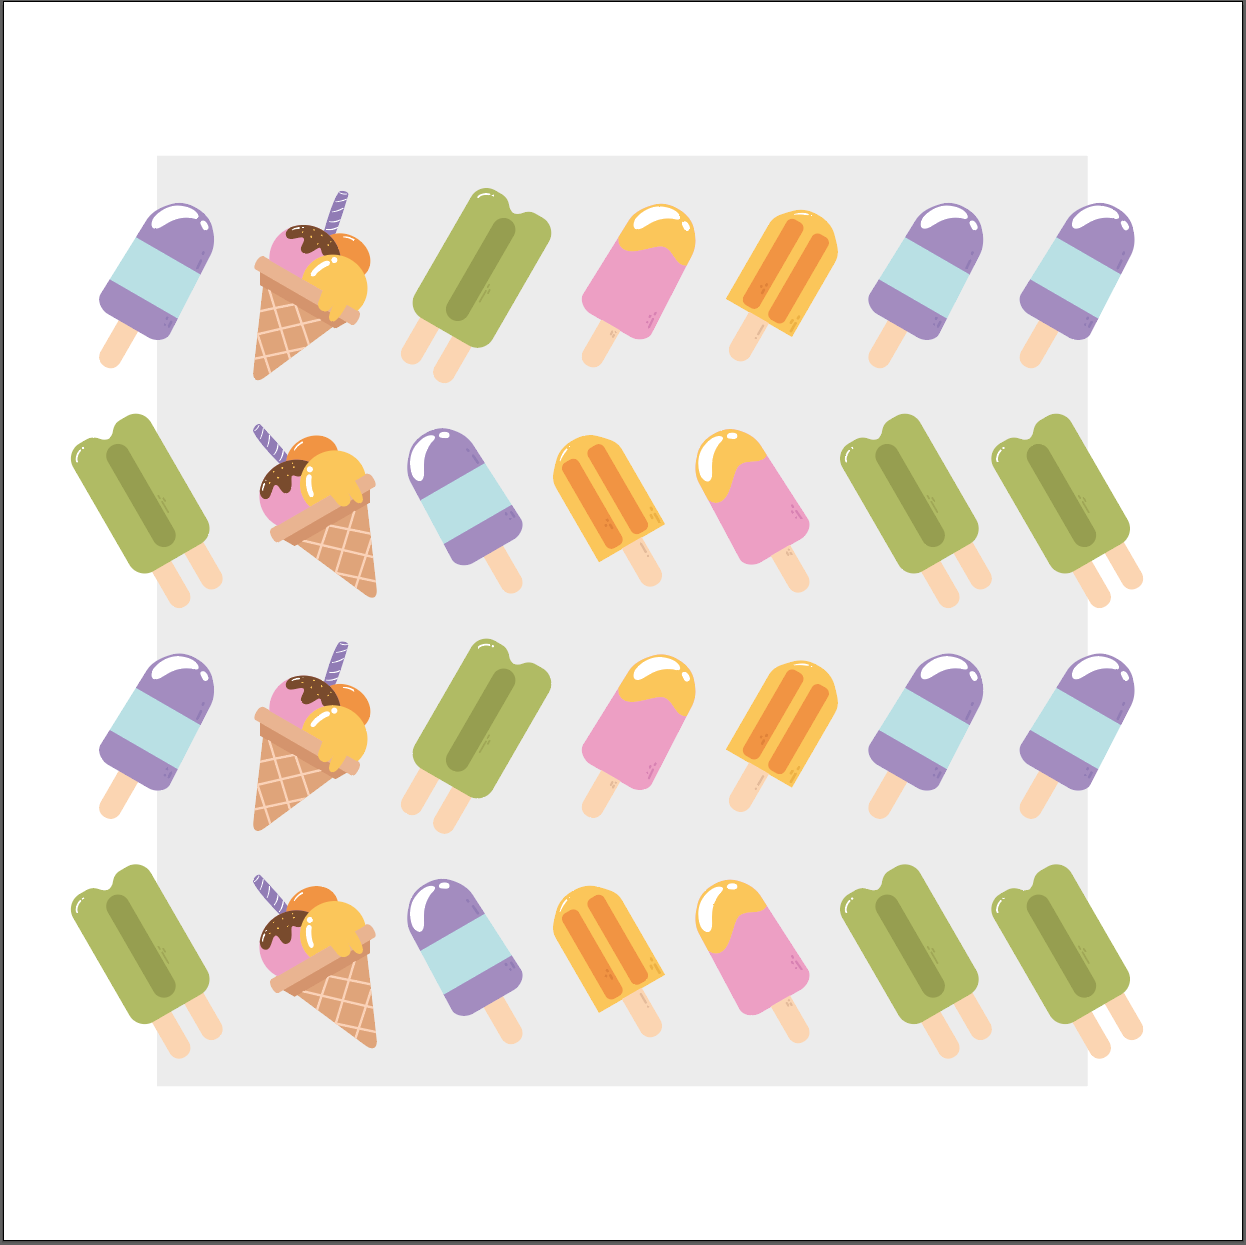
And if you need it, repeat with the top and bottom too.
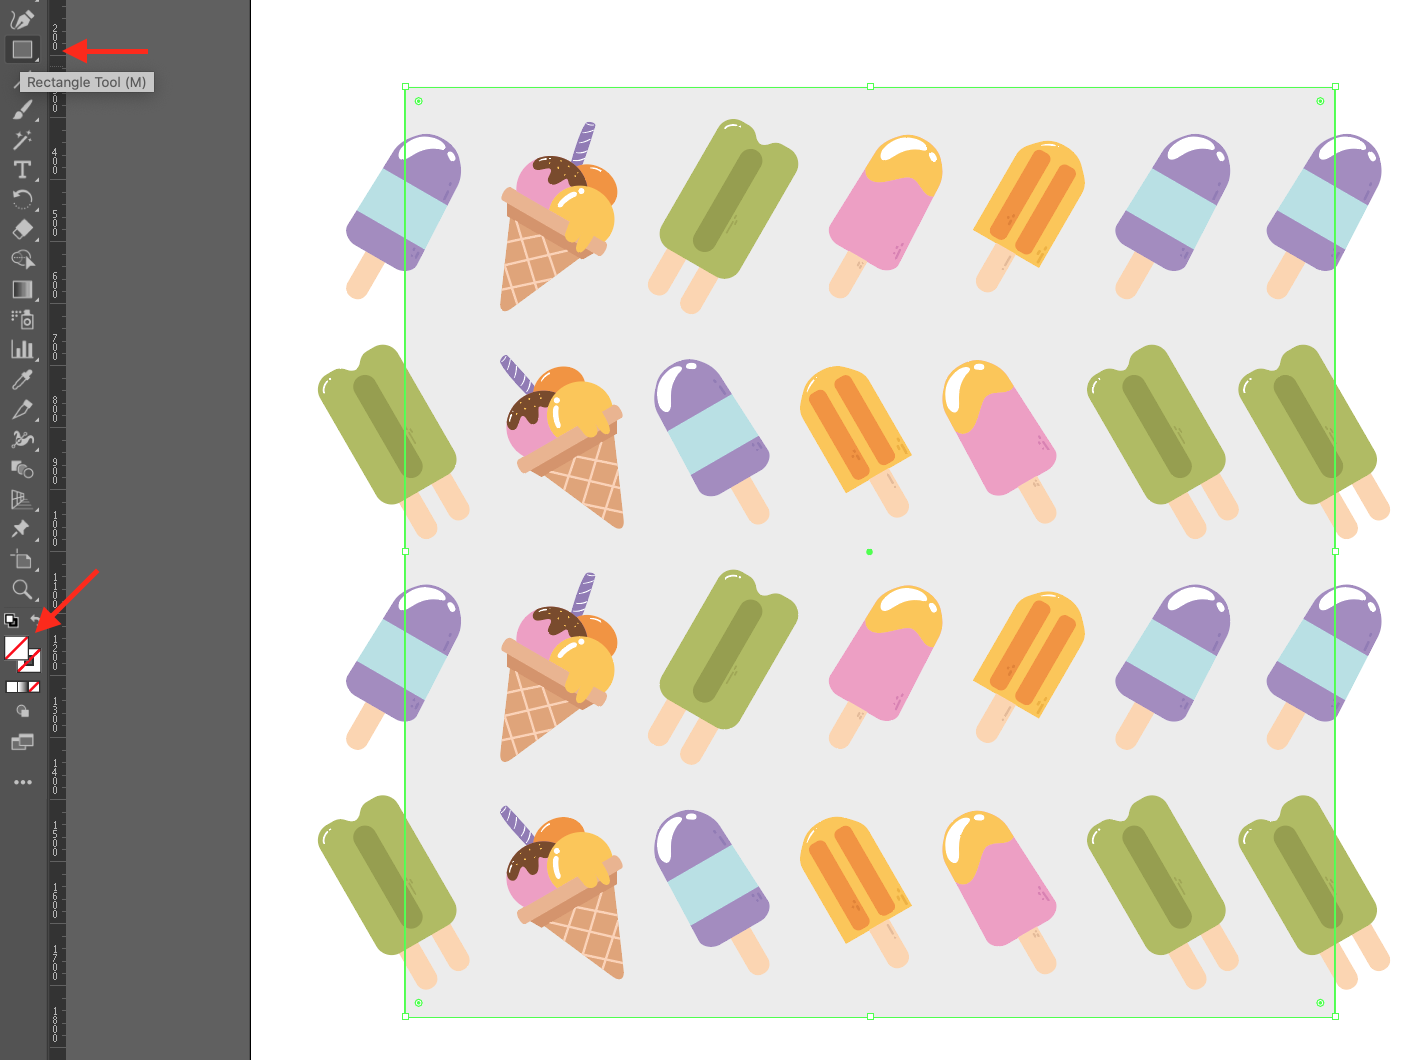
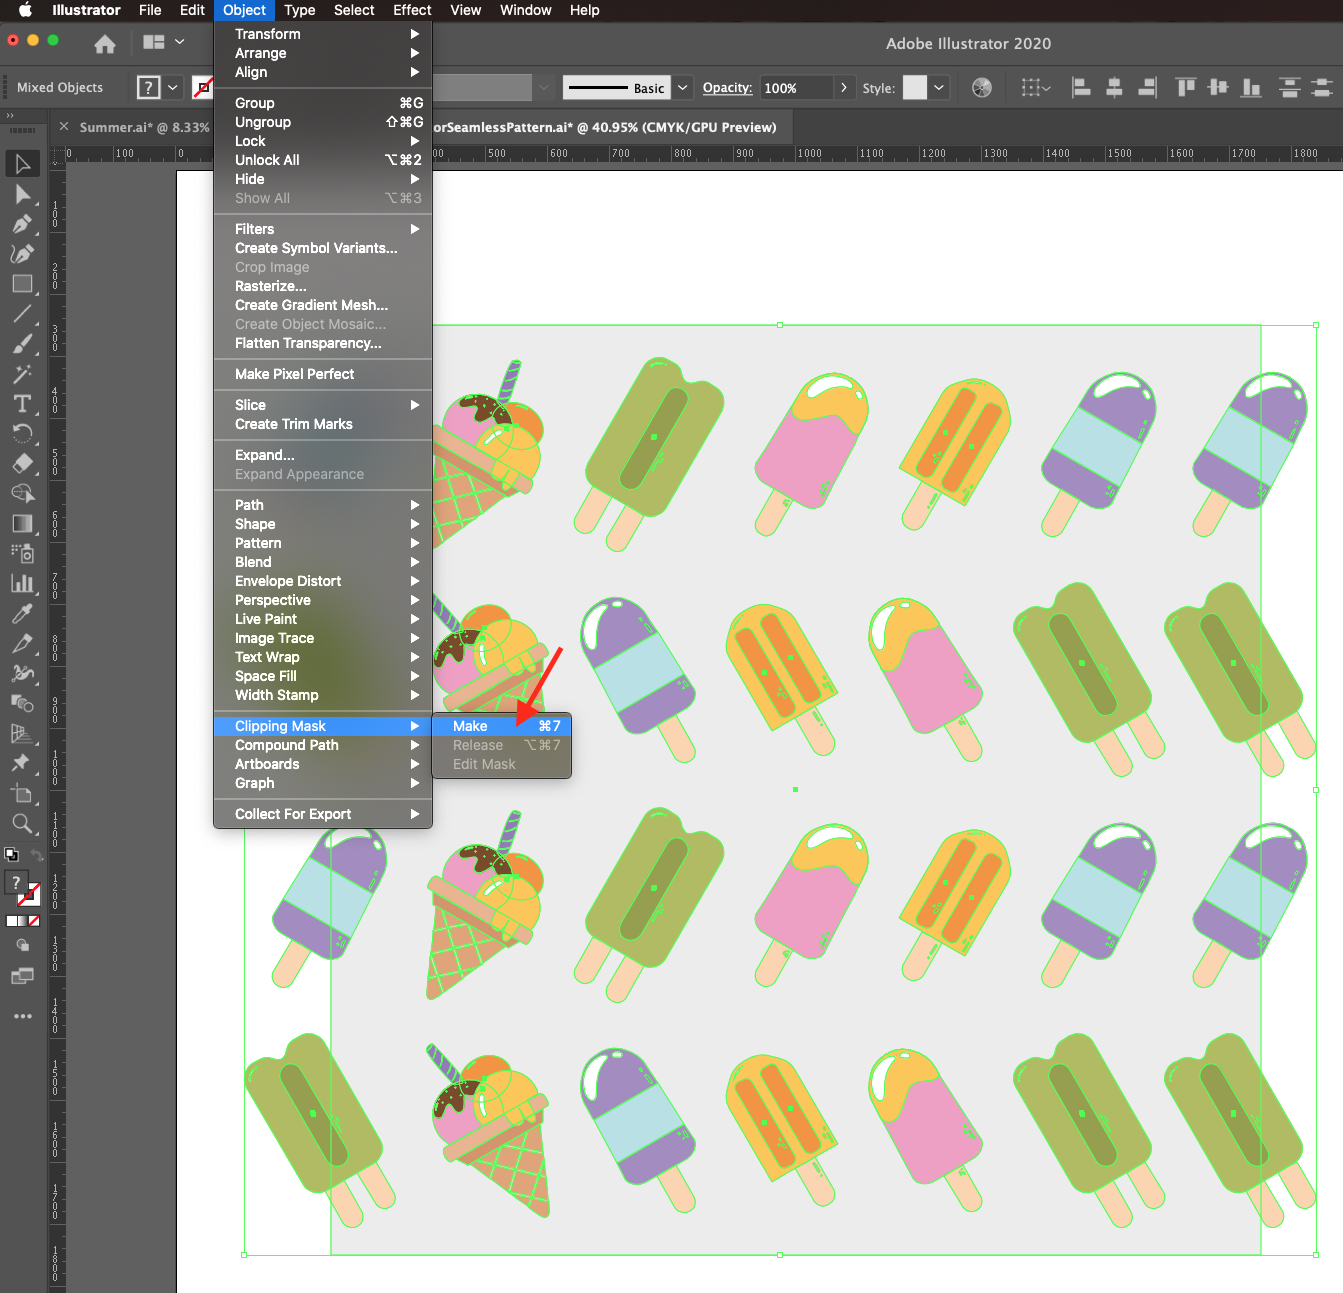
To crop the leftover portions of the design elements on the edges, use the Rectangle Tool and create a square that has NO Fill and Stroke. Then, select everything and go to Object > Clipping Mask > Make (Command/Control + 7).
In our case, we needed to reduce the top and bottom of the bounding square about half the size of the space between elements (25 px from each one) so the tiling would be right correct.
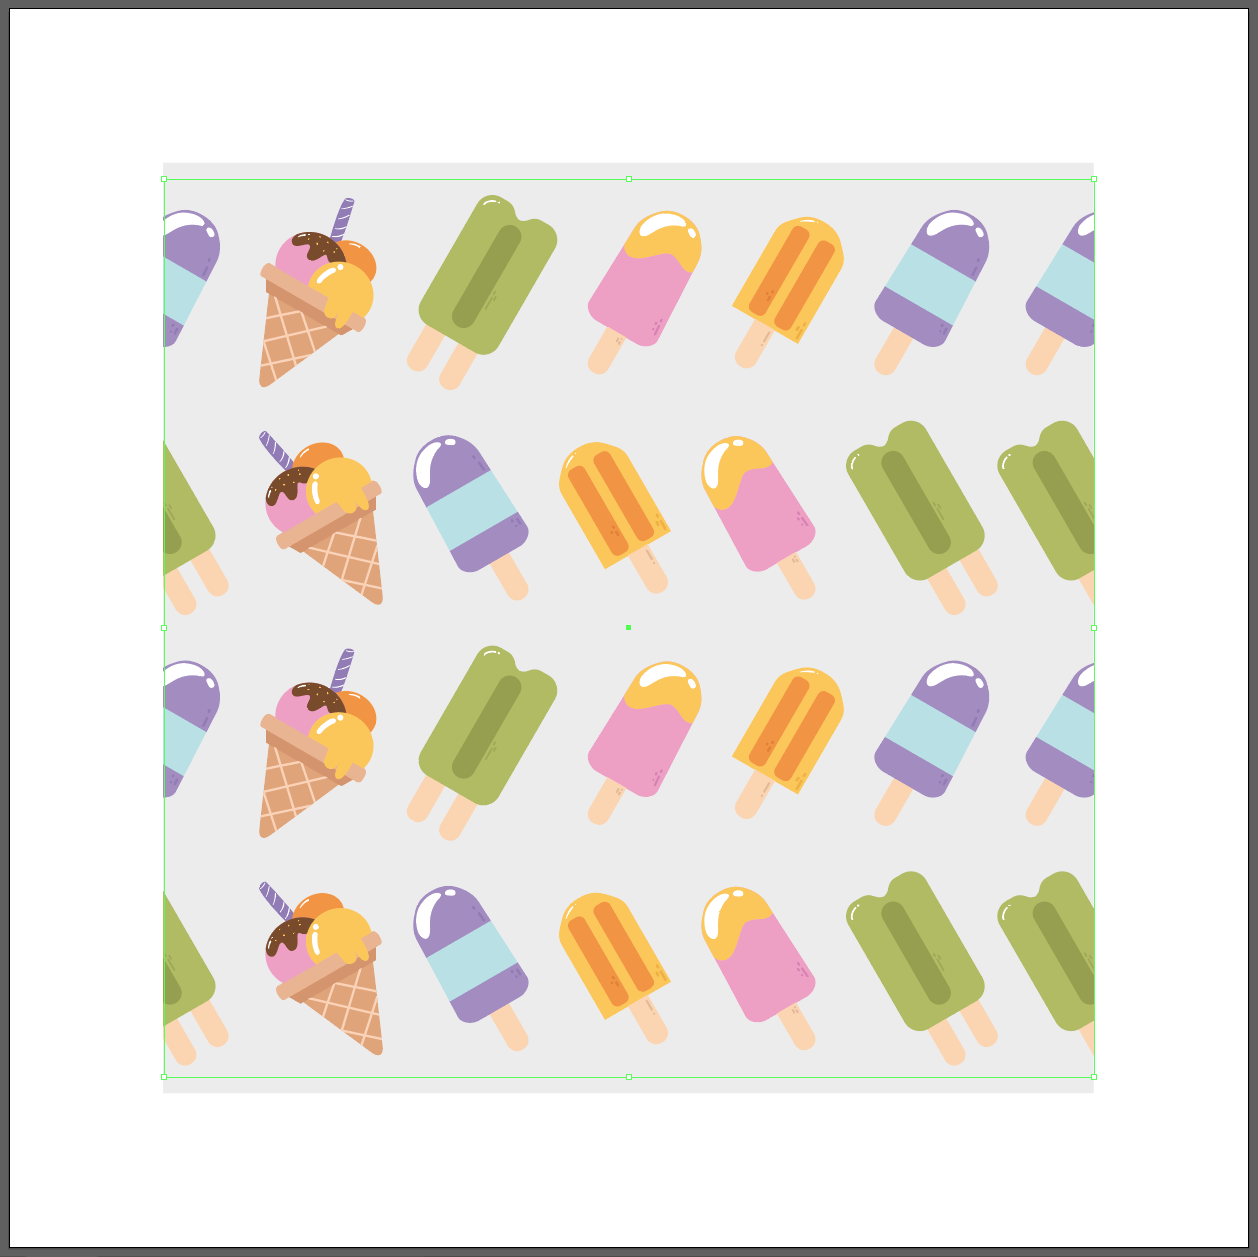
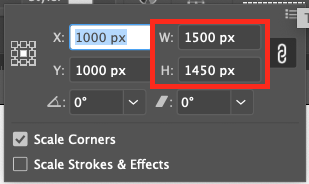
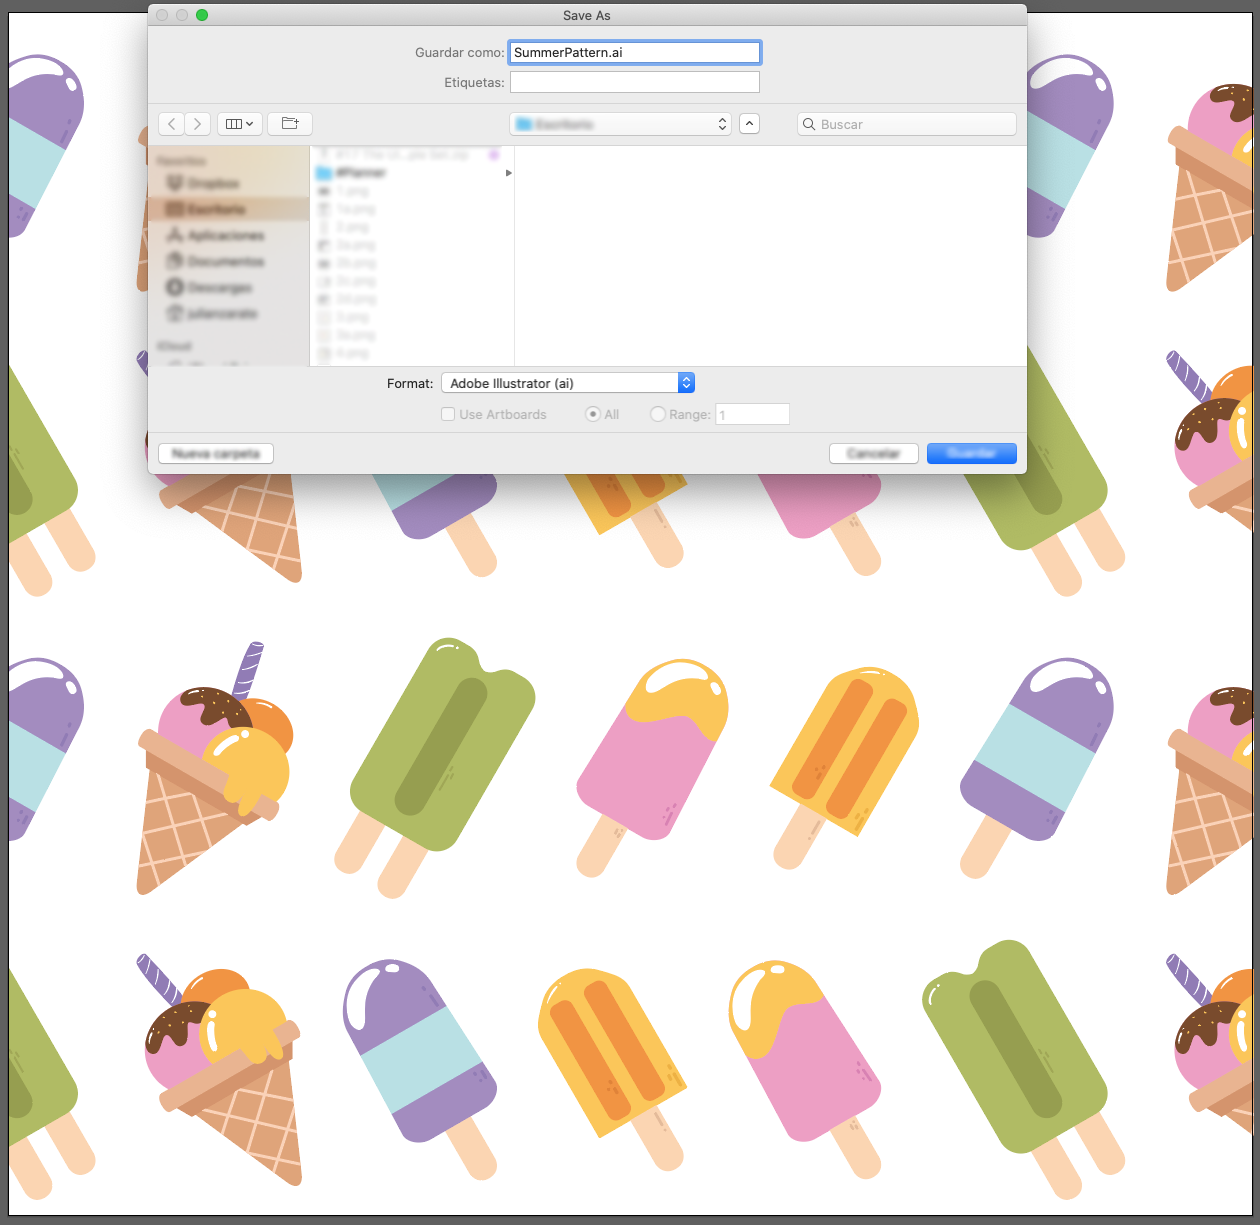
You can just save this Pattern Tile as it is by creating a Create a New Document with the same measurements as your Pattern Tile (in our case it was 1500 x 1450 px) then, Copy (Command/Control + C) and Paste (Command/Control + V) it into the new document and saving it for further use. You can export the tile in any compatible format you want.
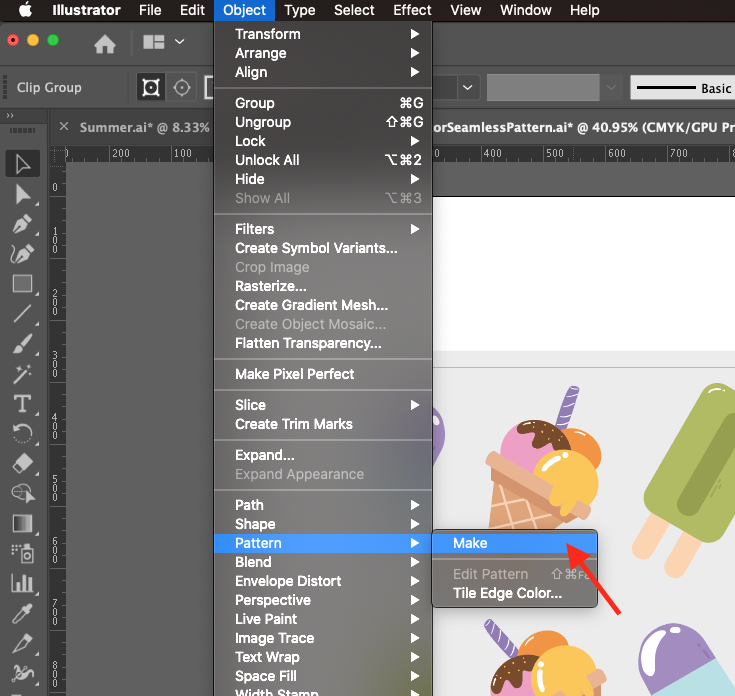
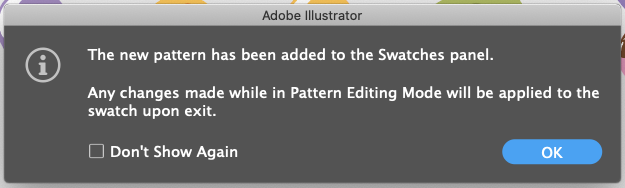
To create and adjust the Pattern with Illustrator, select the base design and go to Object > Pattern > Make, click OK in the pop-up window to enter Pattern Editing Mode.
In the Pattern Options panel and name your pattern.
Here’s a brief explanation of some of the option settings:
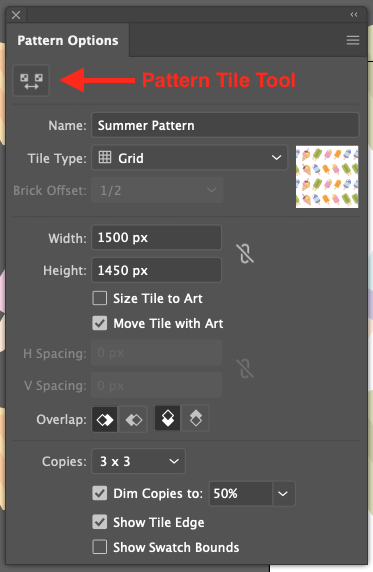
the Pattern Tile Tool brings up a blue outline with handles around the main pattern. If you resize it you will also resize your tile.
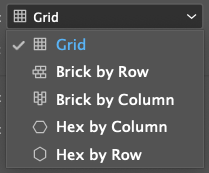
Tile Type is how the pattern repeats.
In the main body of the panel, you can size the spacing of the pattern numerically.
If you enable Size Tile to Art, the copied patterns will snap back in line with the original pattern. You can enable the Maintain Spacing Proportions button to the right of the Width and Height boxes.
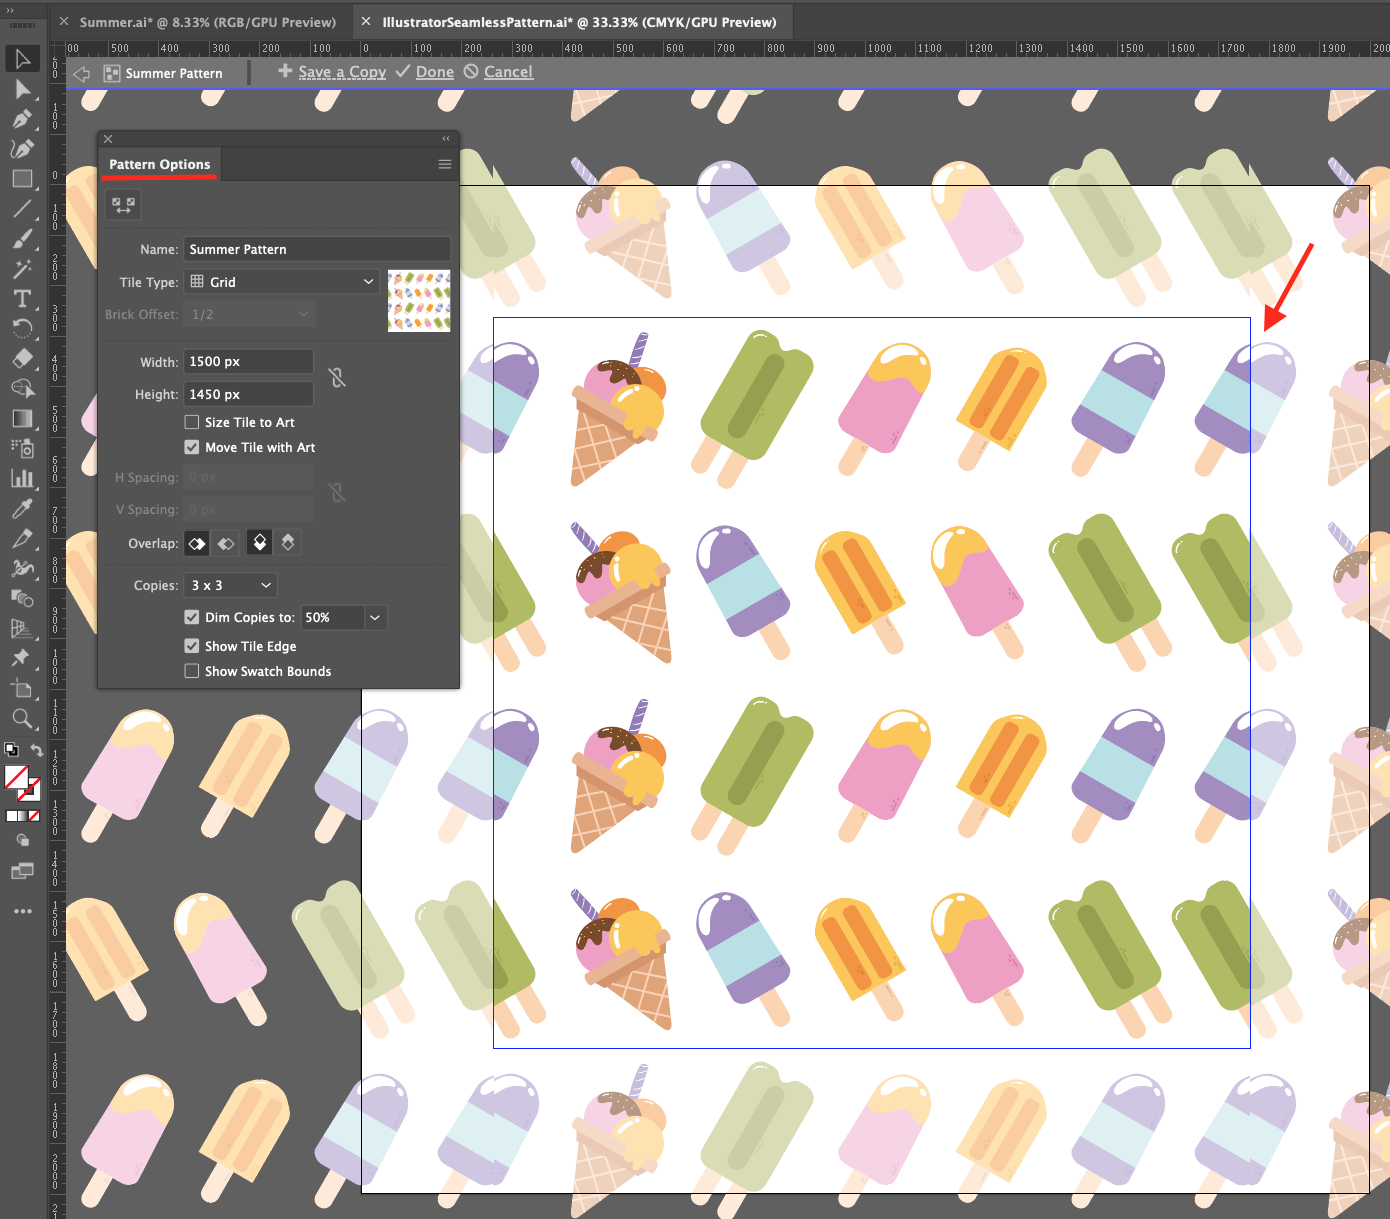
If you notice any problem with your pattern, you can solve it here. For example, we realized that ours wasn’t behaving properly, so we adjusted the Width value and fixed the discrepancy.
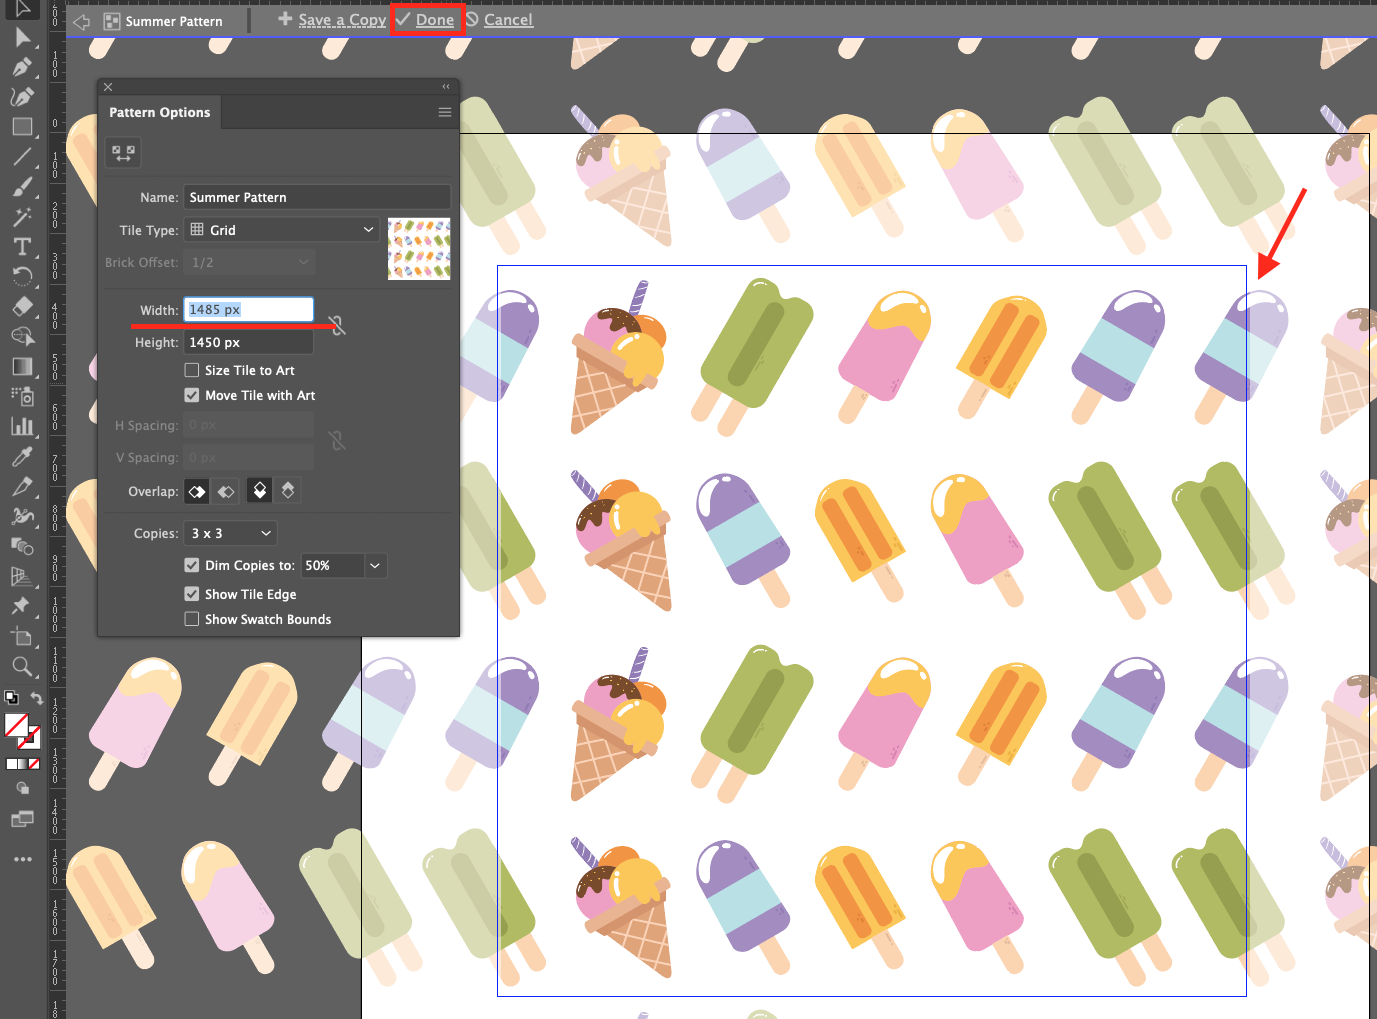
When you are satisfied with your pattern click on Done at the top of your canvas. Your newly created Pattern should be in the Swatches Panel and you can double-click on it to reopen the Pattern Options and edit it.
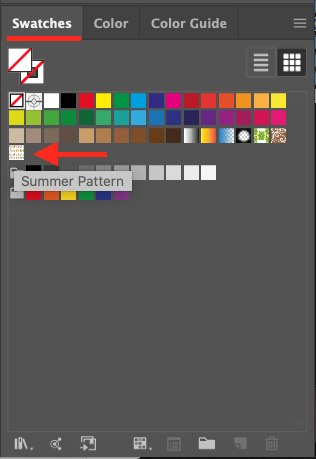
To apply your Pattern, just select the artwork, click on the Fill or Stroke color in the Properties Panel, and with the swatches option selected, choose your pattern.
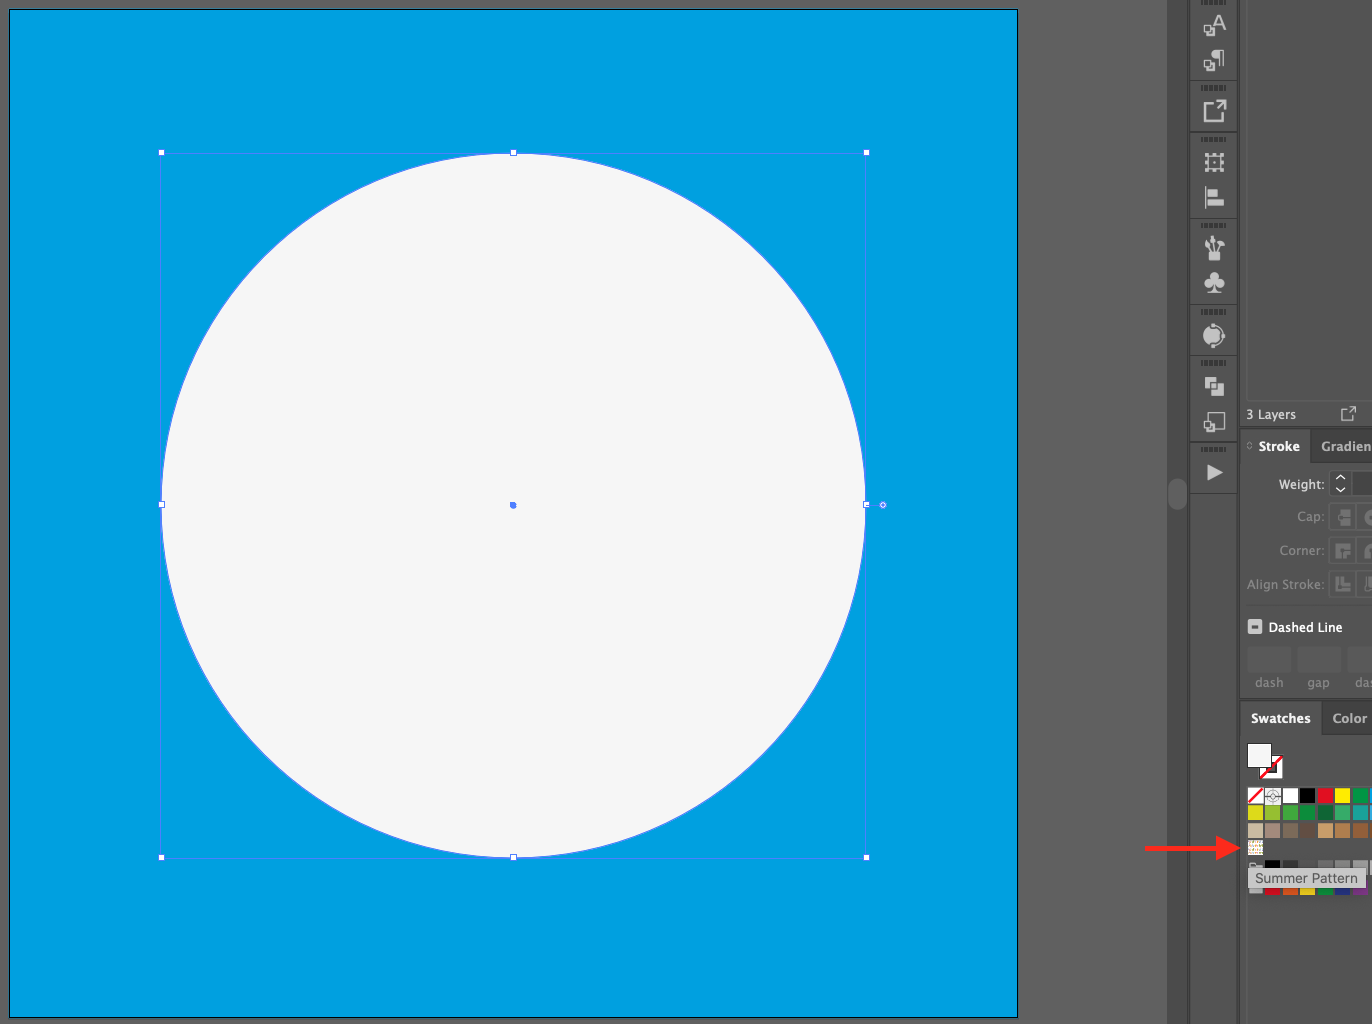
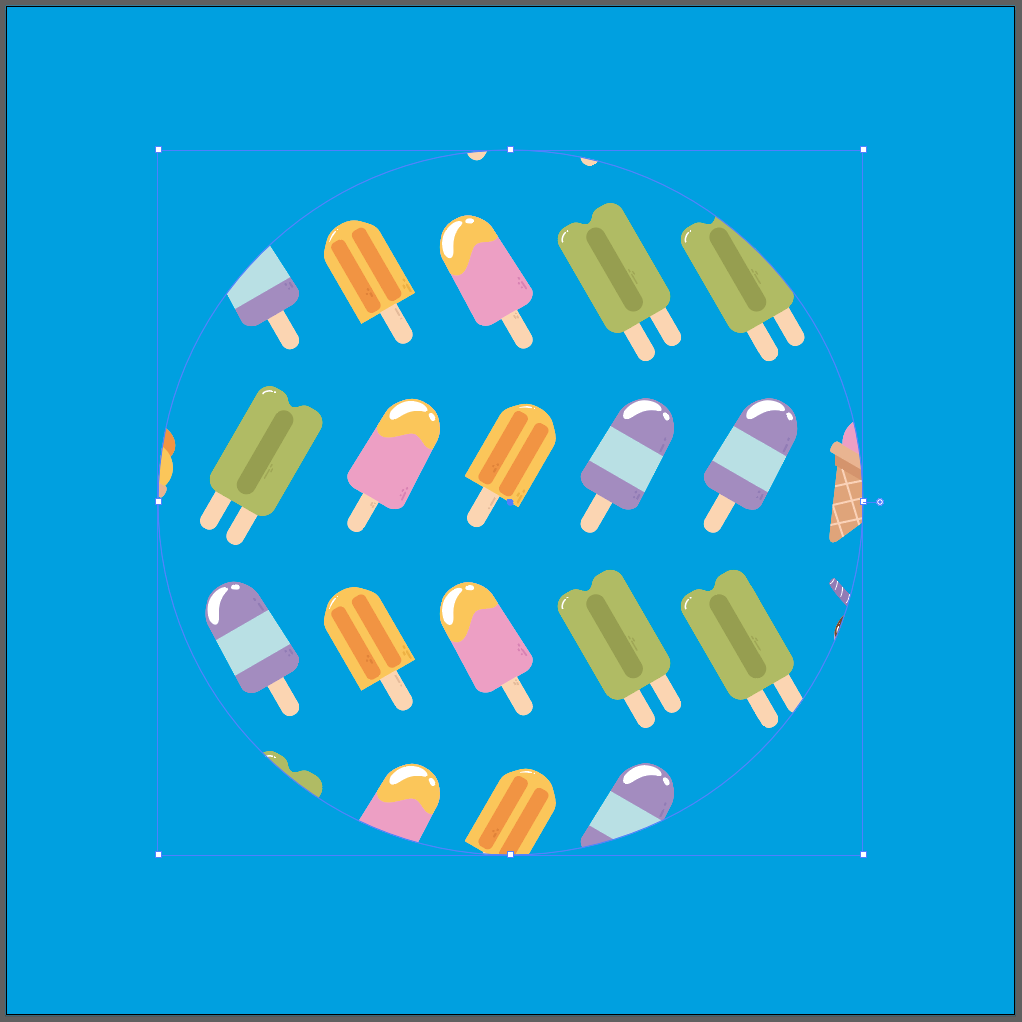
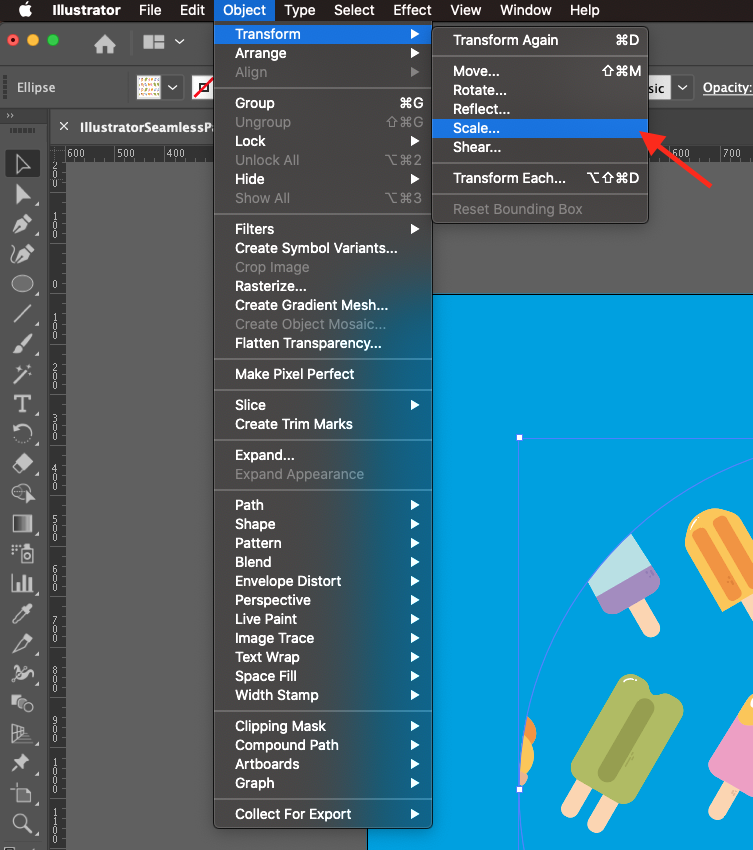
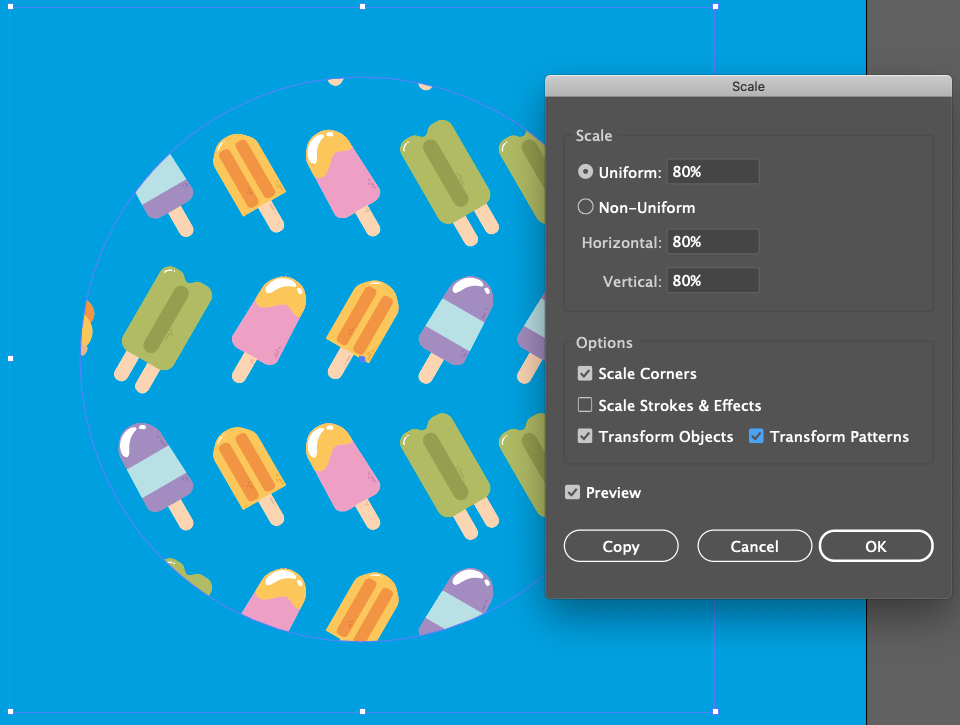
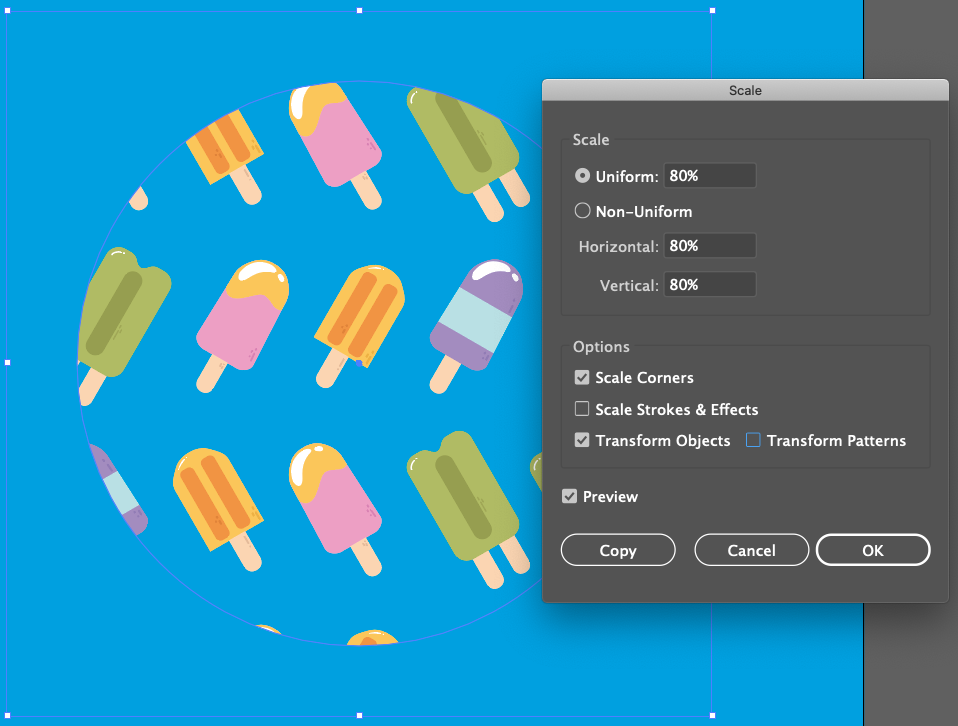
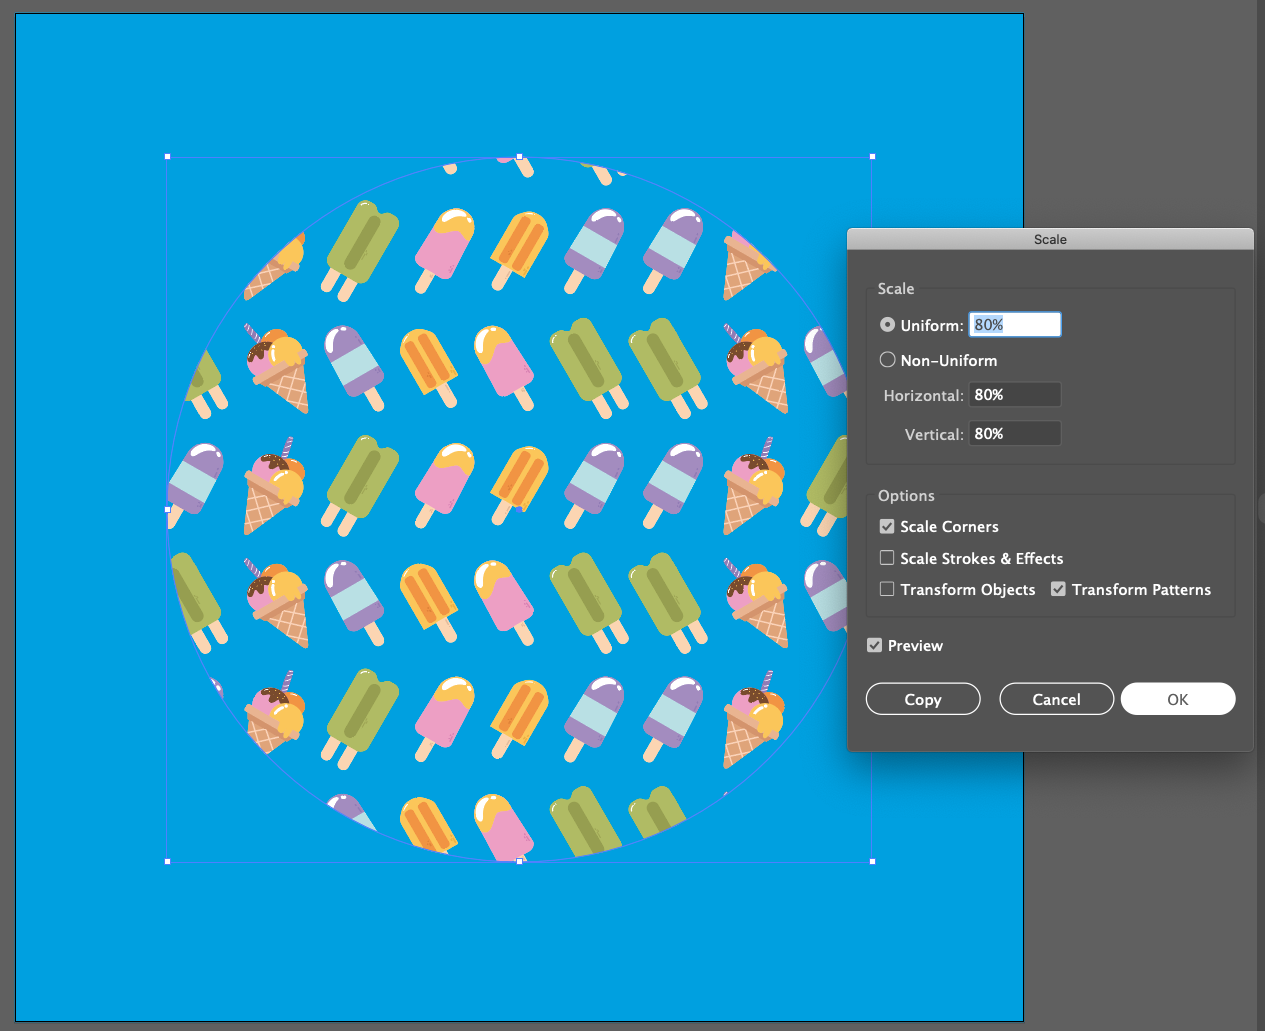
If you want to resize your pattern, your shape, or both, right-click on your shape and go to Object > Transform > Scale. You will be presented with different options.
To enlarge or reduce the shape and pattern, make sure the Transform Patterns box is checked. If you only wish to transform the shape, uncheck it. And, If you only wish to transform the pattern, uncheck the Transform Objects box.

If you want to learn more about what you can do with Illustrator, take a look at our other tutorials like creating a floral logo, making a split monogram and how to make a knockout design.
Basic information about Illustrator Patterns
There are two types of Patterns in Illustrator, Fill and Stroke patterns, in this case, we will be focusing on Fill Patterns. Fill patterns can be geometrical or irregular.
The more complex the Pattern is the smallest should be the artwork used to make it. But keep in mind that the smallest the tile is, the more copies of it are needed to create the Pattern. Prefer that Pattern tiles be of an even dimension that is dividable by 2 but this is more for convenience and not a rule.
Patterns in Illustrator are saved as Swatches in the Swatches Panel, where you can click on them to apply and even double-click on them to edit.
First, create the Base Design
What makes your Pattern seamless is that the design elements on the edges mirror each other so when they tile together they will join and form a smooth transition. You need to keep that in mind when you create the base design. But, depending on your base design and on the tweaking of the Pattern Options you may not need to worry about this part too much.
The settings of the document, as well as the size of the Background and/or Artboard, depends on the desired usage for the Pattern. Bear in mind that if you use vectors, you will be able to resize them without losing resolution but if you use bitmaps of any kind (or rasterize objects) then, you won't be able to enlarge the Pattern that much.
Step 1: Create a New Document
Create a New Document. We are using 2000 x 2000 px, CMYK Color Mode, and High (300 ppi) Raster Effects as the settings for this one.
Turn On the Rulers (Command/Control + R).
Step 2: Choose your Base Design
The base design can be made from scratch or you can use something similar like vector clipart. For our base design, we decided to go with this cute summer holiday clipart from Design Bundles.
Select the Rectangle Tool, click on your Canvas, and create a 1500 x 1500 px square, Center it and give it a contrasting Fill color so it won’t get confused with the Canvas.
You may need to Lock (Command/Control + 2) the square to avoid moving it while doing the Pattern.
Step 3: Add Design Elements
Now, start adding the Design elements. First, arrange ones inside your square.
Step 4: Check Size for Elements on the Edges
To add the ones at the edges, check the size of the Width and/or Height of the design elements and write them down somewhere. You can check them in the Transform Panel. You also may need to keep in mind the distance between elements (if it is a fixed one) so you can add it later.
To reproduce a vertical column of objects, for example, select the ones you want to use and go to Object > Transform > Move (Shift + Command/Control + M) and input the Width measurement you noted before + the one of the distance between elements (in our case it was 1190.854 + 50 = 1240.854). Since we are moving the elements to the left we should add a - (minus) sign before the number. Click Copy instead of OK to create a duplicate. Check the Preview box to make sure you are getting things right.
Repeat for the right side edge side but remember to recalculate the Horizontal Move amount if needed and to remove the - (minus) sign before the number since we are moving the items to the right.
And if you need it, repeat with the top and bottom too.
Step 5: Crop Leftover Portions of the Design Elements
To crop the leftover portions of the design elements on the edges, use the Rectangle Tool and create a square that has NO Fill and Stroke. Then, select everything and go to Object > Clipping Mask > Make (Command/Control + 7).
In our case, we needed to reduce the top and bottom of the bounding square about half the size of the space between elements (25 px from each one) so the tiling would be right correct.
Now, create the Pattern
Step 1: Save the Pattern Tile
You can just save this Pattern Tile as it is by creating a Create a New Document with the same measurements as your Pattern Tile (in our case it was 1500 x 1450 px) then, Copy (Command/Control + C) and Paste (Command/Control + V) it into the new document and saving it for further use. You can export the tile in any compatible format you want.
Step 2: Create and Adjust the Pattern
To create and adjust the Pattern with Illustrator, select the base design and go to Object > Pattern > Make, click OK in the pop-up window to enter Pattern Editing Mode.
In the Pattern Options panel and name your pattern.
Here’s a brief explanation of some of the option settings:
the Pattern Tile Tool brings up a blue outline with handles around the main pattern. If you resize it you will also resize your tile.
Tile Type is how the pattern repeats.
In the main body of the panel, you can size the spacing of the pattern numerically.
If you enable Size Tile to Art, the copied patterns will snap back in line with the original pattern. You can enable the Maintain Spacing Proportions button to the right of the Width and Height boxes.
Step 3: Resolve any Issues with the Pattern
If you notice any problem with your pattern, you can solve it here. For example, we realized that ours wasn’t behaving properly, so we adjusted the Width value and fixed the discrepancy.
When you are satisfied with your pattern click on Done at the top of your canvas. Your newly created Pattern should be in the Swatches Panel and you can double-click on it to reopen the Pattern Options and edit it.
Step 4: Apply your Pattern
To apply your Pattern, just select the artwork, click on the Fill or Stroke color in the Properties Panel, and with the swatches option selected, choose your pattern.
Step 5: Resize the Pattern
If you want to resize your pattern, your shape, or both, right-click on your shape and go to Object > Transform > Scale. You will be presented with different options.
To enlarge or reduce the shape and pattern, make sure the Transform Patterns box is checked. If you only wish to transform the shape, uncheck it. And, If you only wish to transform the pattern, uncheck the Transform Objects box.
If you want to learn more about what you can do with Illustrator, take a look at our other tutorials like creating a floral logo, making a split monogram and how to make a knockout design.
Related Tutorials
Illustrator Tutorials
How to Make a Seamless Instagram Carousel in Illustrator
Create stunning Instagram Carousels using Adobe Illustrator.
Affinity Tutorials
How to Make a Seamless Pattern in Affinity Designer
In this tutorial you will learn how create a Seamless Pattern in Affinity Designer.
Inkscape Tutorials
How to Make a Seamless Pattern in Inkscape
Discover how to make a seamless pattern Inkscape using a template.
Procreate Tutorials
How to Make a Seamless Pattern in Procreate
Discover how to create a Seamless Repeating Pattern using Procreate.
Silhouette Tutorials
How to Make a Seamless Pattern in Silhouette Studio
DesignScape Tutorials
How to Make a Simple Seamless Pattern in DesignScape
Learn how to create your own seamless patterns in DesignScape today.