By Design Bundles
How to Warp Text in Photoshop
This tutorial will show you how you can warp text in Photoshop using the Warp Text options. We’ll go through the different options found in the Warp Text dialog so that you can create the most fitting warped text for your next project. The warping effect is not permanent and can always be changed or removed.
In today’s tutorial, we'll be using the fancy serif font, AL Bavista Soulvare, from Font Bundles.
Step 1 - Add Text
Select a type tool from the left toolbar. We’ll be using the Horizontal Type Tool (T). Then pick your font in the Options bar at the top. Click on the canvas, type your text, and click the checkmark in the Options bar to stop entering text.

Step 2 - Apply a Warping Effect to the Text
Now we’ll open the Warp Text dialog and change the settings to warp the text. The changes made in the Warp Text dialog can be previewed on the actual text.
Open the Warp Text Dialog
Select the text layer and a type tool. Click on the Warp Text button in the Options bar to open the Warp Text dialog.
Note: the Warp Text button will only appear when one of the type tools is active.

Select the Warp Style
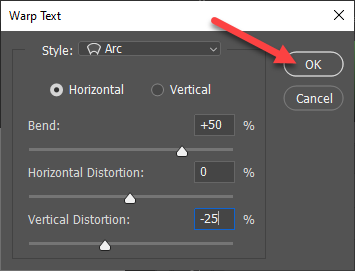
In the Warp Text dialog, select a warp Style from the dropdown list. There are several different styles available. We’ll use Arc in this tutorial.

Select the Warp Orientation
Once you have selected your warp style, you can pick the direction in which the text is warped.
Horizontal Warp
Horizontal will apply the warp style horizontally/up or down, as shown in the following image.

Vertical Warp
The warp style will be applied vertically/left or right if you select Vertical.

Set the Warp Intensity With the Bend Slider
The Bend slider affects the intensity and direction of the warping effect.

Add a Perspective Effect
You can add a perspective effect using Horizontal Distortion and Vertical Distortion. These two settings can also be used even if the Bend is set to 0%.
Horizontal Distortion
The Horizontal Distortion slider affects the perspective of the left and right sides of the text. The left and right sides will look as if they’re either closer or further from you.
See below for a better understanding. The Bend set at 0% to see the distortion better.

Vertical Distortion
The Vertical Distortion slider affects the perspective of the top and bottom of the text. The top and bottom will look like it's either closer or further from you, making the text look as if it’s leaning towards or away from you.
Again, see below for a better understanding, and again, the Bend set at 0% to see the distortion better.

Once you are happy with your warp, you can select OK to commit the changes.
Step 3 - Change or Remove the Text Warping Effect if Needed
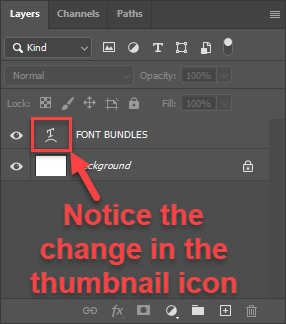
You can find the warped text layer in the Layers panel by looking at its thumbnail. The warped text layer’s thumbnail will have the same icon as the Warp Text button.
If at any point you want to change or remove the warping effect, you can select the warped text layer, a Type Tool, and click on the Warp Text button. The Warp Text dialog will open again with the previous settings that you applied to that text layer.
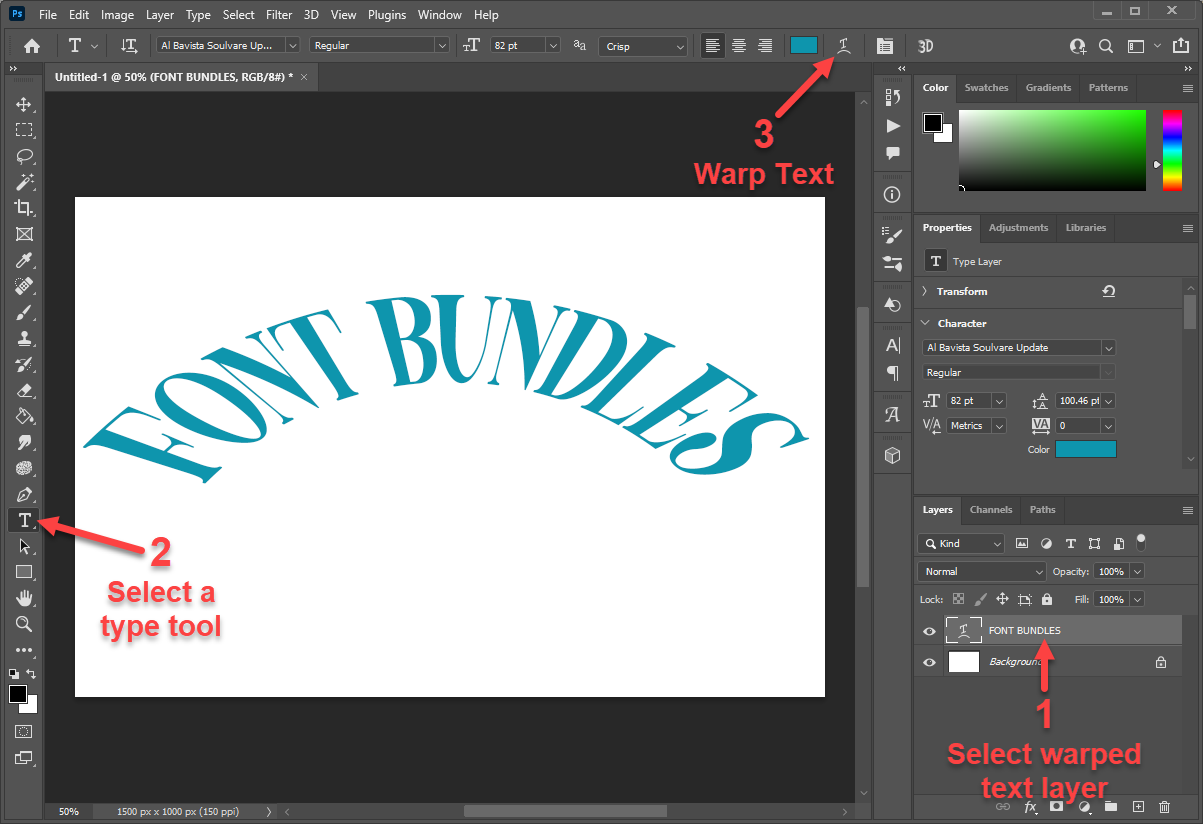
Simply set the Style to None and click OK to remove the warping effect.

You’ve just finished learning how to warp text in Photoshop. Have fun testing and playing around with all the warp styles and options!