By Design Bundles
Scan N Cut Tutorials3 min
How to create a shaped word card in brother scan and cut canvas workspace
1- Open scan and cut canvas workspace. Click o the text icon.
2- Select your font and then type the text you would like to make a card with.
3- Select the text then click on the edit option. Click on the offset icon.
4- A new window will appear. Keep all the defaults, click ok. The offset will appear.
5- With the offset selected, repeat the above process and create a new offset.
6- Move the larger offset from the original offset.
7- Right click and duplicate the offset.
8- Select the duplicated offset and flip it horizontally.
9- Place the flipped offset above the other offset.
10- Slightly overlap the 2 offsets.
11- With both selected, weld the 2 together.
12- Click the line tool and draw a line where the two halves meet.
13- Change the line to perforated so you can fold easy.
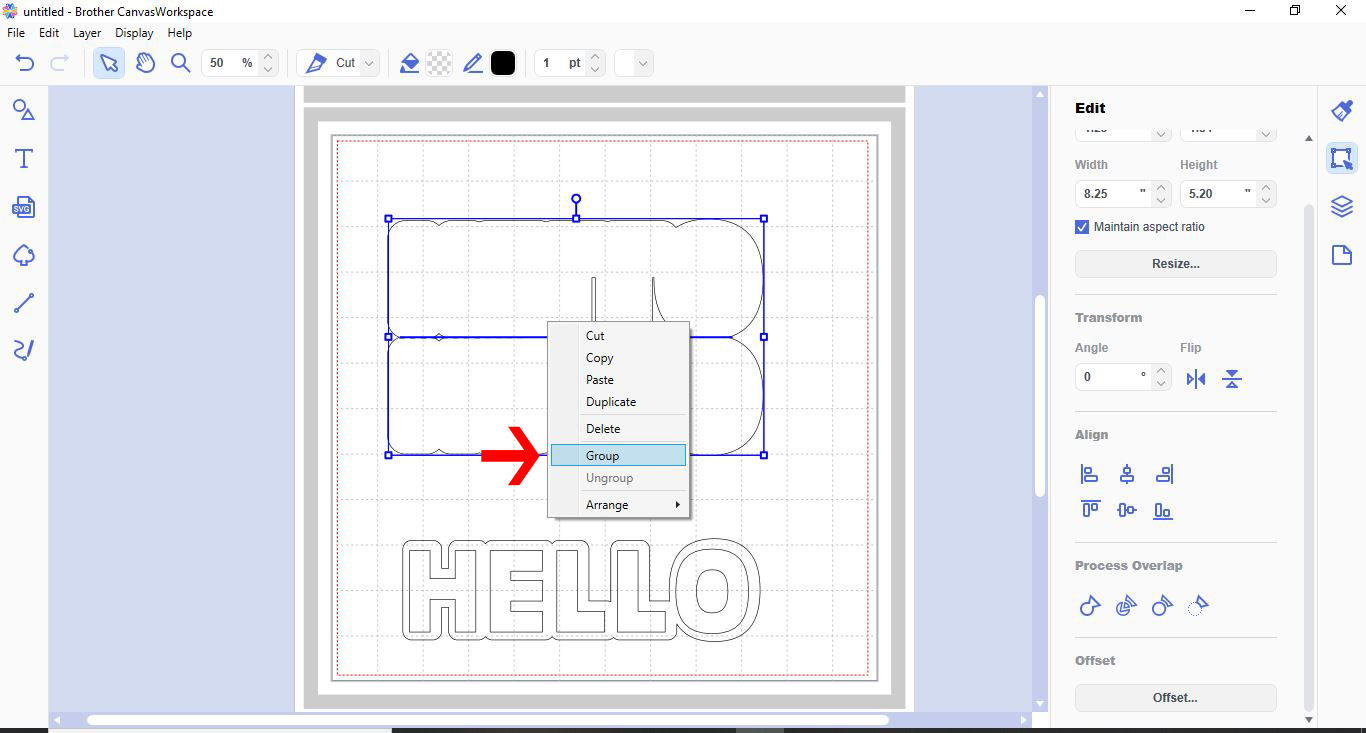
14- Select both the line and the shape. Right click and group.
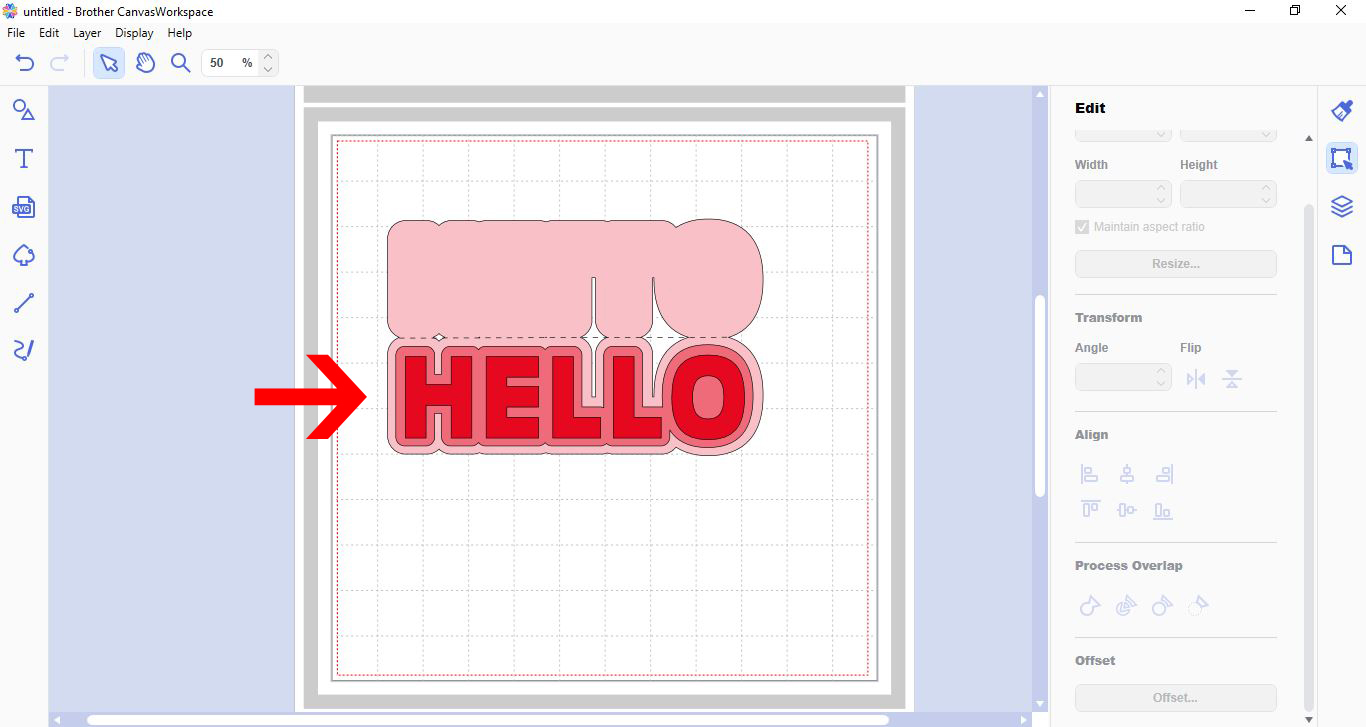
15- You can now layer the original text and first offset over your card. finally you can cut the pieces ad layer.
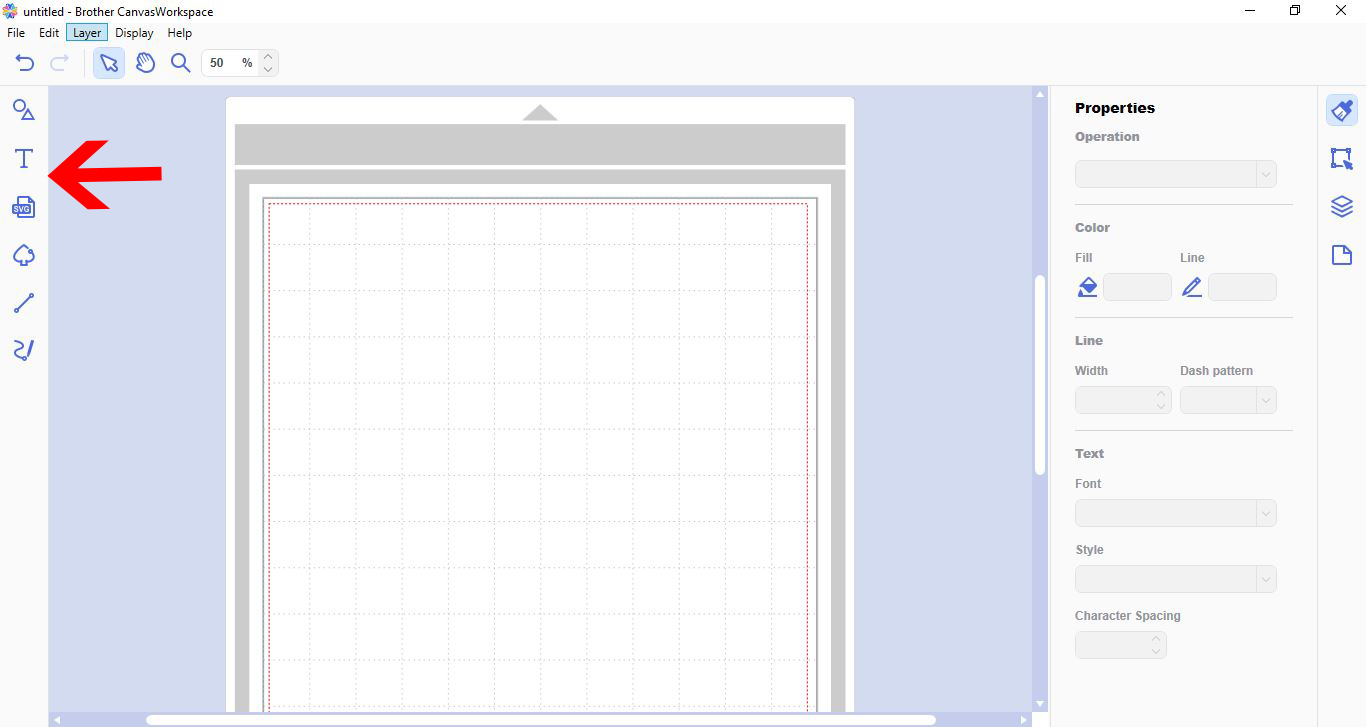
2- Select your font and then type the text you would like to make a card with.
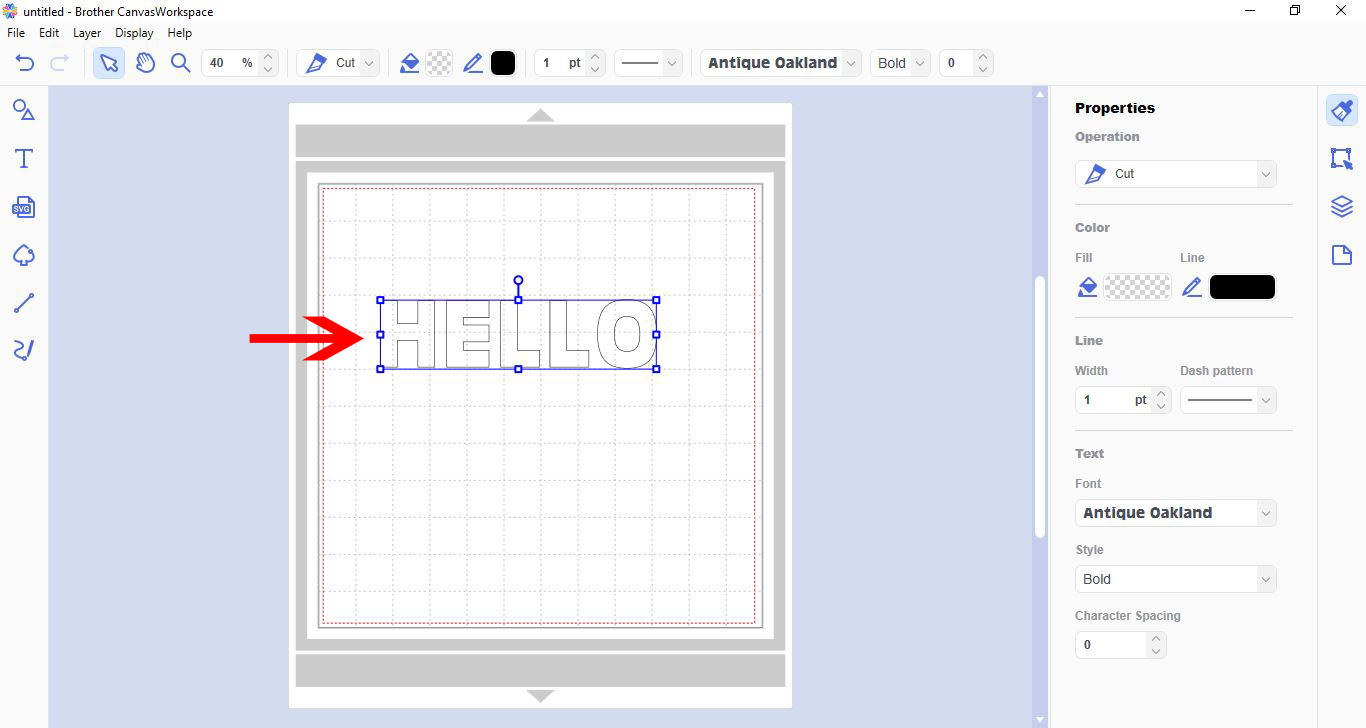
3- Select the text then click on the edit option. Click on the offset icon.
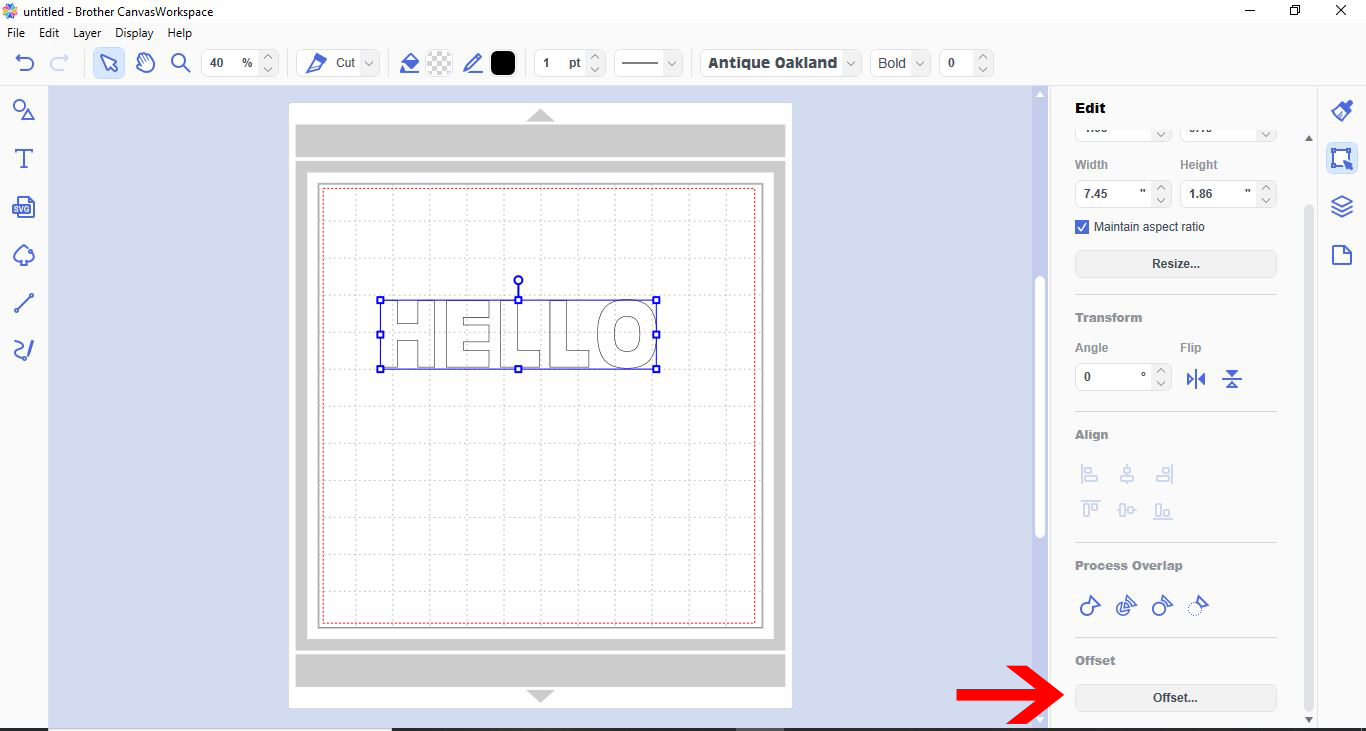
4- A new window will appear. Keep all the defaults, click ok. The offset will appear.
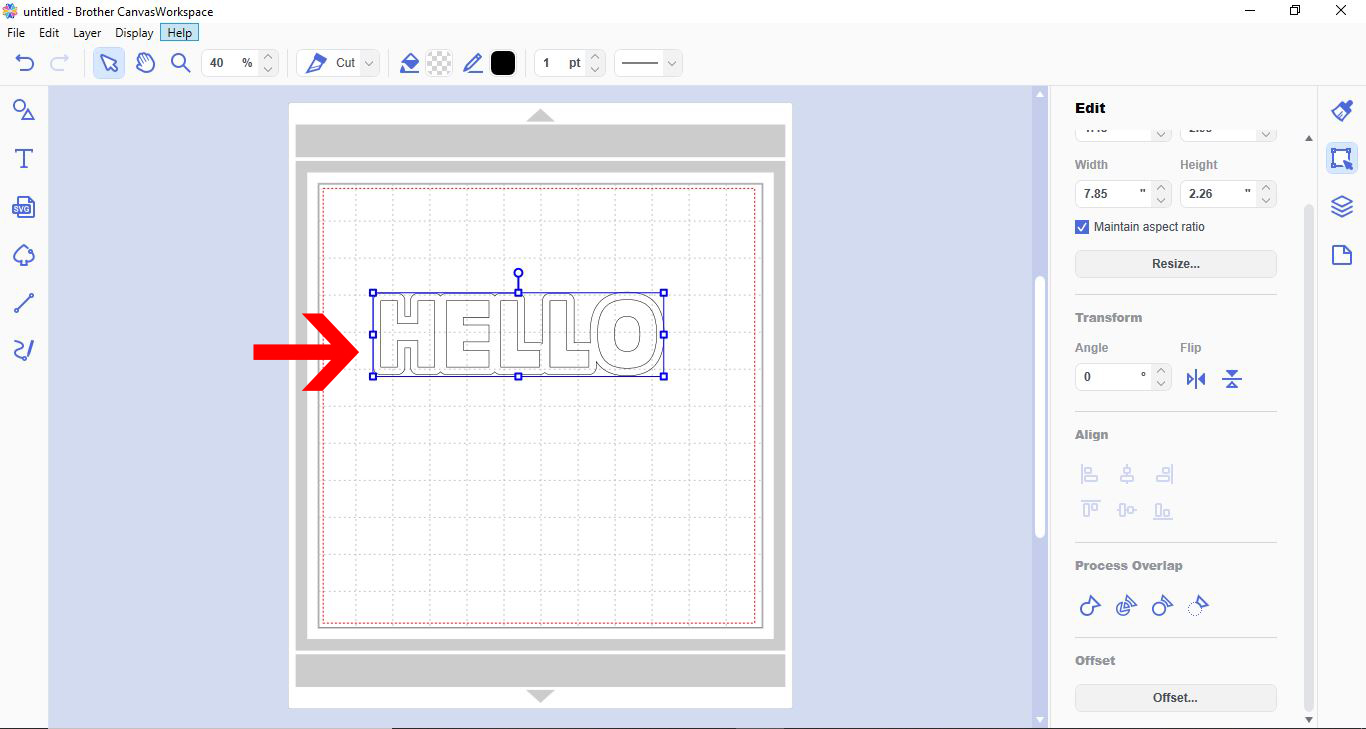
5- With the offset selected, repeat the above process and create a new offset.
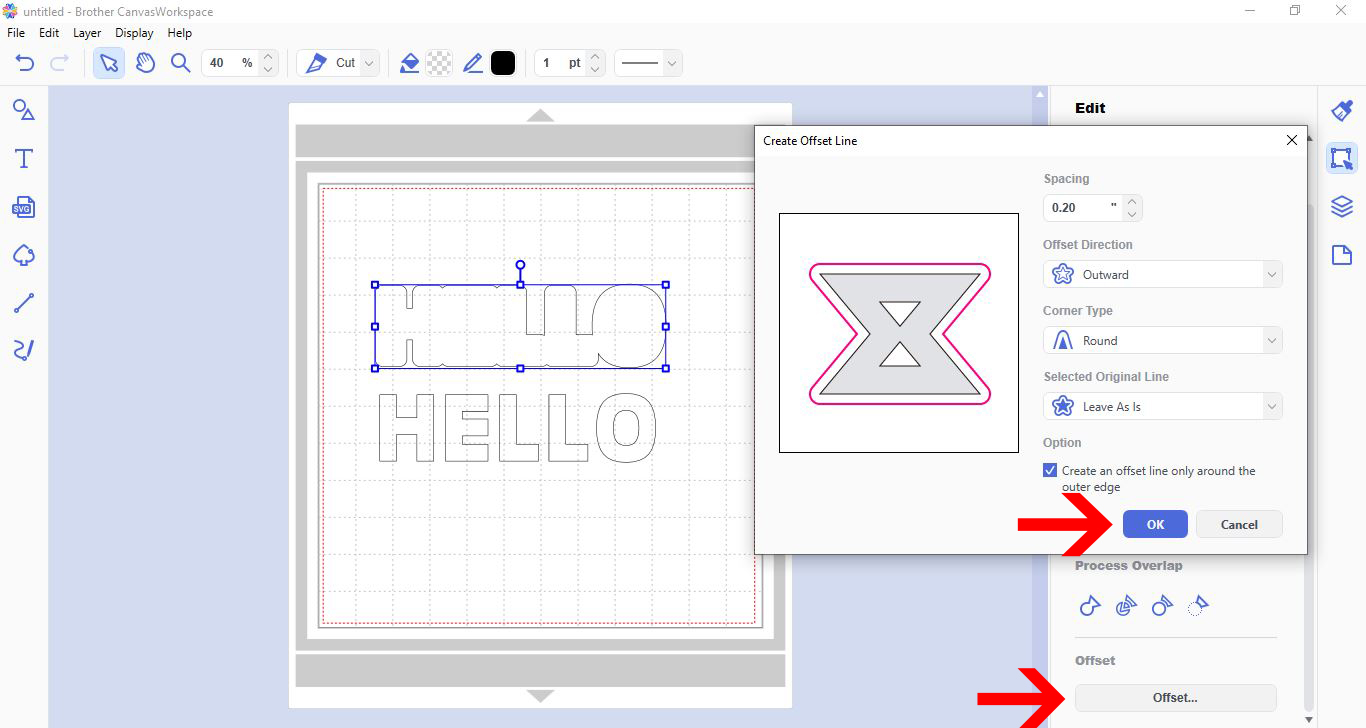
6- Move the larger offset from the original offset.
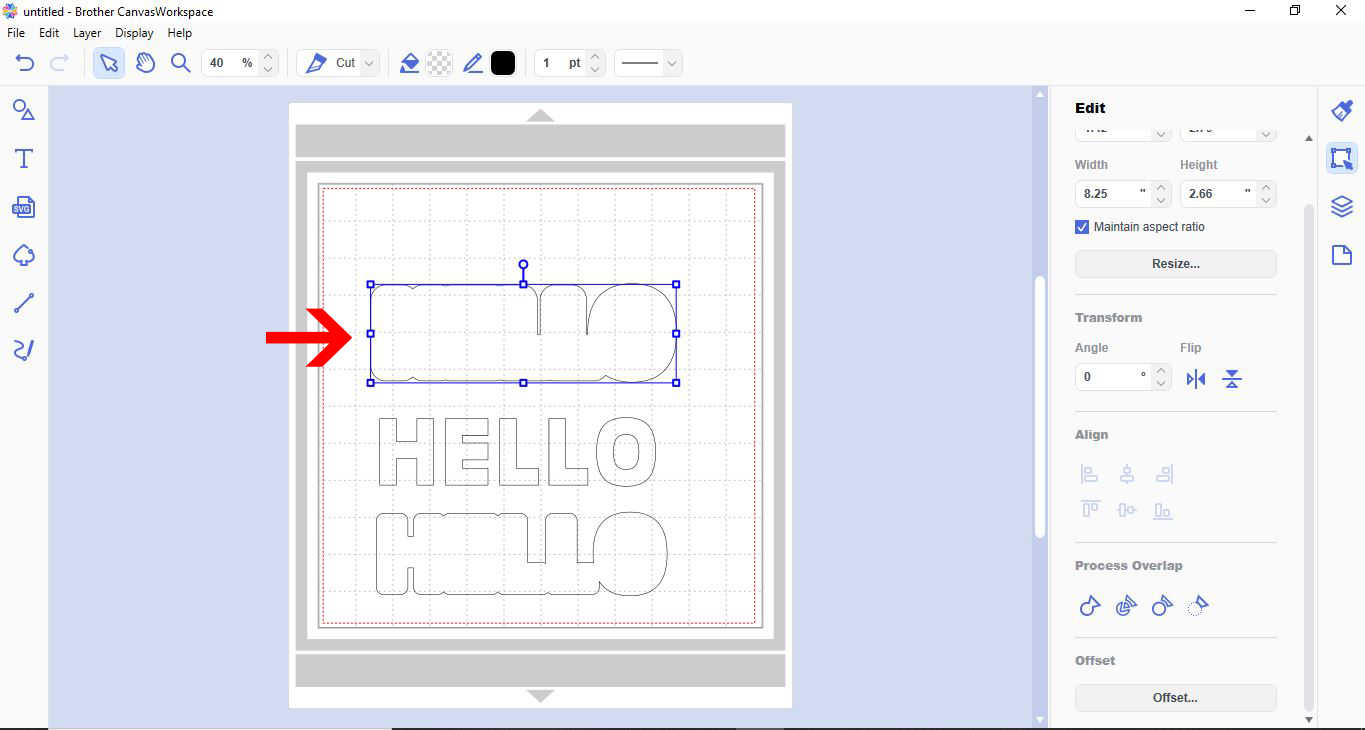
7- Right click and duplicate the offset.
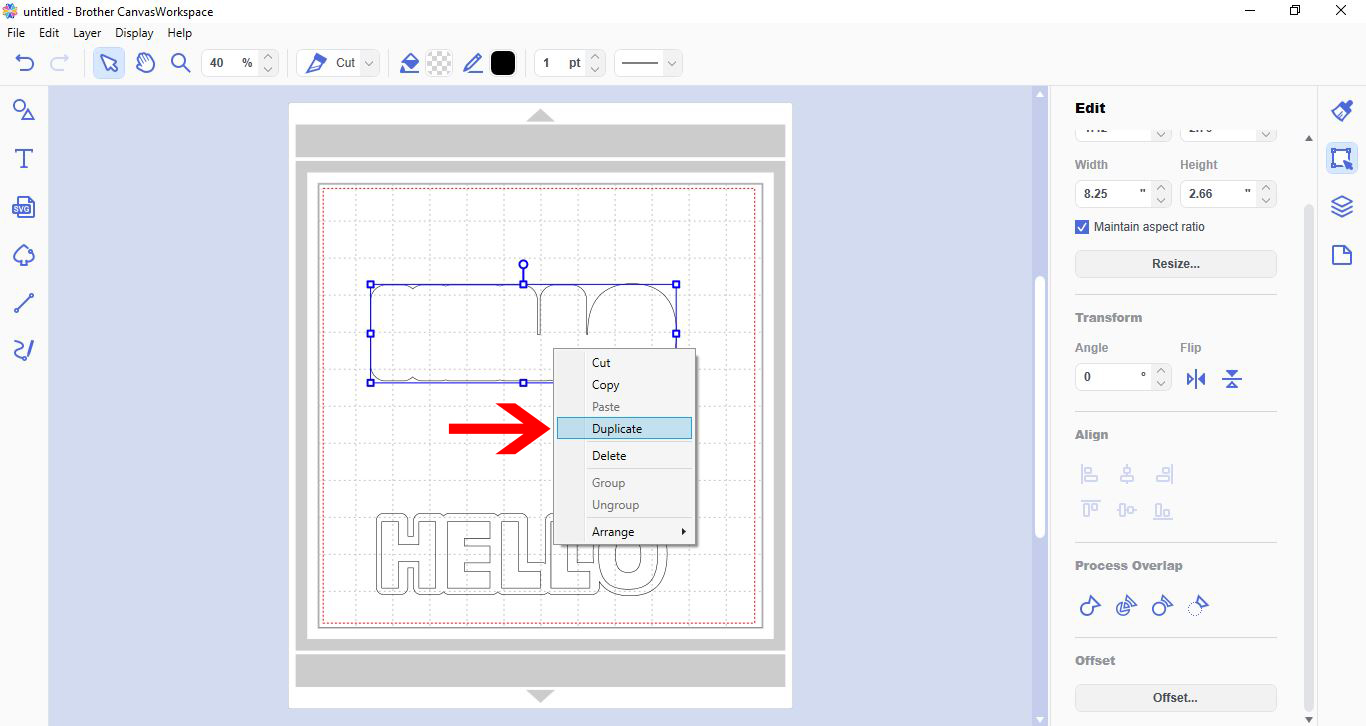
8- Select the duplicated offset and flip it horizontally.
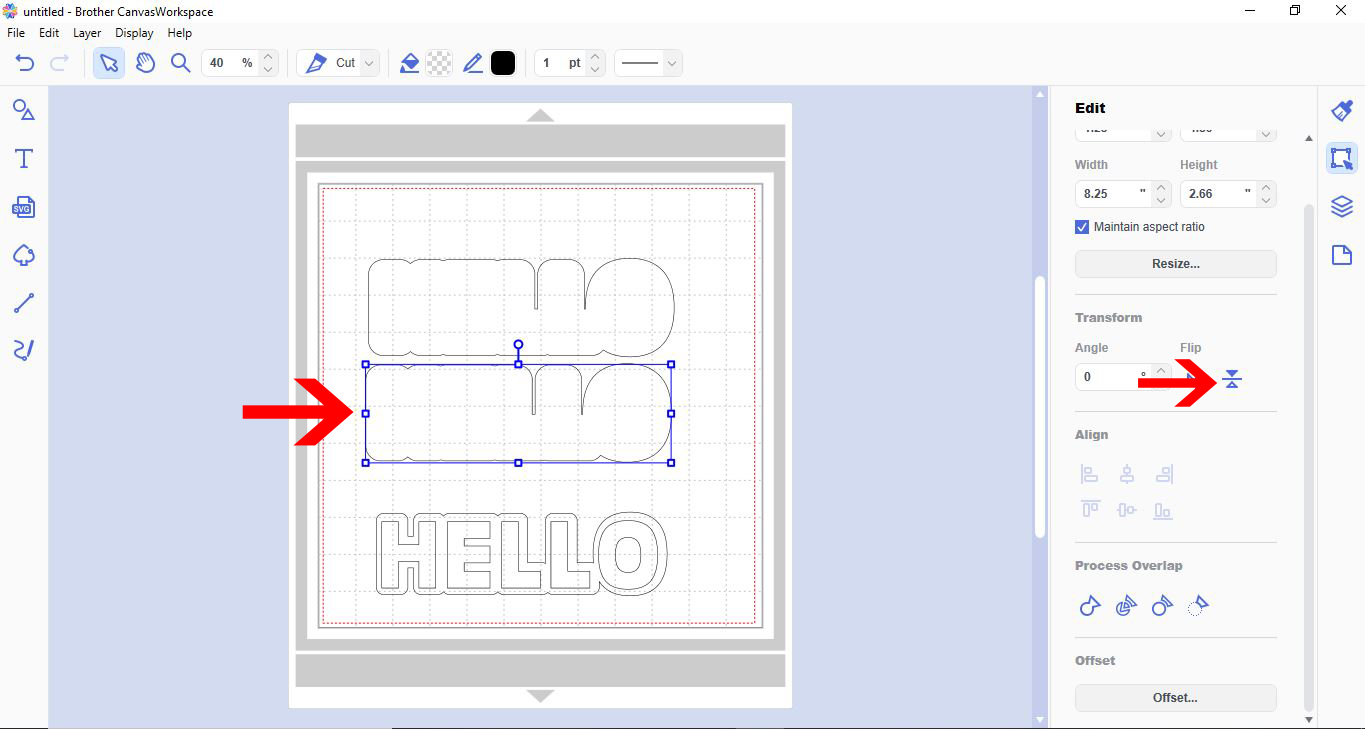
9- Place the flipped offset above the other offset.
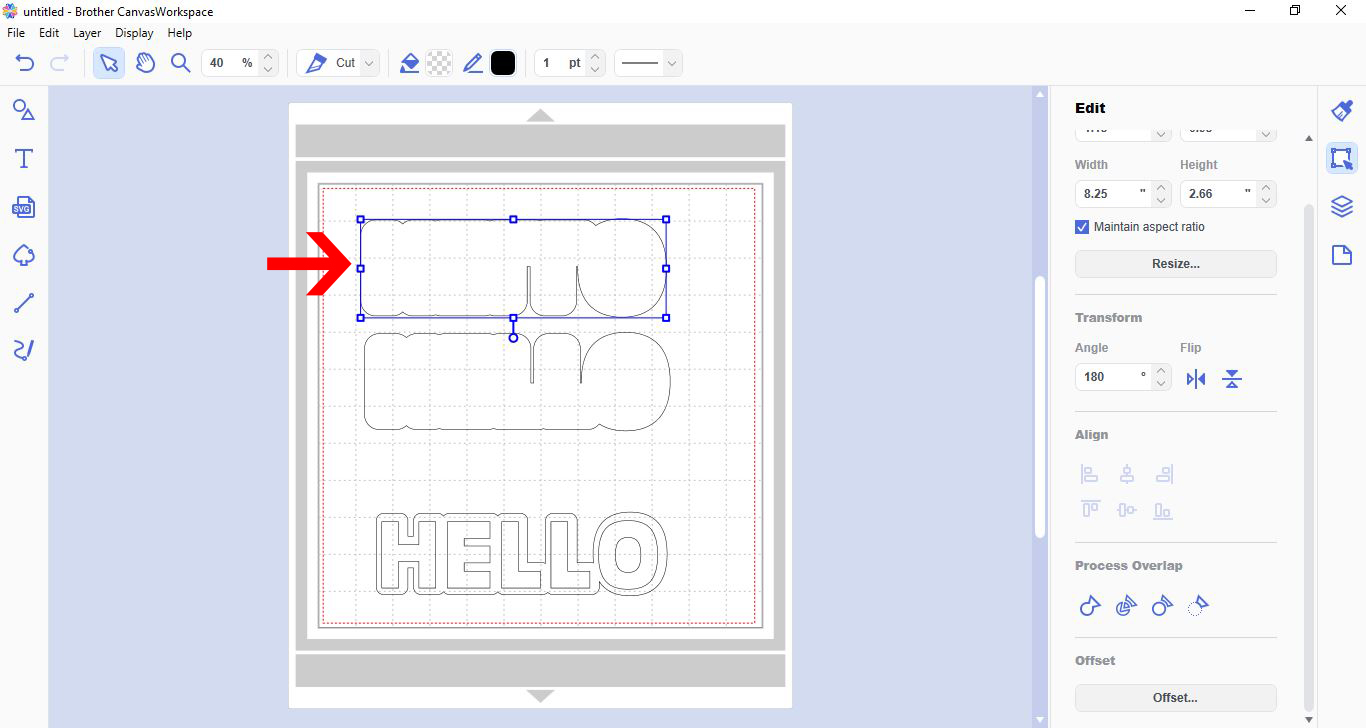
10- Slightly overlap the 2 offsets.
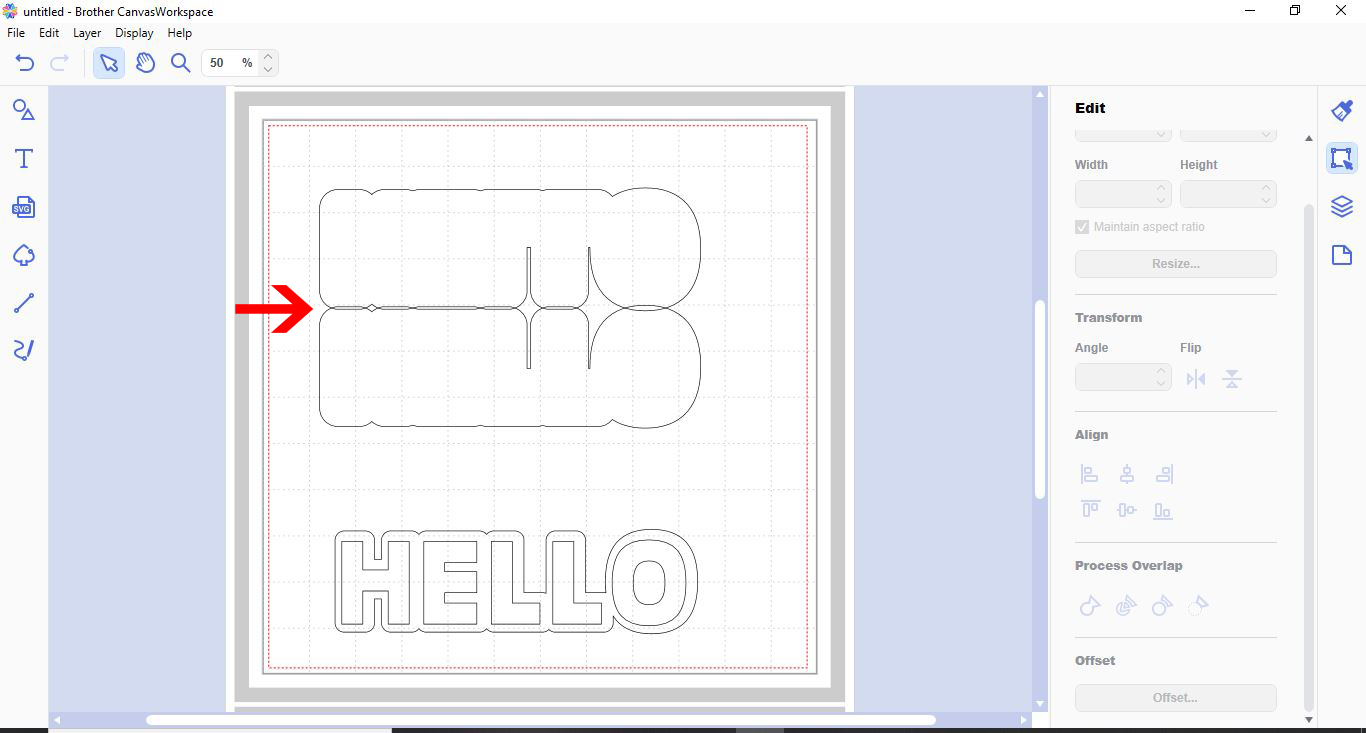
11- With both selected, weld the 2 together.
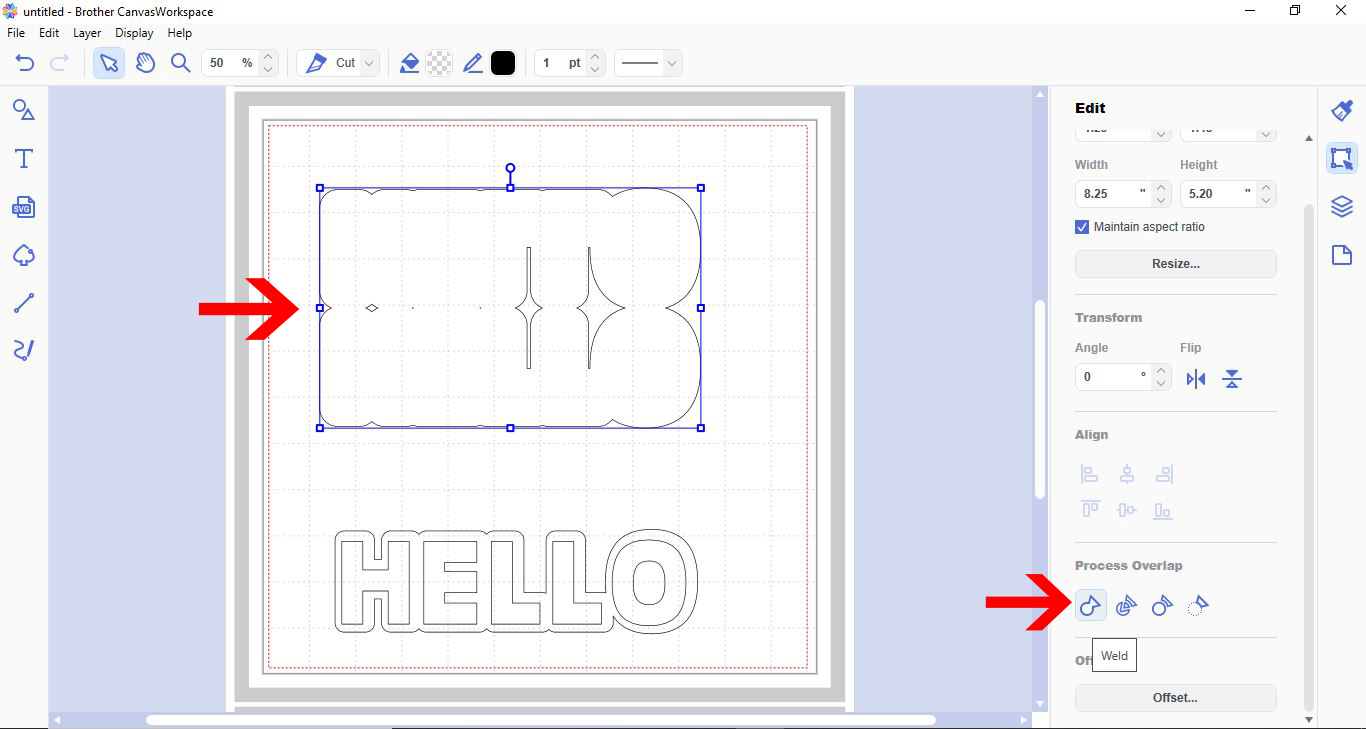
12- Click the line tool and draw a line where the two halves meet.
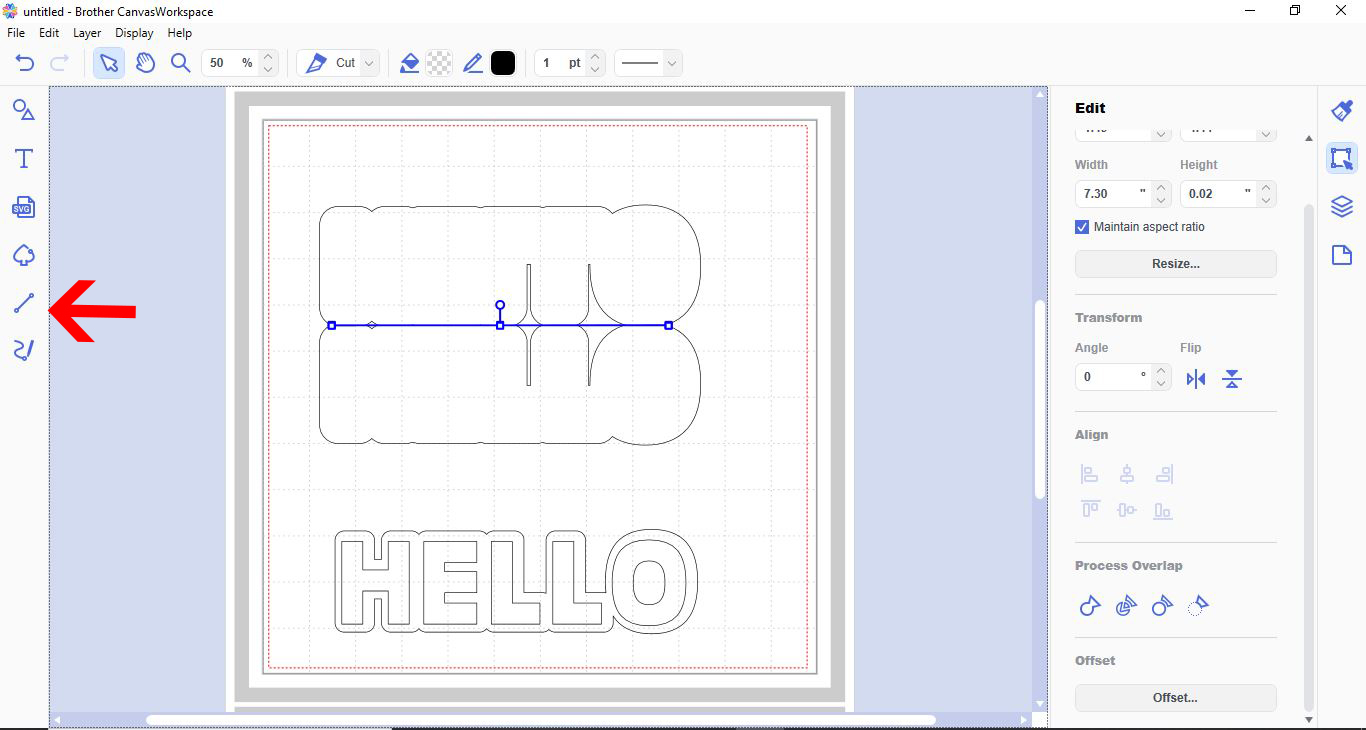
13- Change the line to perforated so you can fold easy.
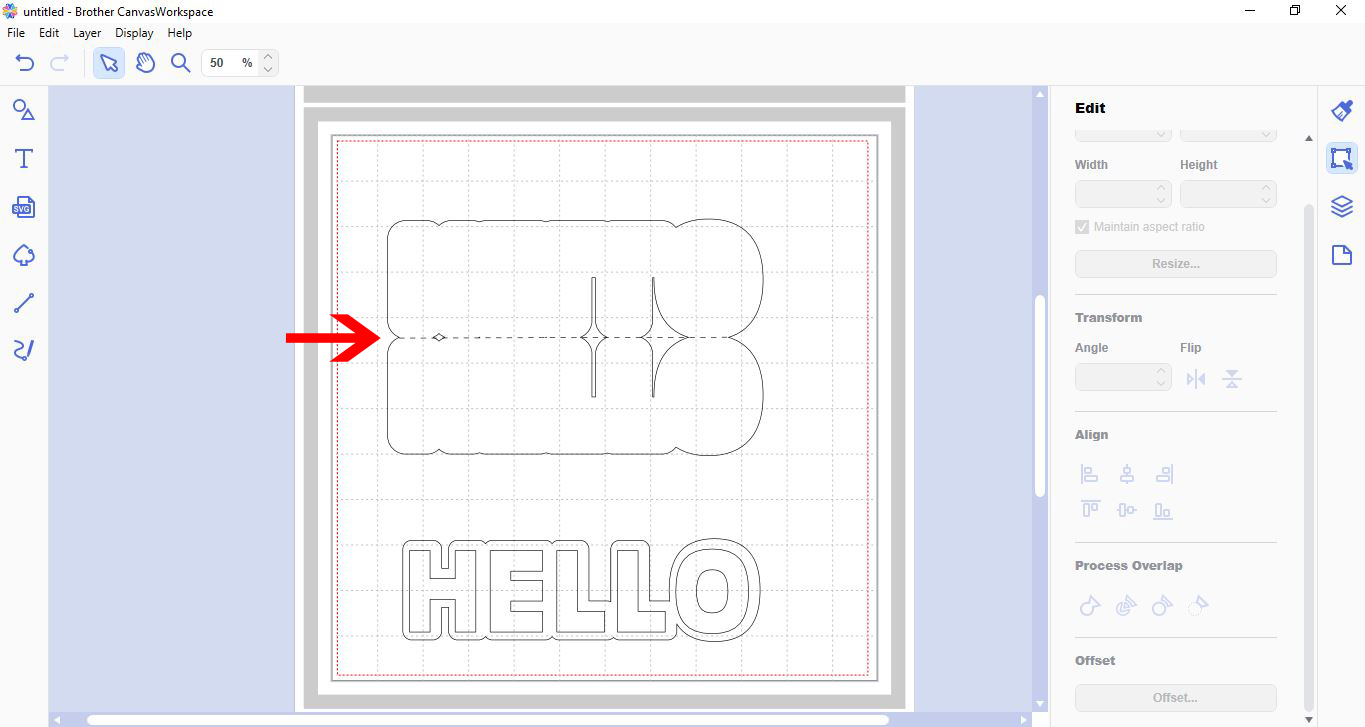
14- Select both the line and the shape. Right click and group.
15- You can now layer the original text and first offset over your card. finally you can cut the pieces ad layer.
Related Tutorials
Scan N Cut Tutorials
How to create curved text in brother scan and cut canvas workspace
Learn how to curve text in Brother Scan N Cut
Scan N Cut Tutorials
How to create a curved line in Brother scan and cut canvas workspace
Scan N Cut Tutorials
How to Create an Offset Using the Foil Quill in Brother Scan and Cut Canvas Workspace
Scan N Cut Tutorials
How to create a custom fill pattern in brother scan and cut canvas workspace
Scan N Cut Tutorials
How to create a font into a stencil font in Brother scan and cut canvas workspace
Scan N Cut Tutorials