By Design Bundles
Scan N Cut Tutorials4 min
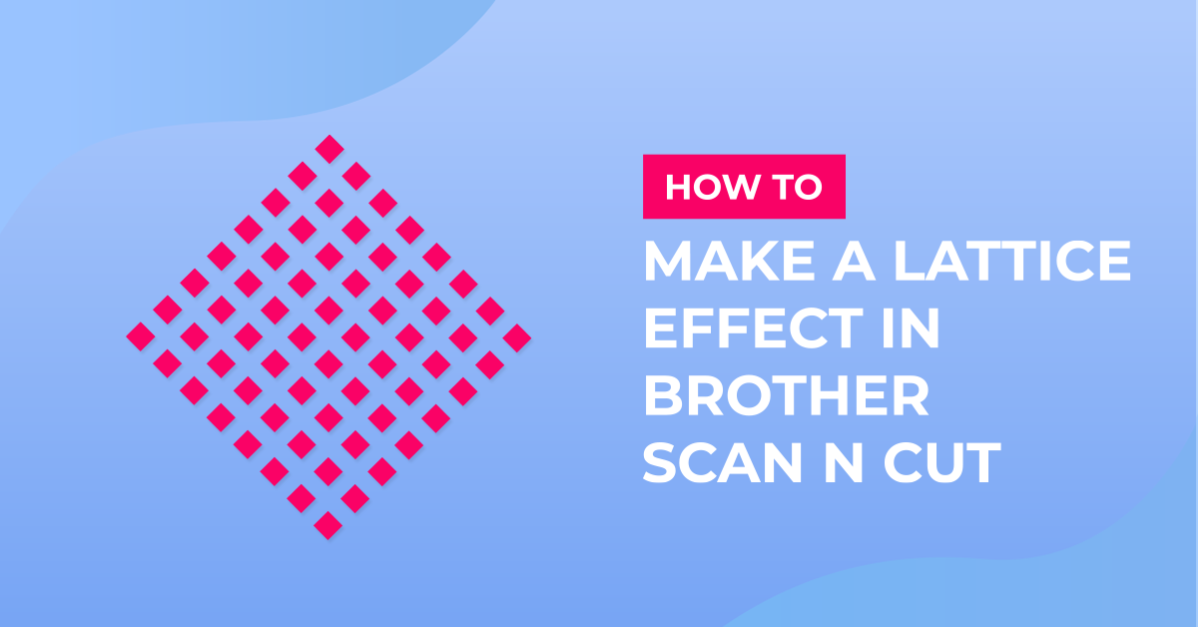
How to create a lattice effect in brother scan and cut canvas workspace
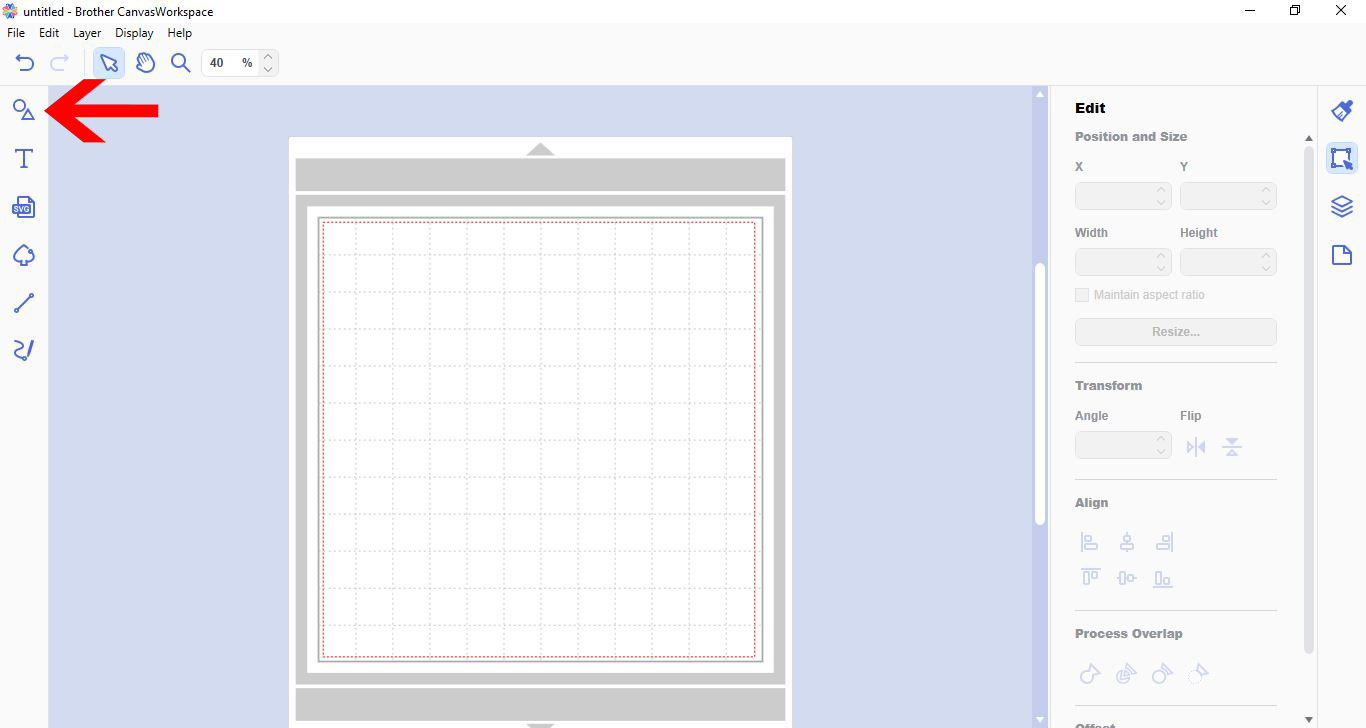
1- Open canvas workspace. Click on the shape tool.
2- Select a rectangle.
3- Using the edit tool, Change the size of your rectangle to make it long and thin.
4- With your thin shape selected, right click and duplicate.
5- Move the duplicate under the original.
6- Align the 2 shapes to the left using the align tool.
7- Right click and group the two together.
8- Repeat the above steps until you have enough for your lattice.
9- With everything grouped, right click and duplicate.
10- With the duplicate selected, go to transform and turn 90 degrees.
11- Move the two lots of shapes over each other.
12- Go to the transform option again and rotate 45 degrees.
13- Select the shape tool. Click on the square.
14- Place over the lattice. With the square selected, right click - arrange - send to back.
15- Now select the lattice. Right click - arrange - bring to front.
16- Select both the square and lattice. Go to process overlap and subtract.
17- You lattice will be cut out. To place a border around it and finish off the lattice, go to shapes and select a square. Place around the lattice.
18 - With both the lattice and the square selected, right click and group.
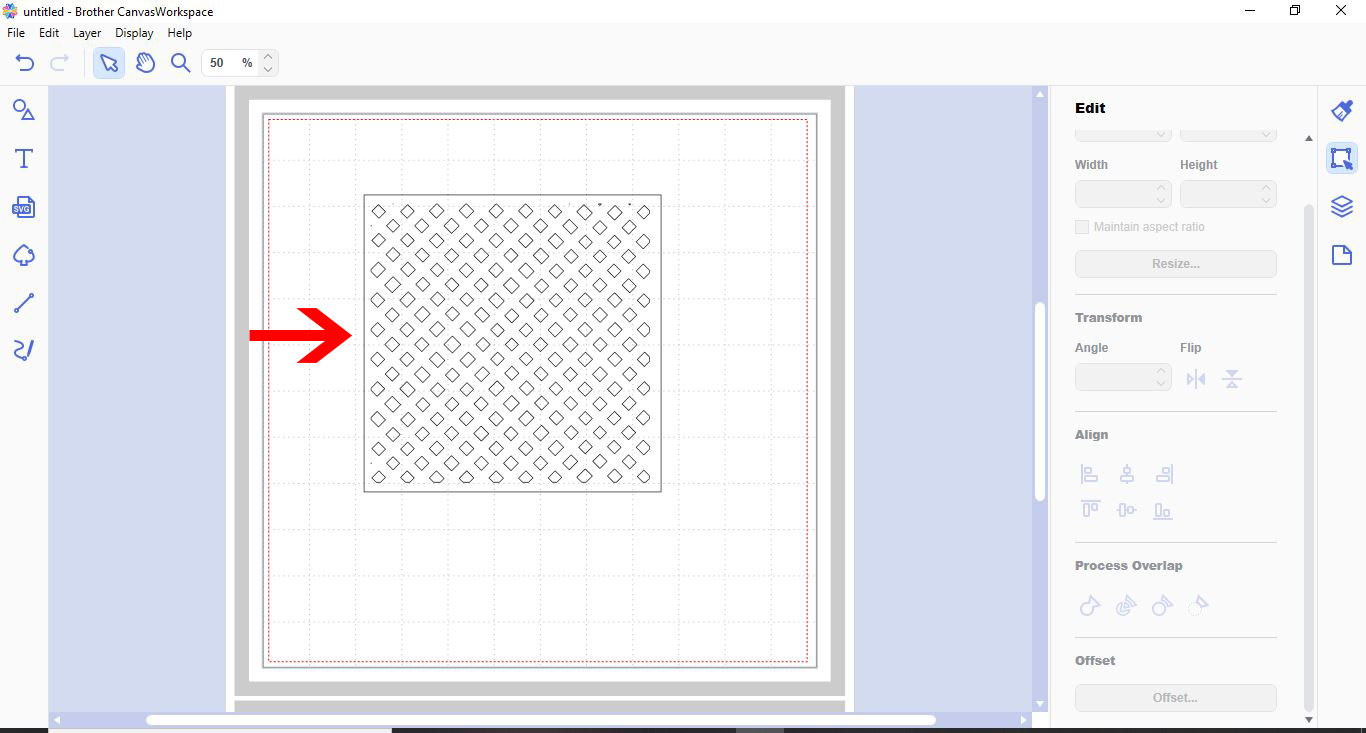
19- You can now resize your lattice and cut.
2- Select a rectangle.
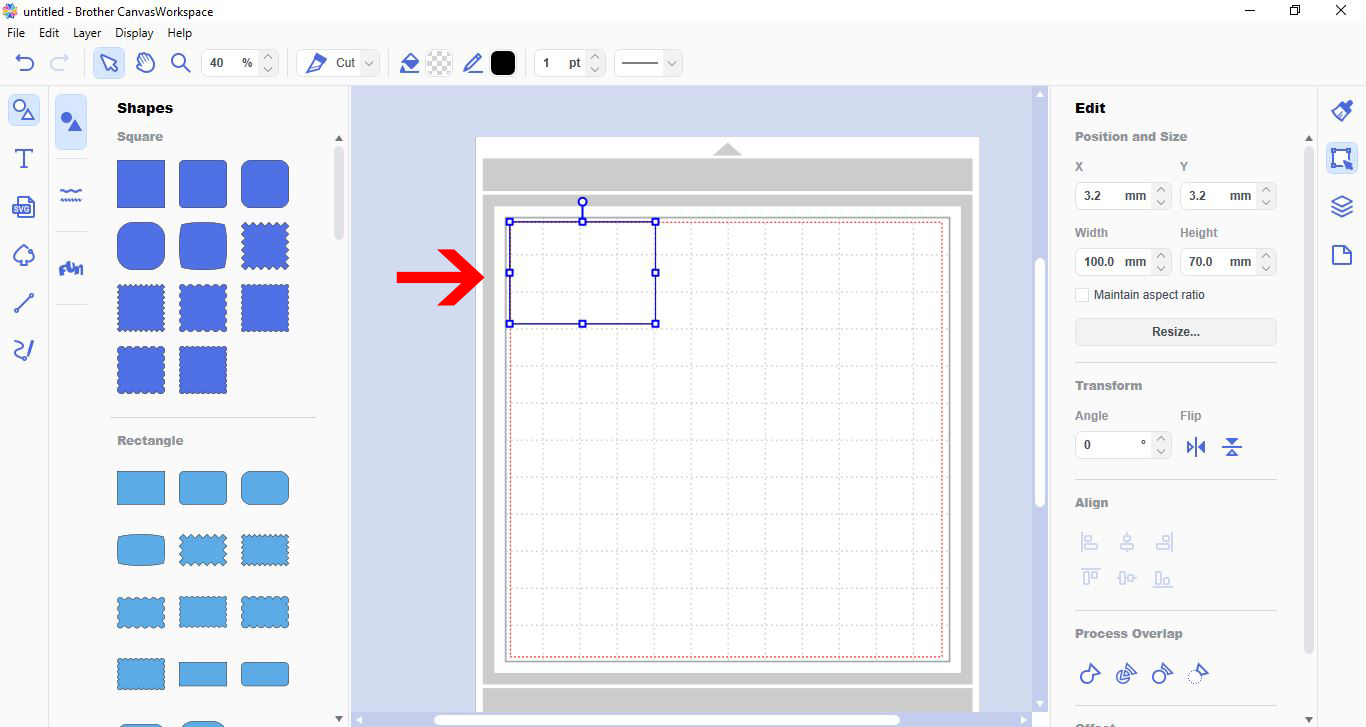
3- Using the edit tool, Change the size of your rectangle to make it long and thin.
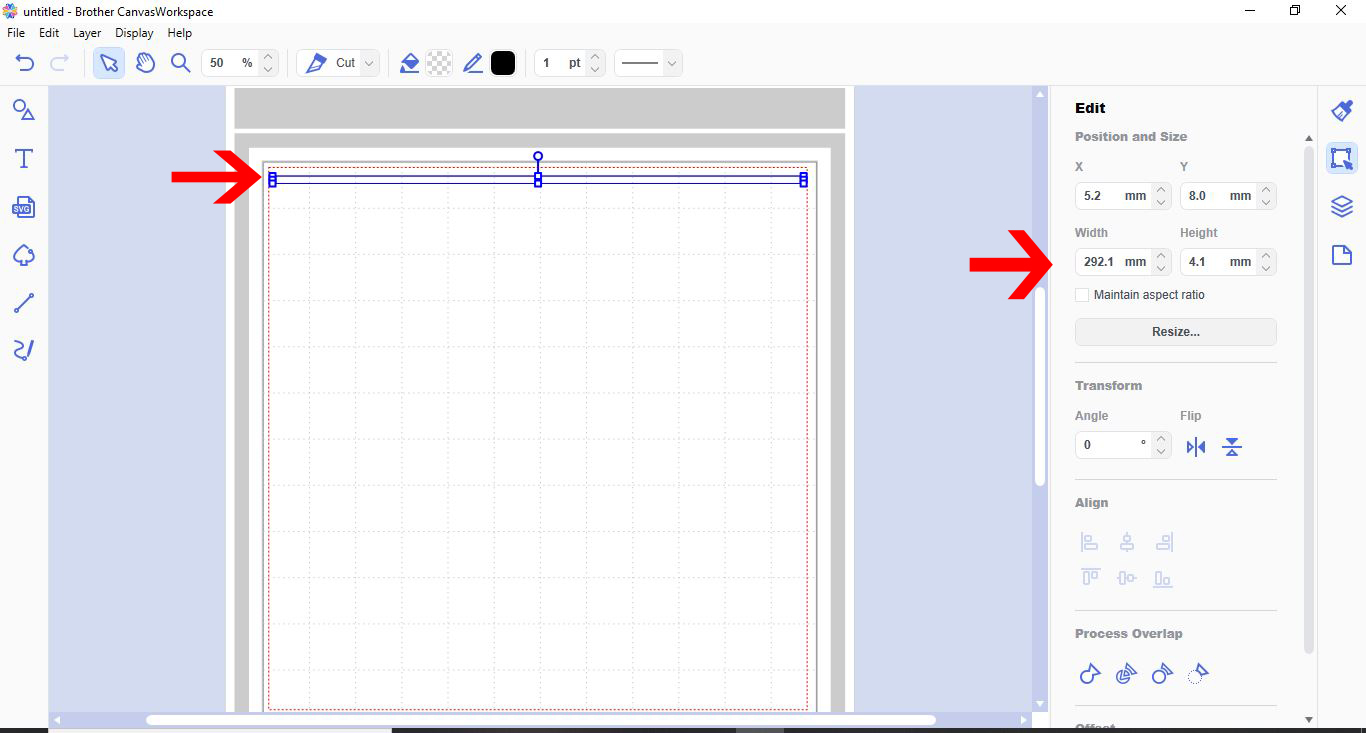
4- With your thin shape selected, right click and duplicate.
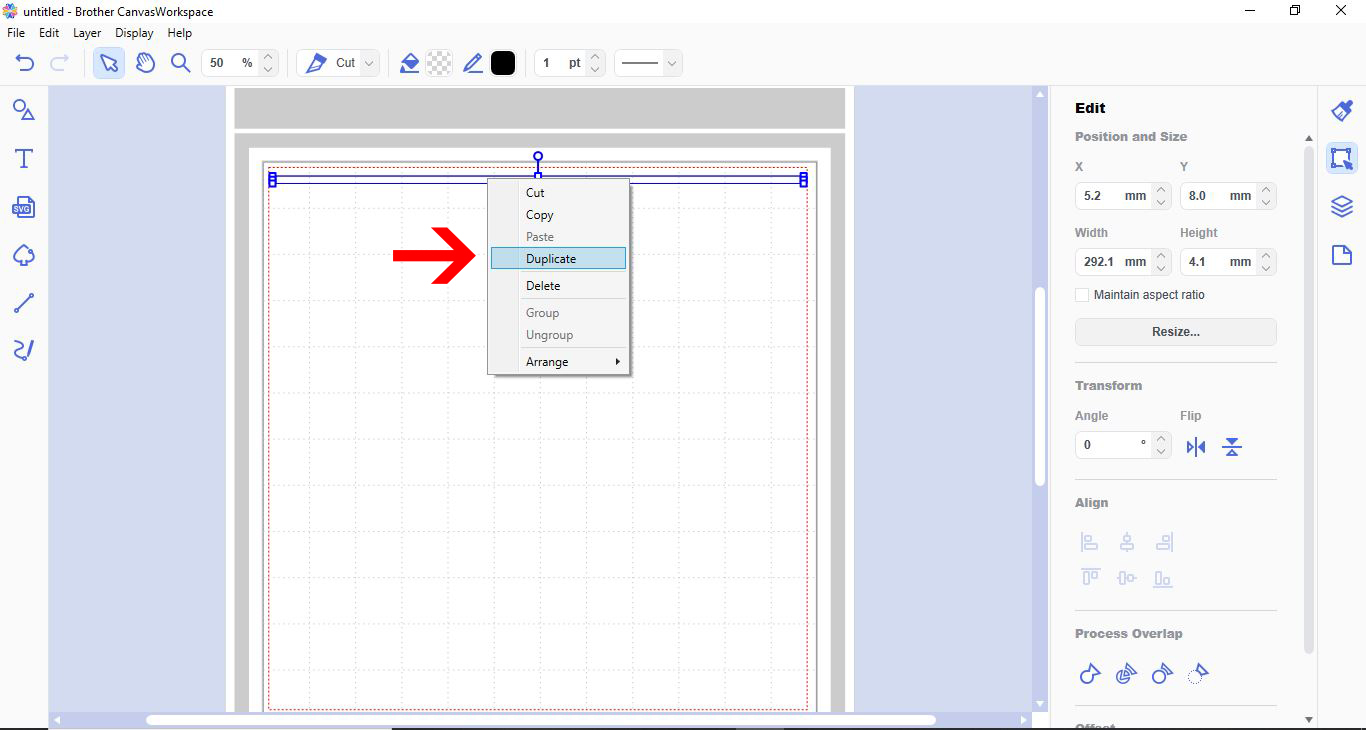
5- Move the duplicate under the original.
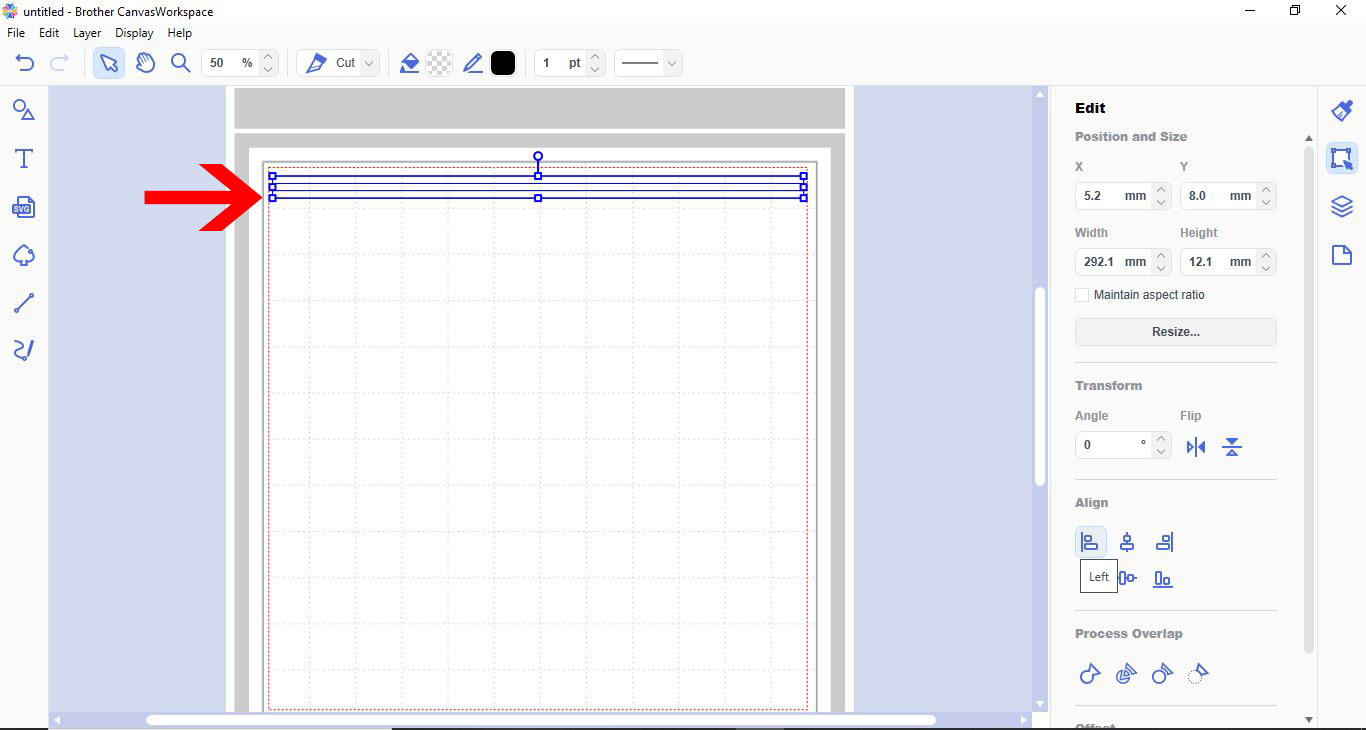
6- Align the 2 shapes to the left using the align tool.
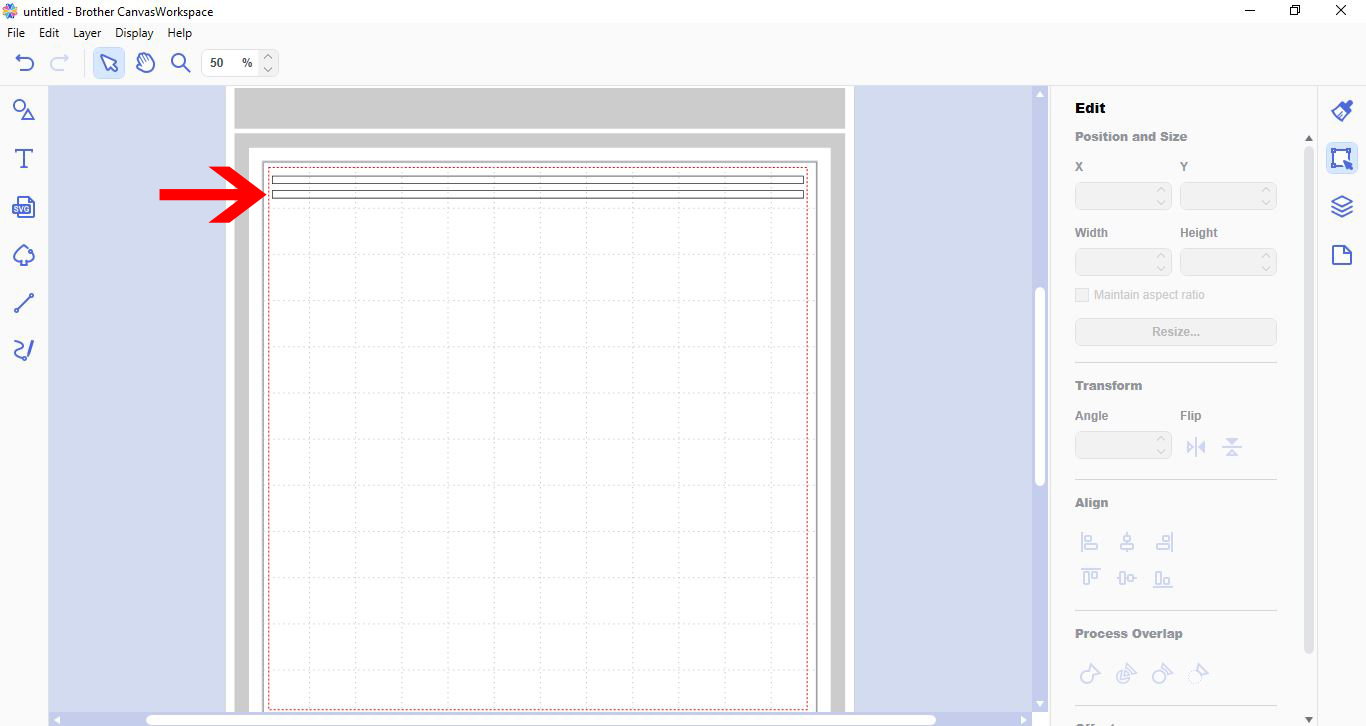
7- Right click and group the two together.
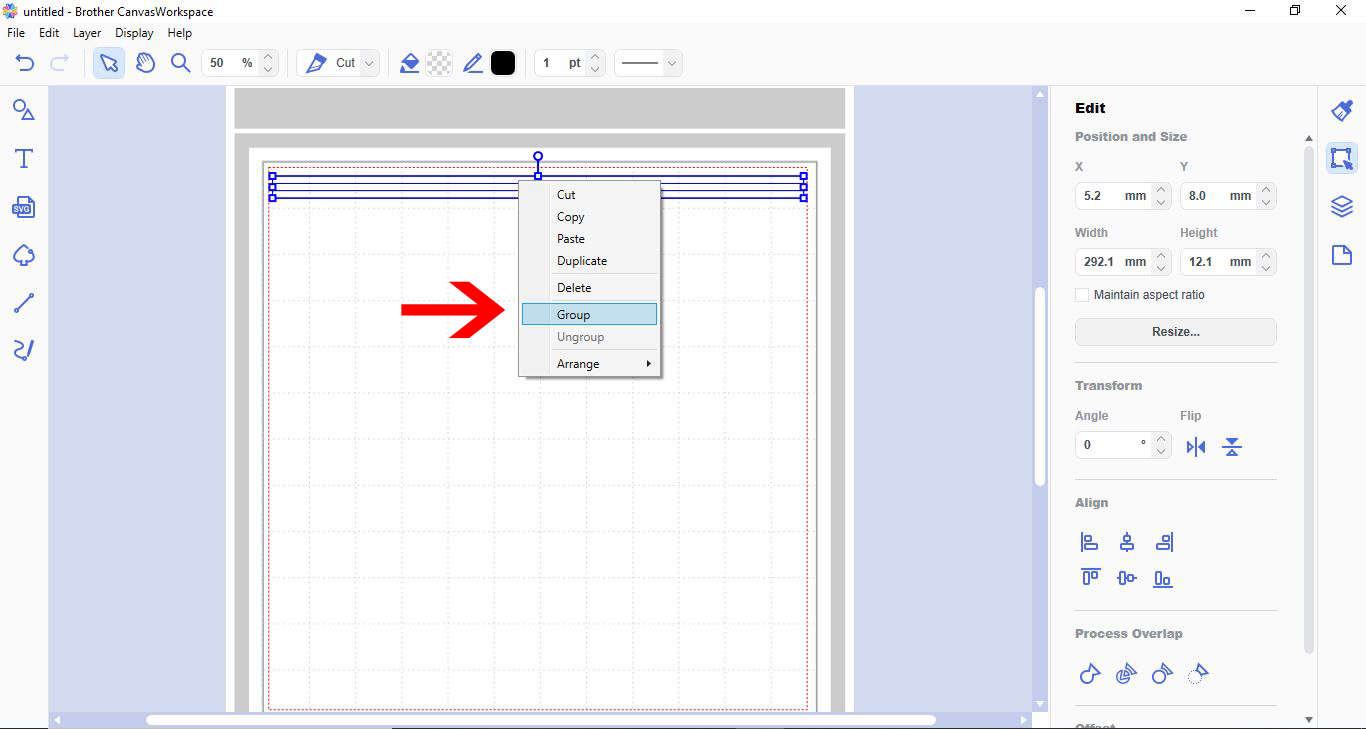
8- Repeat the above steps until you have enough for your lattice.
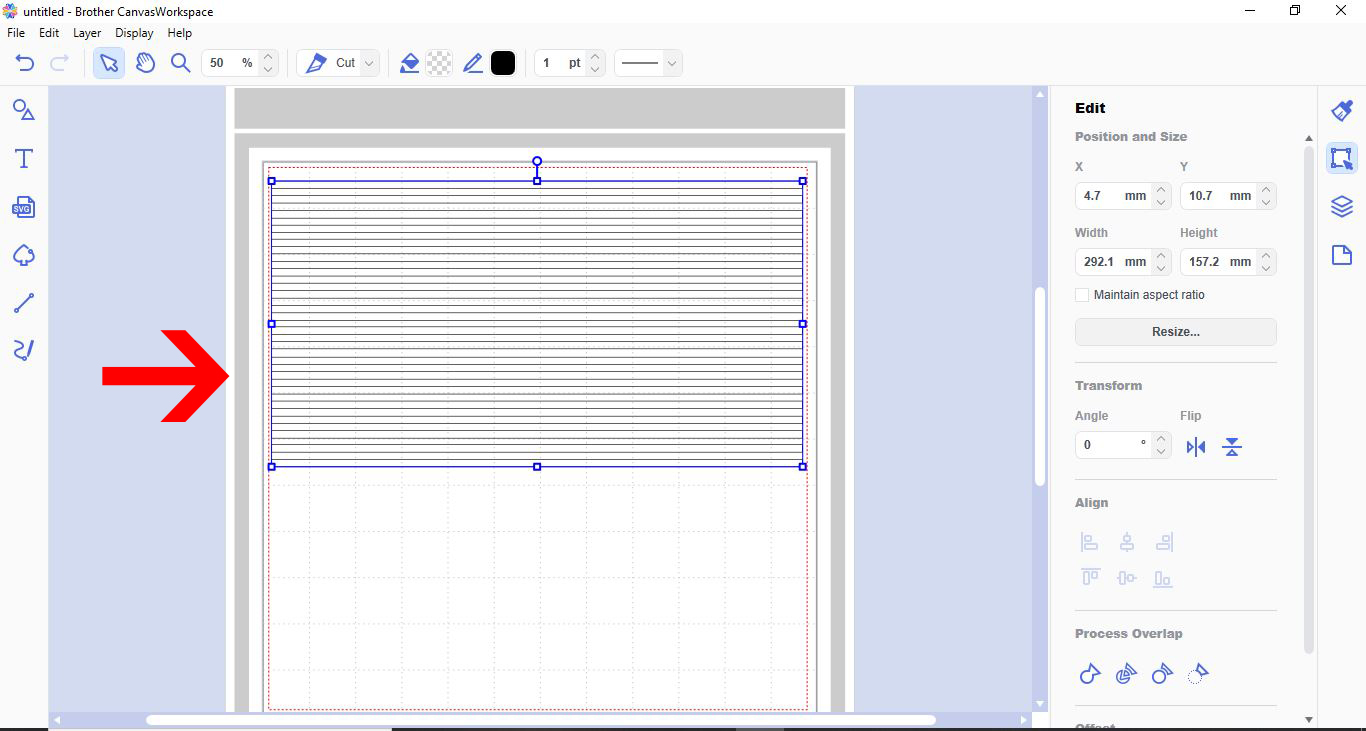
9- With everything grouped, right click and duplicate.
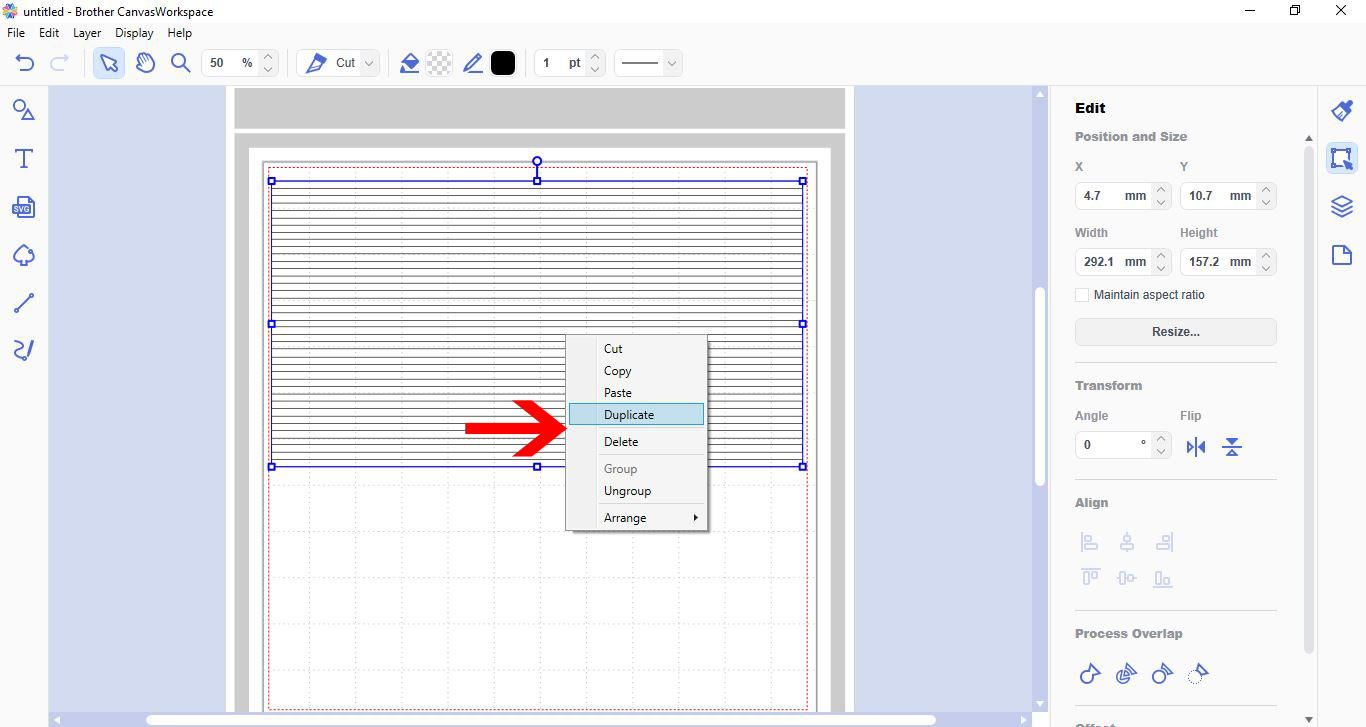
10- With the duplicate selected, go to transform and turn 90 degrees.
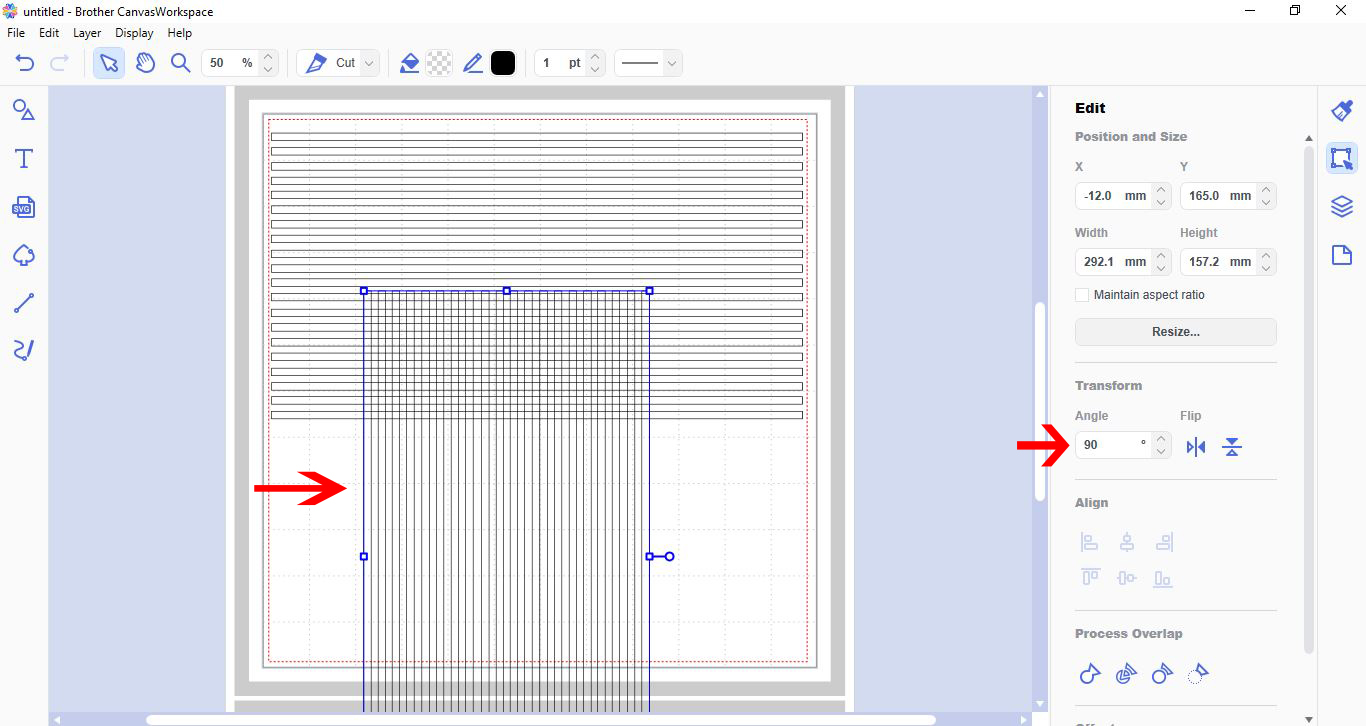
11- Move the two lots of shapes over each other.
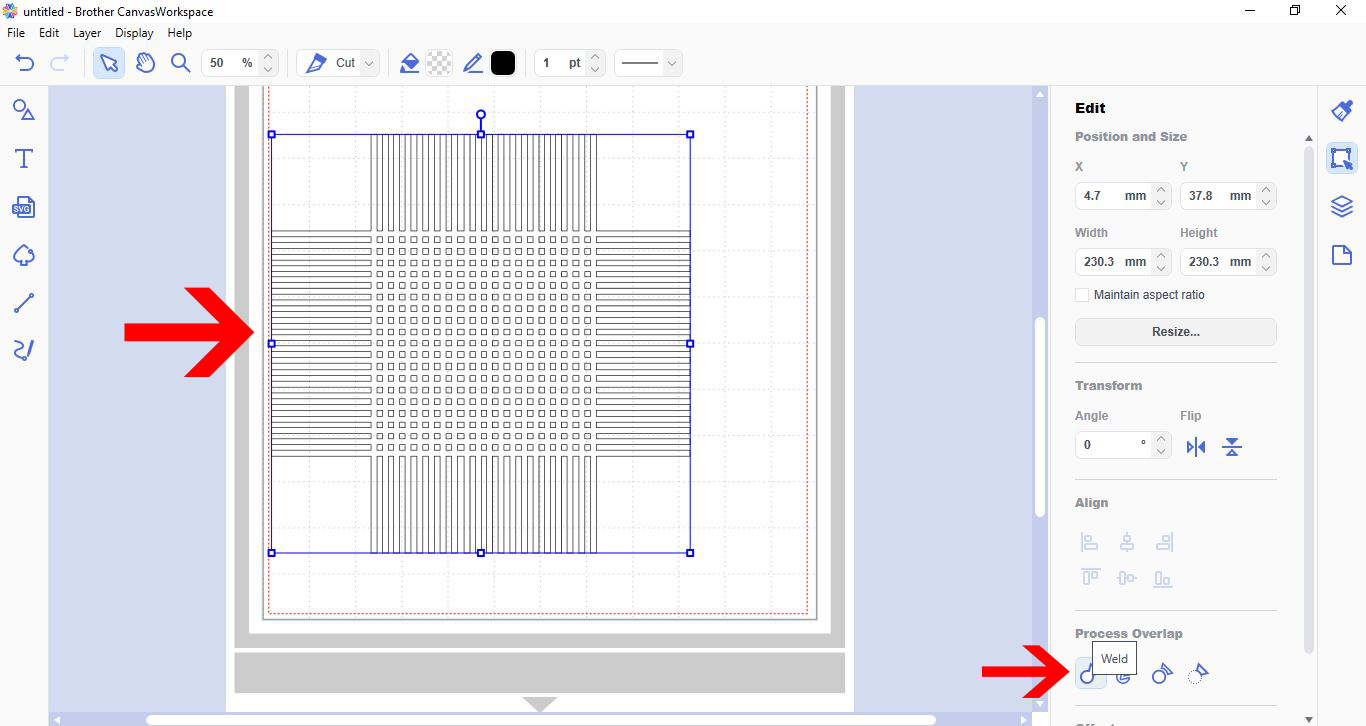
12- Go to the transform option again and rotate 45 degrees.

13- Select the shape tool. Click on the square.
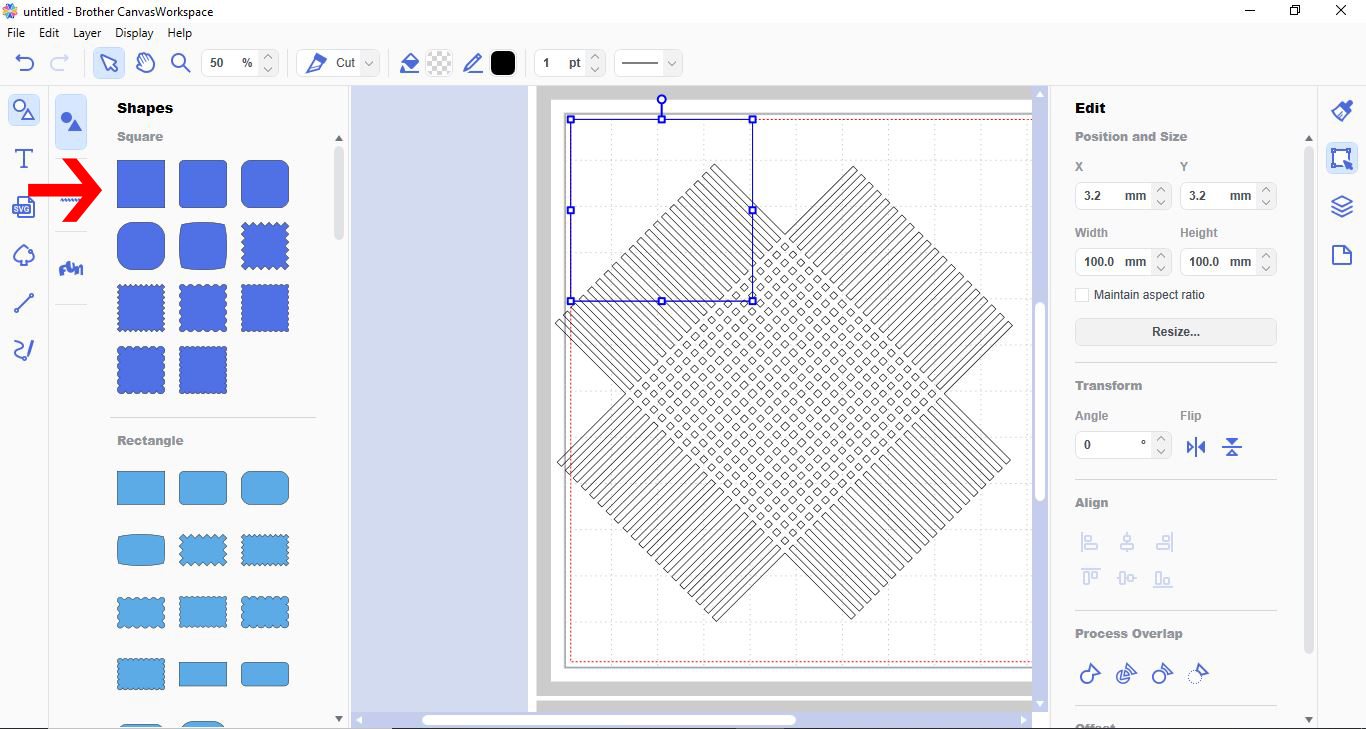
14- Place over the lattice. With the square selected, right click - arrange - send to back.
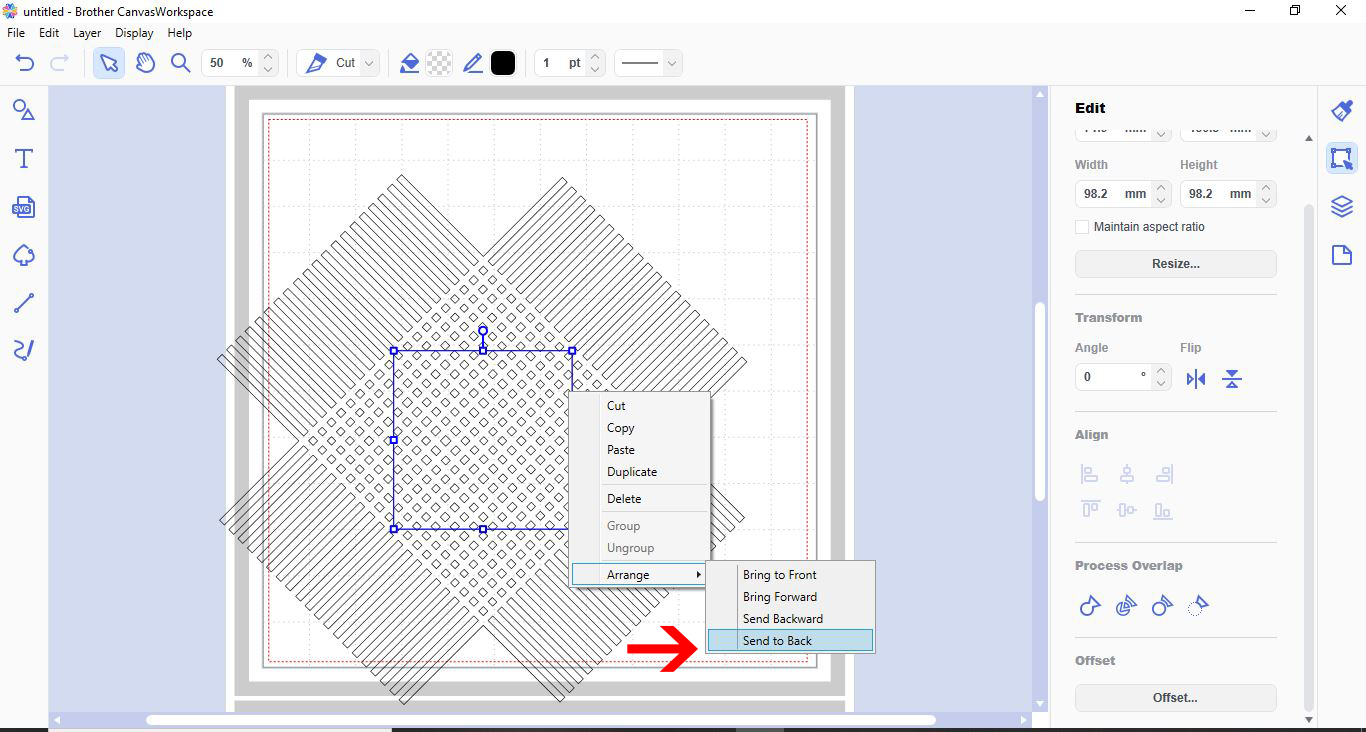
15- Now select the lattice. Right click - arrange - bring to front.
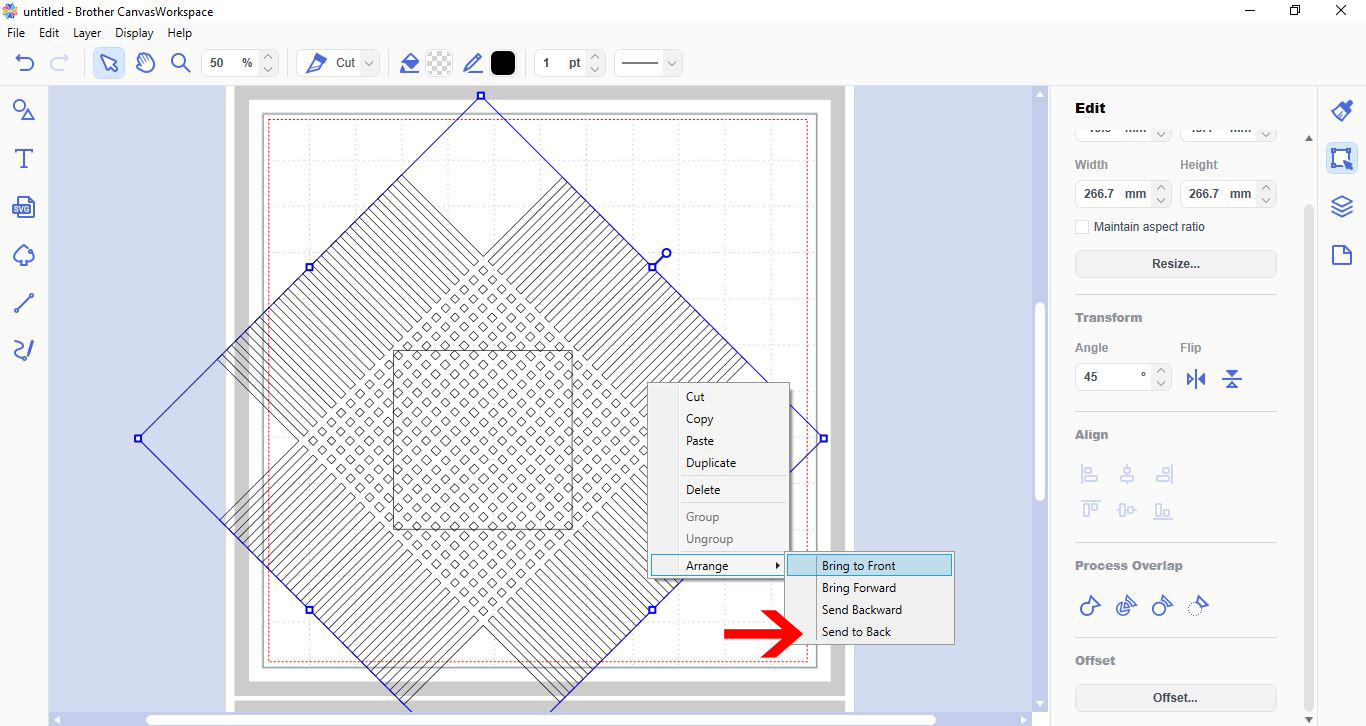
16- Select both the square and lattice. Go to process overlap and subtract.
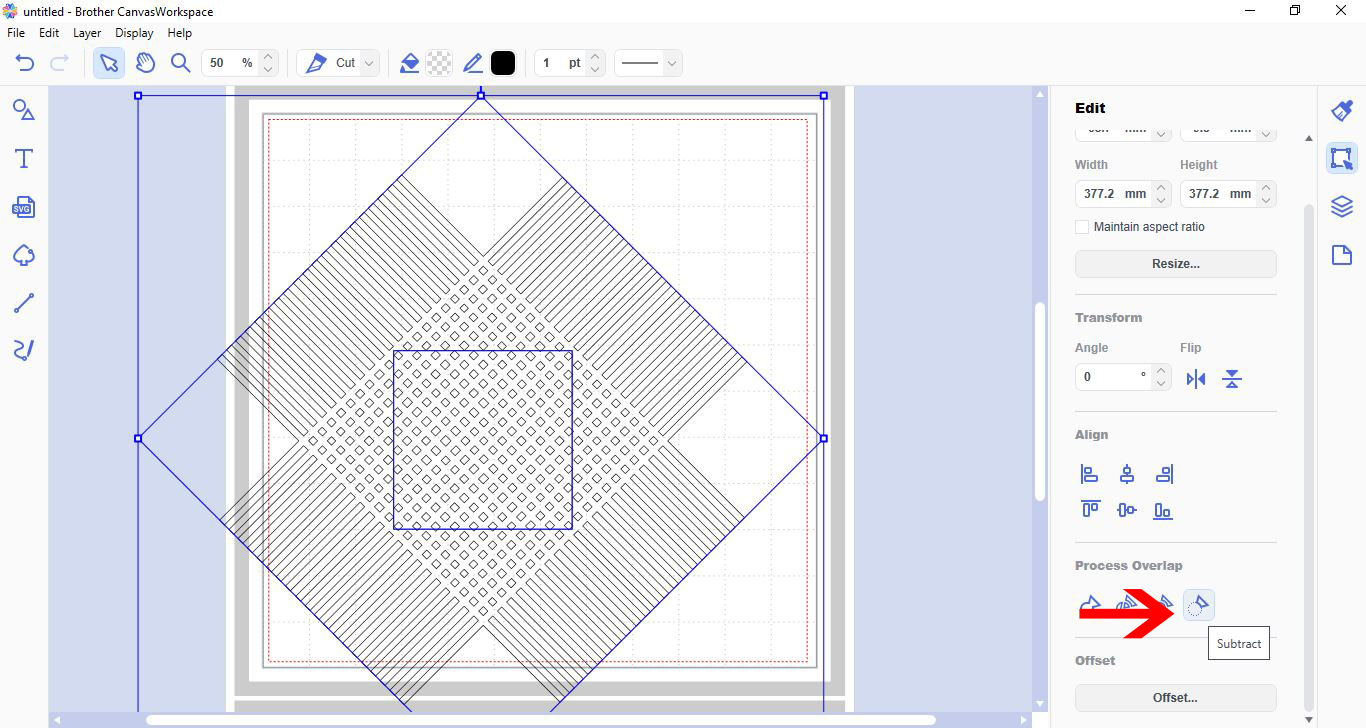
17- You lattice will be cut out. To place a border around it and finish off the lattice, go to shapes and select a square. Place around the lattice.
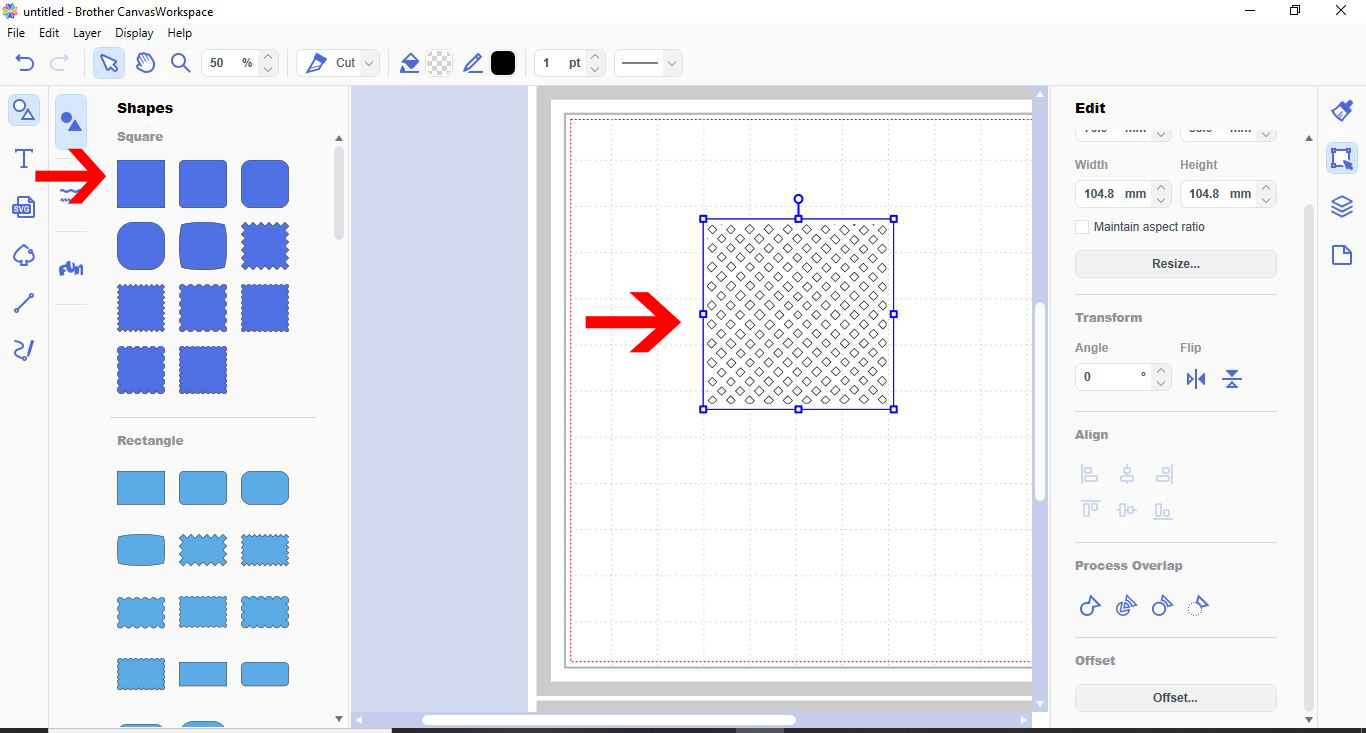
18 - With both the lattice and the square selected, right click and group.
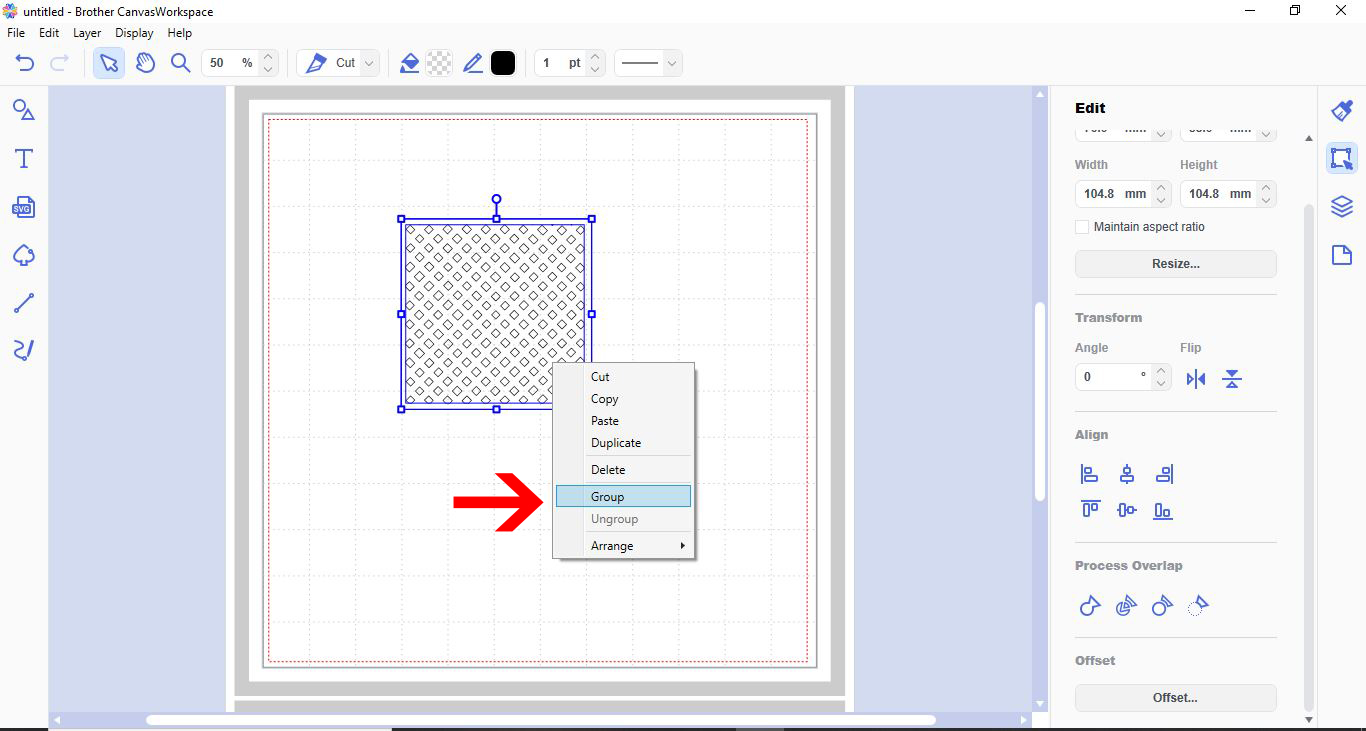
19- You can now resize your lattice and cut.
Related Tutorials
Scan N Cut Tutorials
How to create a knock out effect in brother scan and cut canvas workspace
Scan N Cut Tutorials
How to create curved text in brother scan and cut canvas workspace
Learn how to curve text in Brother Scan N Cut
Scan N Cut Tutorials
How to create a curved line in Brother scan and cut canvas workspace
Scan N Cut Tutorials
How to Create an Offset Using the Foil Quill in Brother Scan and Cut Canvas Workspace
Scan N Cut Tutorials