By Design Bundles
Scan N Cut Tutorials4 min
Foiled tattoo using the brother scan n cut and the foil quill
*CM900 model used.
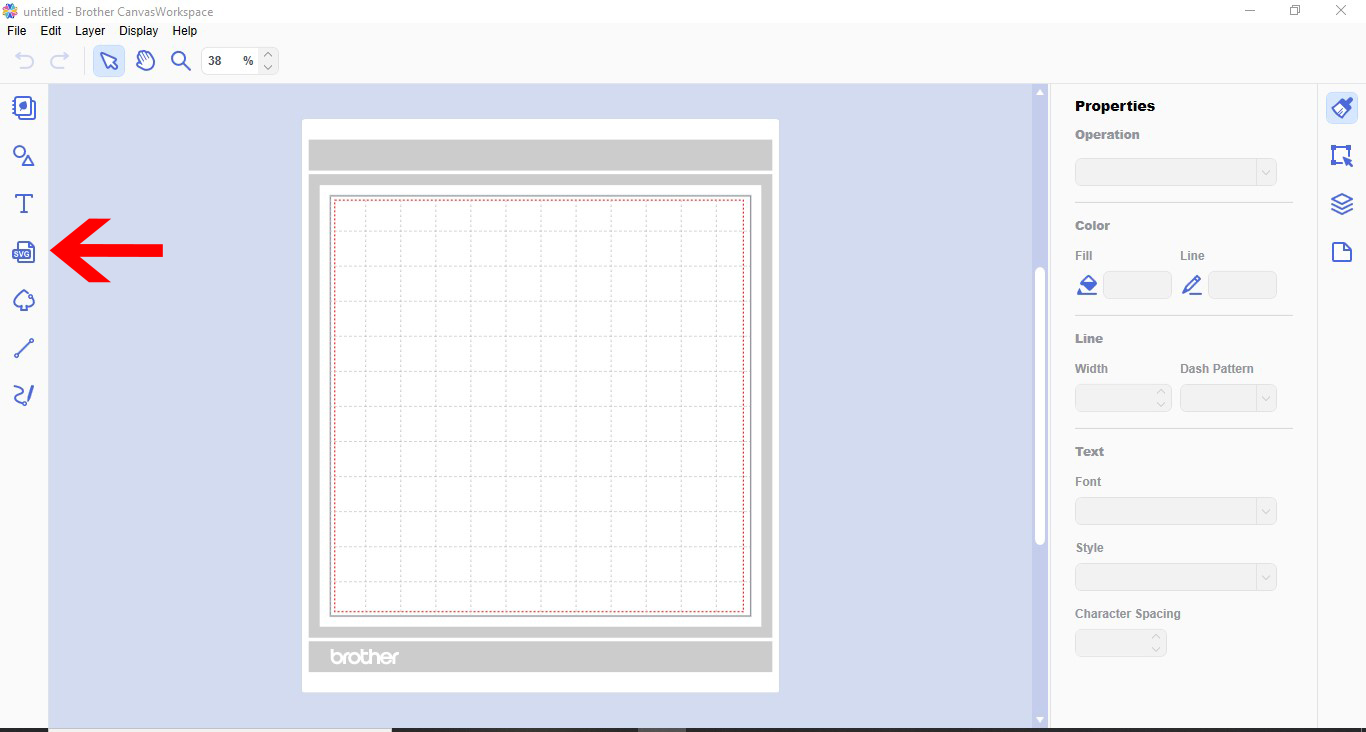
1- Open Canvas workspace and click on the SVG icon.
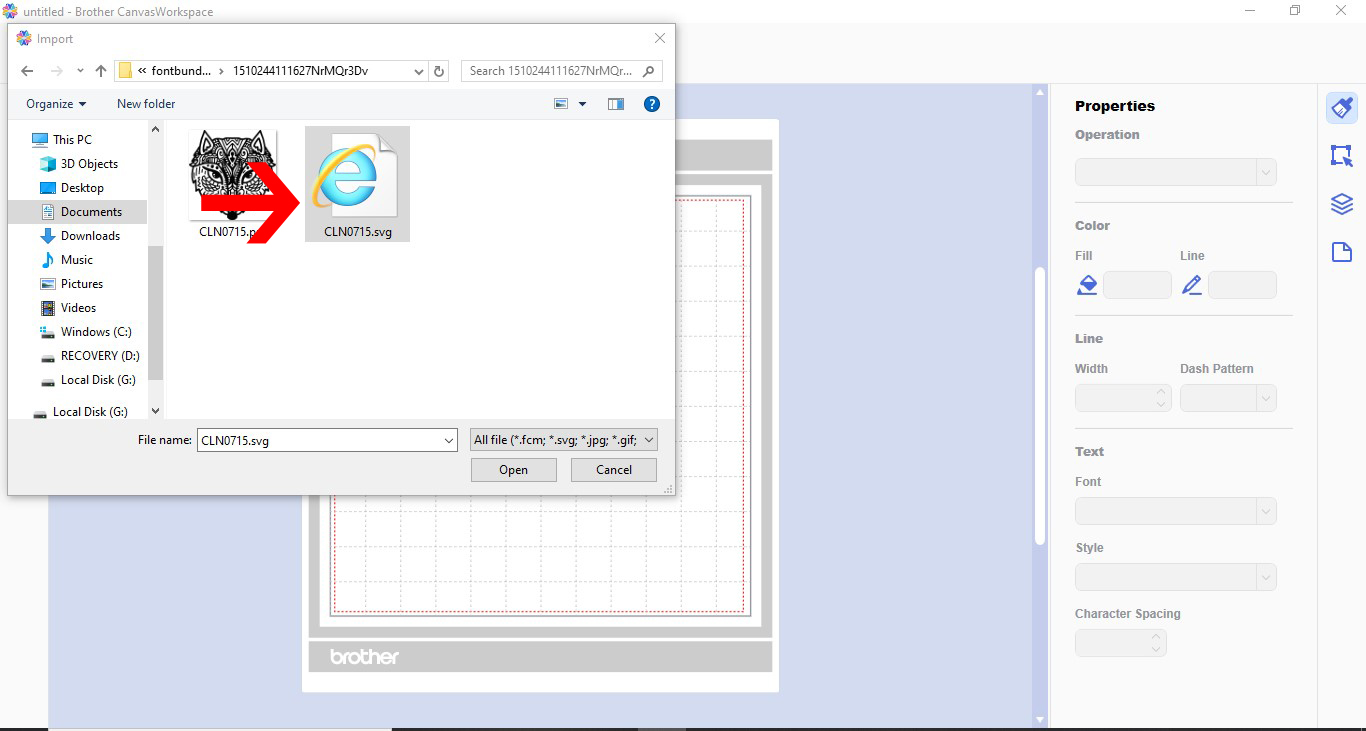
2- Select your design. I am using patterned animals SVG from designbundles.net
3- Resize your design.
4- When making a tattoo you will need to flip your design. Click the edit tab, then select the horizontal flip icon.
5- Once you are happy with your design, click on file then transfer FCM via the internet.
If you do not have a wireless version of the scan n cut machine you can transfer via USB.
6- A new window will appear to let you know when the file has transferred.
7- On the LCD panel click on pattern option.
8- Click on the transfer icon.
9- Your design will transfer. Move to make sure it fits over the tattoo paper.
(Prepare the tattoo paper as per instructions on the packet.)
10- Once you are happy click OK.
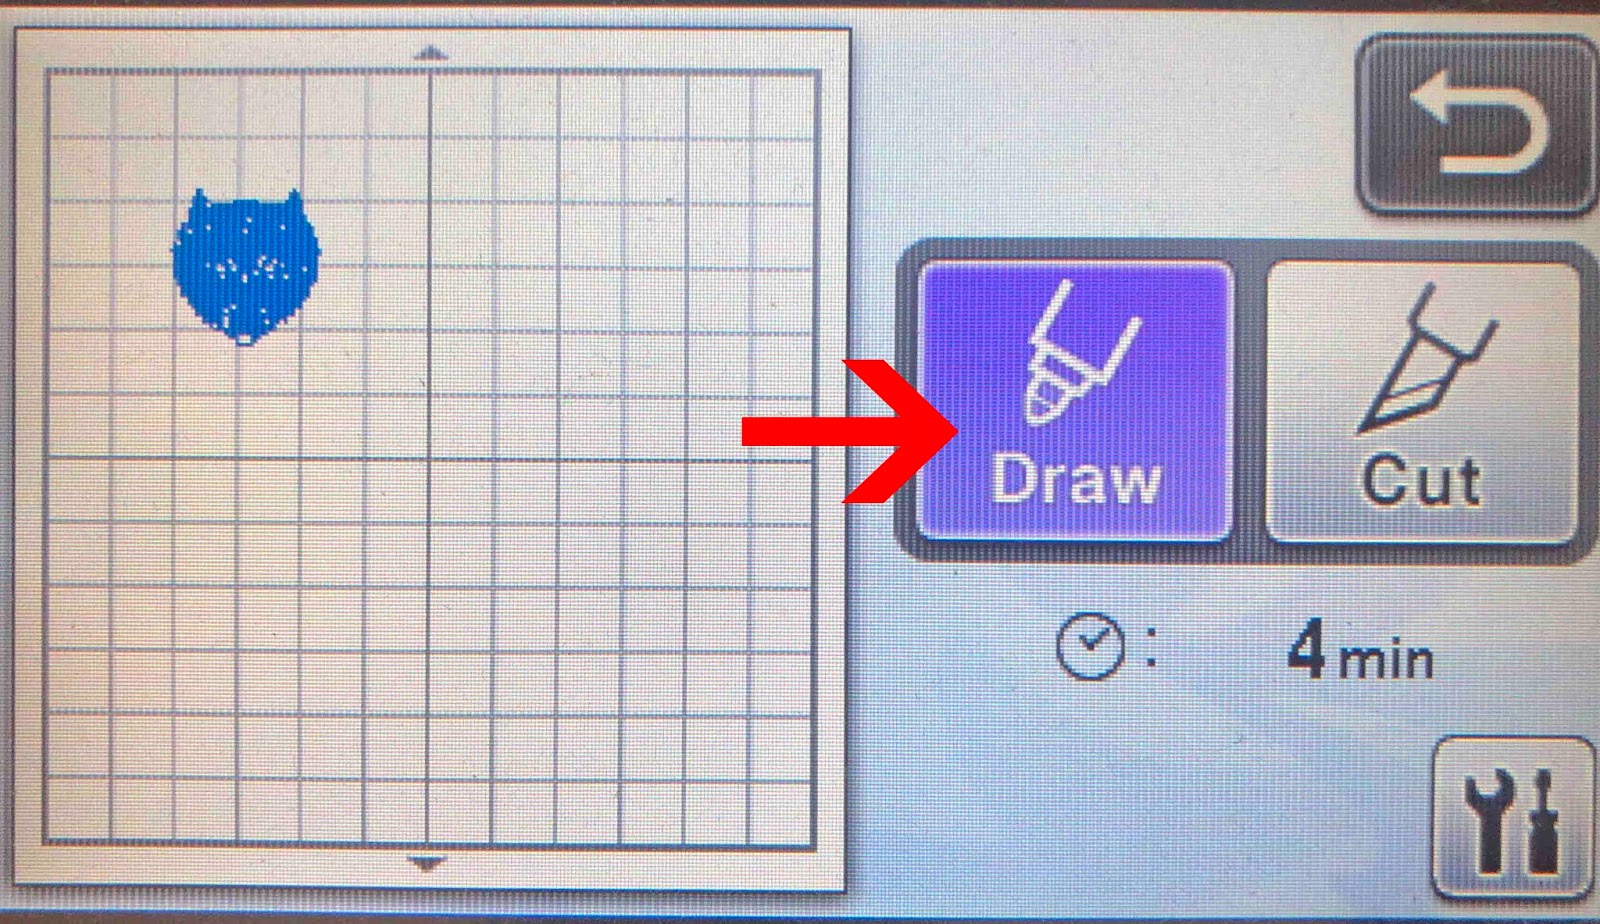
11- Click draw. I use the setting for the tattoo paper speed 3 pressure 1.
12- The design will be foiled. Note that even tho I used gold foil it appears silver. This is because the design will be reversed when you transfer it to the tattoo and you will see the back of the foil.
13- Place the tattoo transfer over the top and rub well. Once rubbed well slowly remove the plastic.
14- As per instructions place the tattoo on your body. The foil color is the color of the back of the foil.
1- Open Canvas workspace and click on the SVG icon.
2- Select your design. I am using patterned animals SVG from designbundles.net
3- Resize your design.

4- When making a tattoo you will need to flip your design. Click the edit tab, then select the horizontal flip icon.

5- Once you are happy with your design, click on file then transfer FCM via the internet.
If you do not have a wireless version of the scan n cut machine you can transfer via USB.

6- A new window will appear to let you know when the file has transferred.

7- On the LCD panel click on pattern option.

8- Click on the transfer icon.

9- Your design will transfer. Move to make sure it fits over the tattoo paper.
(Prepare the tattoo paper as per instructions on the packet.)
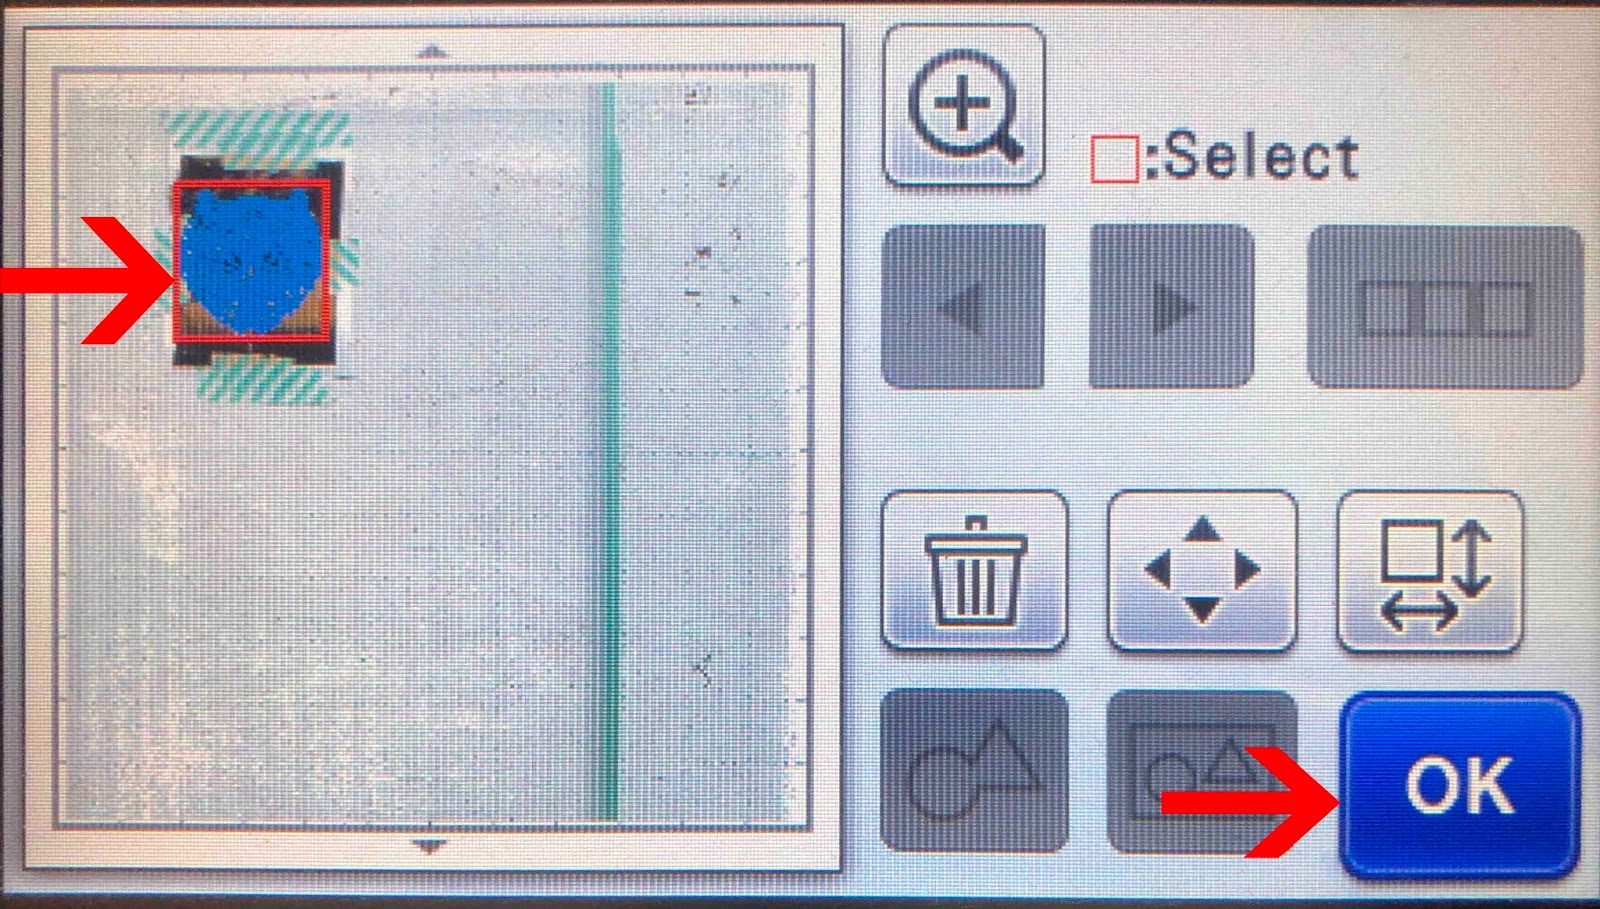
10- Once you are happy click OK.

11- Click draw. I use the setting for the tattoo paper speed 3 pressure 1.
12- The design will be foiled. Note that even tho I used gold foil it appears silver. This is because the design will be reversed when you transfer it to the tattoo and you will see the back of the foil.

13- Place the tattoo transfer over the top and rub well. Once rubbed well slowly remove the plastic.

14- As per instructions place the tattoo on your body. The foil color is the color of the back of the foil.

Related Tutorials
Scan N Cut Tutorials
Creating a foiled candle with brother scan n cut machine using the foil quill
Scan N Cut Tutorials
How to Foil a JPEG Image with Brother Scan n Cut Machine Using the Foil Quill
Scan N Cut Tutorials
Using Vinyl with the foil quill in the Brother scan n cut machine
Scan N Cut Tutorials
How to Create an Offset Using the Foil Quill in Brother Scan and Cut Canvas Workspace
Scan N Cut Tutorials
Create a decorative border using the foil quill in Brother scan and cut canvas workspace
Scan N Cut Tutorials