By Design Bundles
Eraser Tool in Silhouette studio
The Eraser Tool in Silhouette Studio is very useful for modifying designs. It allows you to erase specific areas using a selection of tools. You can even use the tool to add some design details. So let us show you how!
When using the Eraser tool, you might experience some lag in response. This can depend on the design size and your system. It is due to the amount of information that is constantly changing. So keep this in mind when working with larger files.
For this tutorial we will be using this paper cut svg but we have tons of SVG files to choose from. Be sure to download and unzip your files to your PC or Mac before beginning.
Step 1 - Open your Design in Silhouette Studio
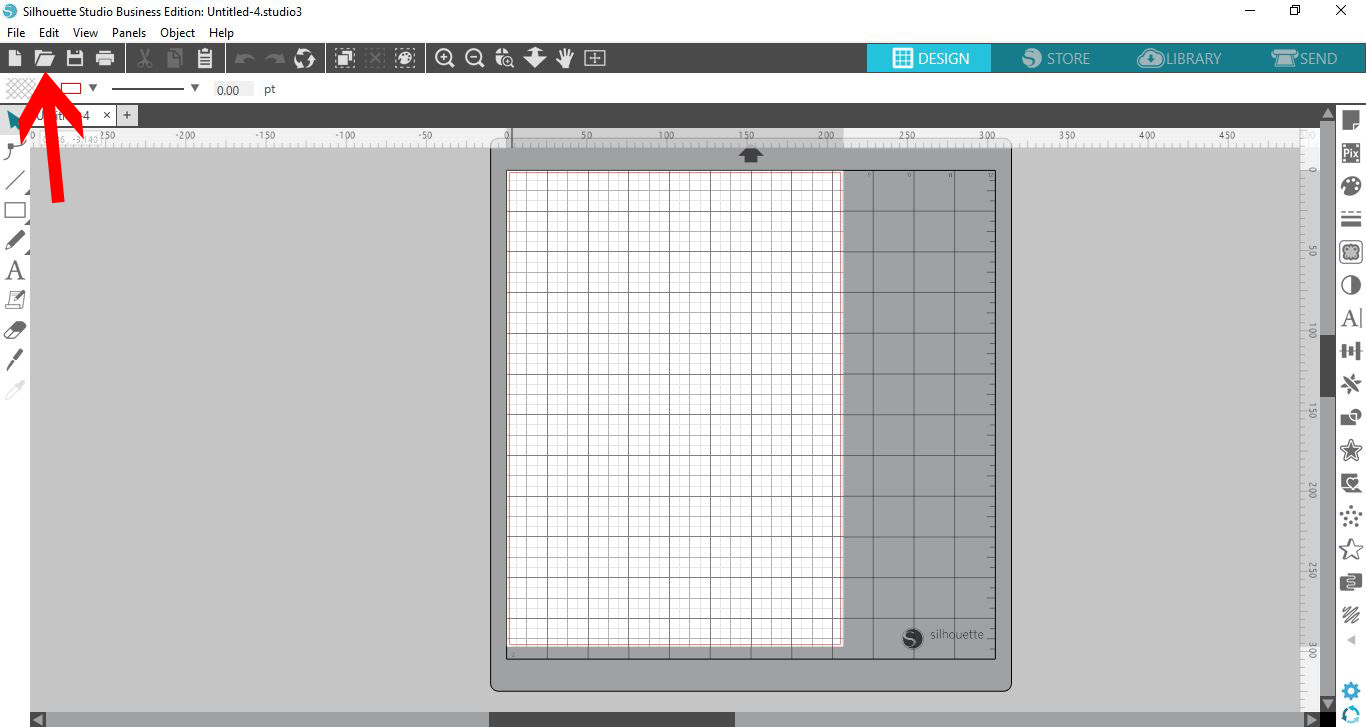
Once you have opened Silhouette Studio, open the design you want to edit. You can do this by clicking on the little folder icon called Open in the top left toolbar.
Another way to open a file is to go to File > Open. Alternatively, just drag and drop the image onto the mat.
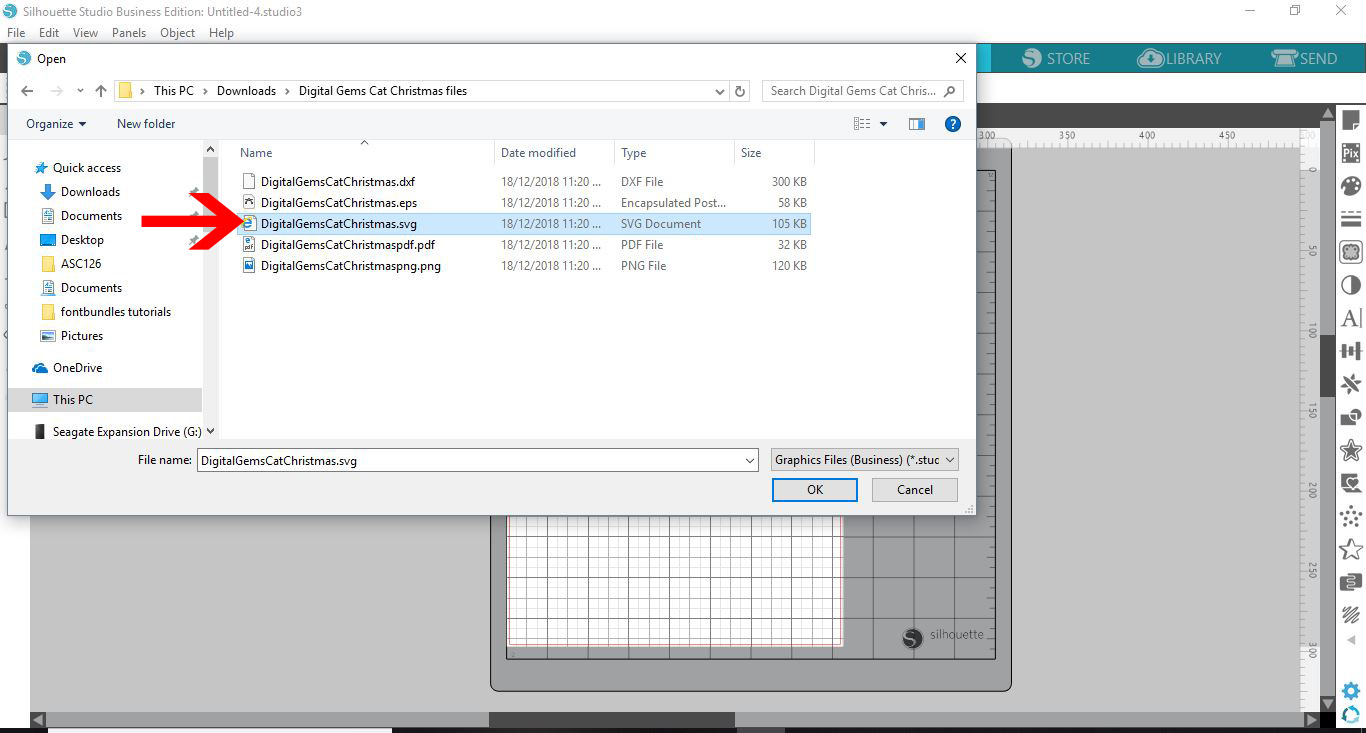
Select the file that you want to use. We selected a SVG for this tutorial.
Step 2 - Eraser Tool Settings in Silhouette Studio
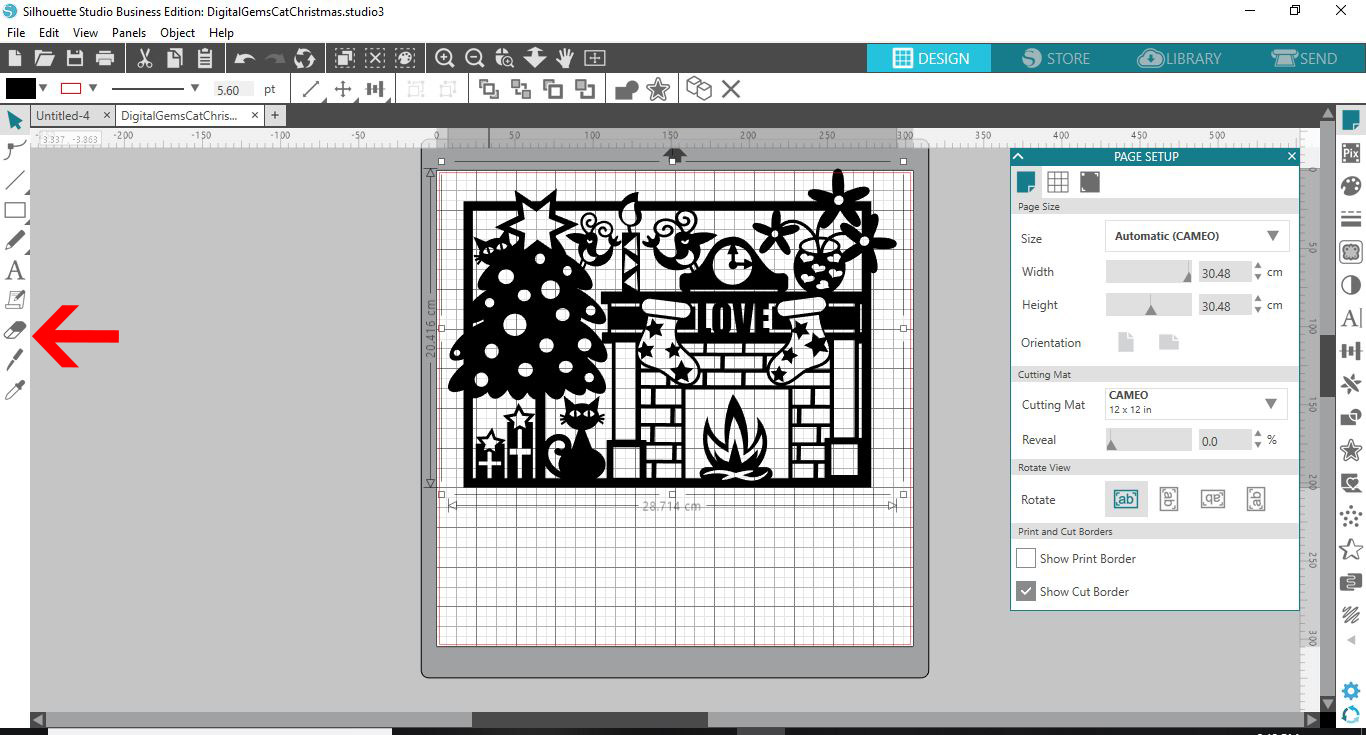
You will find the Eraser tool on the left side panel. Click on the tool to select it. You will now see settings appear on the top toolbar.
Let’s explore the options available.
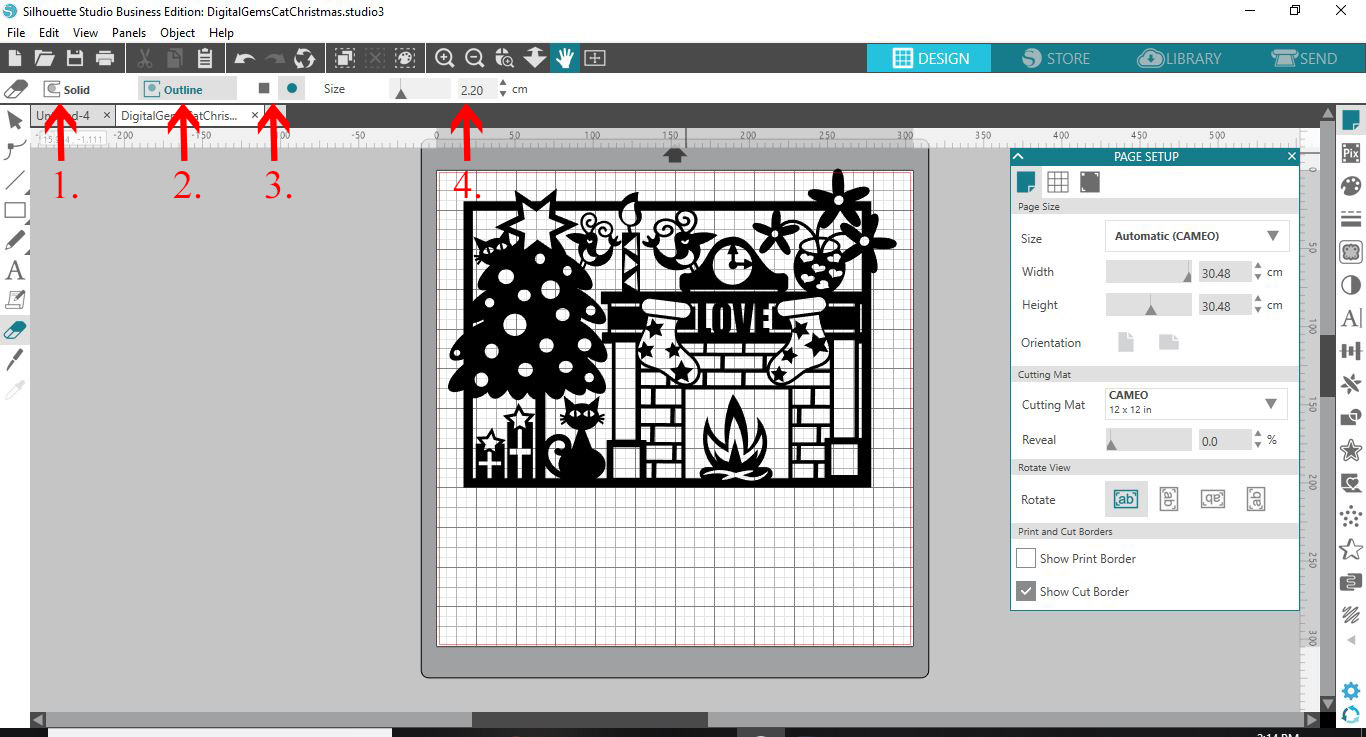
Solid Eraser is the first setting. Solid shapes or closed paths will remain closed when erasing areas. This applies to both filled and unfilled shapes. If you erase a line through the shape, it will be split into two.
Open paths such as lines will remain open. In the image below, you can see how some of the shapes have been changed into new objects. The one on the right only has small areas removed so it still remains a single object.

The second setting is the Outline Eraser. When used on a filled solid shape or a line, the result is the same as the Solid Eraser. If used to erase part of an unfilled shape, the shape will break up into lines.

The third set of options refers to the shape of the eraser. You can choose either a Square or a Circle depending on the application. Squares are useful for sharp and even corners.
The fourth setting allows you to change the diameter of the eraser. The slider can be adjusted or you can input the value for a more accurate sizing.
Step 3 - Use the Eraser Tool
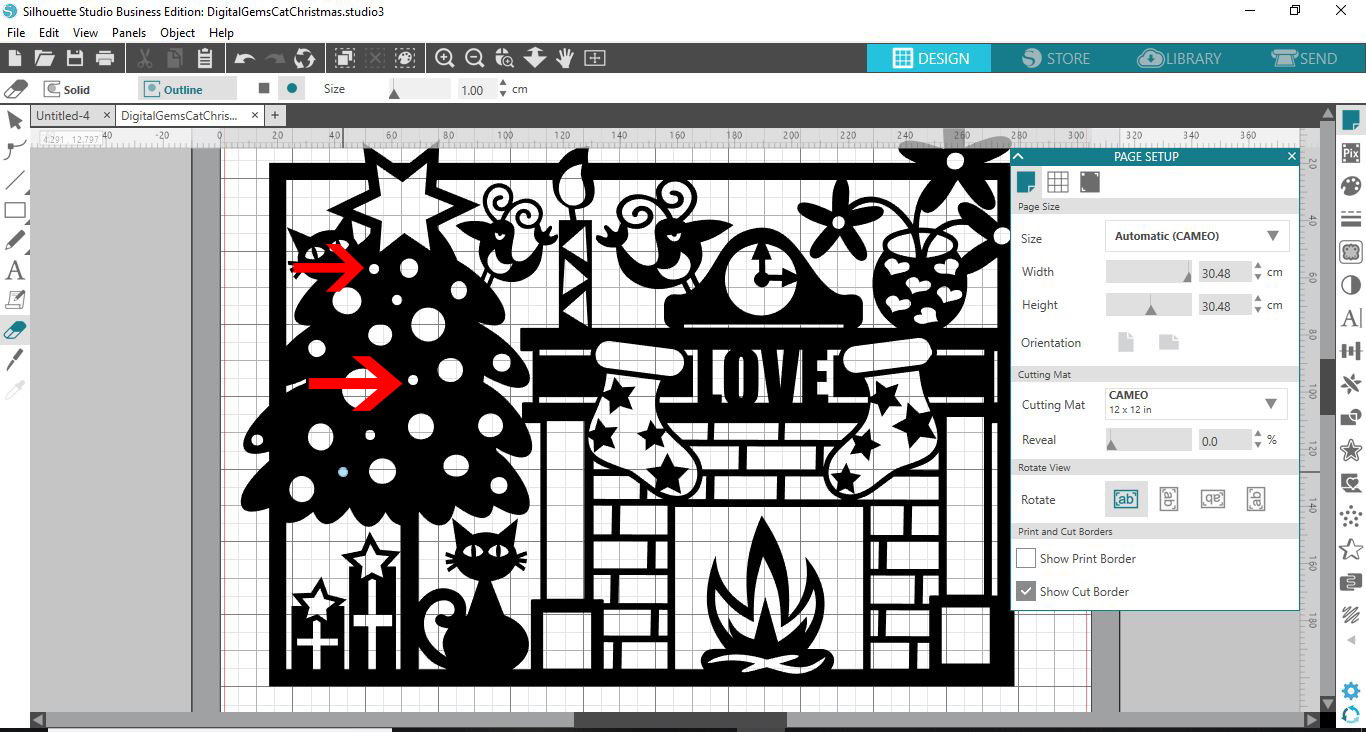
We decided to add a few more “baubles” or circles to the tree in the design. The Circle or Square tools can be used to add shapes to solid areas on your design.
We clicked on the Circle eraser. As the tree is a filled design, either the Solid or Outline setting will work.
Position your cursor over a filled area of the tree and click once to erase the area. This is an easy way to get a perfect circle and add more details to the tree.
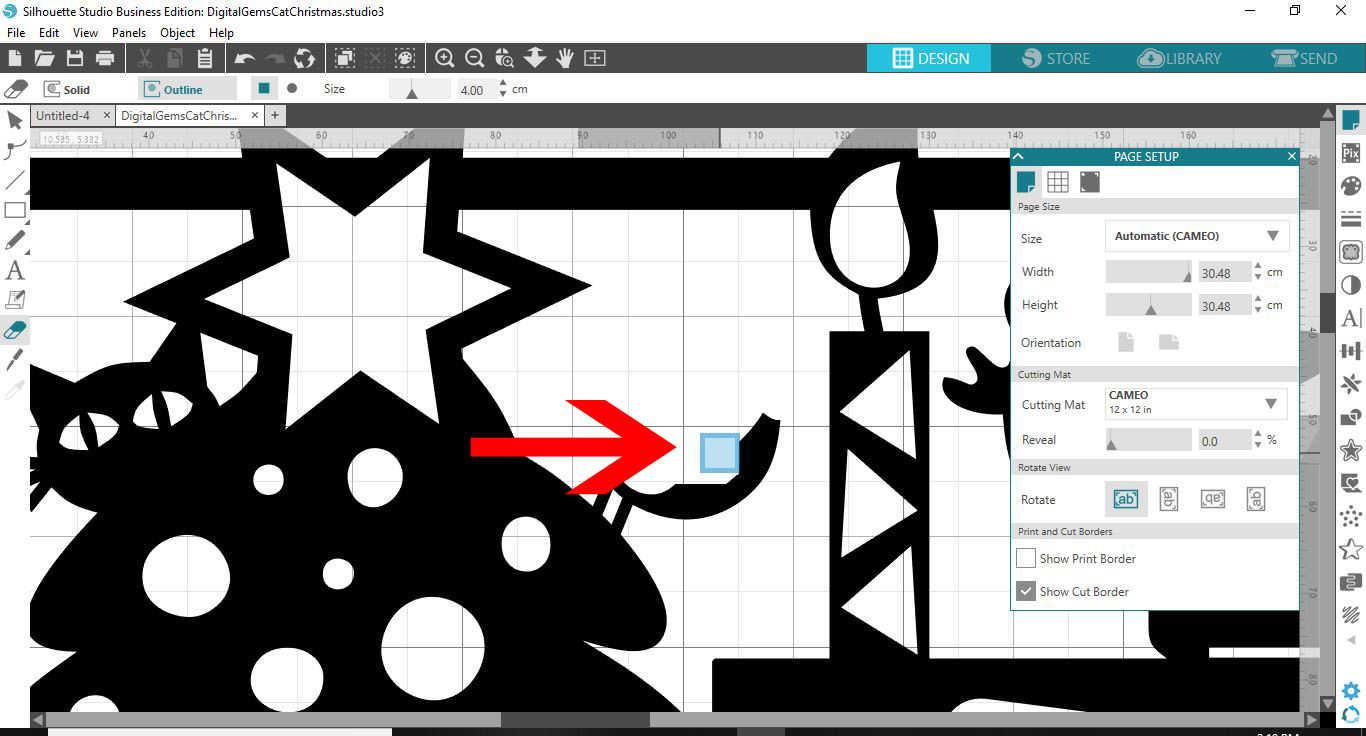
The Square eraser was then selected to remove the bird on the right side of the tree.
Once you are done erasing, you can change the design color using the advanced color settings in Silhouette Studio.
Erasing parts of your purchased design is so easy with the Eraser Tool in Silhouette Studio. Not only can you remove unwanted areas, you can also add details to the design. The Eraser Tool is super helpful and so versatile, it is definitely on the essential tools list.