
By Design Bundles
Font Management Feature in Silhouette V4.1
The Font Management feature in Silhouette Studio V4.1 is a great way to organize your fonts. This feature is available to all editions of Silhouette Studio. It should be noted that font sub-folders can only be used with purchased Silhouette Studio fonts. In this tutorial we will guide you on how to use the Font Management feature in Silhouette Studio V4.1.
If you want to use your own fonts, check out our tutorial on how to install fonts on your PC or Mac.
Step 1 - Locate the Text Style Panel
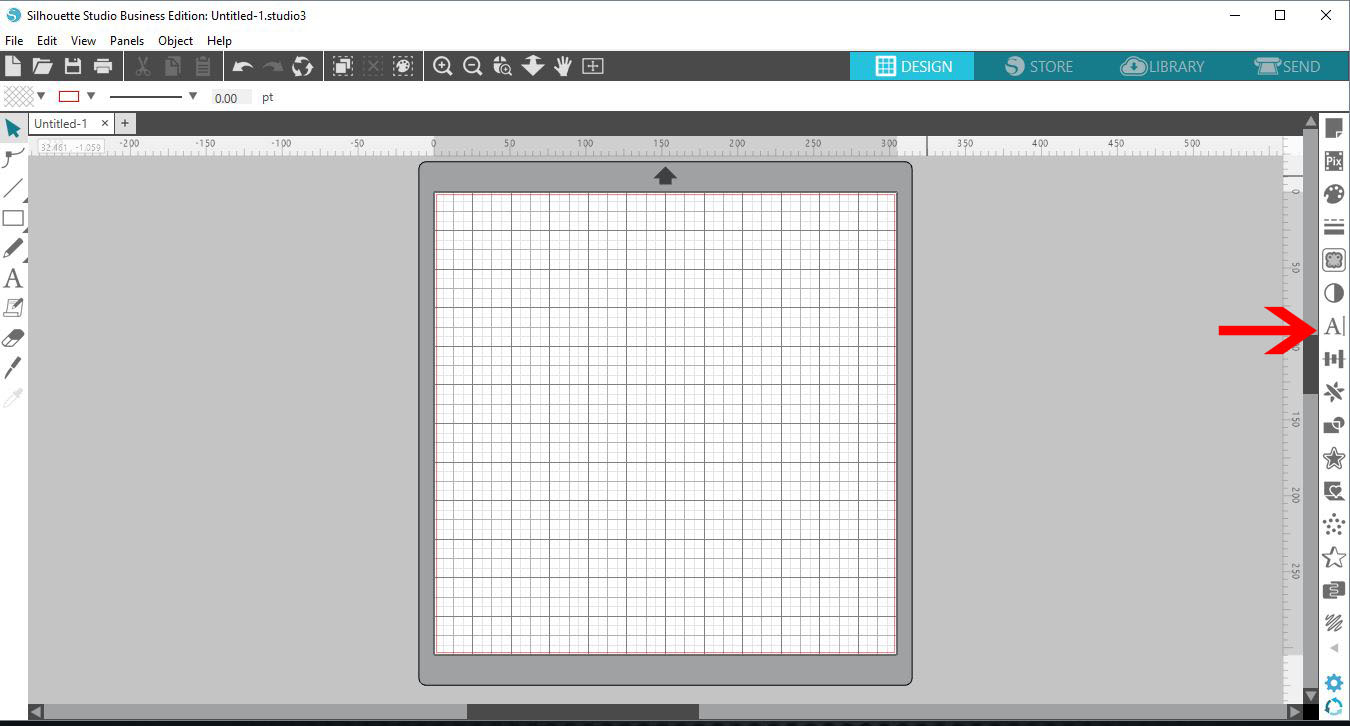
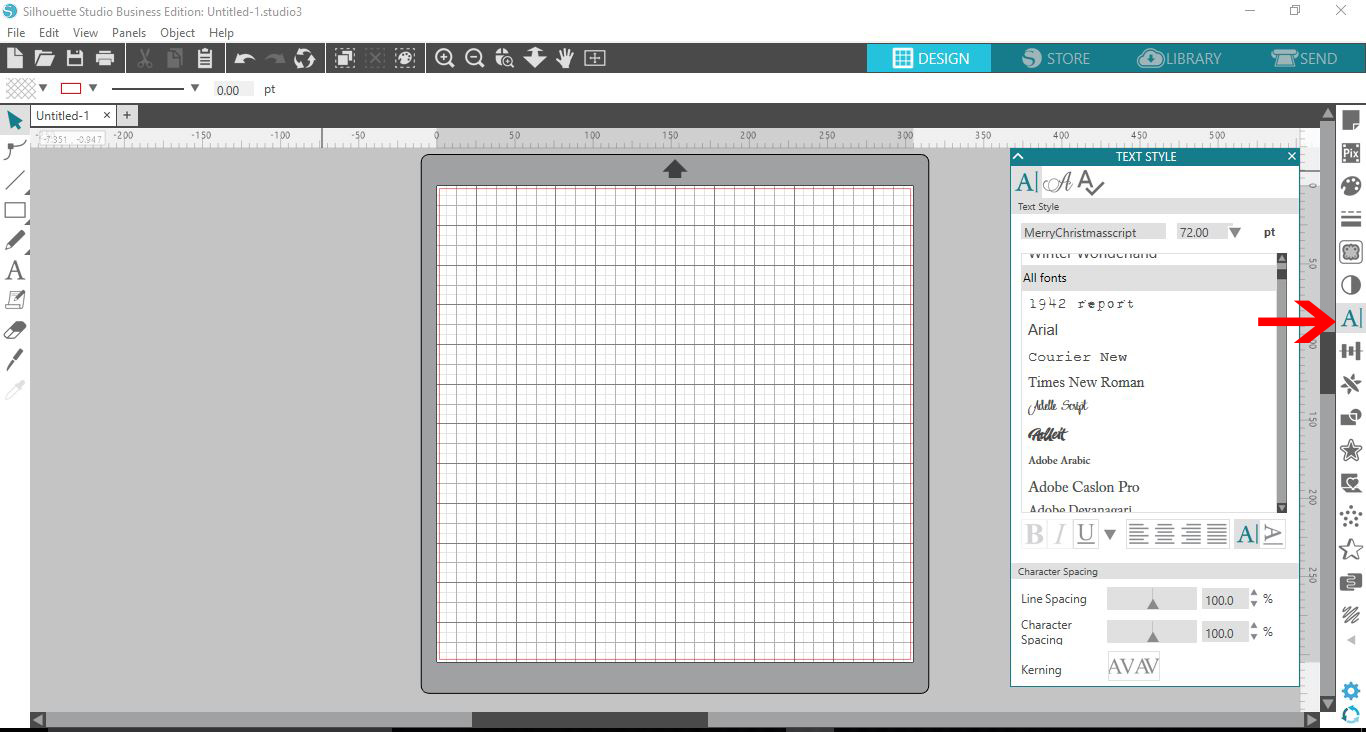
Open Silhouette Studio. Your fonts are located under the Text Style Panel. This can be found on the right side toolbar.
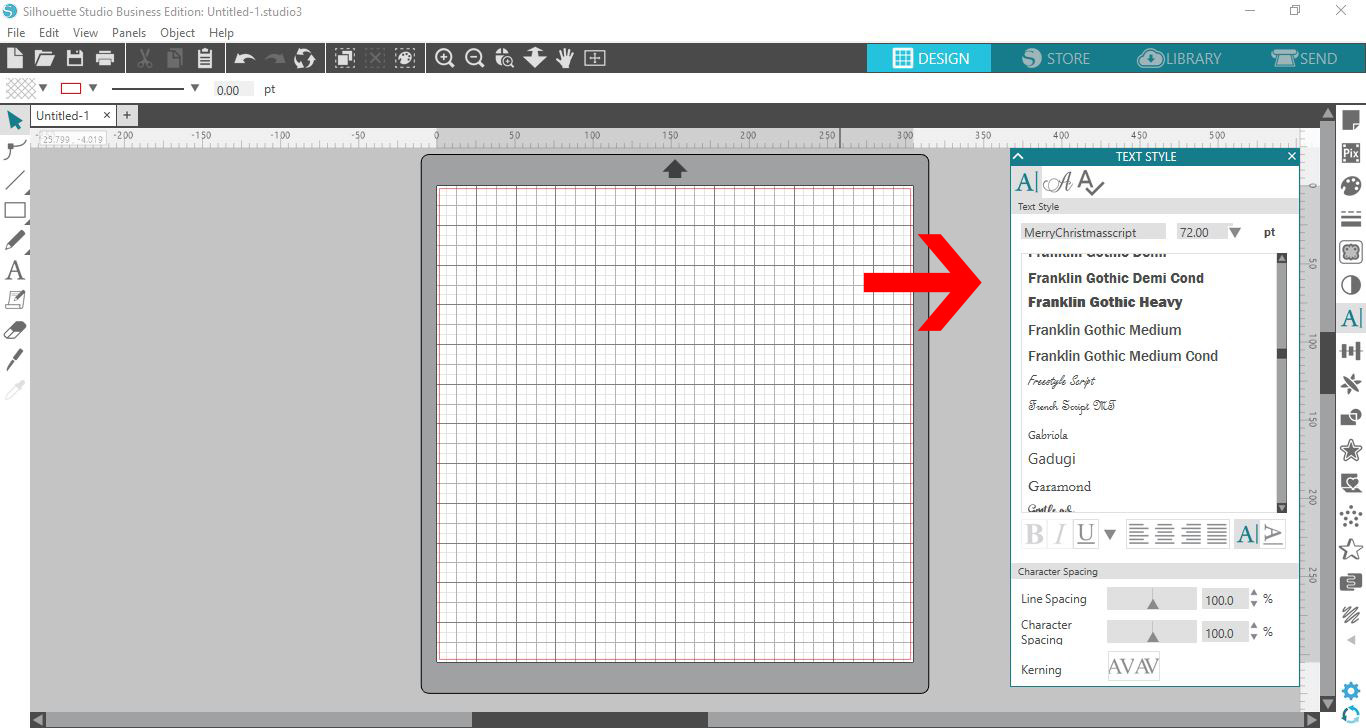
Here you will get a preview of each font installed on your PC or Mac. We have a great tutorial on using text basics in Silhouette Studio if needed.
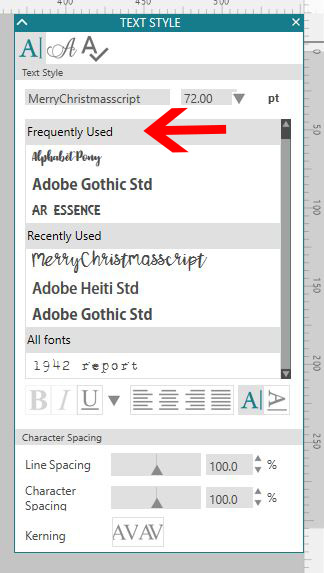
The first category you will see is Frequently Used. This is a quick access for your most frequently used fonts.
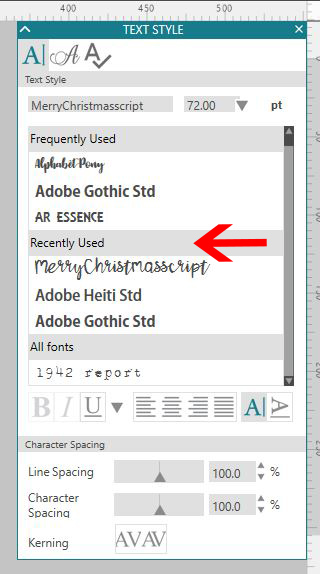
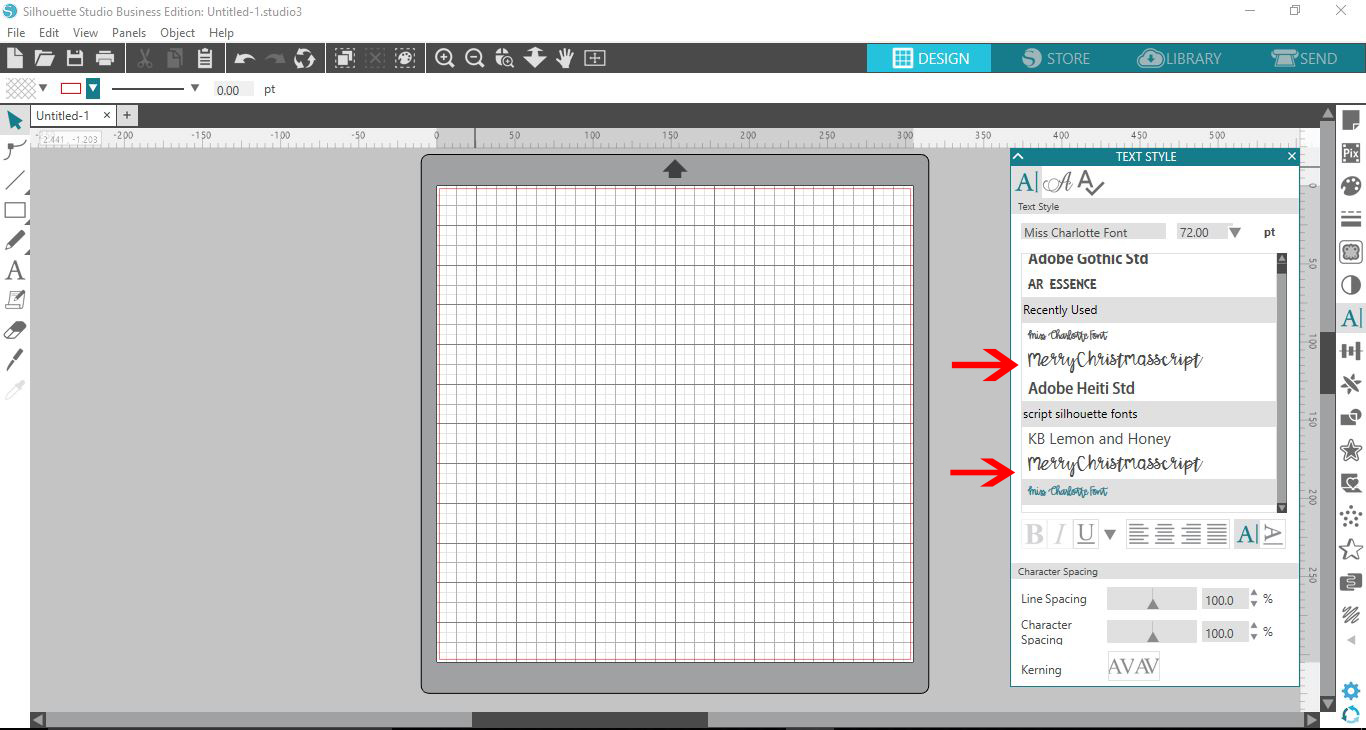
Next is Recently Used. This will show the last three fonts that were recently used.
Step 2 - Create Sub-Folders for Fonts in Silhouette Studio
You can also create new folders for your fonts. Keep in mind this only works with fonts purchased from Silhouette Studio. Organizing fonts this way allows you to quickly locate a specific font style. Click on the Library icon top right.

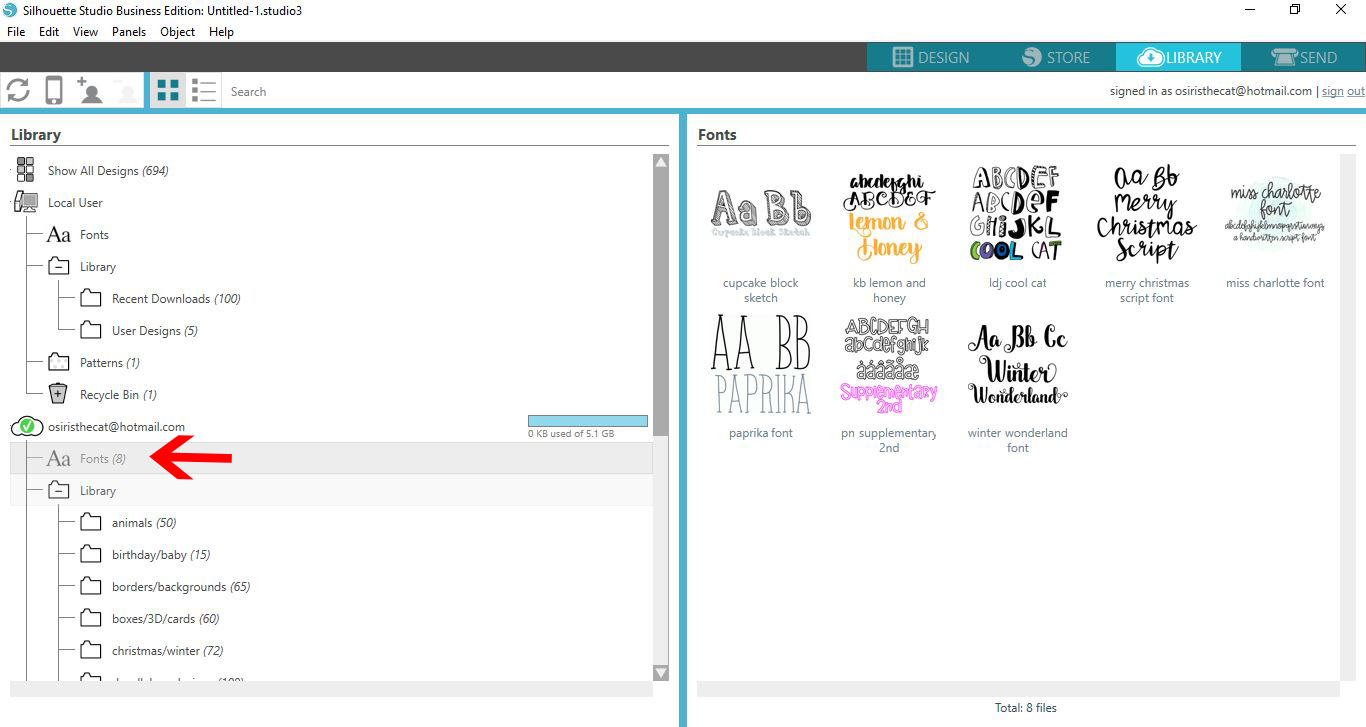
Once in the Library you will see two sections. The top section is for everything stored on your device. The second is Cloud storage. Go to the Cloud storage that shows your email user details. Right click the Font Folder as shown in the image.
You will see your Silhouette Studio fonts on the right side panel.
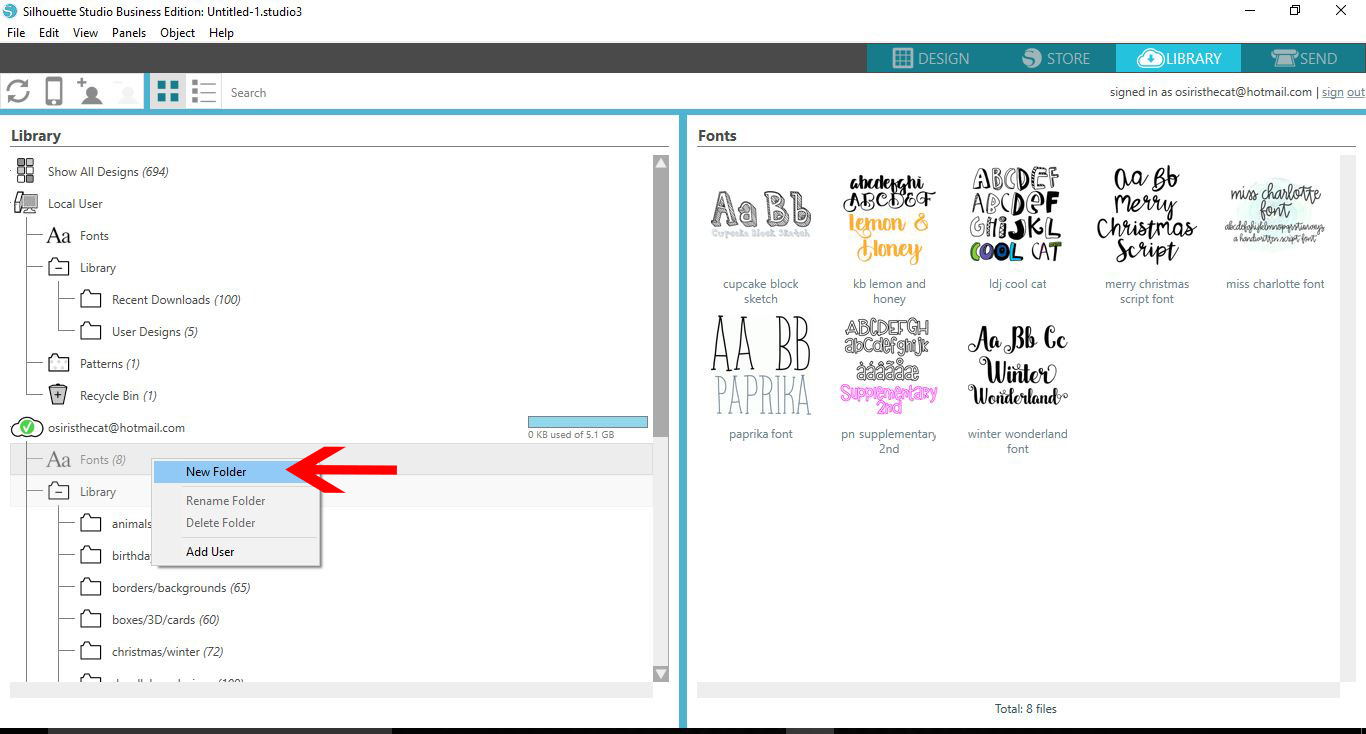
Click on New Folder.
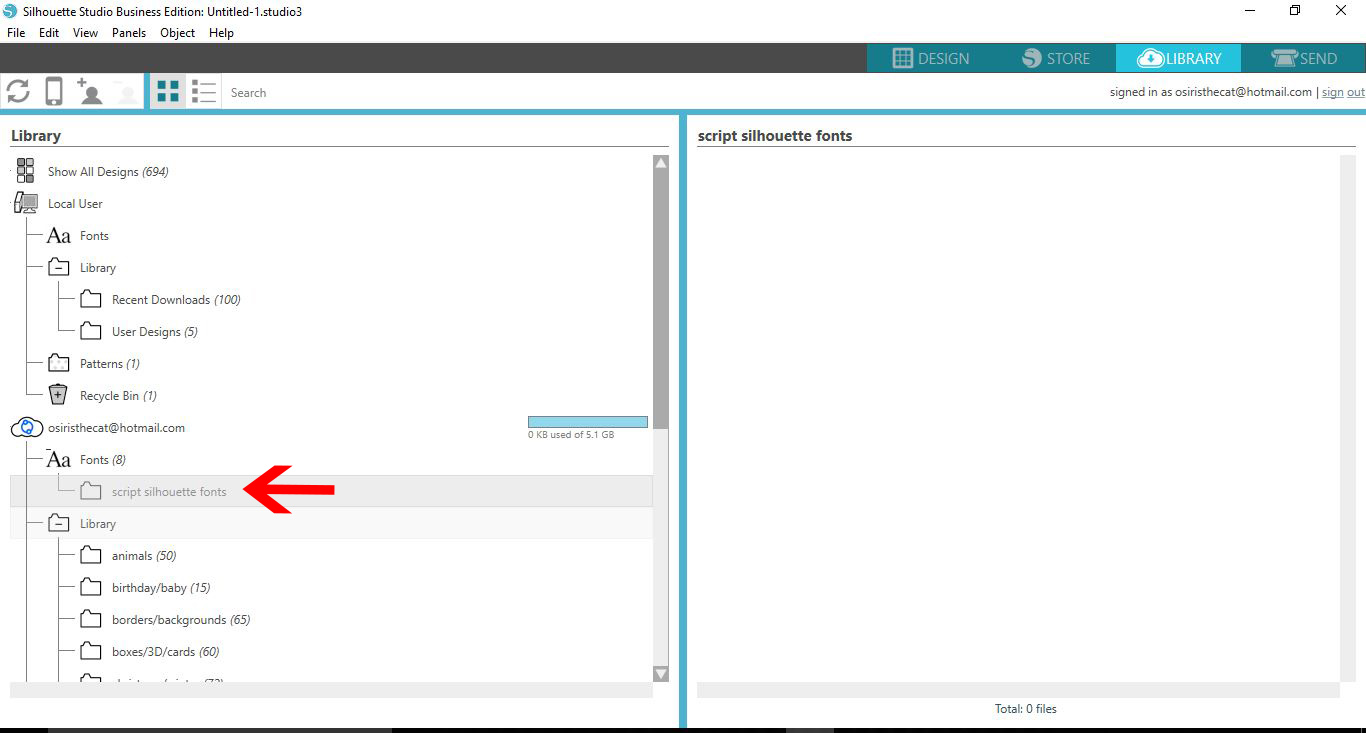
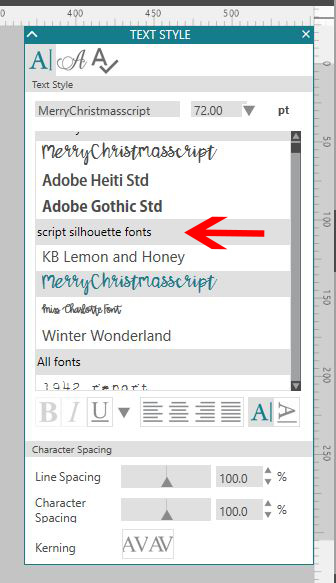
Give your folder a name. We named our folder Script Silhouette Fonts.
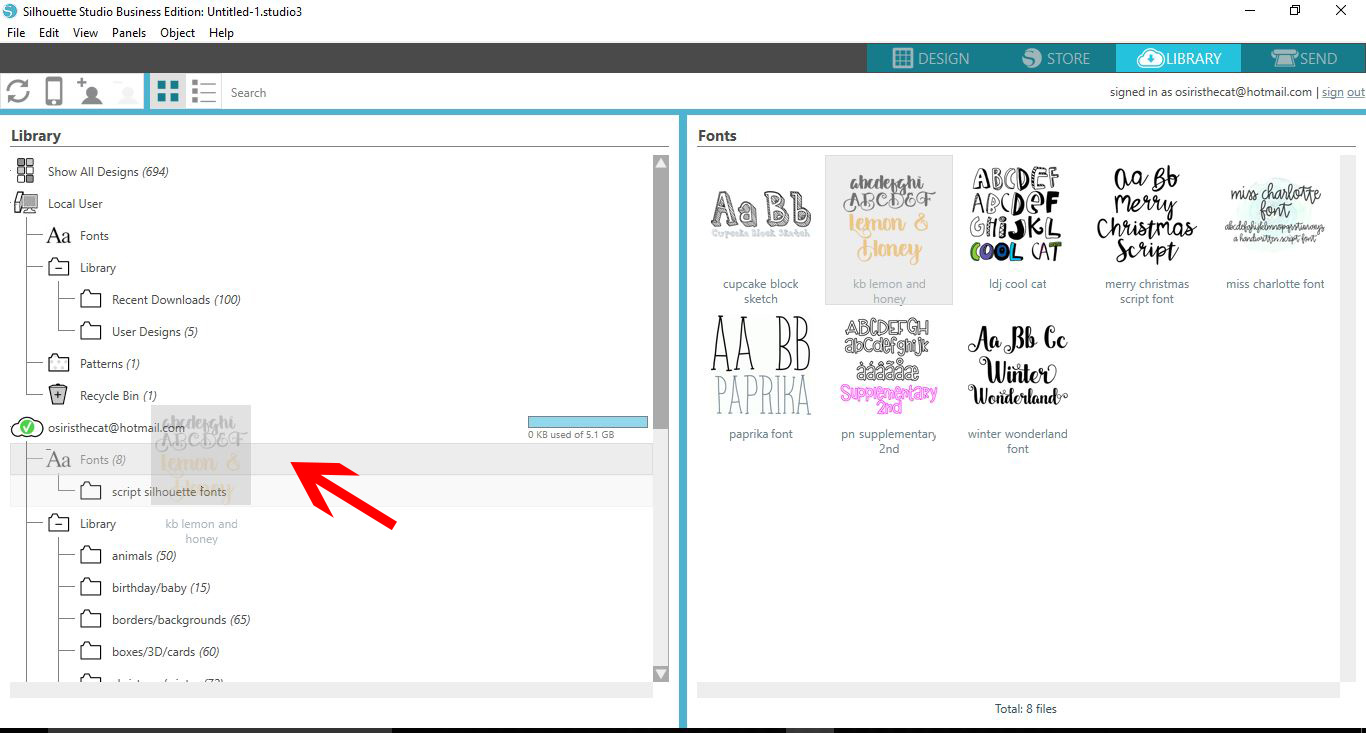
Click back on the Fonts folder to see your fonts on the right side panel. Now, click + drag and drop your selected fonts into to the new folder you created.
Click on the new folder and you will see your fonts on the right side panel.

Step 3 - Locate Sub-Folders under Text Style Panel
Go back to the Design tab and open the Text Style Panel.
The folder will now appear at the top section of the fonts panel.
Even though these fonts are in sub-folders, they will also appear in the Recently Used and Frequently Used sections.
There you go, you have just learned how to use the Font Management feature in Silhouette Studio V4.1. Locating specific font styles is now that much easier. We hope this tutorial has been helpful and boosts your knowledge when it comes to using Silhouette Studio