By Design Bundles
How to Print and Cut with the Silhouette Curio
In today’s tutorial, we will guide you on how to Print and Cut with the Silhouette Curio. This feature is especially useful for projects like stickers, cake toppers and more. We will guide you on setting up your Curio work area super quick so you can get started with your projects.
If you’re stuck for ideas, why not check out the selection of Heart Stickers on Design Bundles?
Before we begin, be sure to download and unzip your files to your PC or Mac.
Step 1 - Change the Page Setup for Curio
Open Silhouette Studio then click on the Page Setup icon top right toolbar. Here you will find the mat settings. We are going to be changing the Size and Cutting Mat.
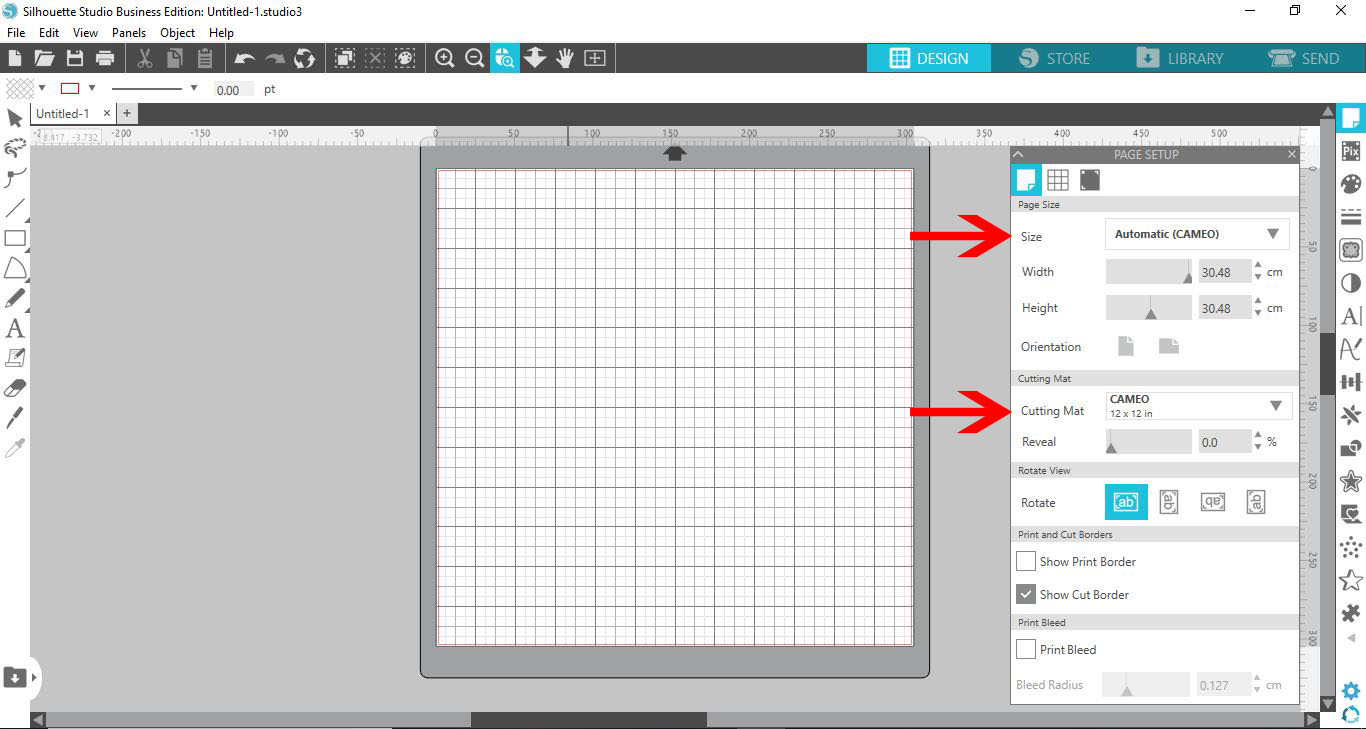
Click on the Cutting Mat option and change to Curio. Next, adjust the Size of the cut area to fit the Curio Mat. You can select A5 or Curio 8.5 x 6.
When you adjust the Page Setup, the mat will also change on your screen to show the Curio setup.

Step 2 - Add Registration Marks
In the Page Setup panel, at the top, you will see three icons. Click on the last one called Registration Marks. Then, click on the option so turn on the Registration Marks. This will allow the machine to read the layout and know where to cut.
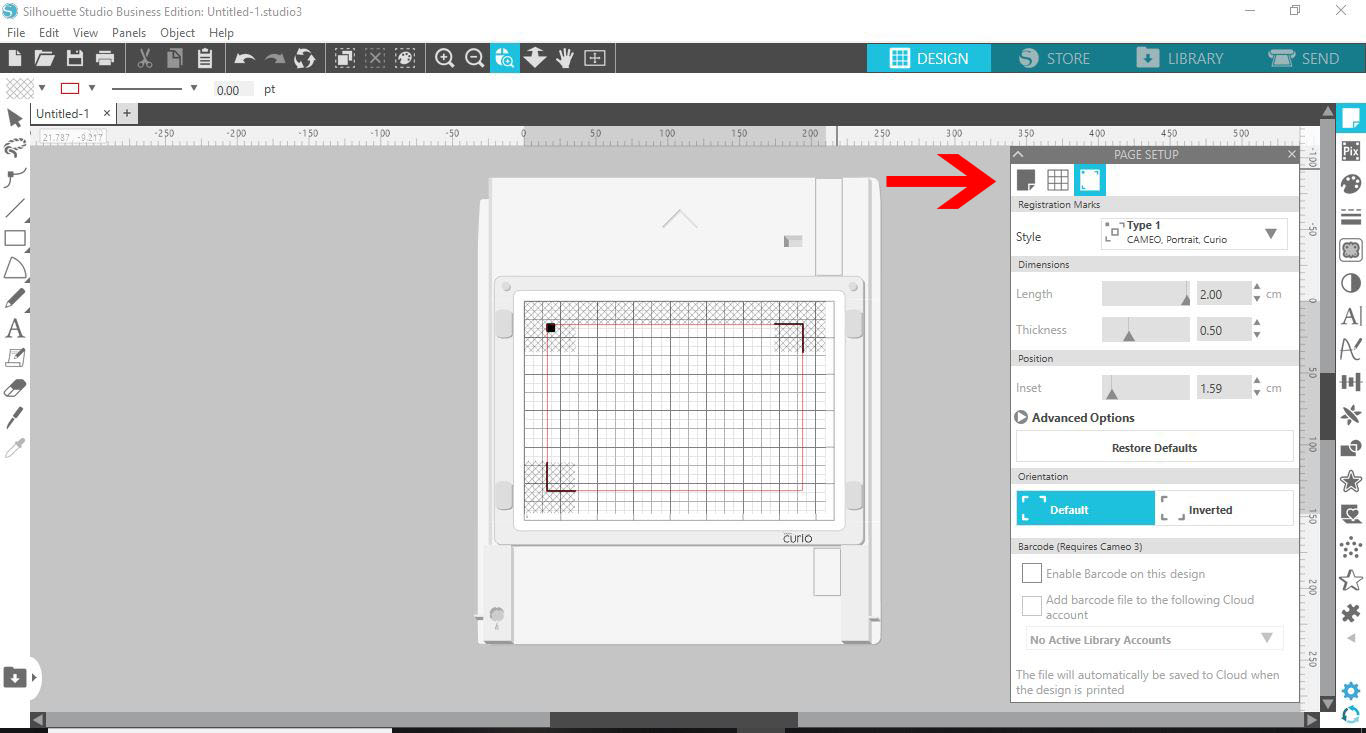
Step 3 - Add Images then Use Trace Feature
If you are using PNG images for print and cut, we will need to trace them first. Drag and drop the images onto the Curio mat.

On the right side toolbar, click to open the Trace Panel.

Now, click on the Select Trace Area icon.

Then, click + drag out the trace area. This will change the area to a gray with the images highlighted in yellow. Adjust the settings as needed to get a clean outline. At the bottom of the screen, click on Trace Outer Edge.

The trace lines will be in red. In the image below we shifted the one design aside so you can clearly see the red line.

Step 4 - Send to Print and Cut
With everything set up, we can now click on the Print icon top toolbar or File > Print. Select your print settings and send them to Print.

After printing is done, place the material on the Curio cutting mat. If cutting standard cardboard, use all of the mat bases to make a total of 6 (mat 2 + mat 2 + mat 1 + the cutting mat).
Back in Silhouette Studio, click on the Send button top right. In the Send panel, go down to the bottom and click on the machine icon.

Select the Curio machine from the options.

Choose the cut settings based on your requirements and material. Once ready, click on the Send button bottom of the screen. The Curio will read the registration marks and begin cutting your lines.

The Print and Cut feature with Silhouette Curio is a great way of using all kinds of designs in projects. You can even use sublimation designs as stickers. We hope this tutorial has been helpful and added to your growing knowledge of Silhouette Studio.