By Design Bundles
How to Use a PNG File in the Silhouette Alta software
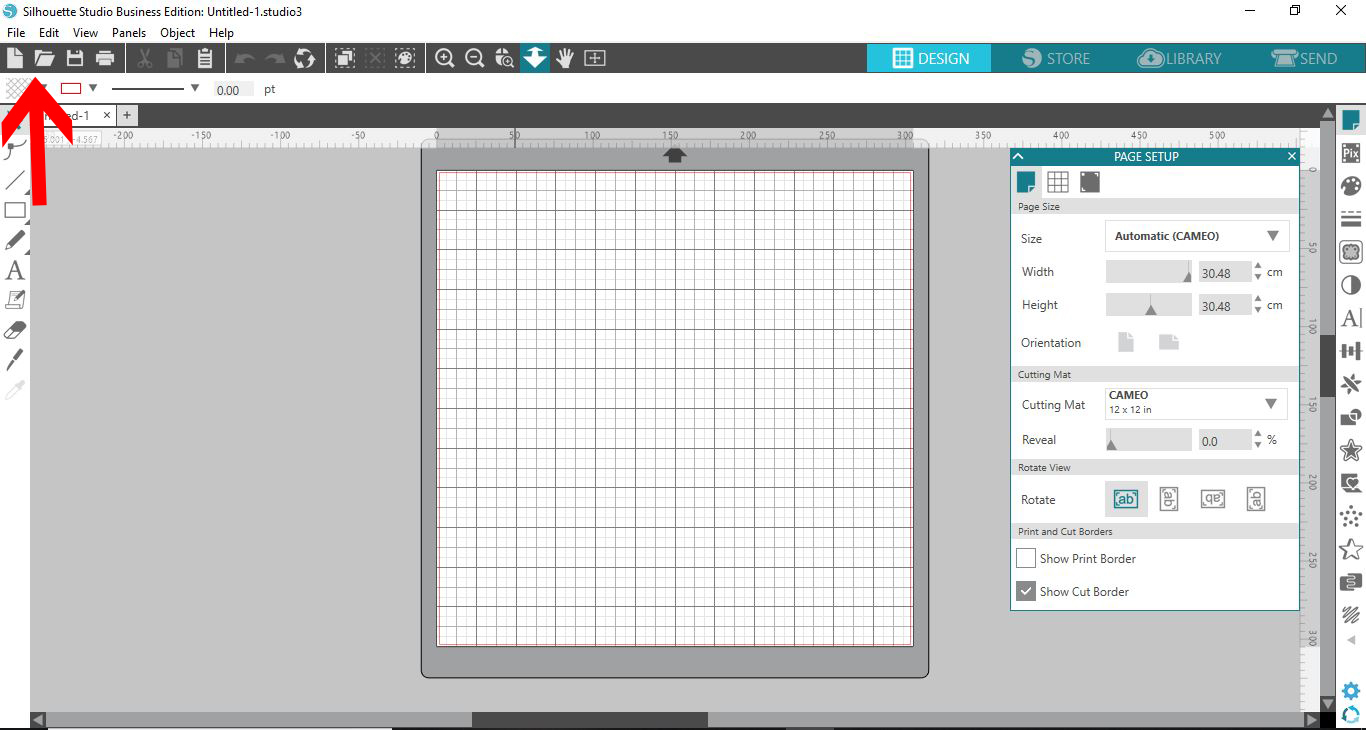
1- Open Silhouette Studio software (free edition). Click on open file.
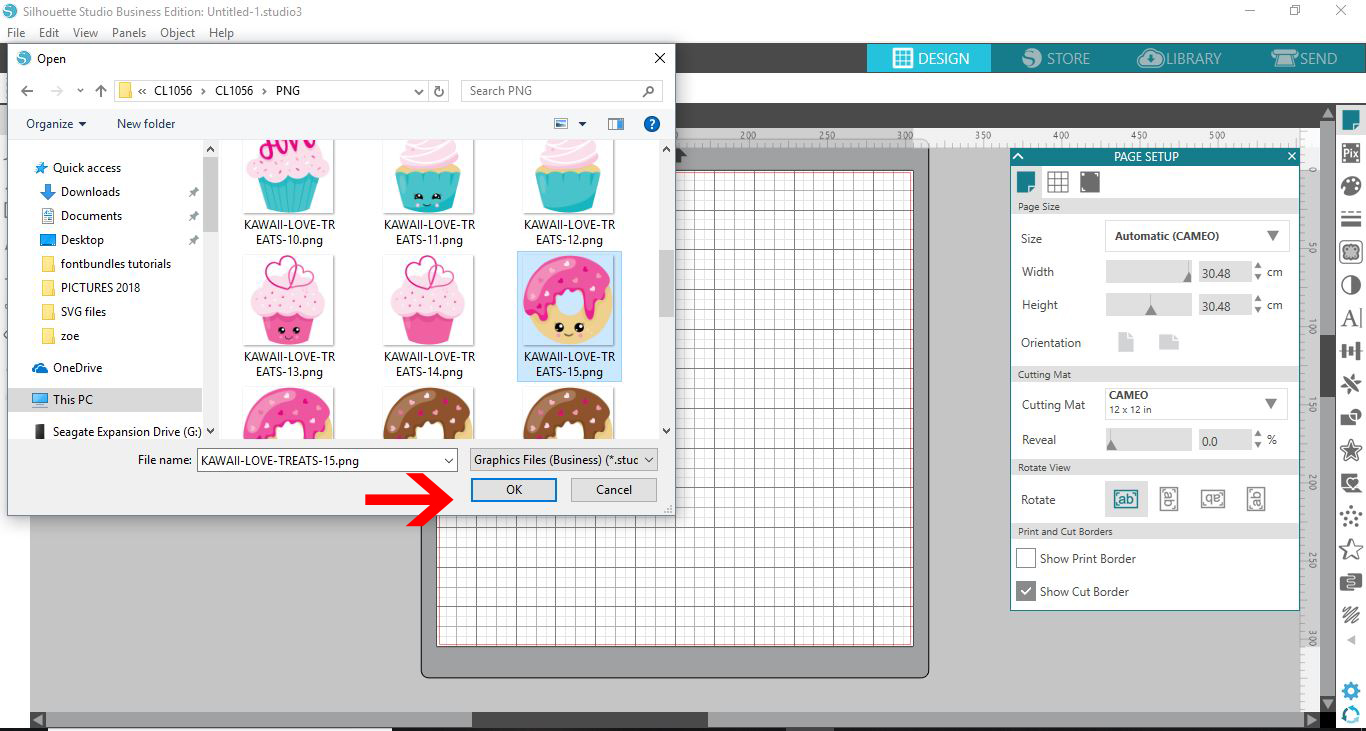
2- Select the PNG you would like to use.
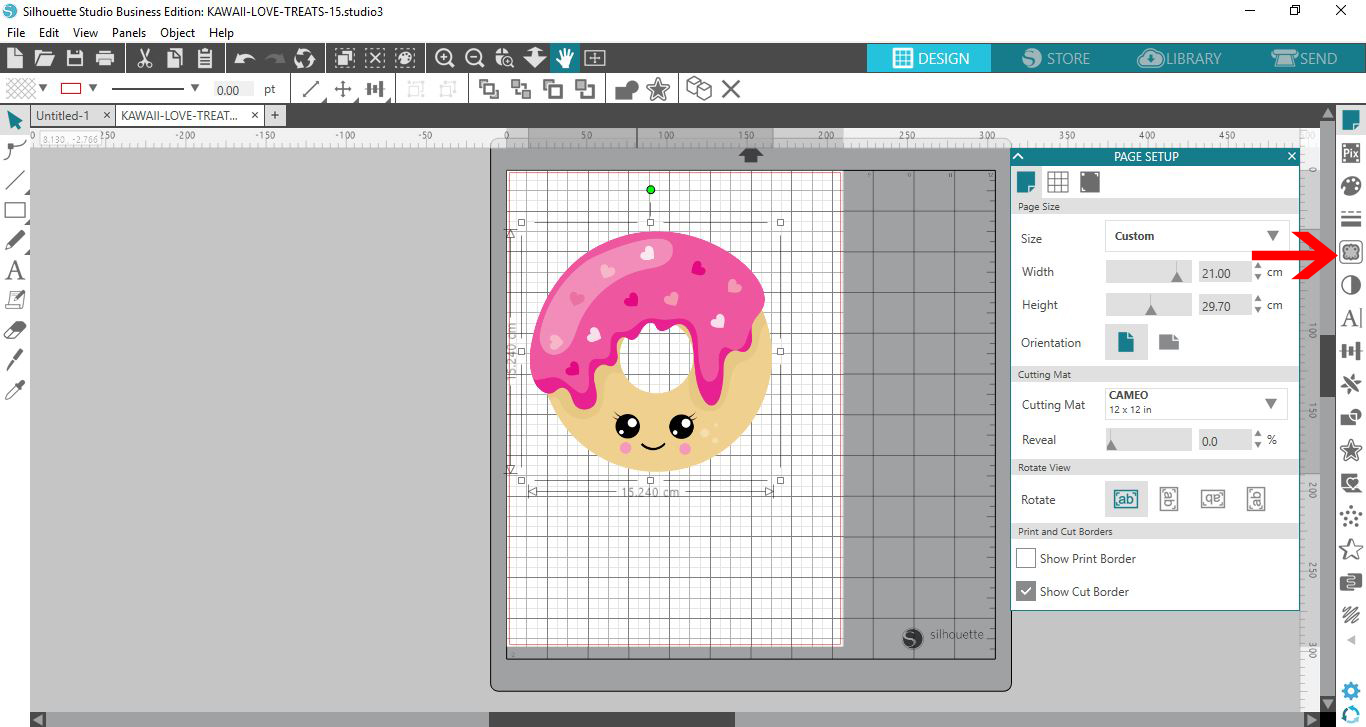
3- Select your PNG and then click on the trace icon. We need to trace the image as when you use a PNG file there are no cut lines. In the Silhouette studio software we can trace and make cut lines that will work in the silhouette alta software.
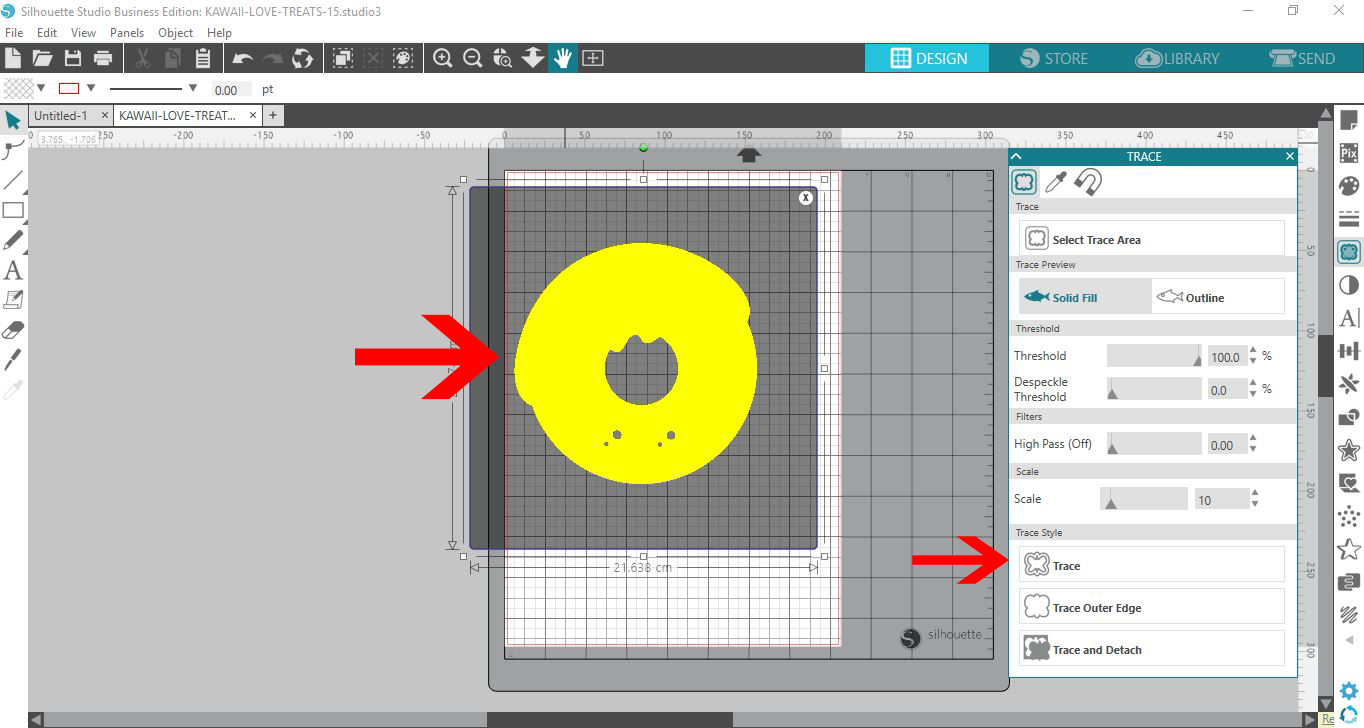
4- Trace the image. When tracing the PNG to use in the Silhouette alta, we will need several layers so the software can create a 3D model of a flat design. This trace will be the base of the design.
5- Remove any parts of the design by ungrouping the parts.
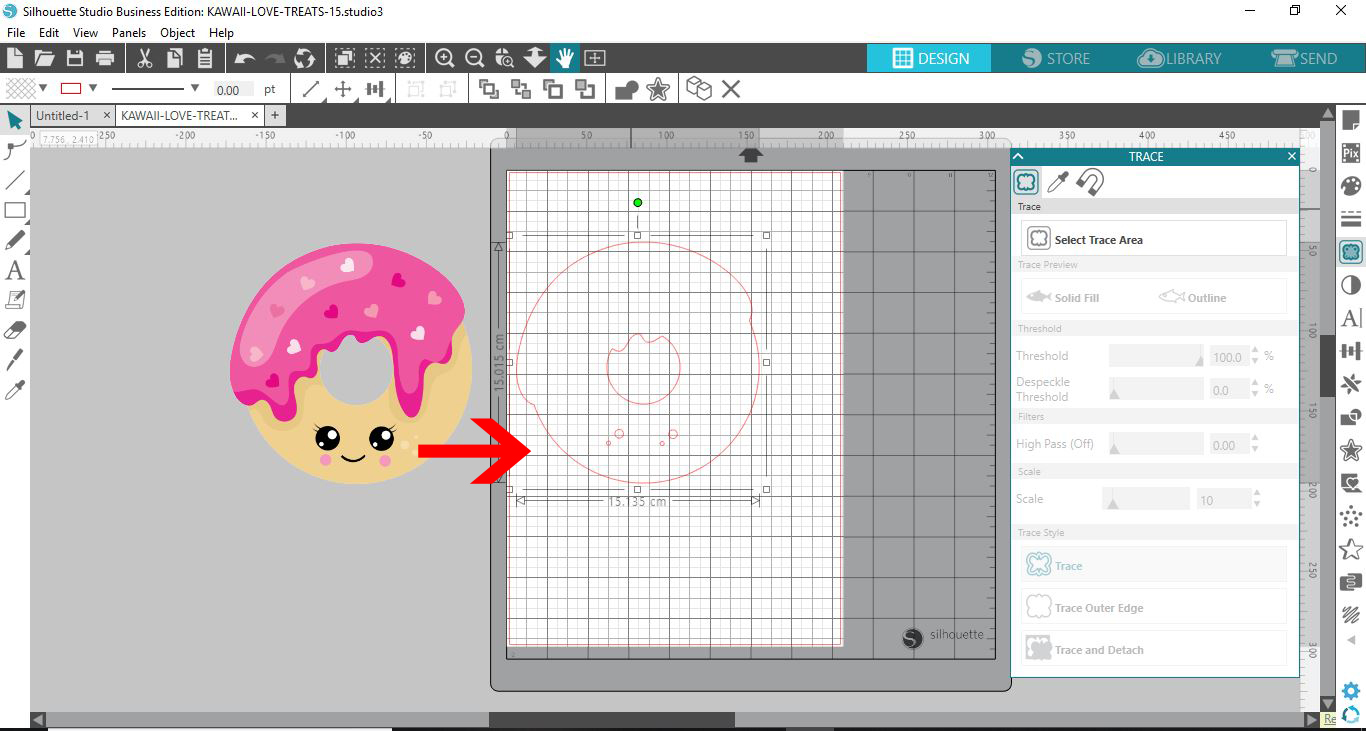
6- Fill with colour so you can reproduce the design with cut lines and will know which part is which and where it needs to go. I am using a PNG from thecupcake graphics and illustrations bundlefrom designbundles.net
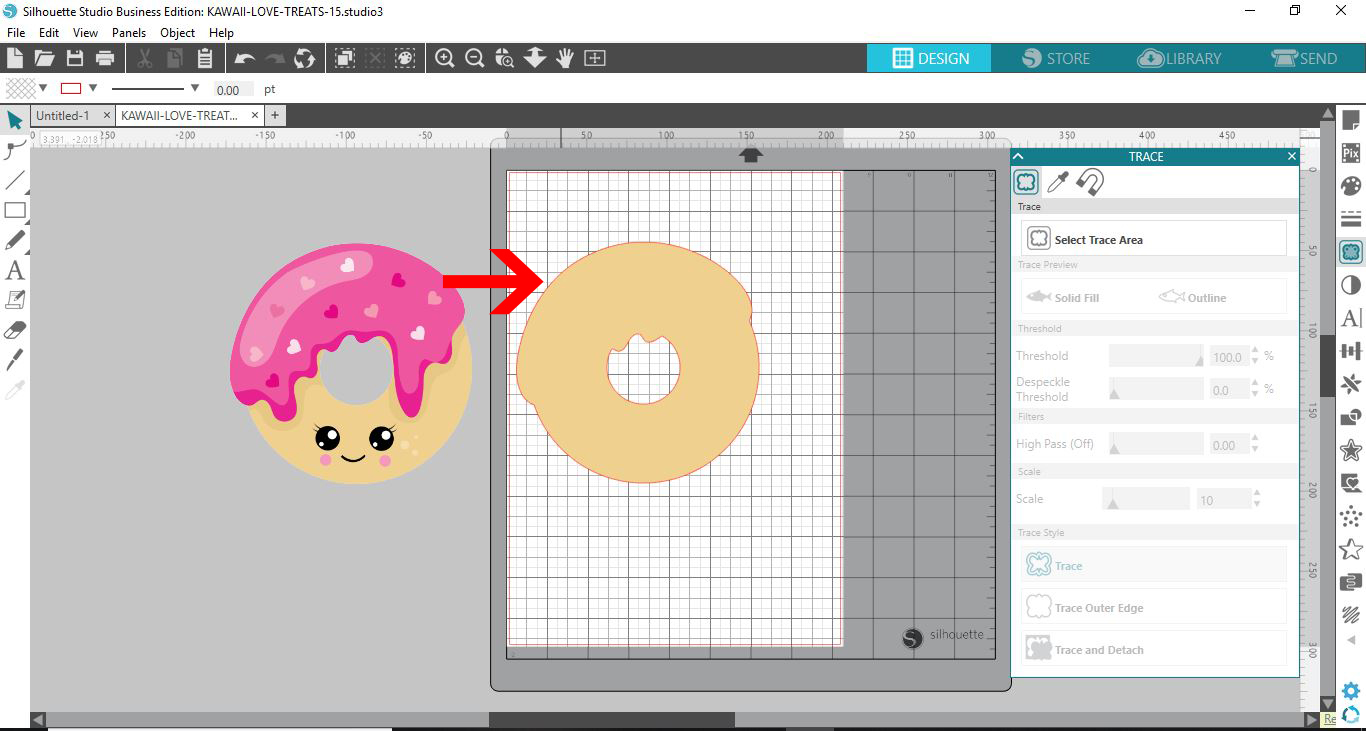
7- Repeat the above process of tracing all the different parts of the PNG.
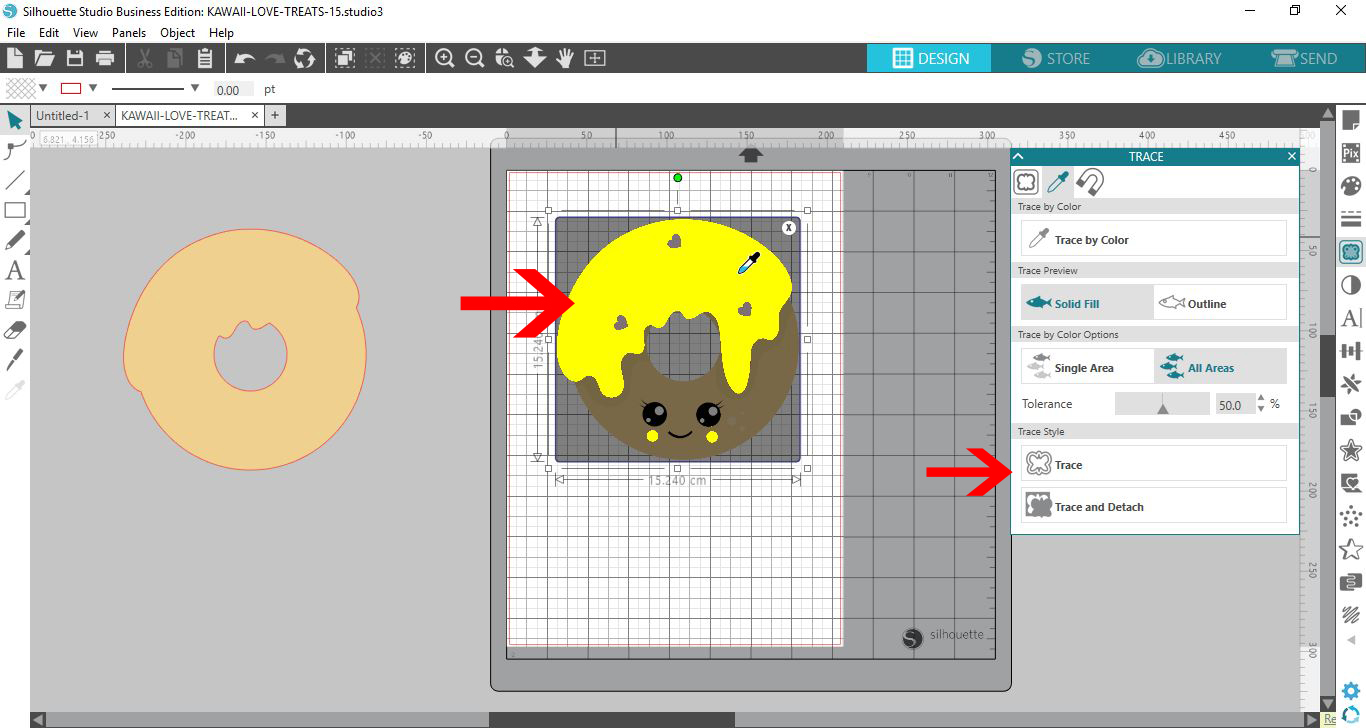
8- Colour the individual parts that you trace.
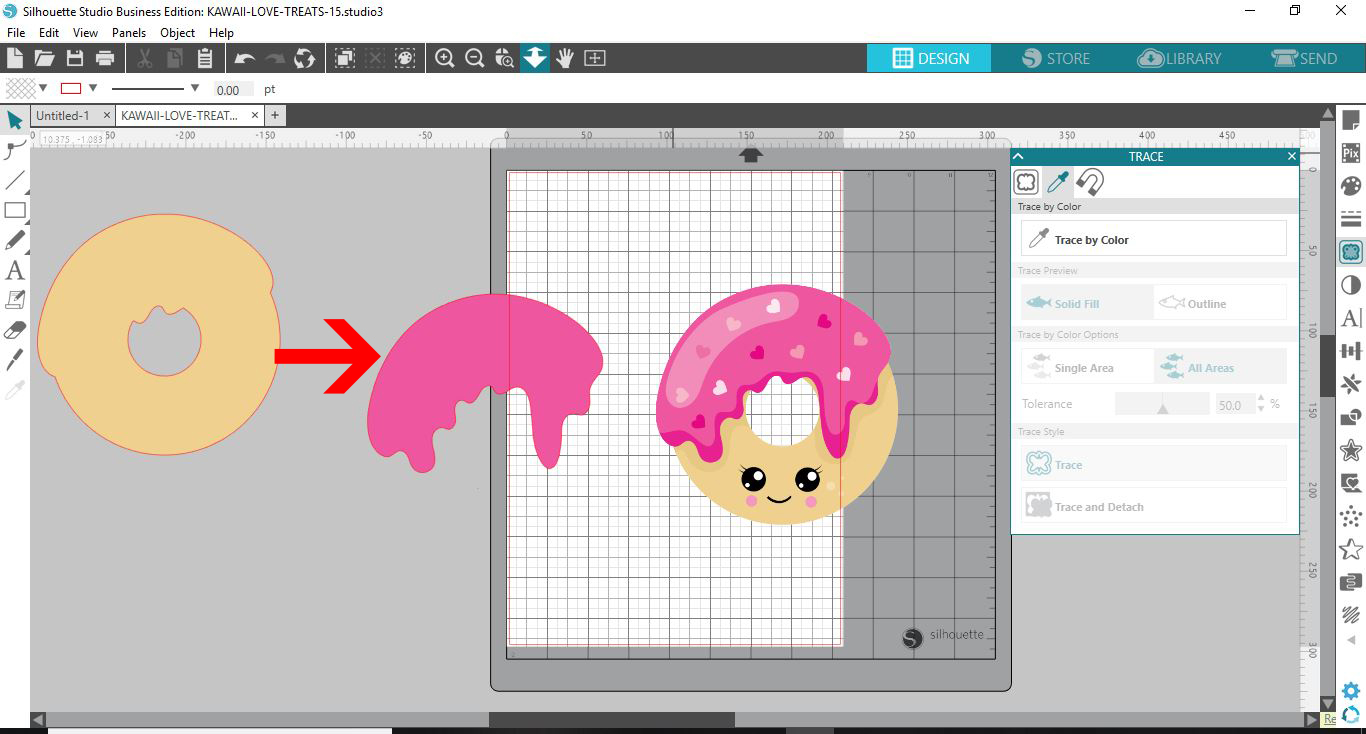
9- If you would like to have a raised part and then a border. (for eg if you want an edge so you can hand paint your design) you can use the internal offset icon to create a border.
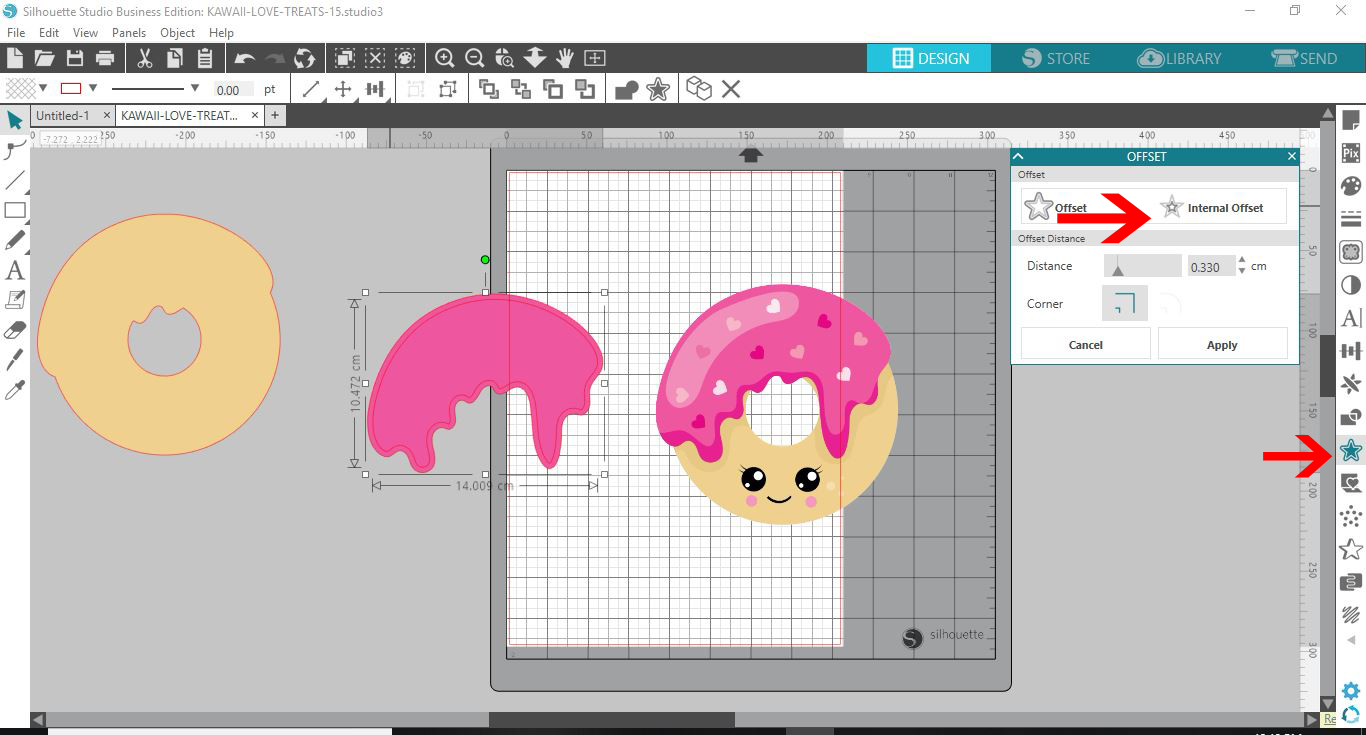
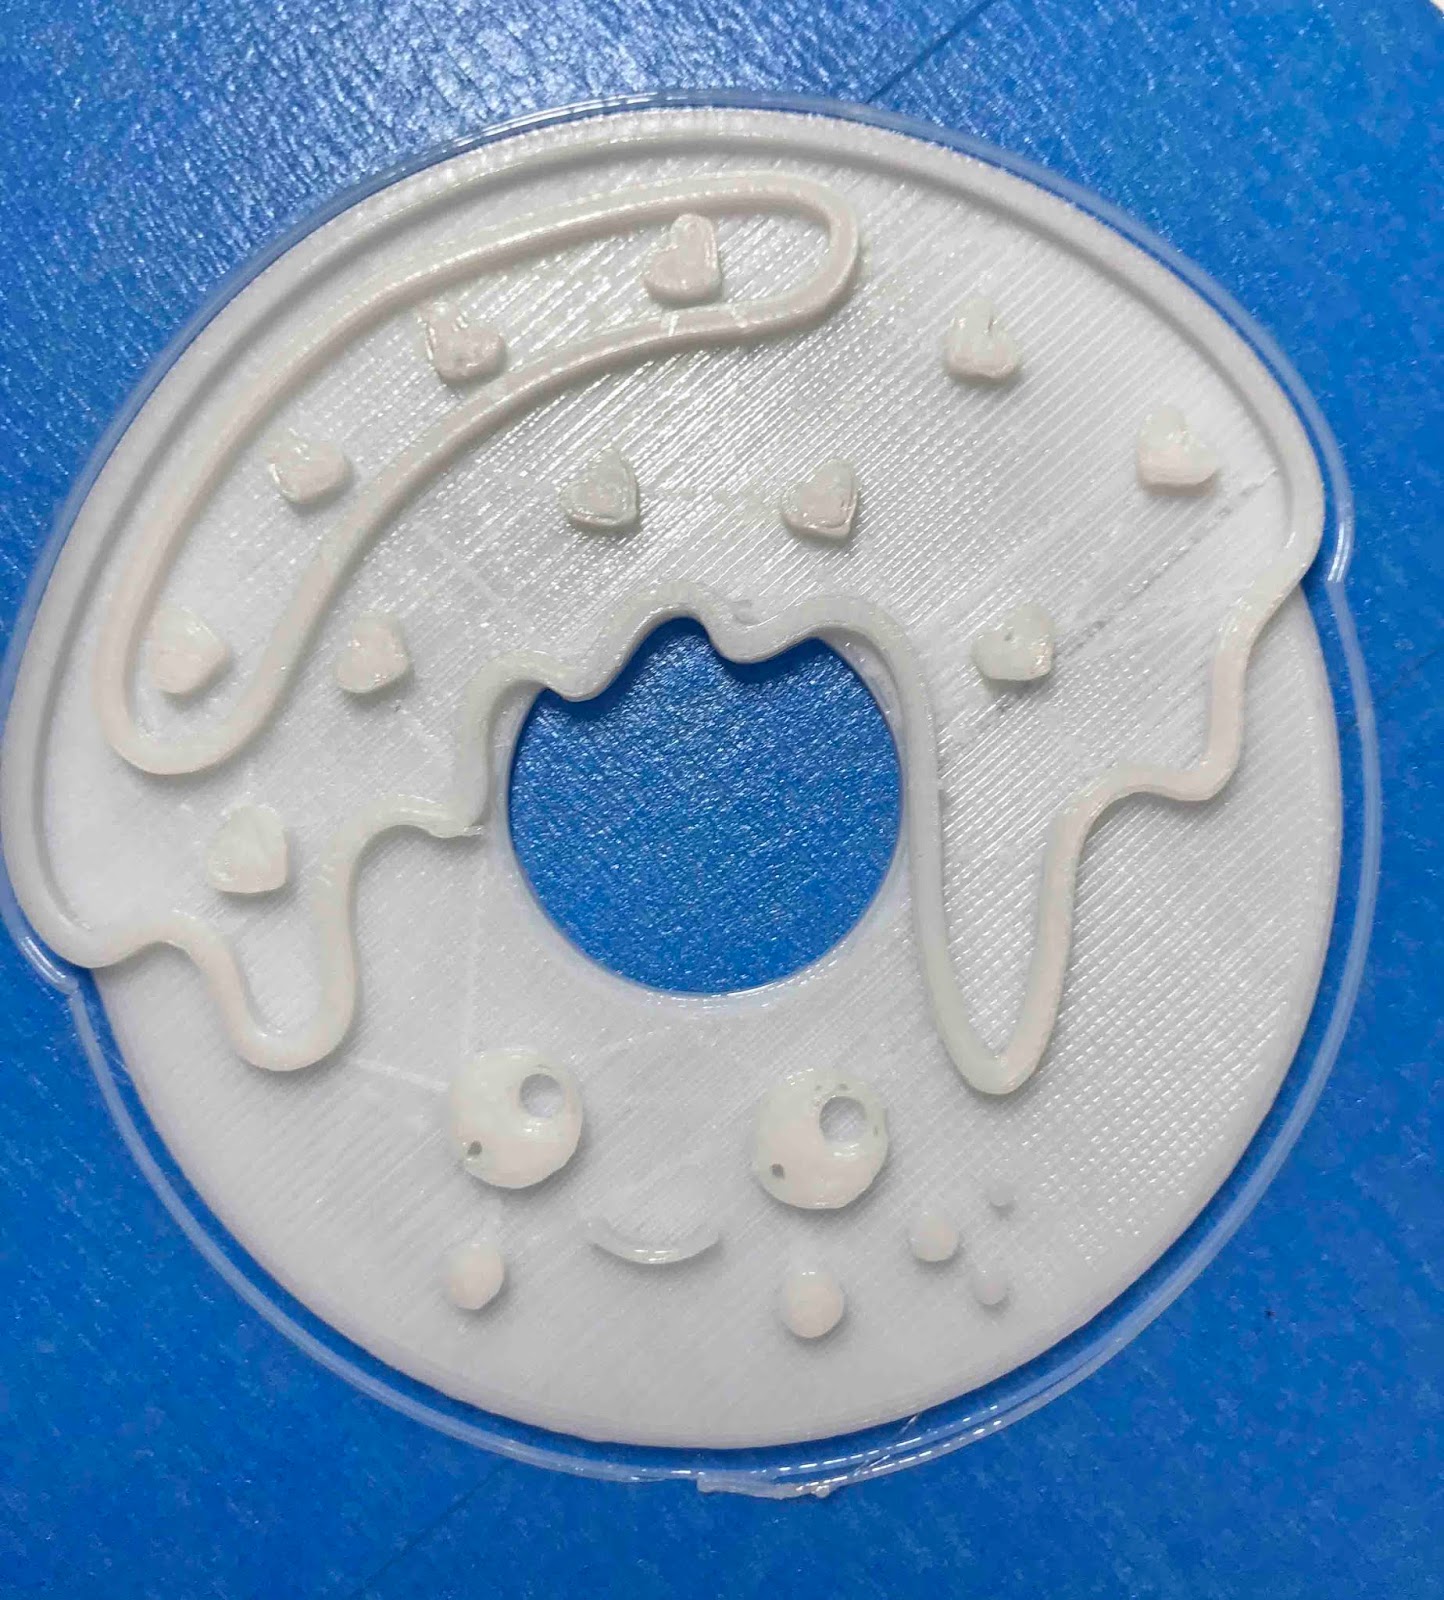
10- Create and borders you would like on your design. I am creating 2 with the icing on the donut so i can paint the inside of it with acrylic paint.
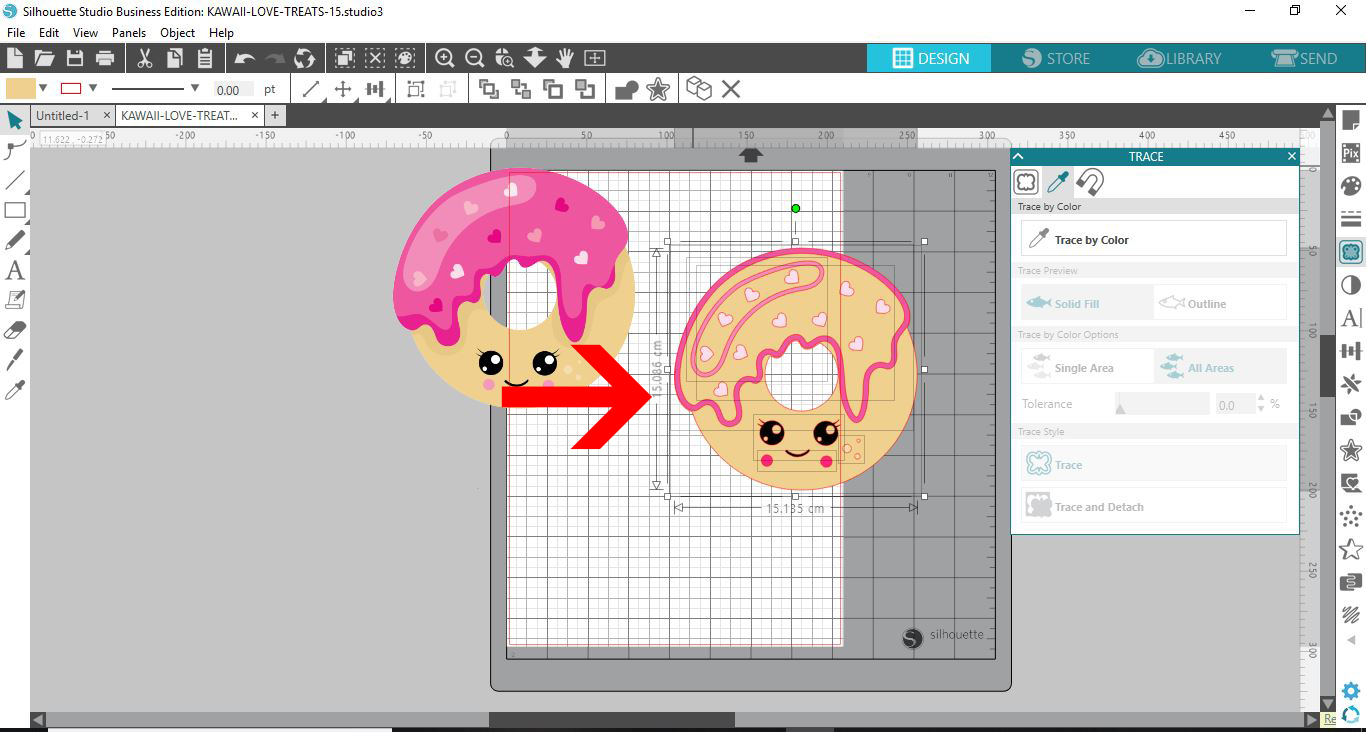
11-Once you have traced every part of the PNG select everything and group.

12- Resize the design to the size you would like in your 3D software. then save as a studio file.
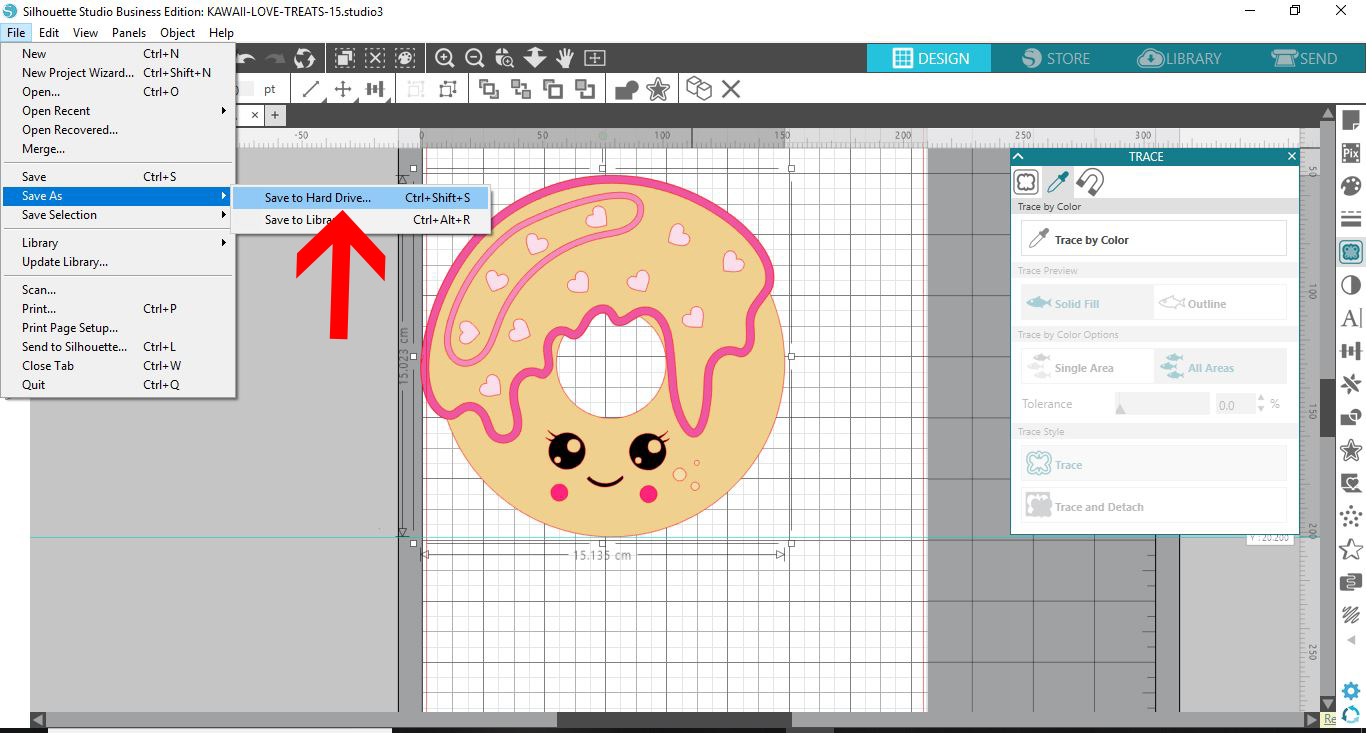
13- Open the silhouette alta software. Click on the open folder icon.
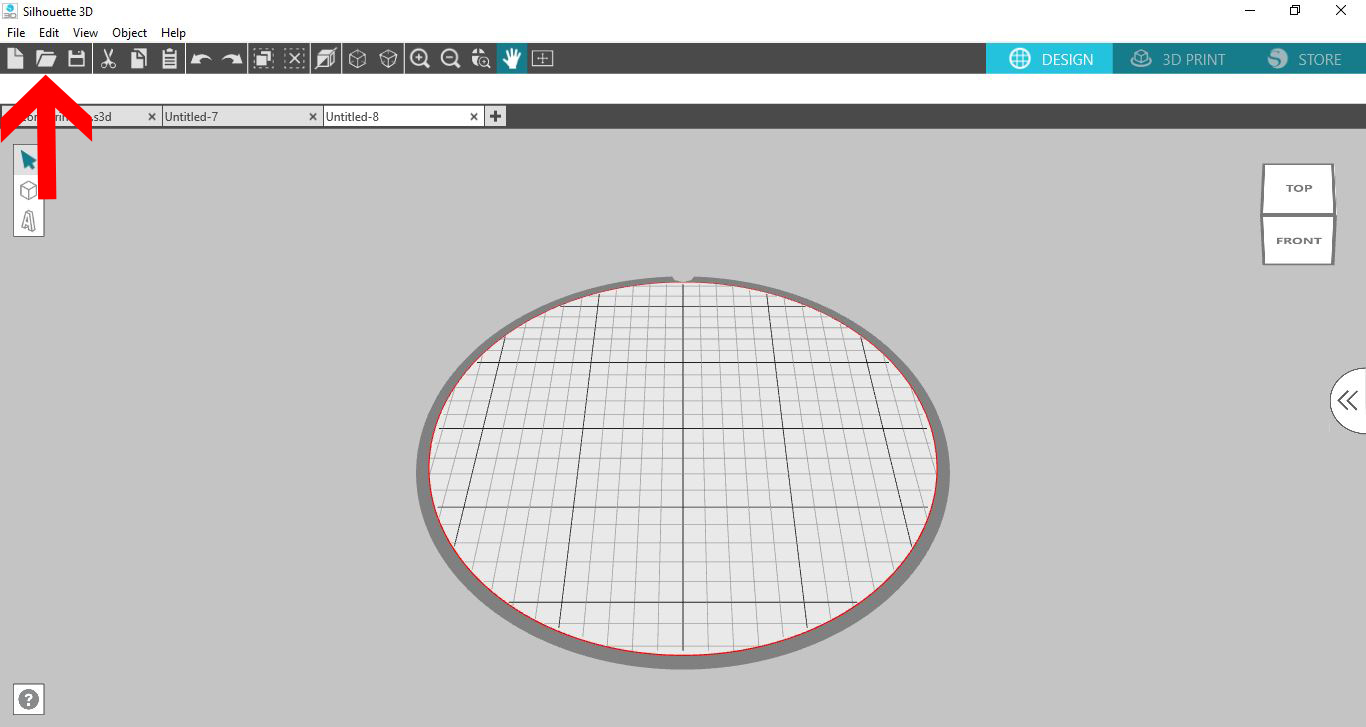
14- Select your silhouette studio file and open.
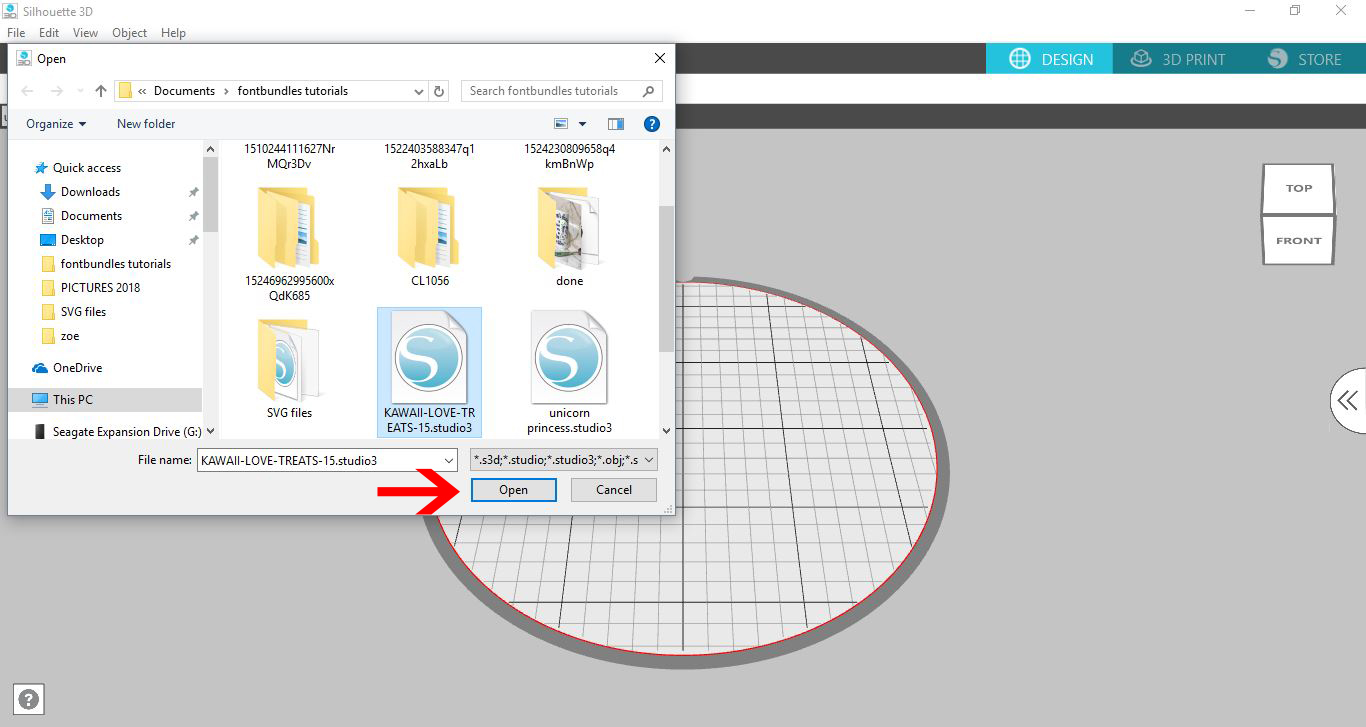
15- Click on Extrusion.

16- Your flat PNG file will now be a 3D file ready to print.
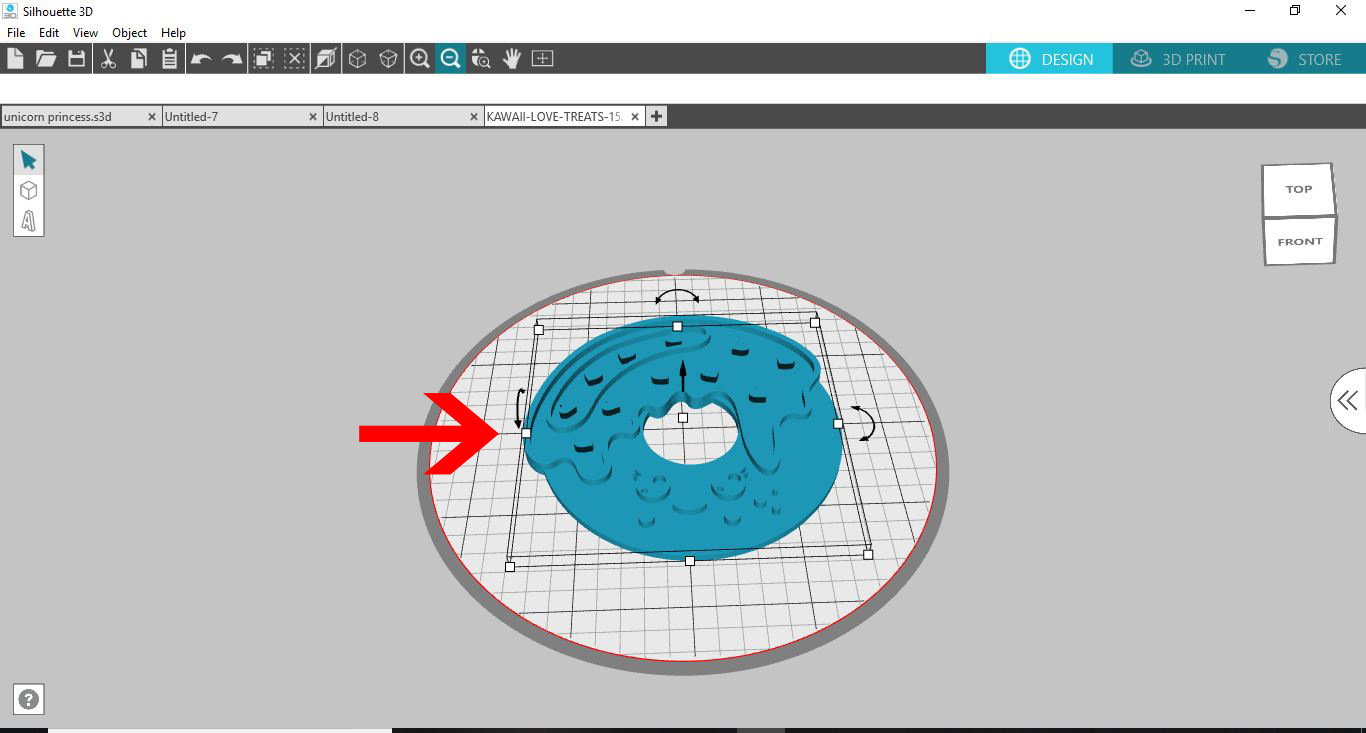
17 - Click on the 3D print file to print.
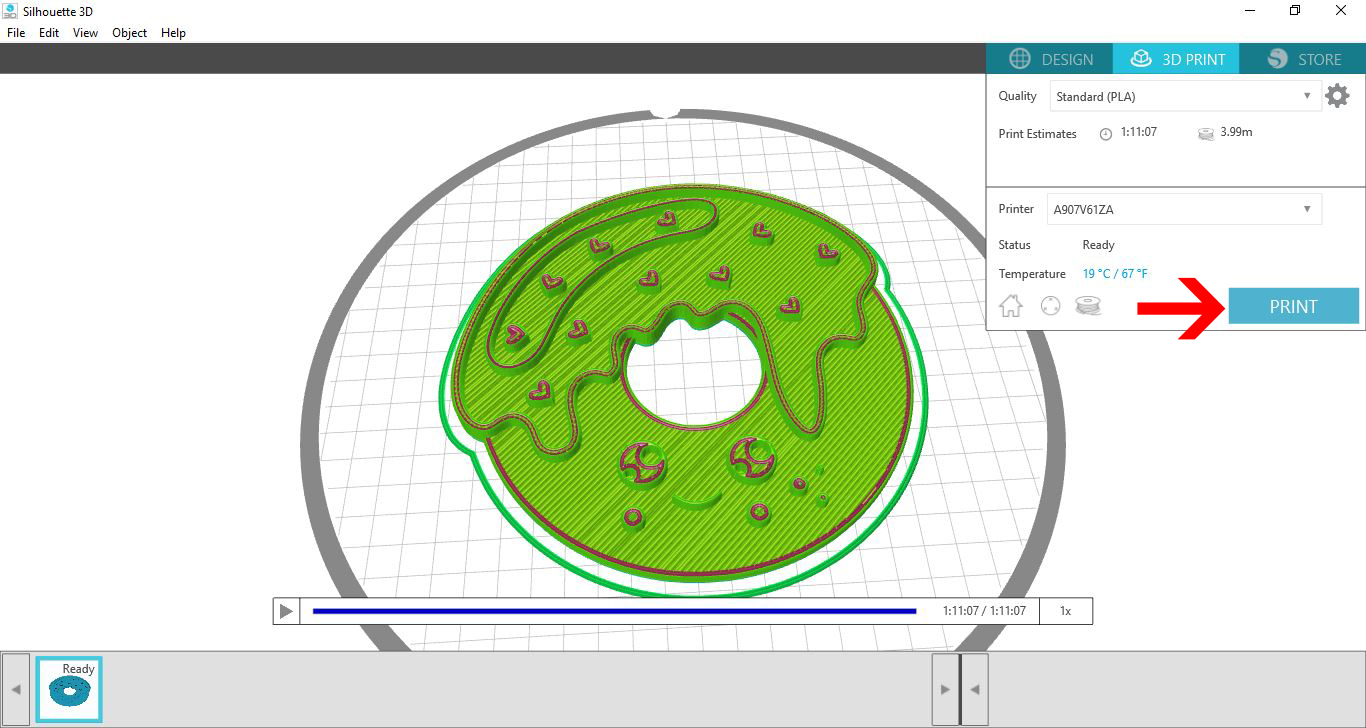
18-Once printed you can see below that you can now paint the design. If you have a silhouette cameo you can even us the design that you first created to cut vinyl pieces to place on the 3D print ed object.