
By Design Bundles
Silhouette Tutorials2 min
Using color fonts in Silhouette studio
* Free version and above.
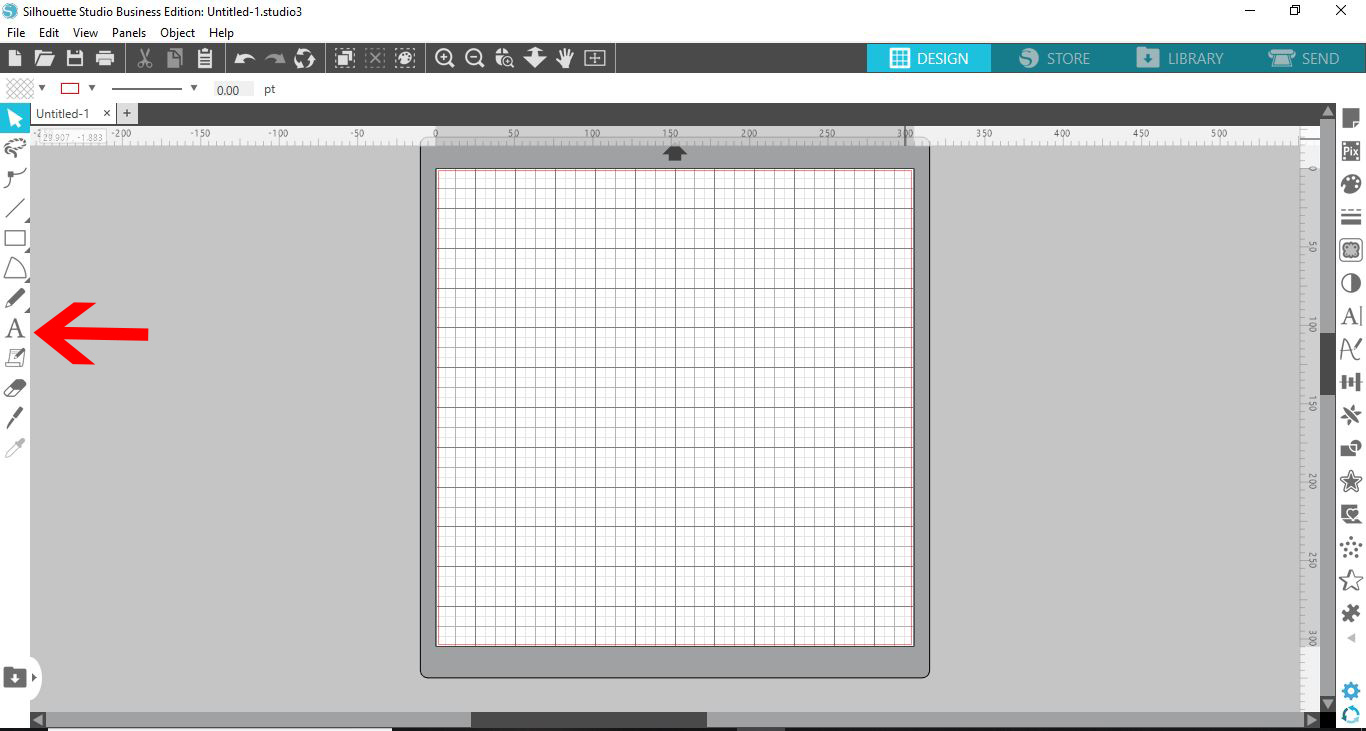
1- Open Silhouette Studio. Click on the text icon.
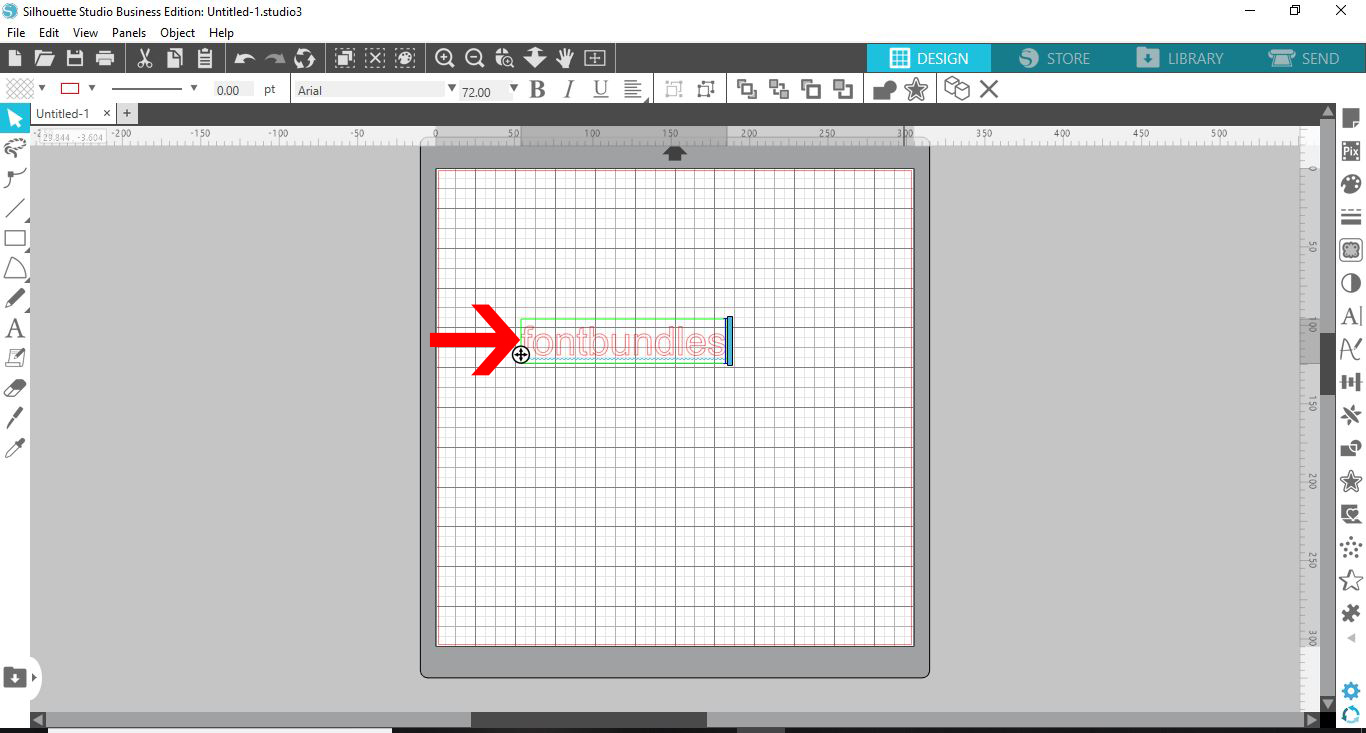
2- Type your text.
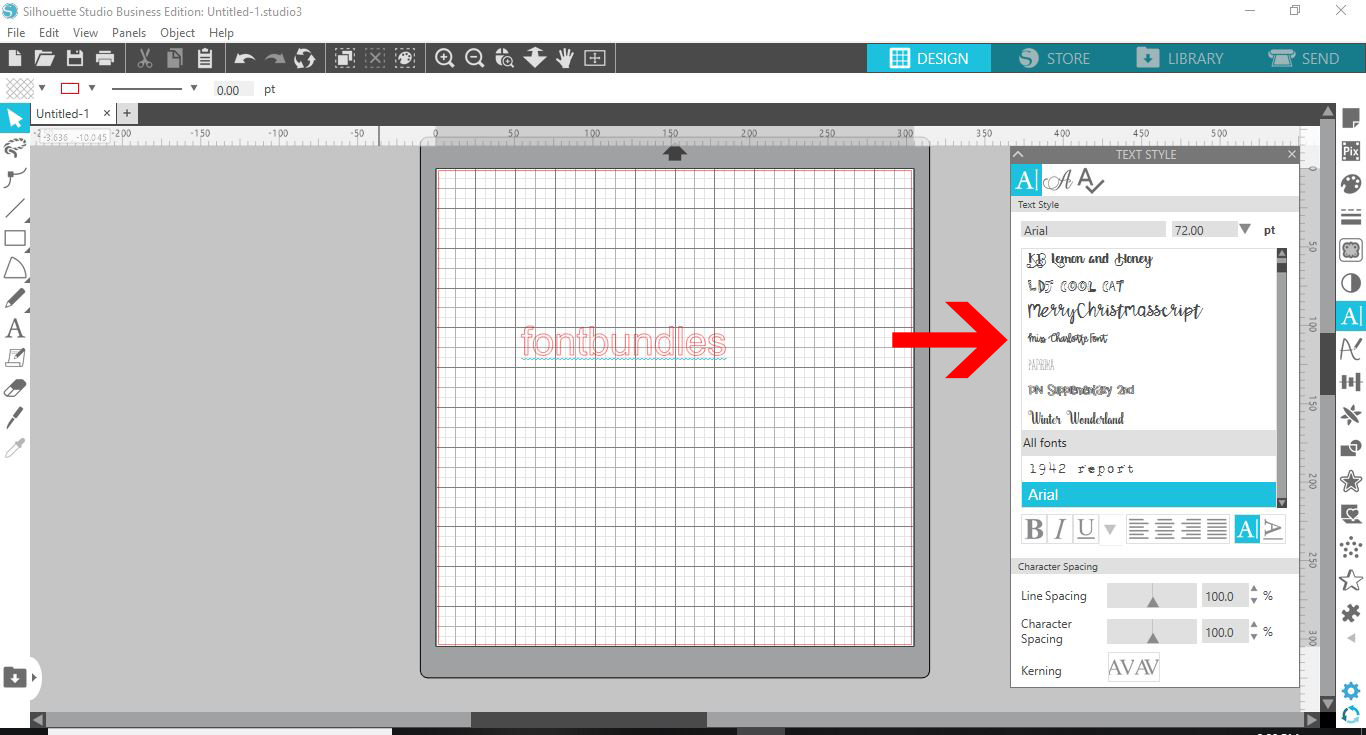
3- Open the text style panel.
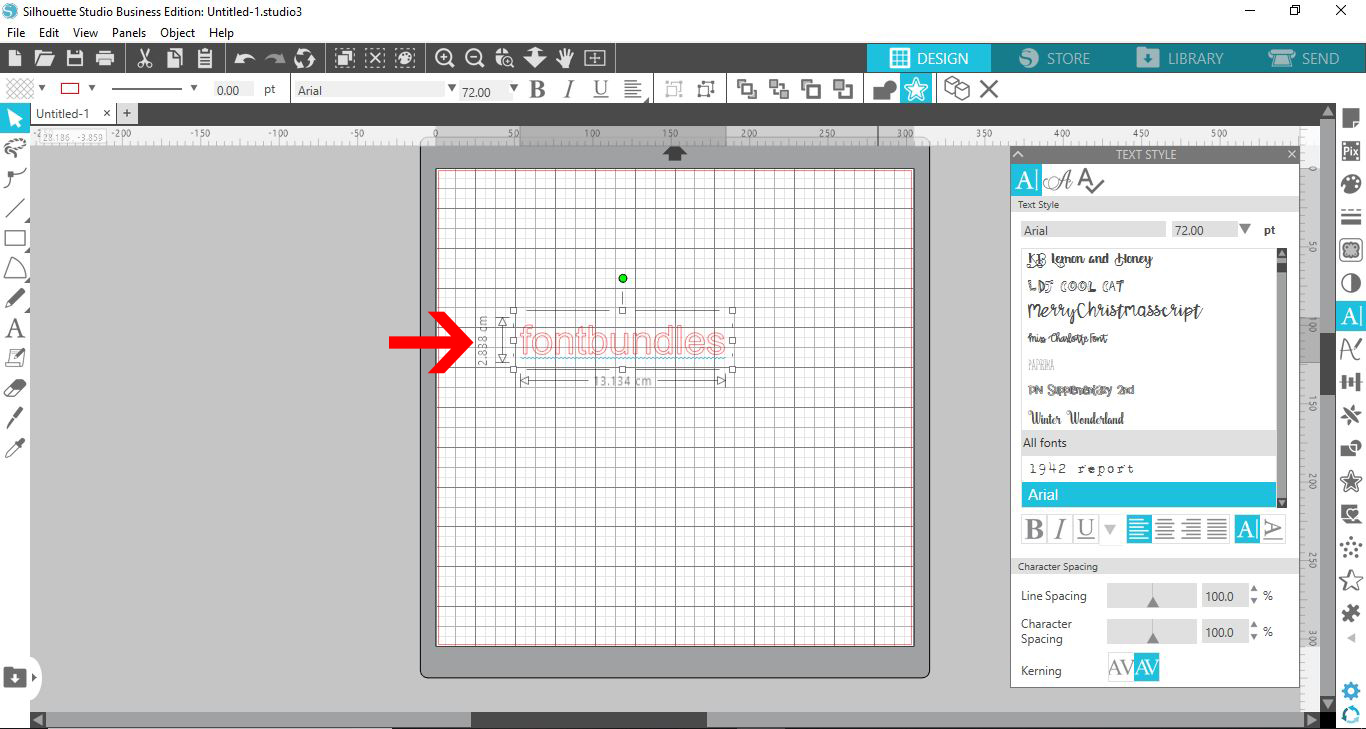
4- Uncheck your text, then re check your text.
5- Select your colored font. It will appear in the design space with the color font type.
5- As your font is colored, You can go to line style and change the red cut lines to invisible.
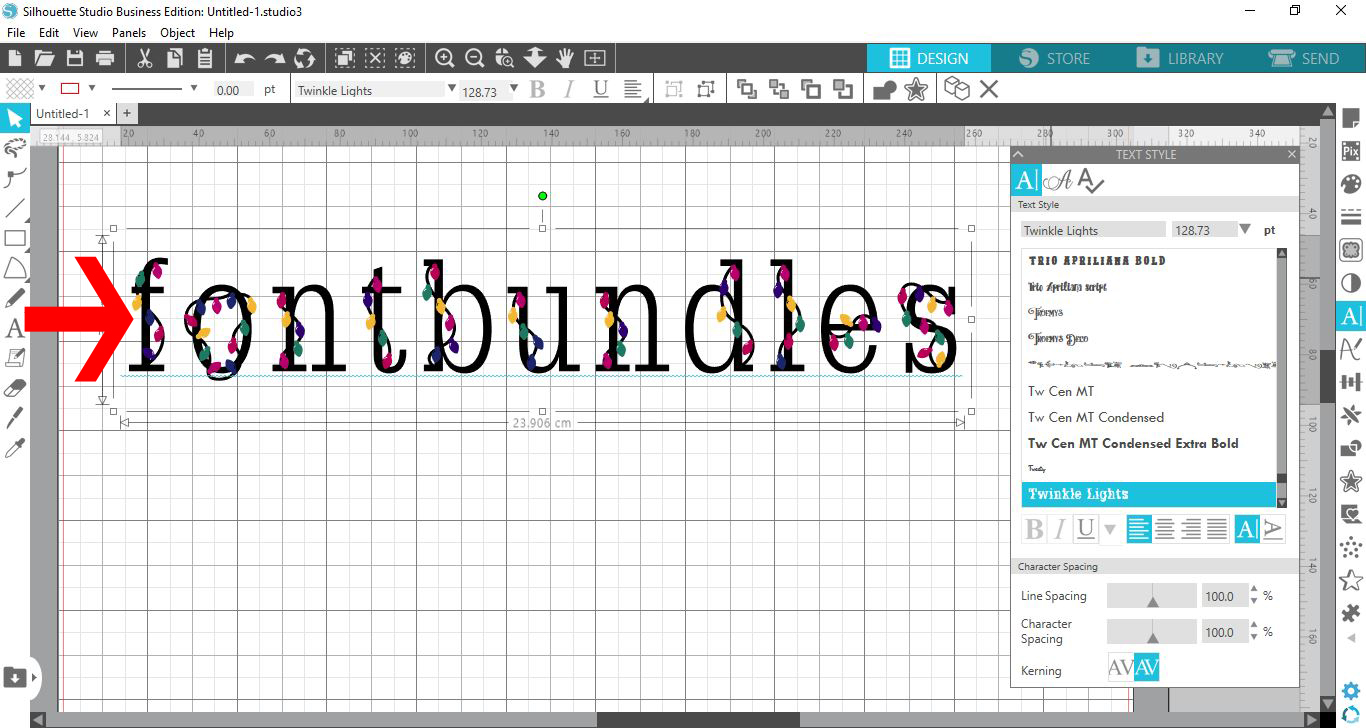
6- Now the colored font does not have the red cut lines around it but they are still there for cutting.
1- Open Silhouette Studio. Click on the text icon.
2- Type your text.
3- Open the text style panel.
4- Uncheck your text, then re check your text.
5- Select your colored font. It will appear in the design space with the color font type.
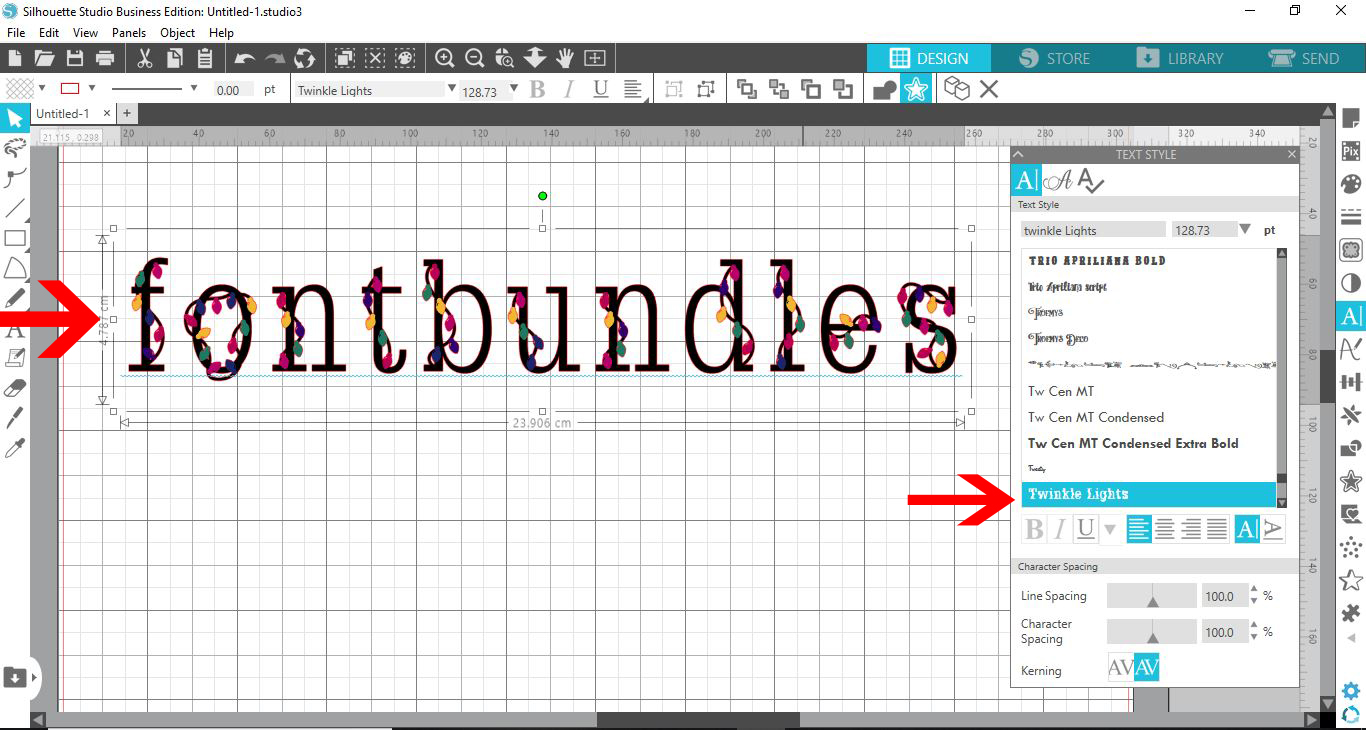
5- As your font is colored, You can go to line style and change the red cut lines to invisible.
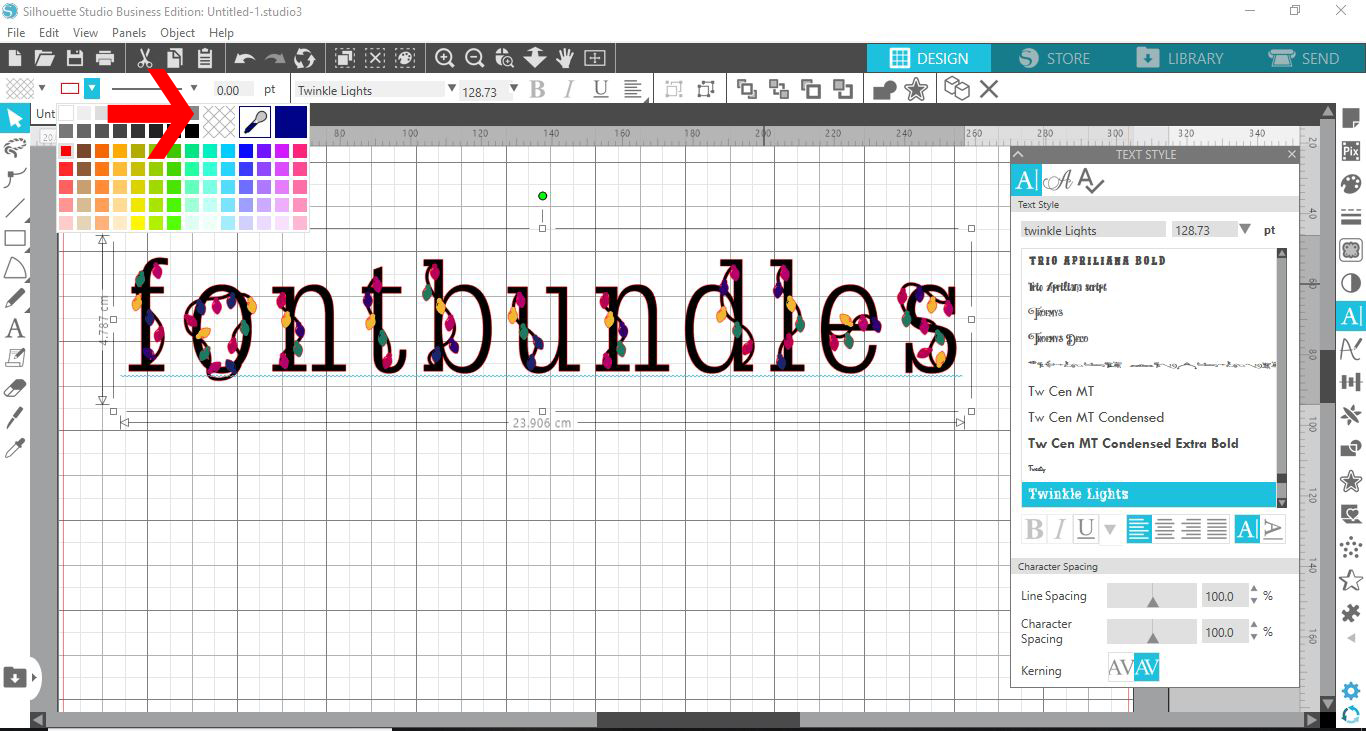
6- Now the colored font does not have the red cut lines around it but they are still there for cutting.
Related Tutorials
Silhouette Tutorials
Using Fonts in Silhouette Studio
Silhouette Tutorials
How to Use Advanced Color Settings in Silhouette Studio
Discover the Advanced Color Settings in Silhouette Studio!
Silhouette Tutorials
Using the Lasso tool in Silhouette Studio
Learn how to use the Lasso Tool in Silhouette Studio with this beginner tutorial.
Cricut Tutorials
How to Thicken Text for Cricut Design Space using Silhouette Studio
In this tutorial learn how to use Silhouette Studio to create thicker text for Cricut Design Space.
Silhouette Tutorials
Using Warp Templates in Silhouette Studio
In this tutorial learn how to use warp templates in Silhouette Studio to manipulate text and images.
Silhouette Tutorials