
By Design Bundles
Using icons in Silhouette Studio
We will be using a retro emblem generator for our tutorial. If you are looking for another style take a browse through our other logo designs on Design Bundles.
Step 1 - Import icons into Silhouette Studio
Once your selected icons are ready, we need to import them into Silhouette Studio. You have an option to import one of three ways. You can click the File menu at the top and select Open. Alternatively you can click the File folder at the top just below the menu option. Or, you can simply drag and drop the items onto the mat. We chose the second option and opened the File folder icon.
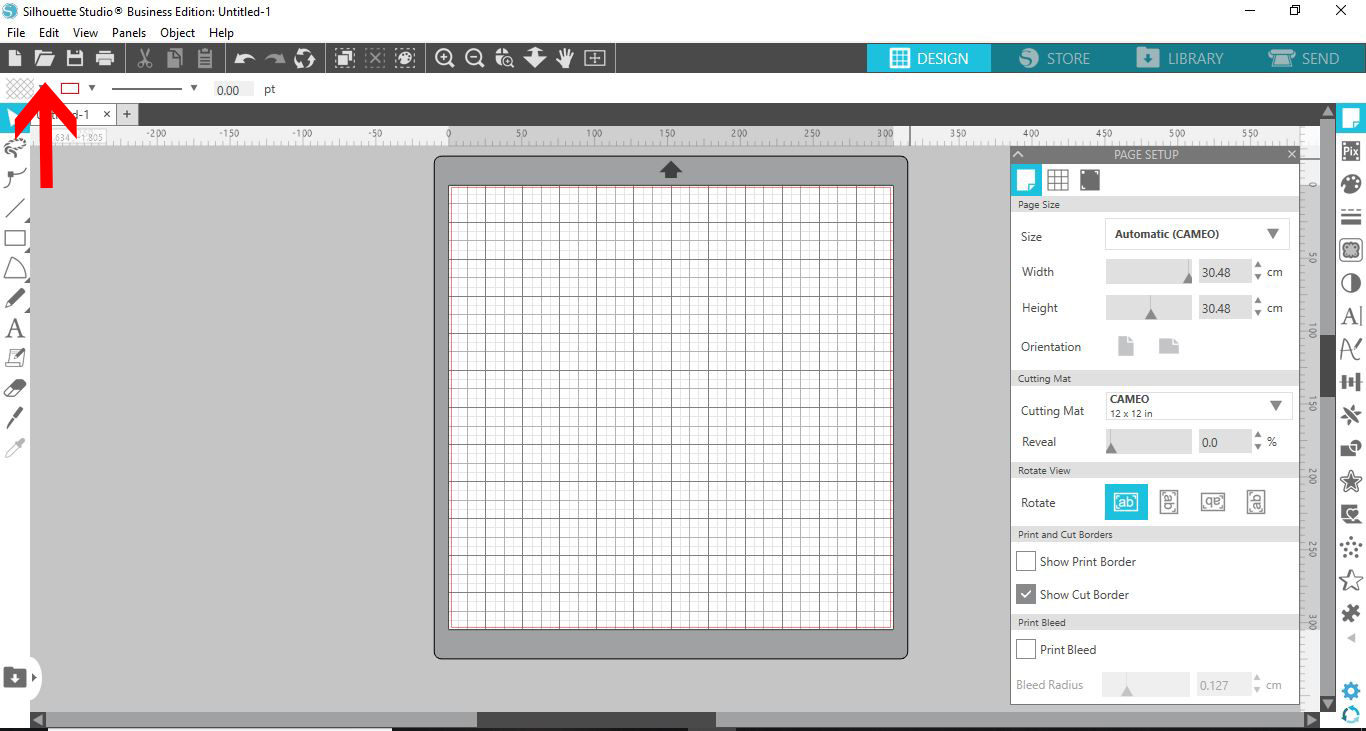
Locate and select your icons then click Ok to import the design to your mat.
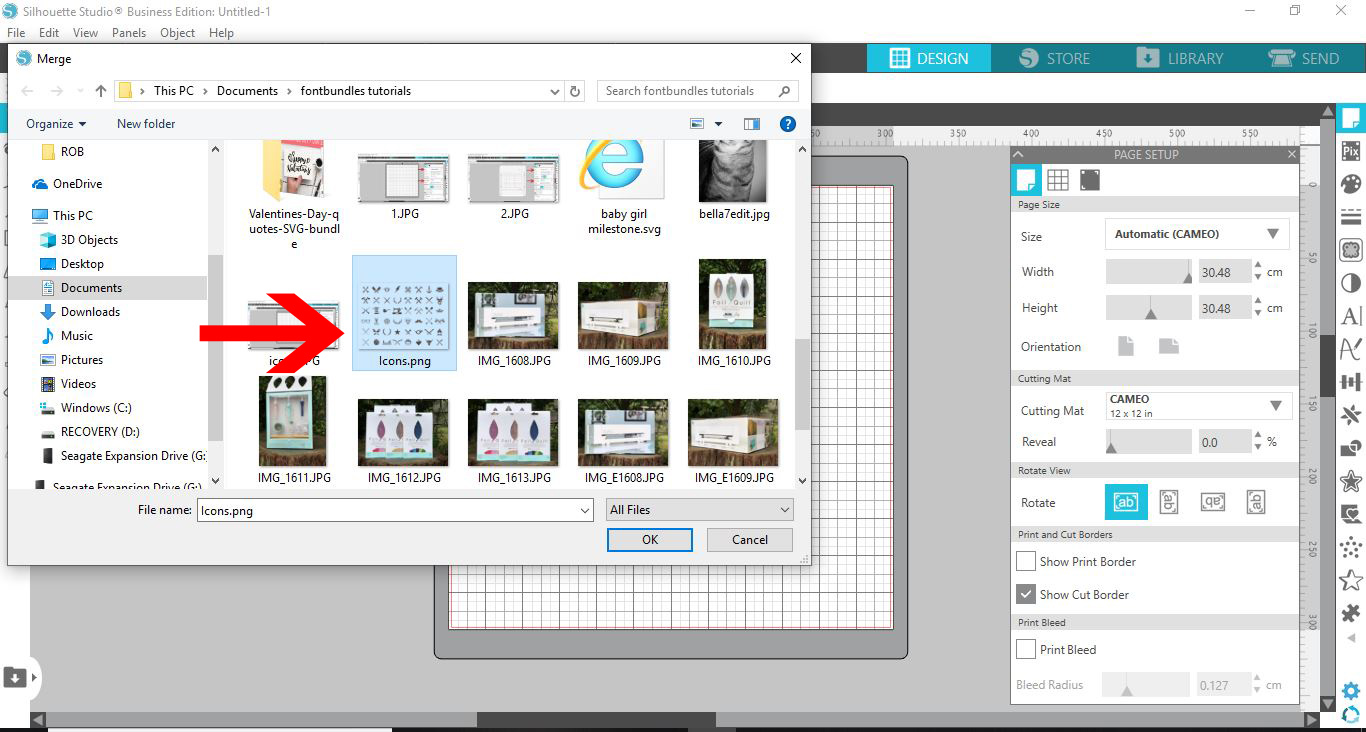
Step 2 - Use the Trace Panel
Now that the icons have been imported, we want to trace them and turn them into cut files. To do this we will use the Trace Panel located on the right hand side of the screen. Click on the Trace Panel to open the options.
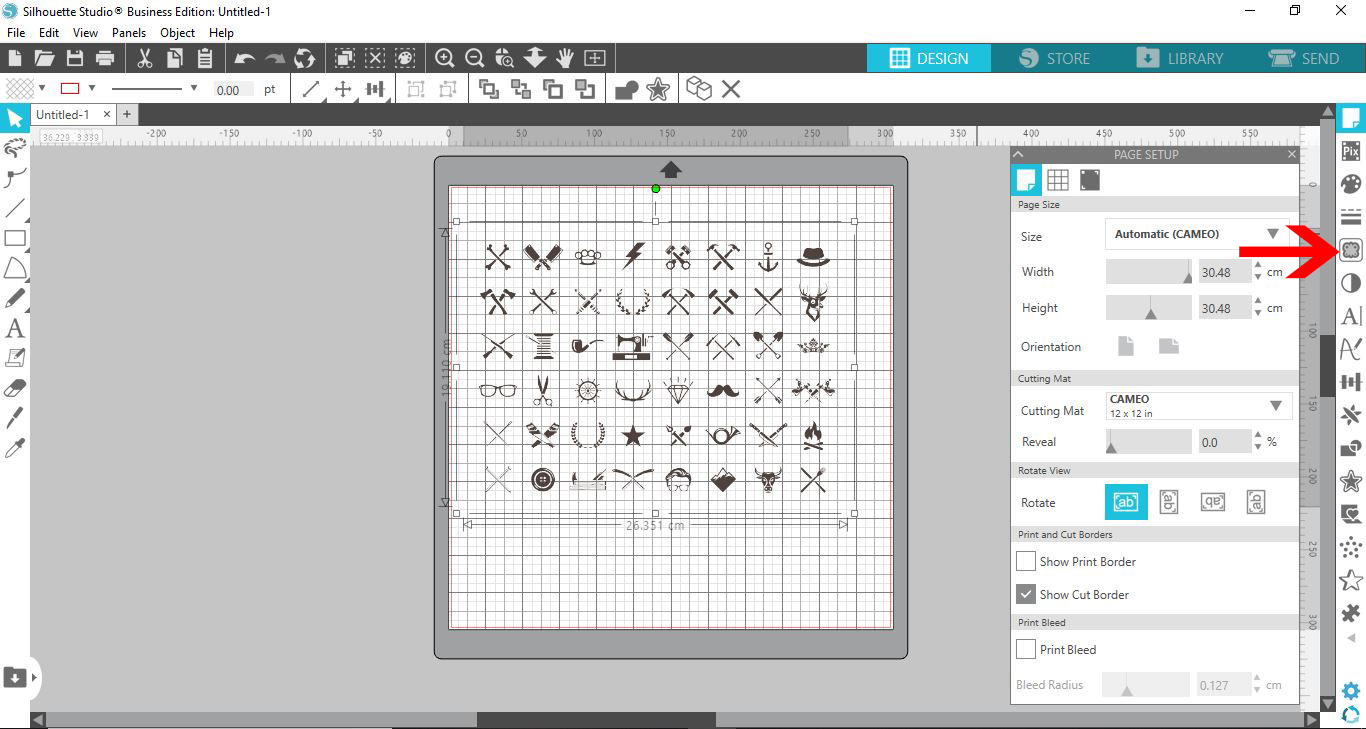
Be sure that you are in the Trace options, shown as the first icon at the top. It will be highlighted in blue. With your icons selected, click on Select Trace Area. Next, click + drag a box around the icons. Adjust the threshold so the icons are all highlighted yellow.
If you need further help with tracing, have look at our tutorial on tracing images in Silhouette Studio.
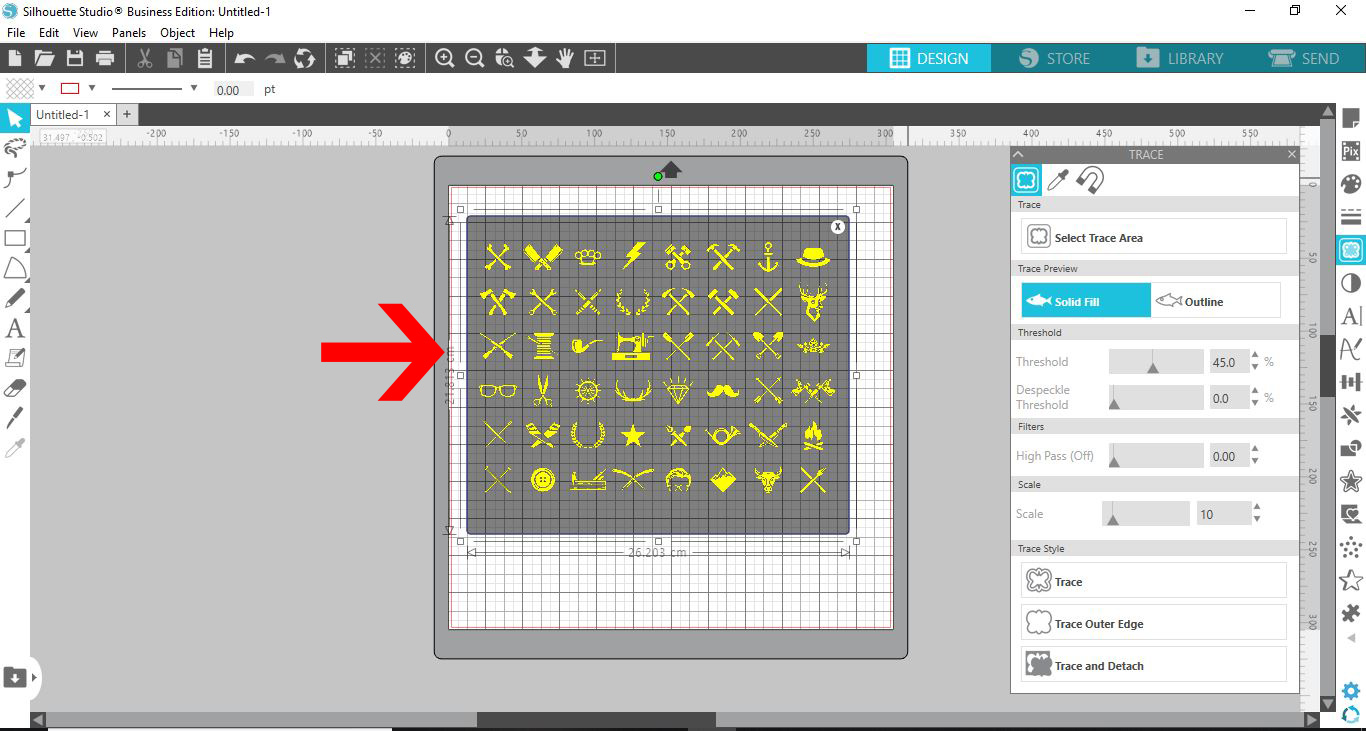
Once all the icons are highlighted in yellow, at the bottom, click Trace and Detach. This will remove the background from each icon.

Step 3 - Adjust the icons and Send to cut
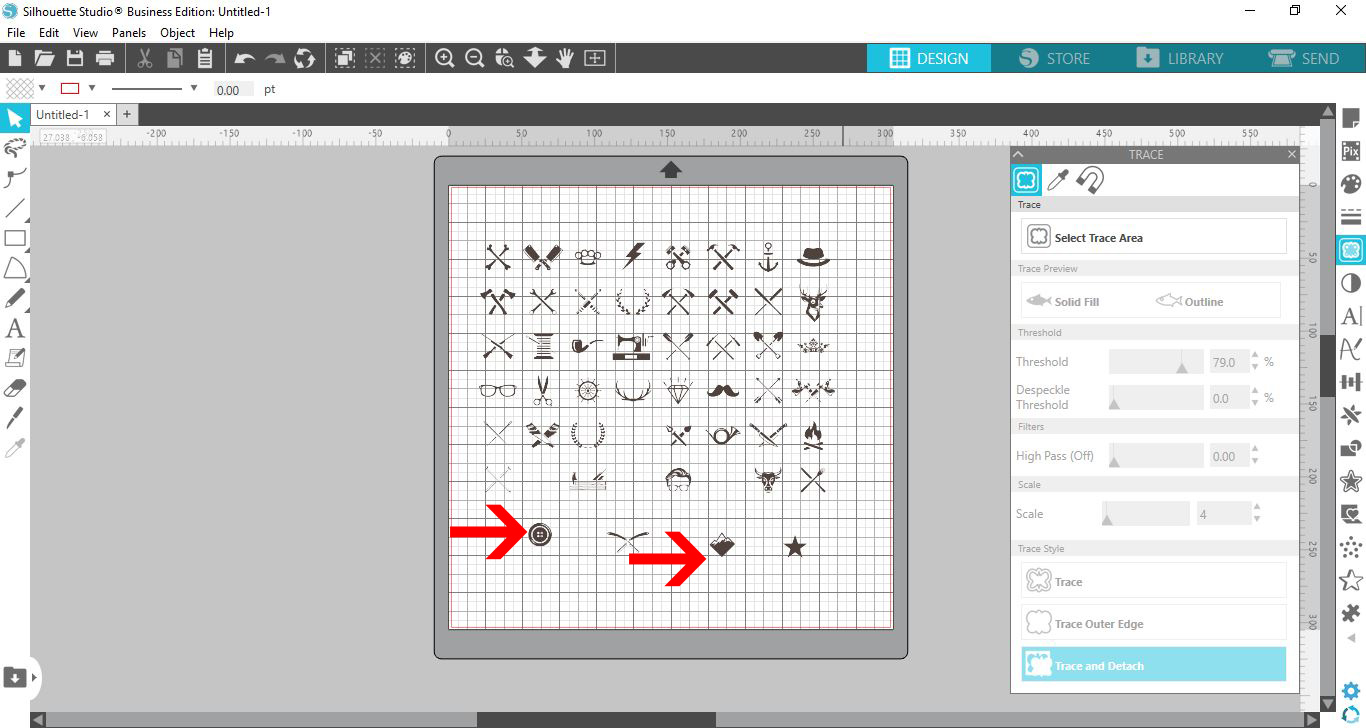
We are just about ready to send the icons to be cut. Part of the tracing may include a detached background. Move this to one side and delete as we don't need it.
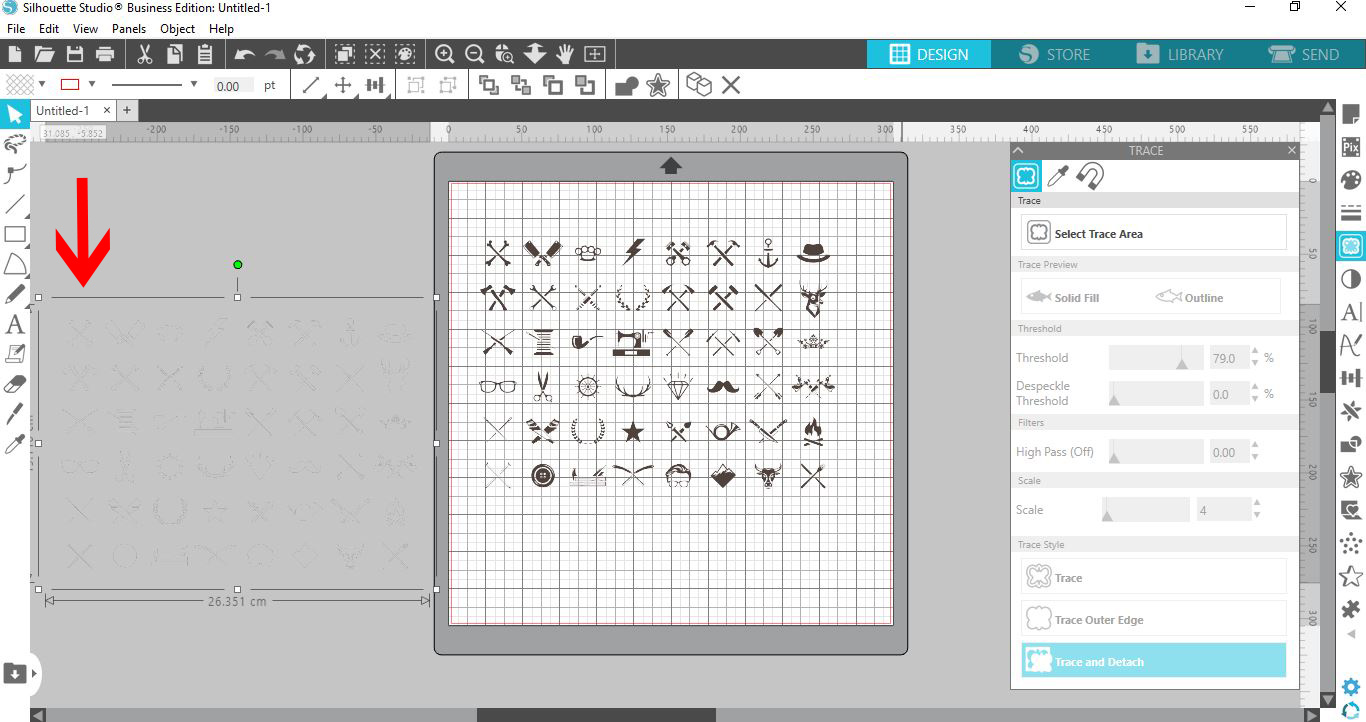
With the Trace option, each icon is now an individual design. You can move these icons around and adjust the size as needed. The cut lines might not be visible now but will be in the Send Panel.
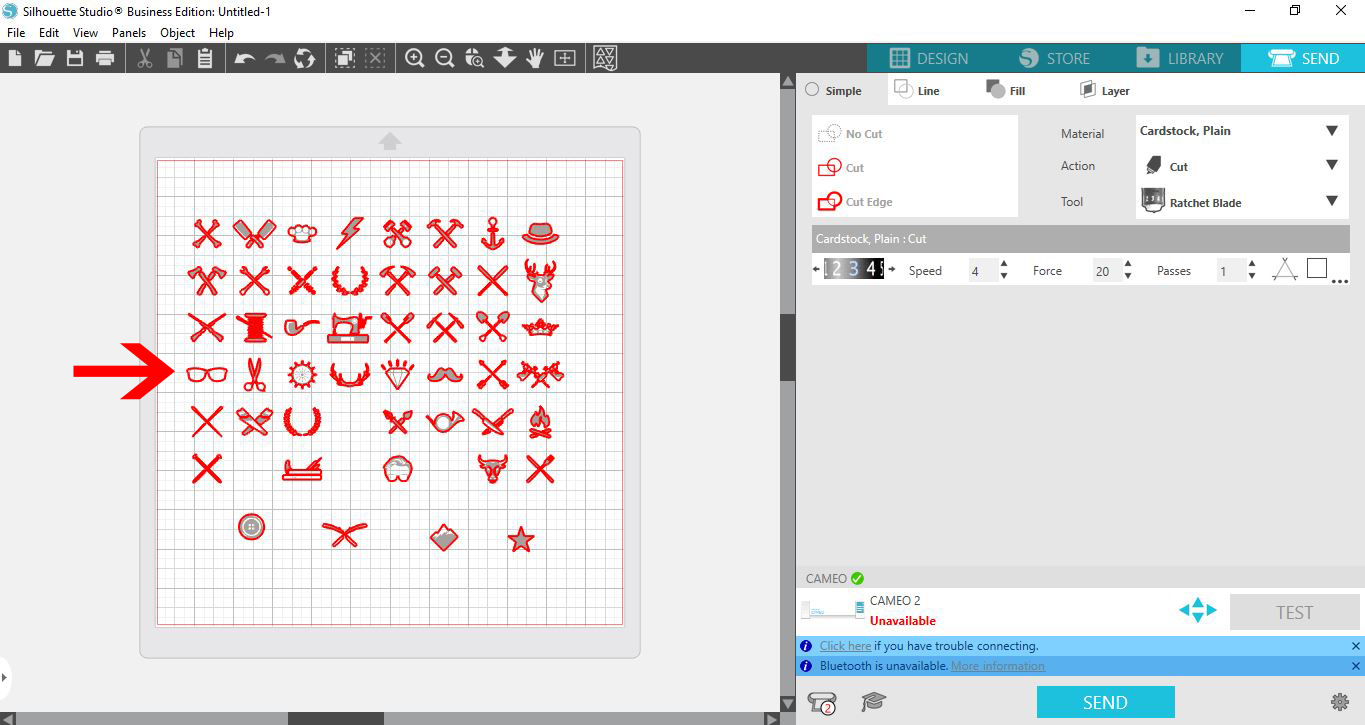
Click on the Send option top right to go to the material settings. Once there you will see the red cut lines now visible. Each icon will have its own cut line. Choose your cut settings specific for your material. When ready, click Send at the bottom of the screen.
Turning generated icons into to cut files in Silhouette Studio is as quick as that. If you found this tutorial helpful, we have many more for you to follow like using the AutoTrace feature, working with PNG files and accessing the Toggle Tool in Silhouette Studio.