By Design Bundles
Using the Font Creator in Silhouette Studio
Did you know that you can create your own font using the Font Creator in Silhouette Studio? You can even use shapes assigned to letters for a personalized dingbat font. Once your font has been saved you can use it with other programs. So let’s have some fun using the Font Creator in Silhouette Studio.
Step 1 - Open the Font Creator
Once you have opened Silhouette Studio, go to the right side toolbar. Click on the icon Open Font Creation Panel. It looks like a cursive “A” with a pencil.
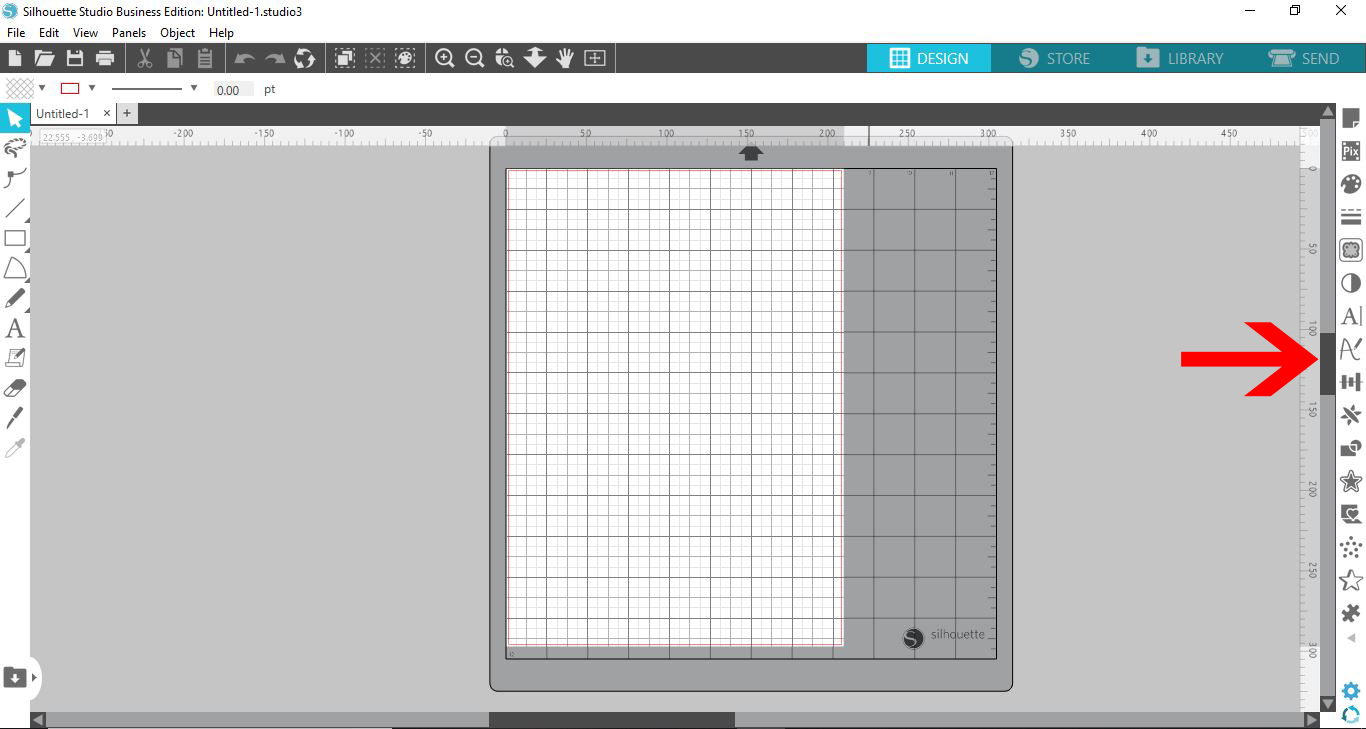
The Font Creation Panel will open on the right.
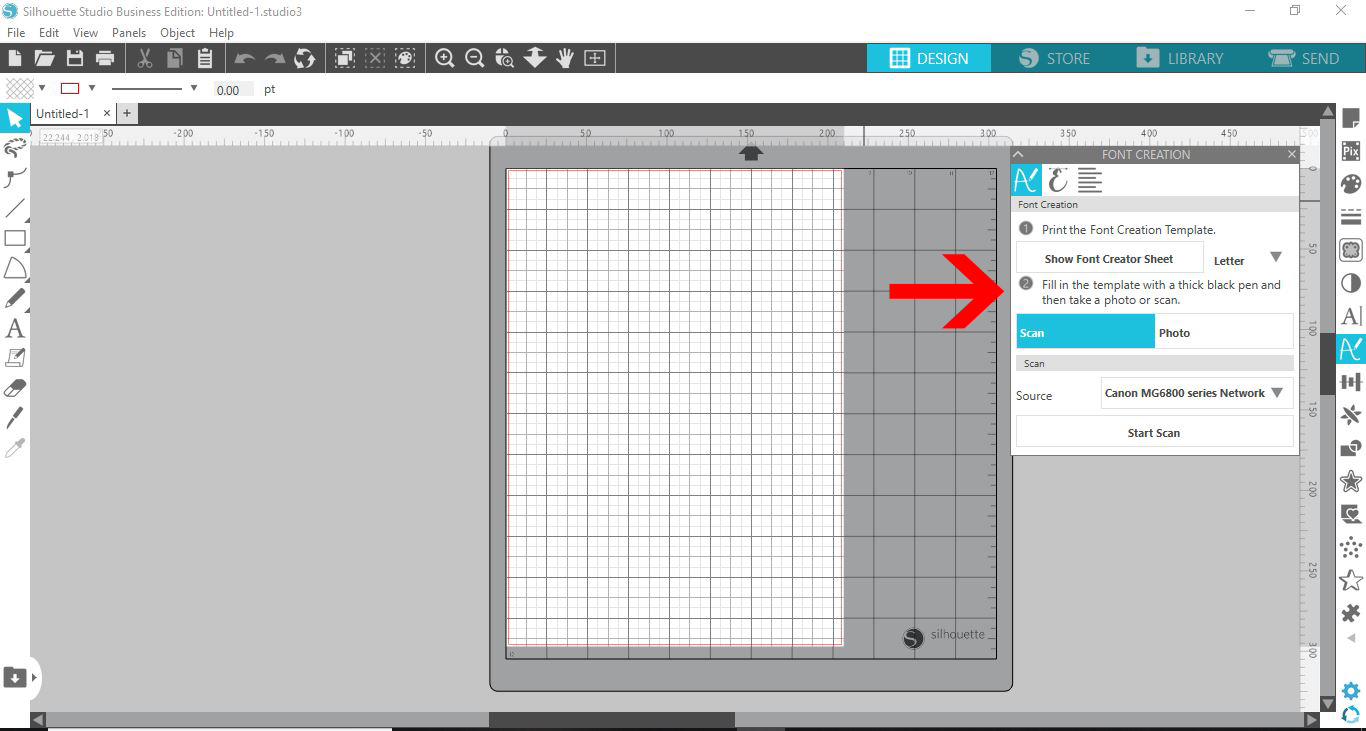
Step 2 - Set Up the Font Creator Sheet
Click on the dropdown box to change the option Show Font Creator Sheet to either A4 or Letter.
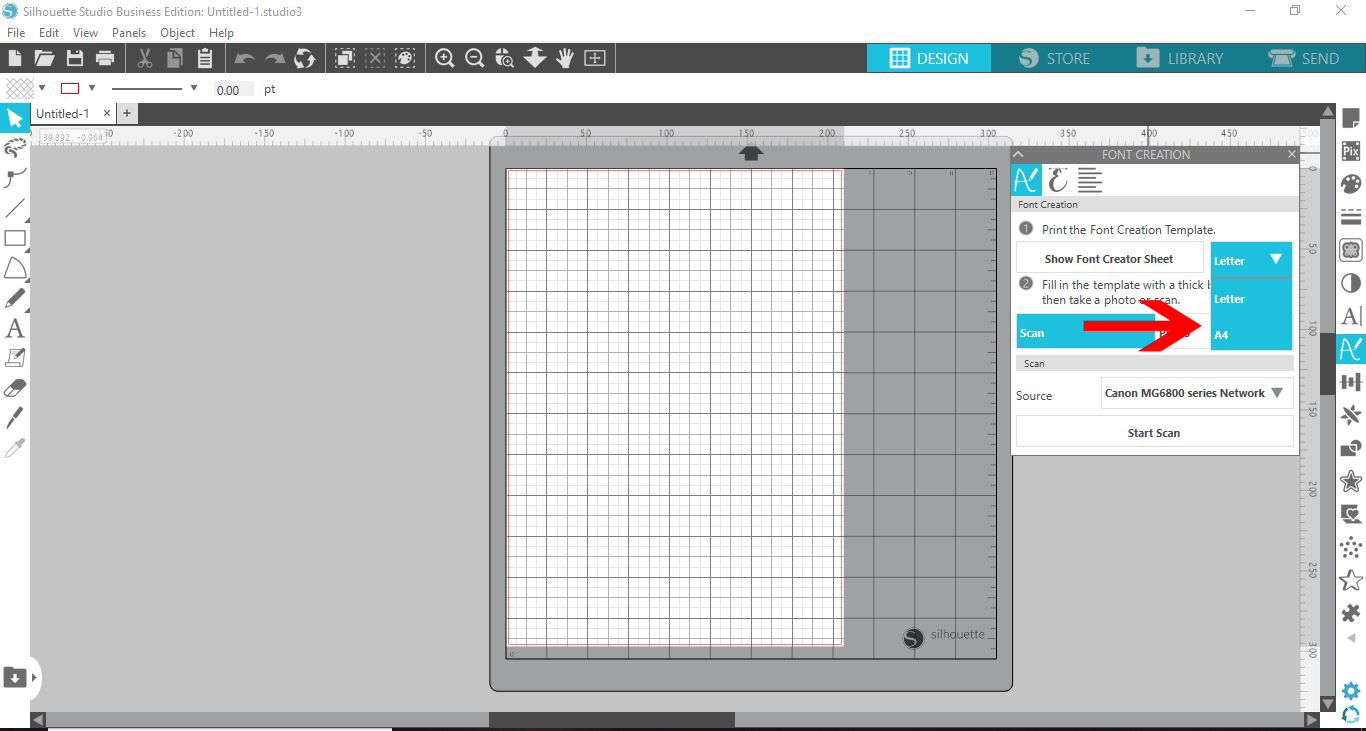
Click on the Show Font Creator Sheet icon. The sheet image will appear on your screen.
Now we are going to print the page. At the top left of the screen, click on the Printer icon.
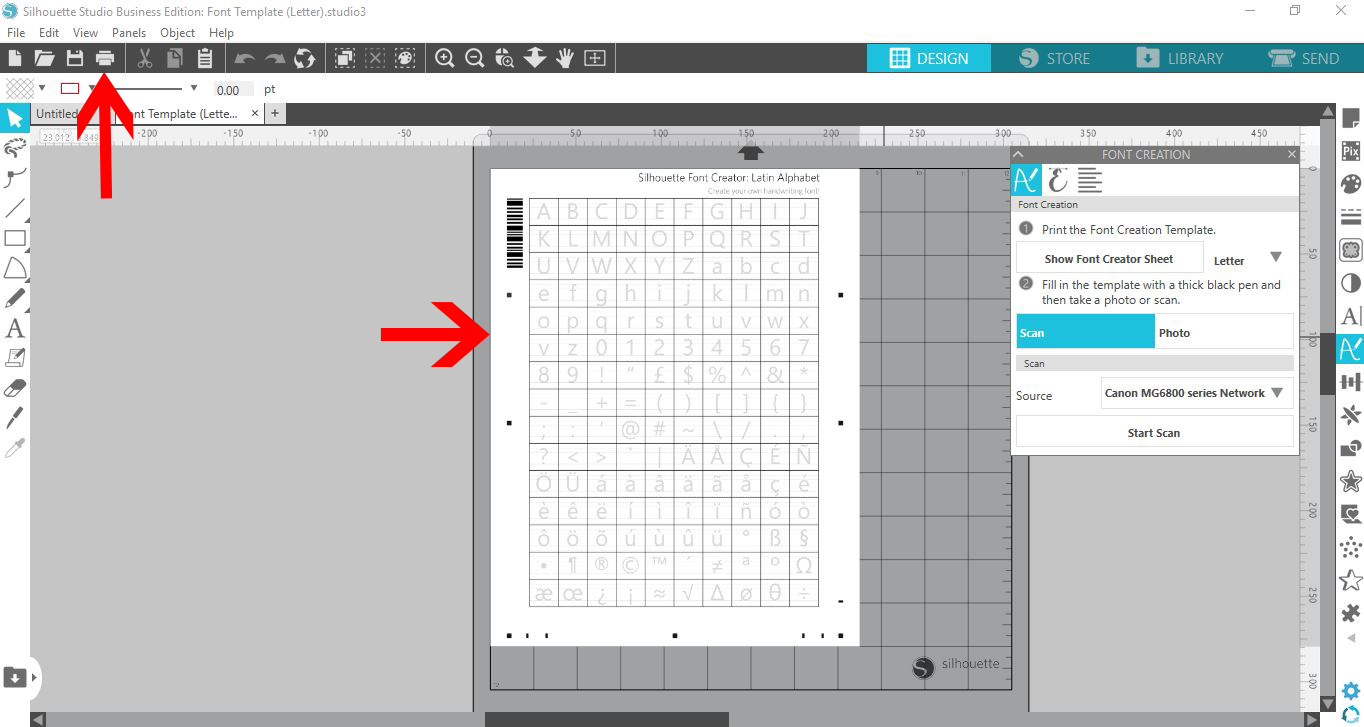
A new window with the Print Preview will appear. Once you click on Print, your printer settings will open. Select your printer and settings then click on Print.

Step 3 - Fill in the Font Creator Sheet
After you have printed the Font Creator Sheet, you can go ahead and fill it in with your own text or icons. You will see light guidelines to help you write or draw. Try to keep the writing within these guidelines. Use a black marker so that it shows up clearly when scanned in.
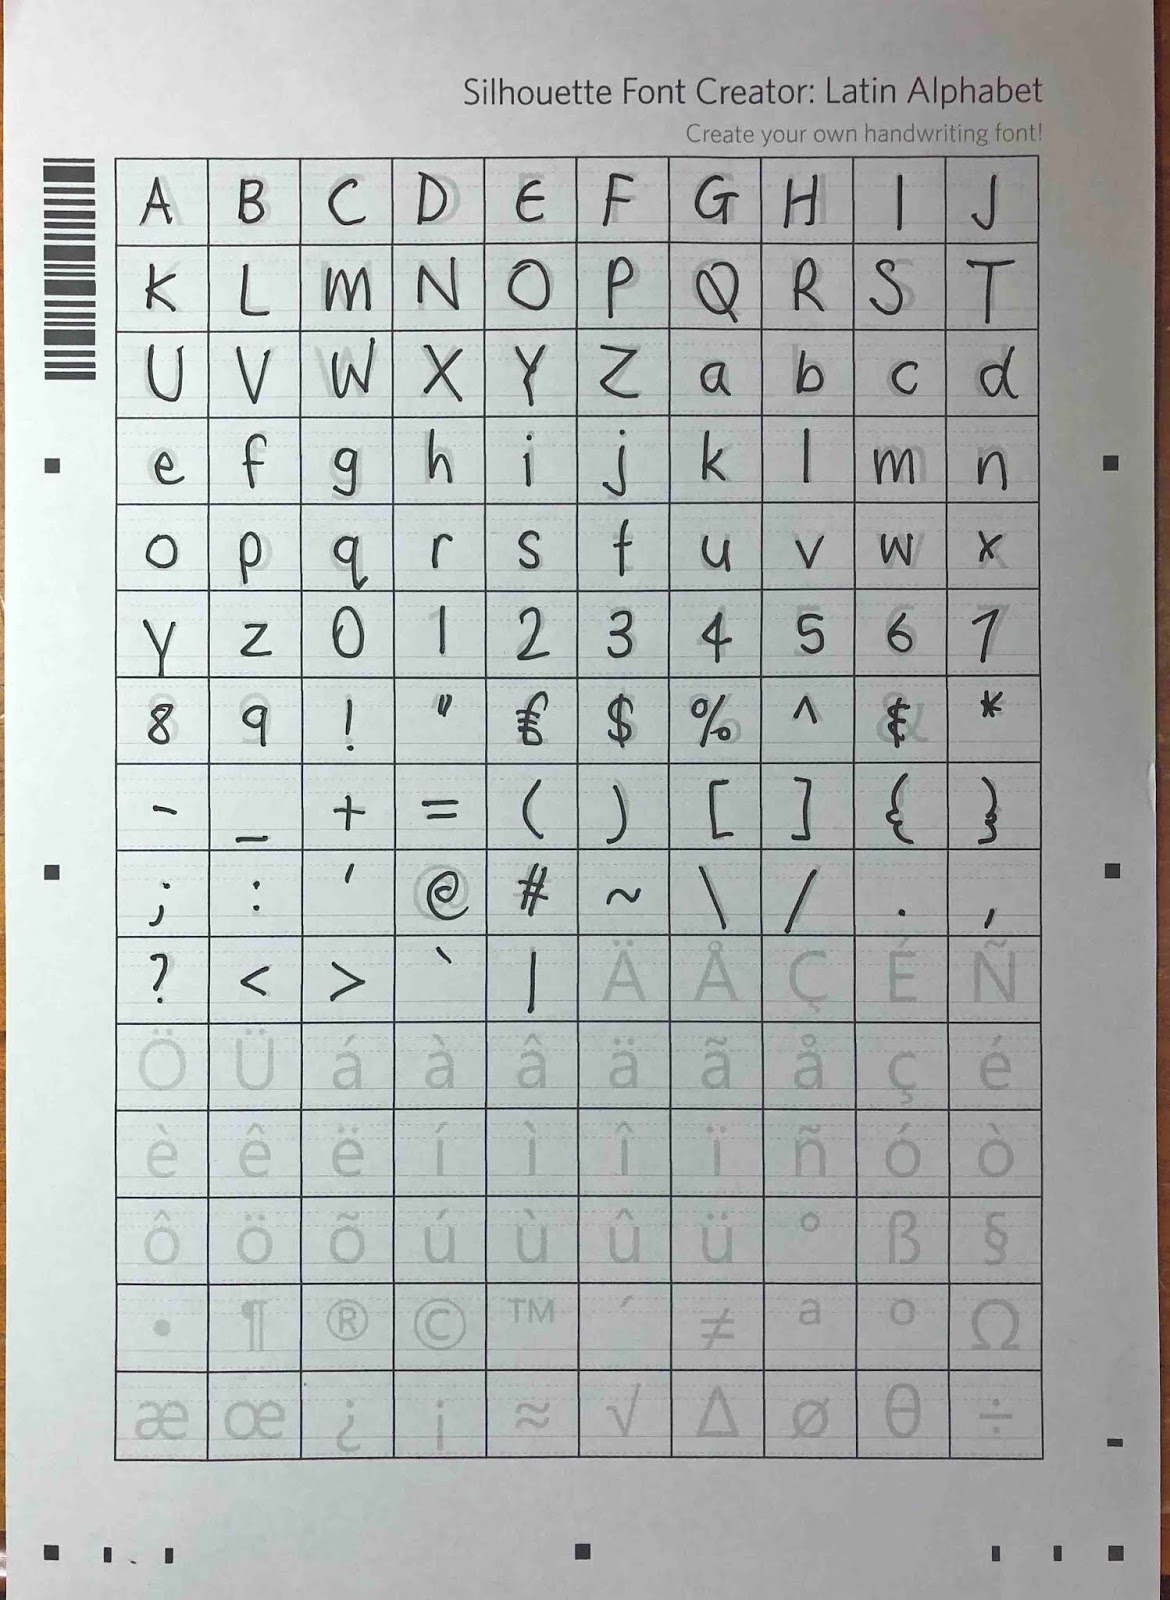
Step 4 - Scan in Font Creator Sheet
Back in Silhouette Studio, under the Font Creator panel, click on the Scan icon. If you are taking a photo you can use the Photo option. You will also be able to calibrate your camera with this option if needed.

We chose to use the Scan option. Choose the Source for scanning then click on Start Scan. A new window will appear. Click on the Preview icon. The sheet will scan and appear on your screen.
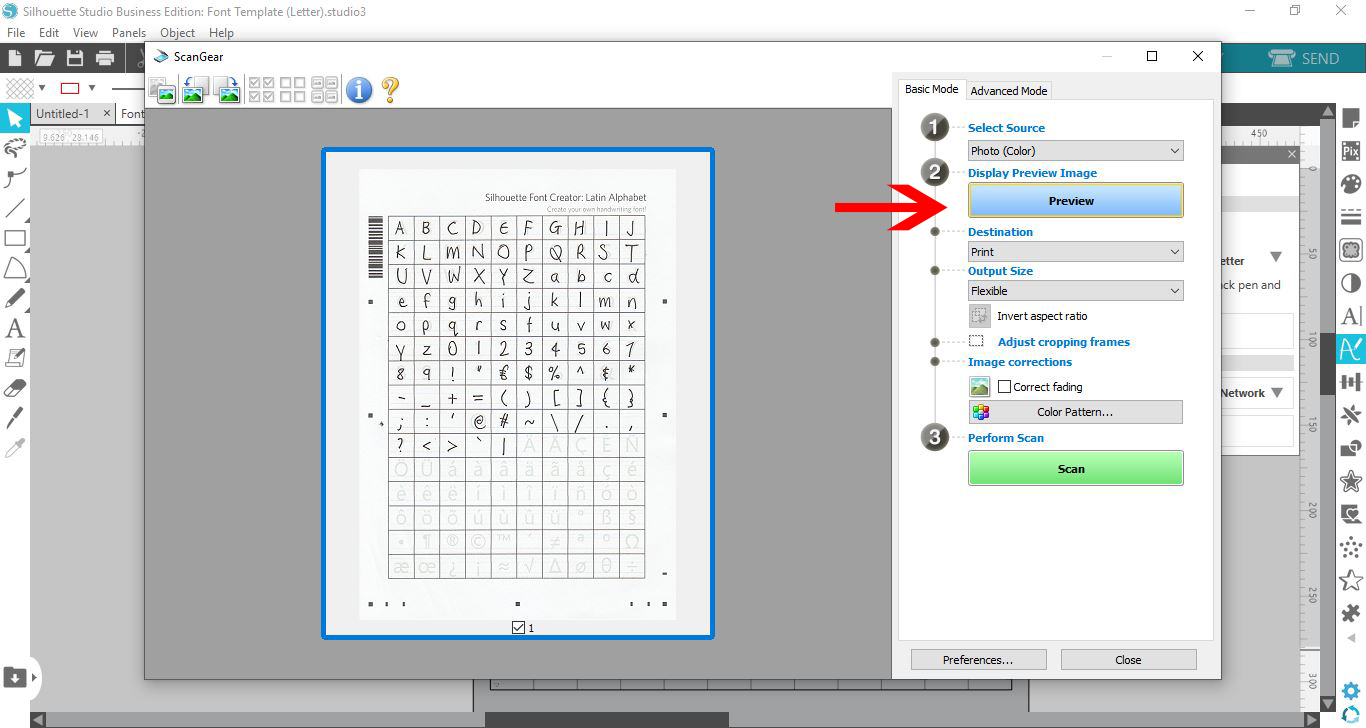
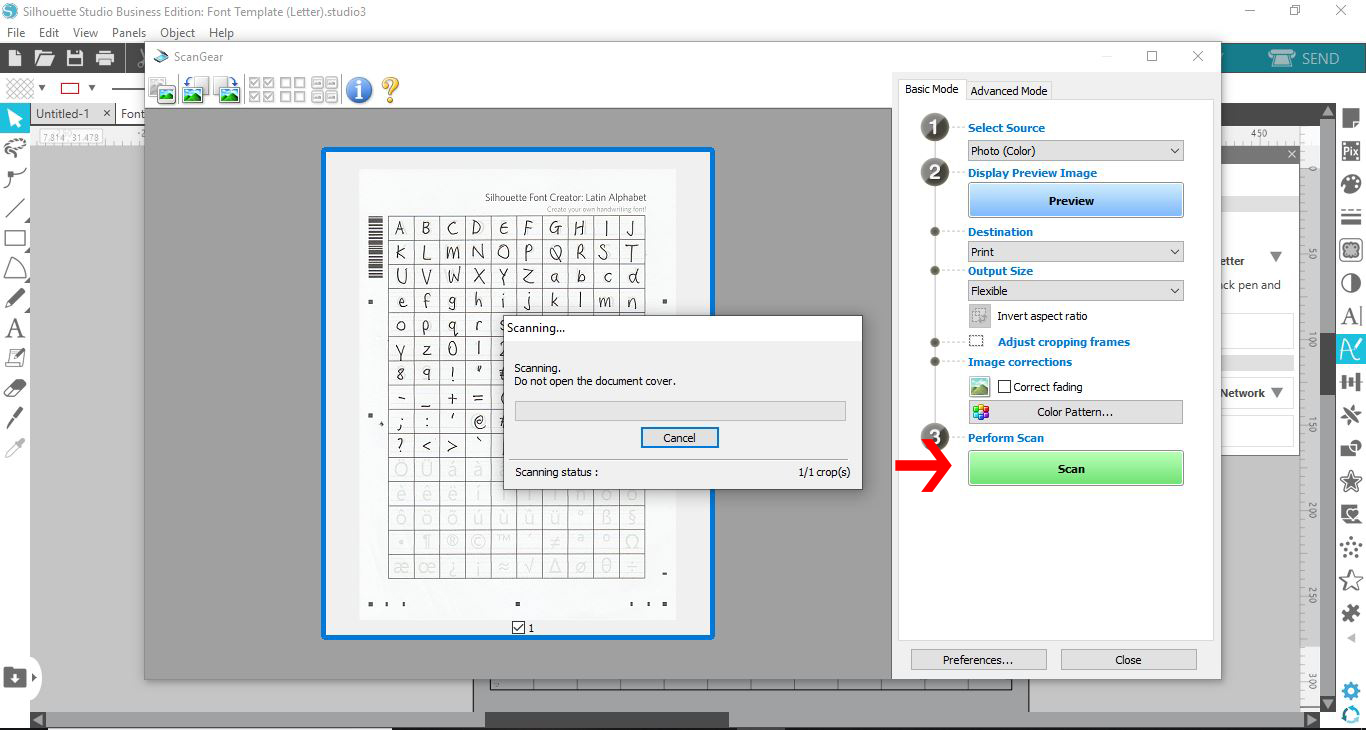
Once you see the scan preview, click on the Scan icon. This will scan it into the software.
Your sheet will upload onto your computer and the letters will appear in the Font Creation panel. You can get a larger view of each glyph by hovering your cursor over the glyph preview.
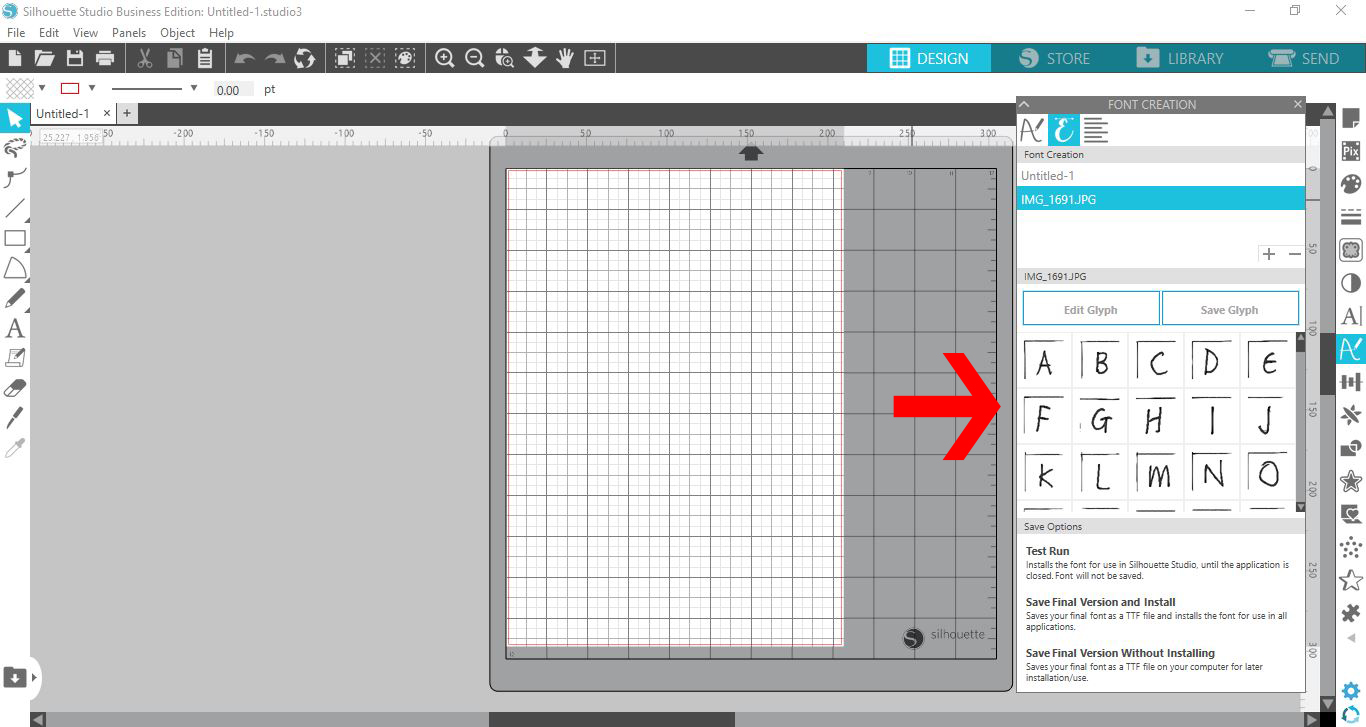
Click on the font name and give it a new name. Now you need to test out the font.
Step 5 - Test Font with Font Creation Panel
We moved our panel over to the right to make it easier to work with. At the bottom of the panel you will see the Test Run icon. This will allow you to use the font in the program. However, it will not save it when you close the program down.
We will show you how to save the font shortly. First, click on the Text Run option.
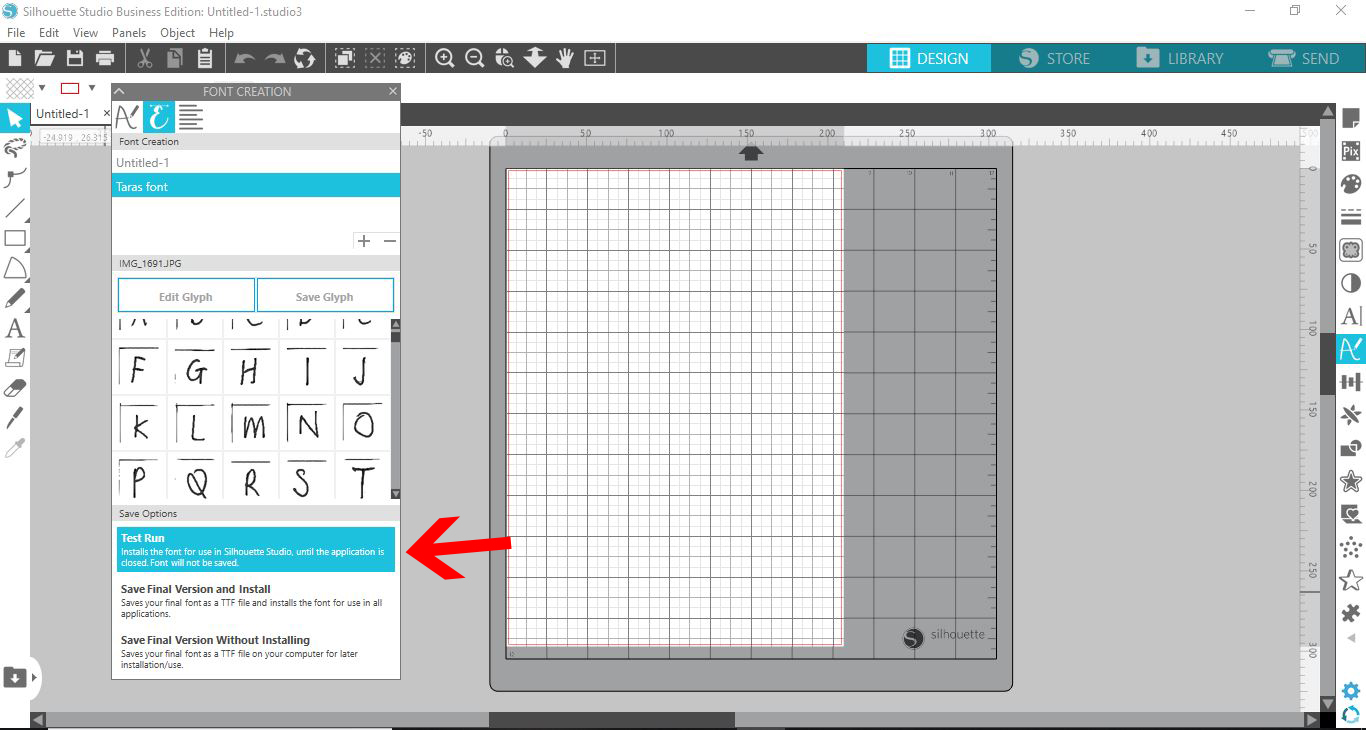
Once you click on Test Run, a popup box will appear and let you know that the font has been uploaded.
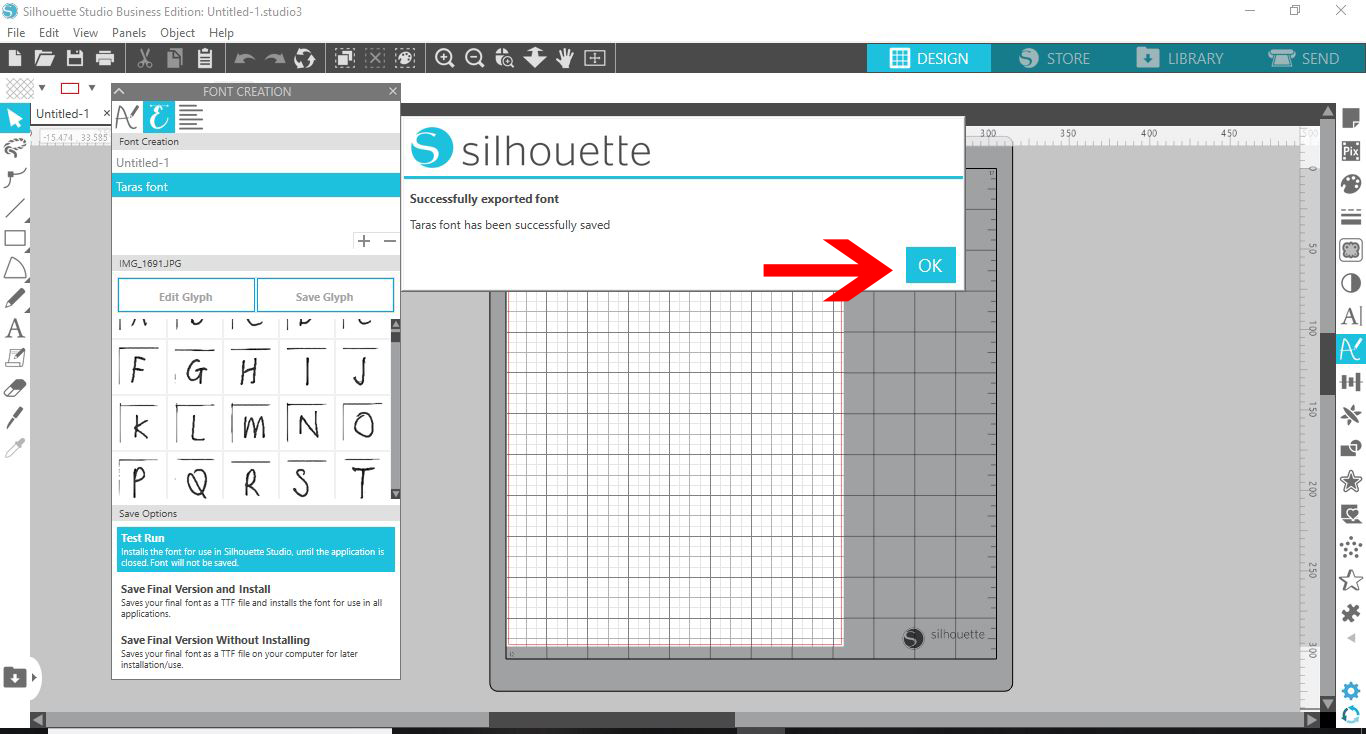
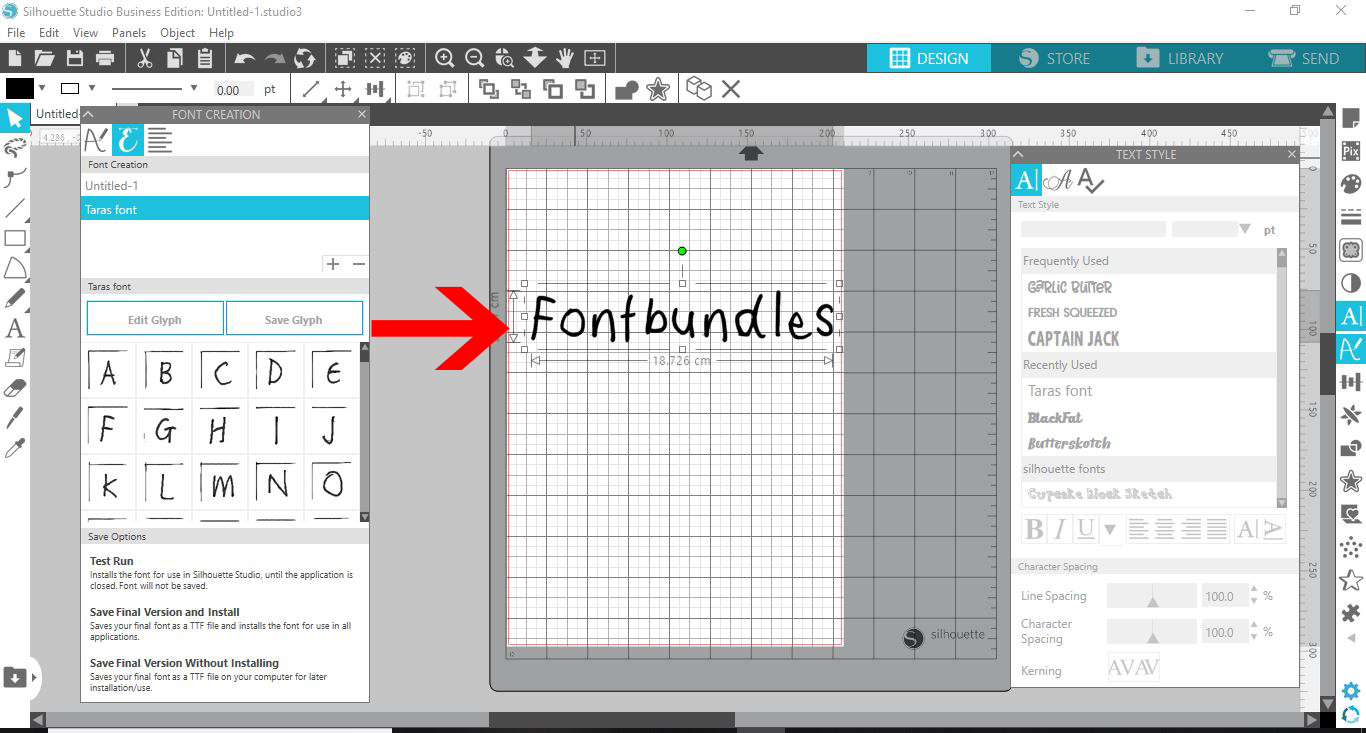
Test out the font using the Text Tool on the left hand side.

Now, go to the Text Style panel on the right hand side and locate your uploaded font. We have a great tutorial on using fonts in Silhouette Studio if needed. Click on the font to select it.
You can further digitally edit your glyphs to make them look exactly as you want. You can use the tools on the left side toolbar such as the eraser and point editing. Keep in mind that after editing you will need to do a Test Run again to save the changes.
All of the fonts that you create will still be available under the Font Creation panel. So you are able to go back and edit as needed.
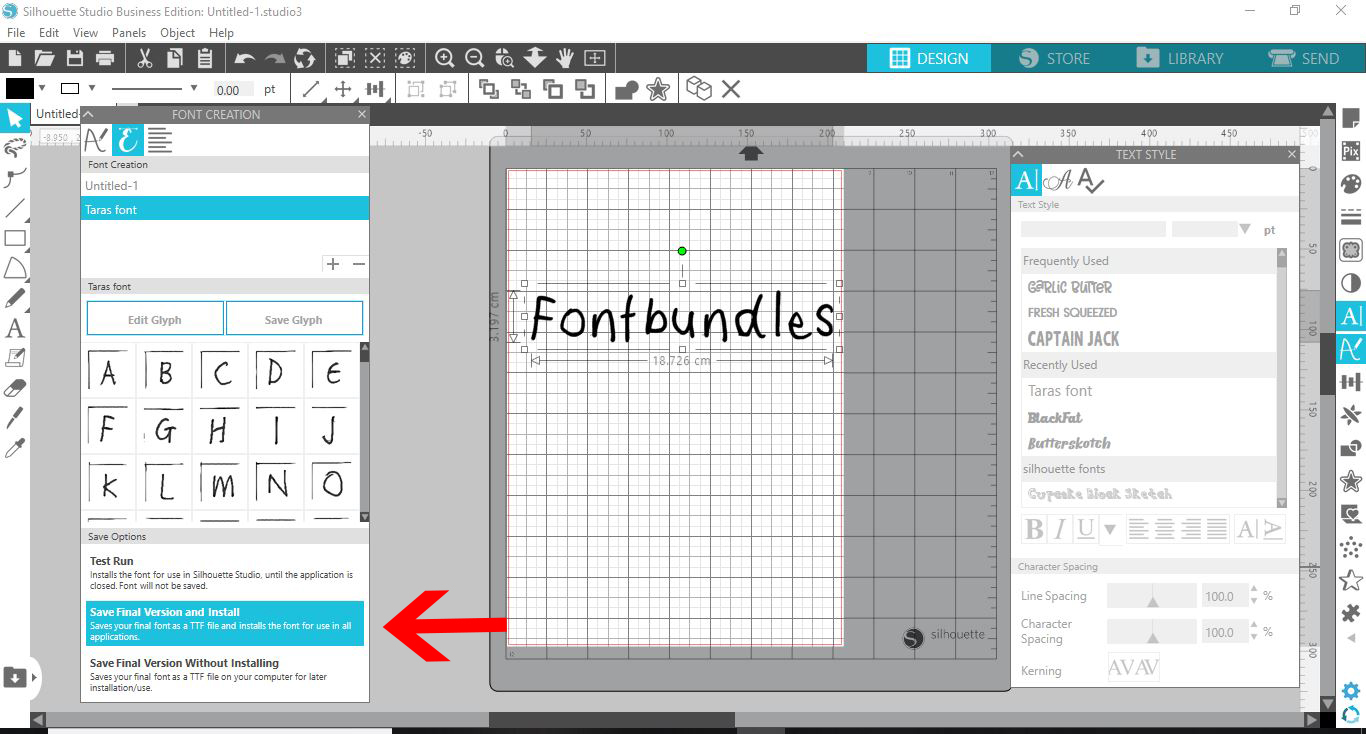
If you think your font is ready, click on the Save option under the Font Creation panel. This way, the new font will be saved on your computer as a .ttf file.
You can now use your customized font in other programs. The Font Creator allows you freedom to create your font with your specific style and design. We hope that this tutorial was helpful in showing you how to use the Font Creator in Silhouette Studio.