By Design Bundles
Separating Images From a Multiple Image in Cricut Design Space 3
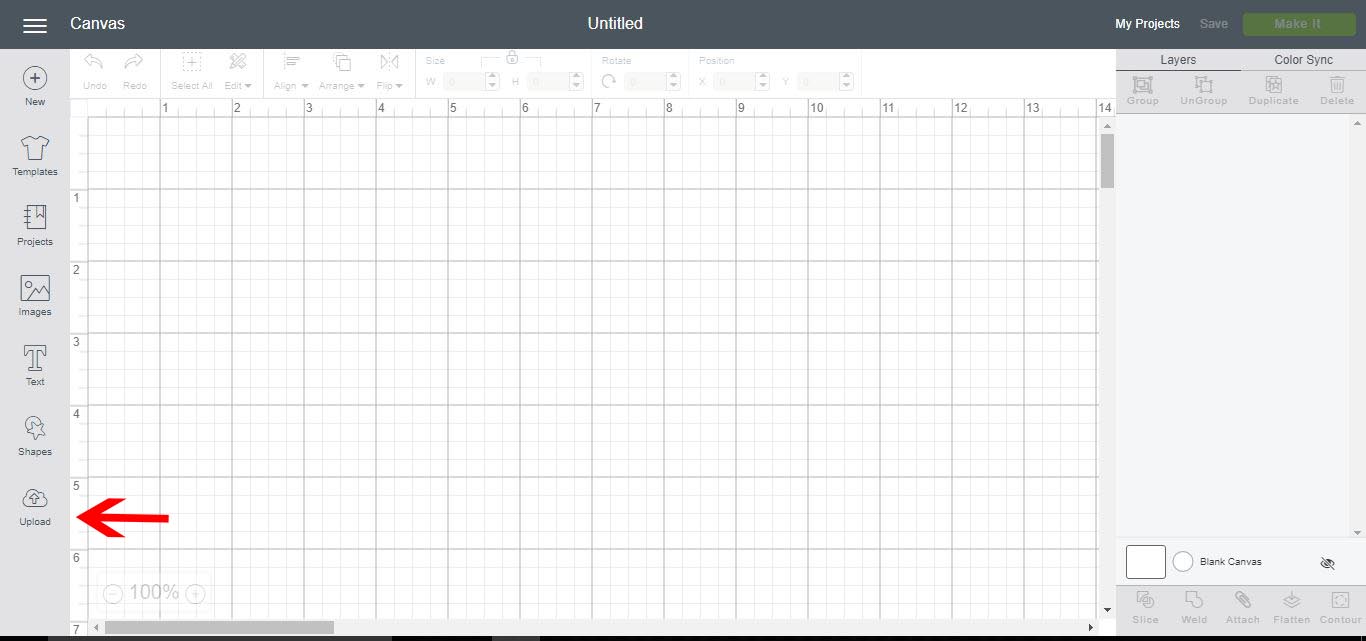
1- Open Cricut Design Space. Click on the upload image icon on the left toolbar.
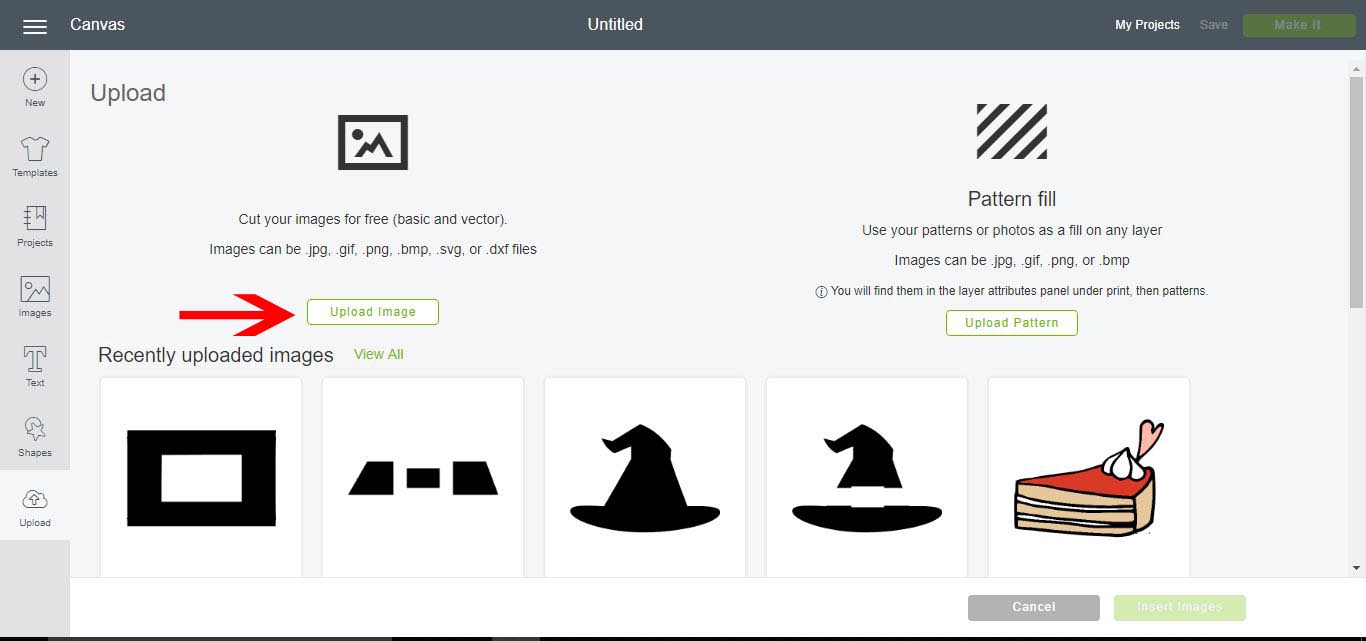
2- In the next screen click on upload image.
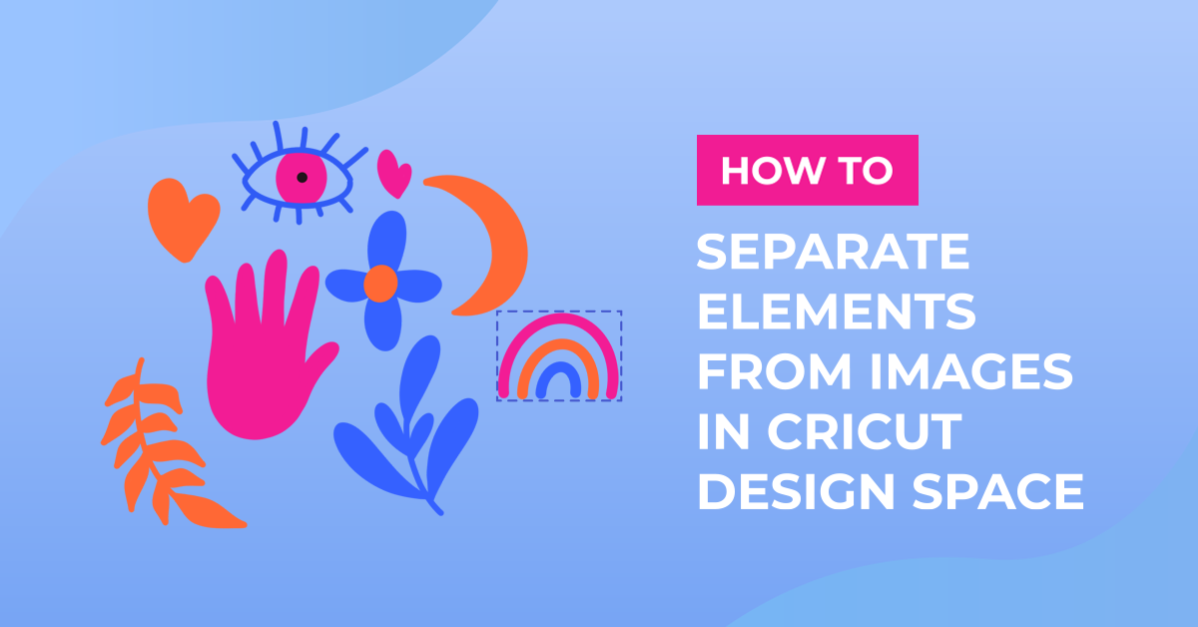
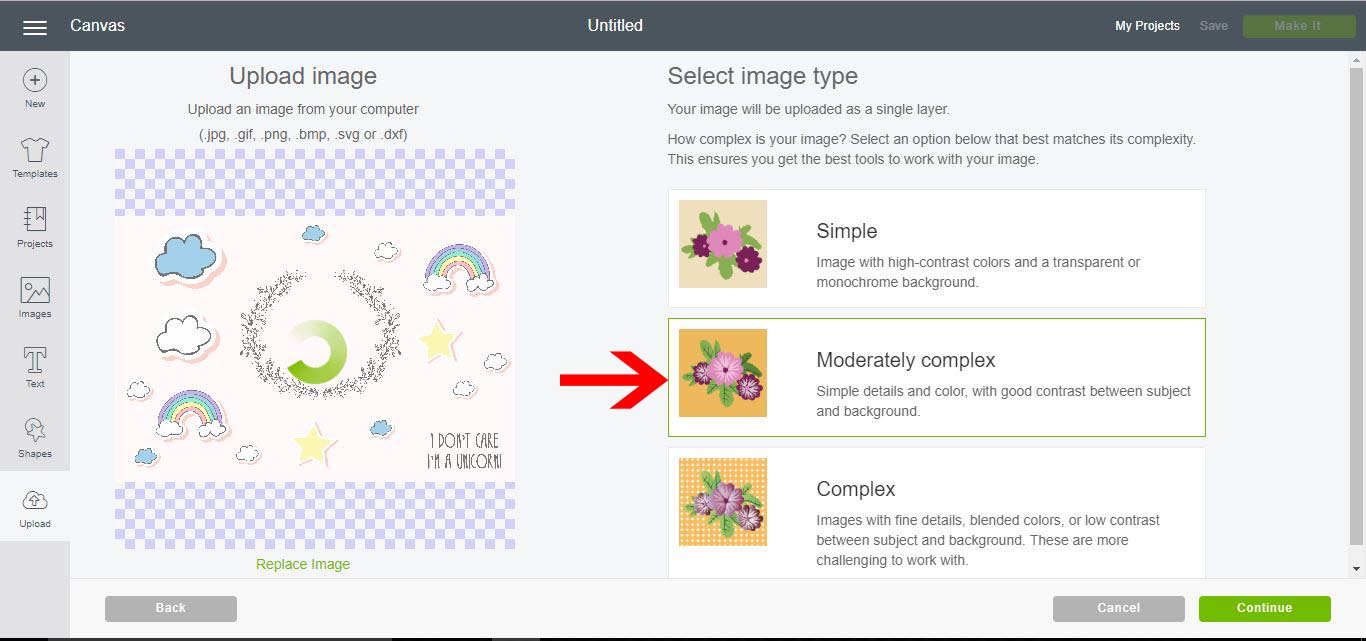
3- Your uploaded image will appear onscreen. As you can see there are multiple images on this design but we only need a couple of the images so we need to separate them from the design. To do this we need to select the moderately complex option onscreen and click continue.
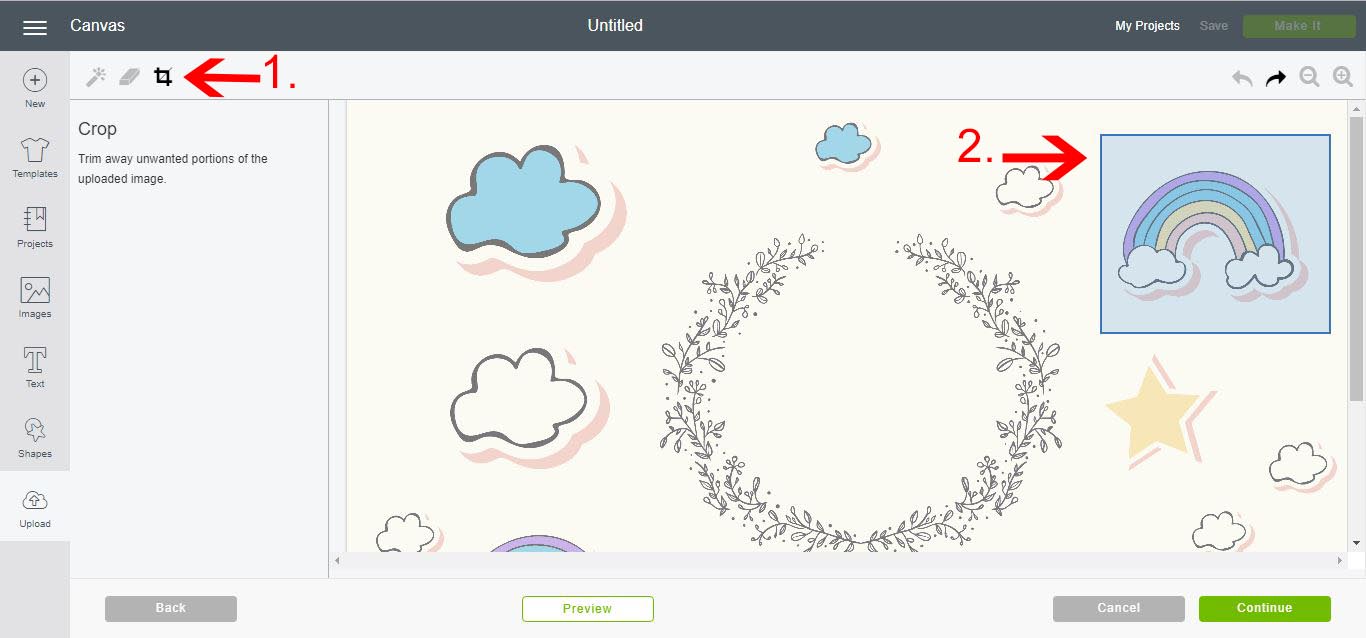
4- Select the crop tool (1) and then crop the image you want out of the larger image(2).
5- Next select the magic want tool. Click on the background and other areas you do not want to keep around the image you want to use. Once you are happy with the image click on preview to confirm you have removed everything you do not want. Then click continue.
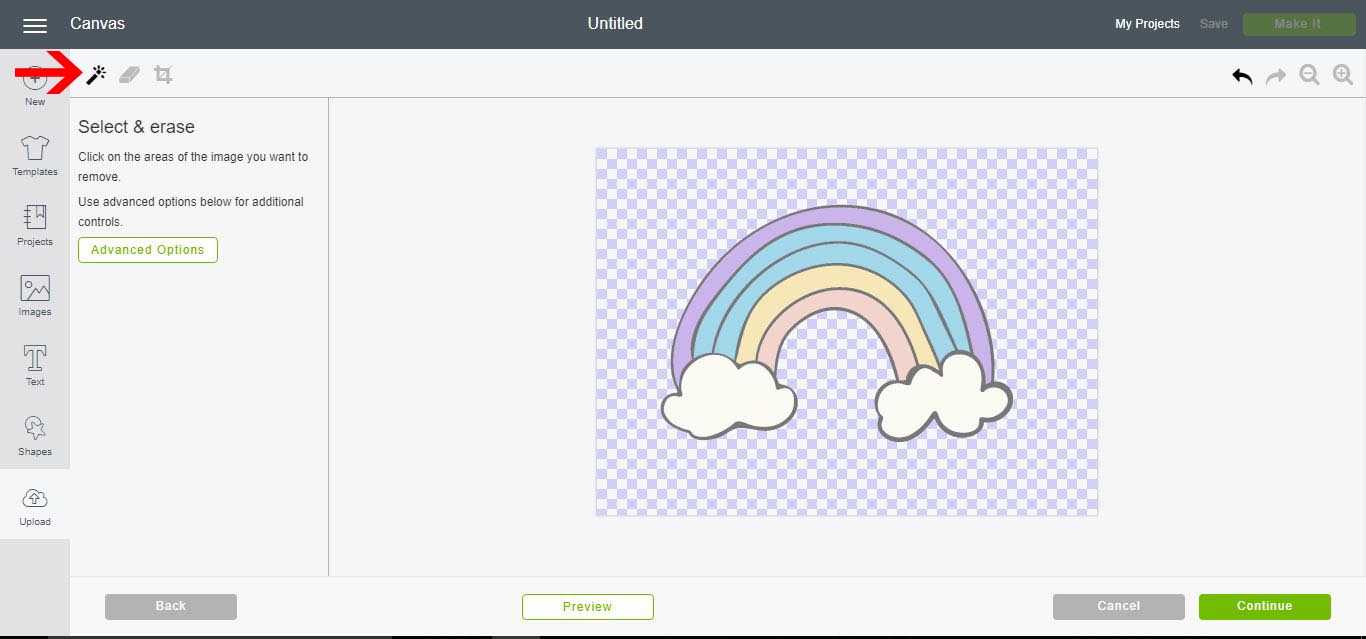
6-With this image we need to print and cut so ensure you click the print and cut option, not the simple cut option. Rename the image and save.
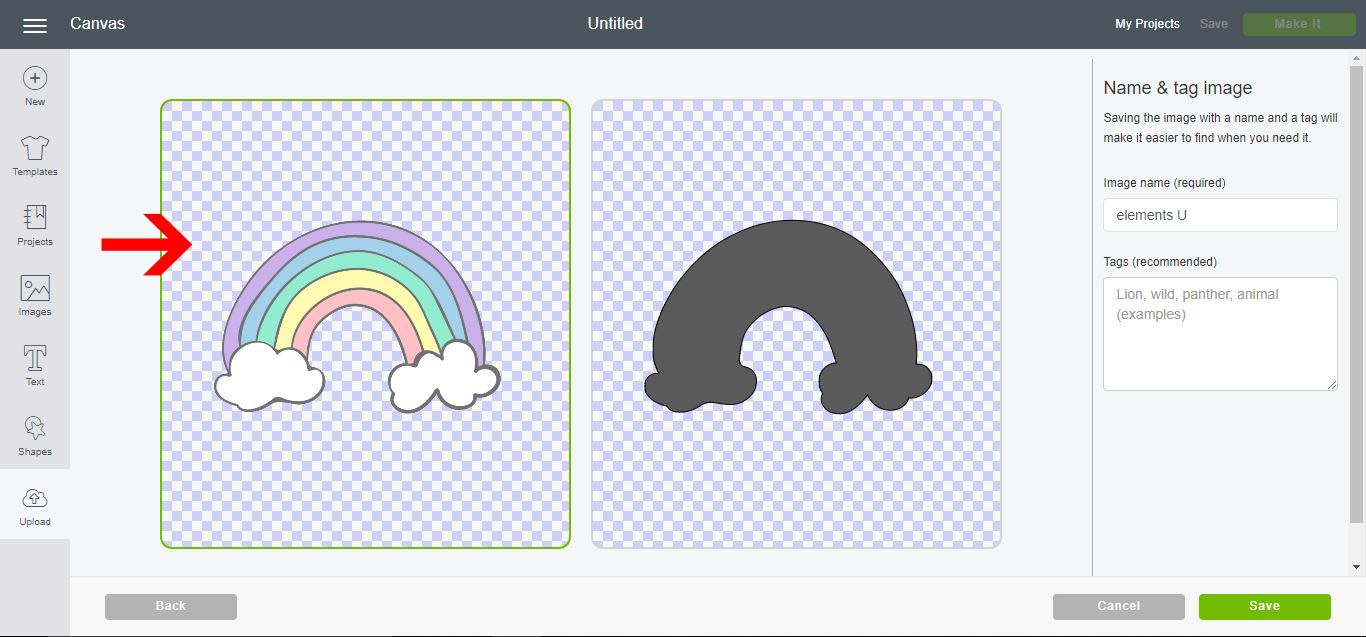
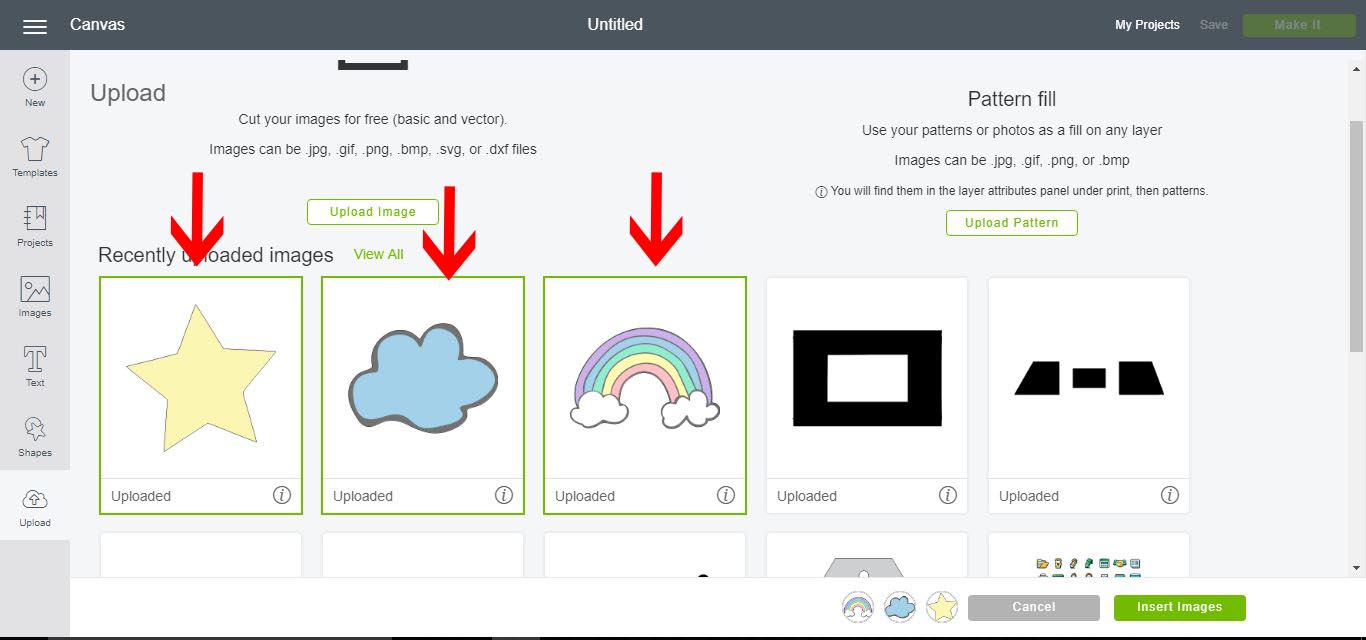
7- If there are other images from the multiple image that you want, repeat steps 2-6. Save each one. Then you can select them all and inset onto your design space.
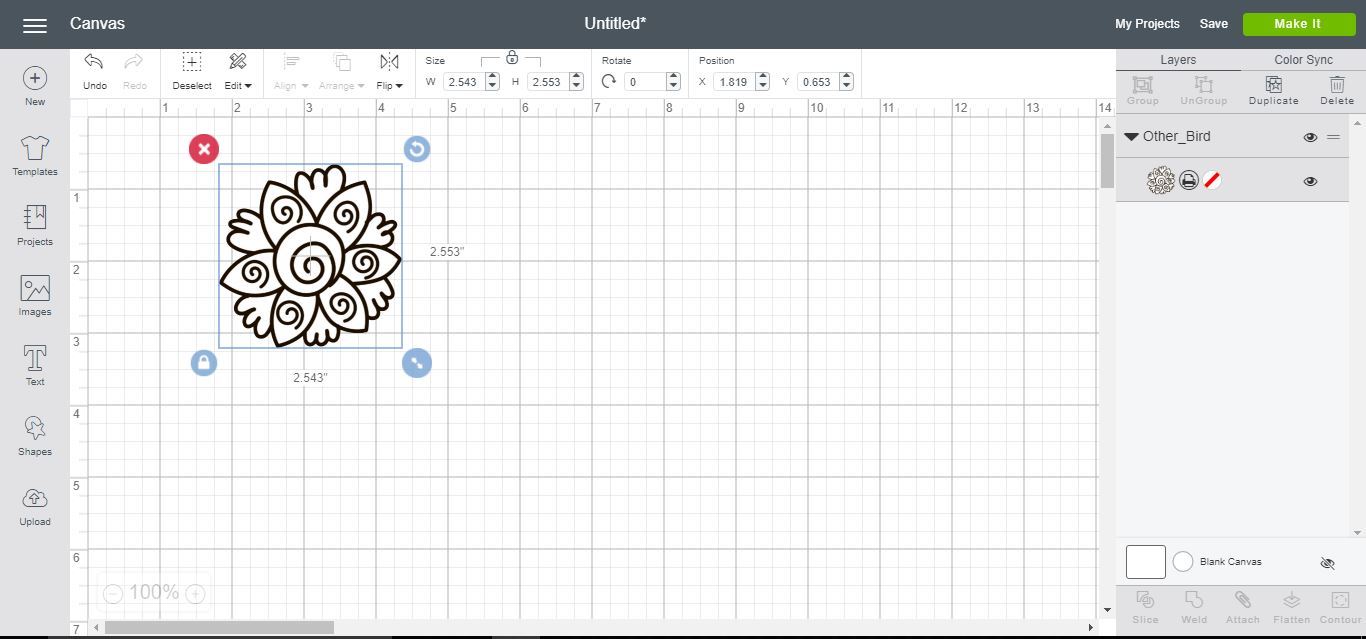
8- Your images are now individual on the screen. Each individual image has its own cut lines so you can cut them separate rather than a whole design like we had to start with.
Resize to your desire and then you can click on make it.
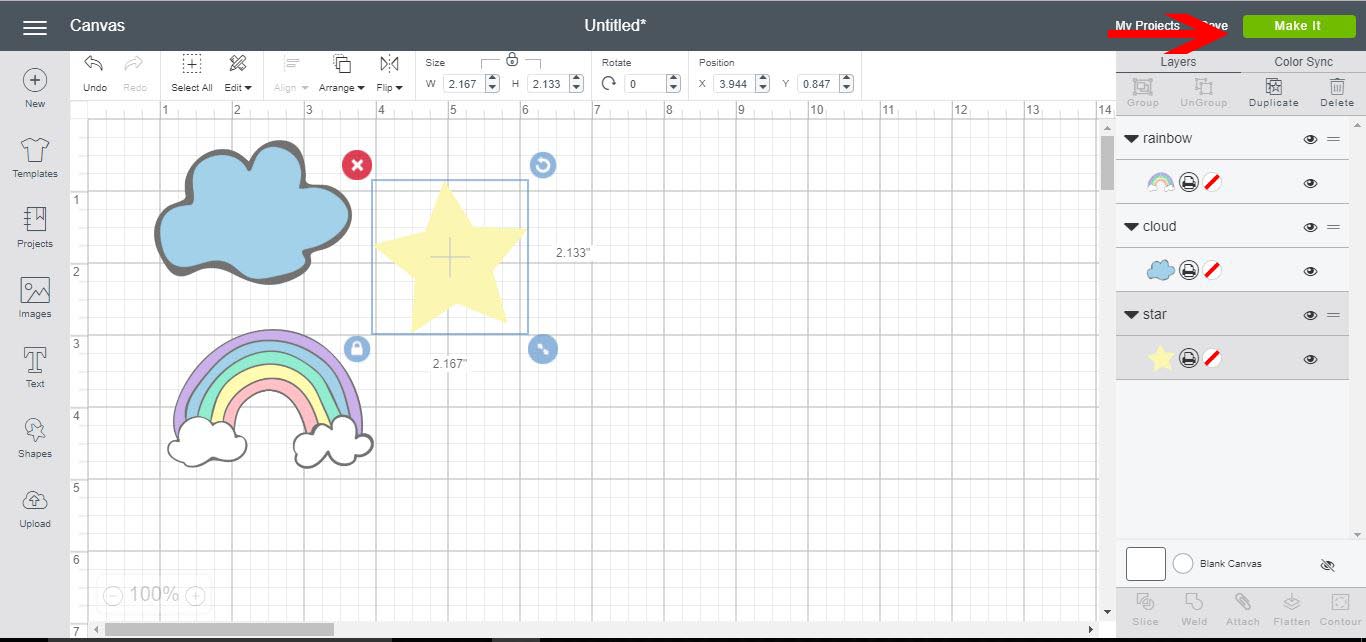
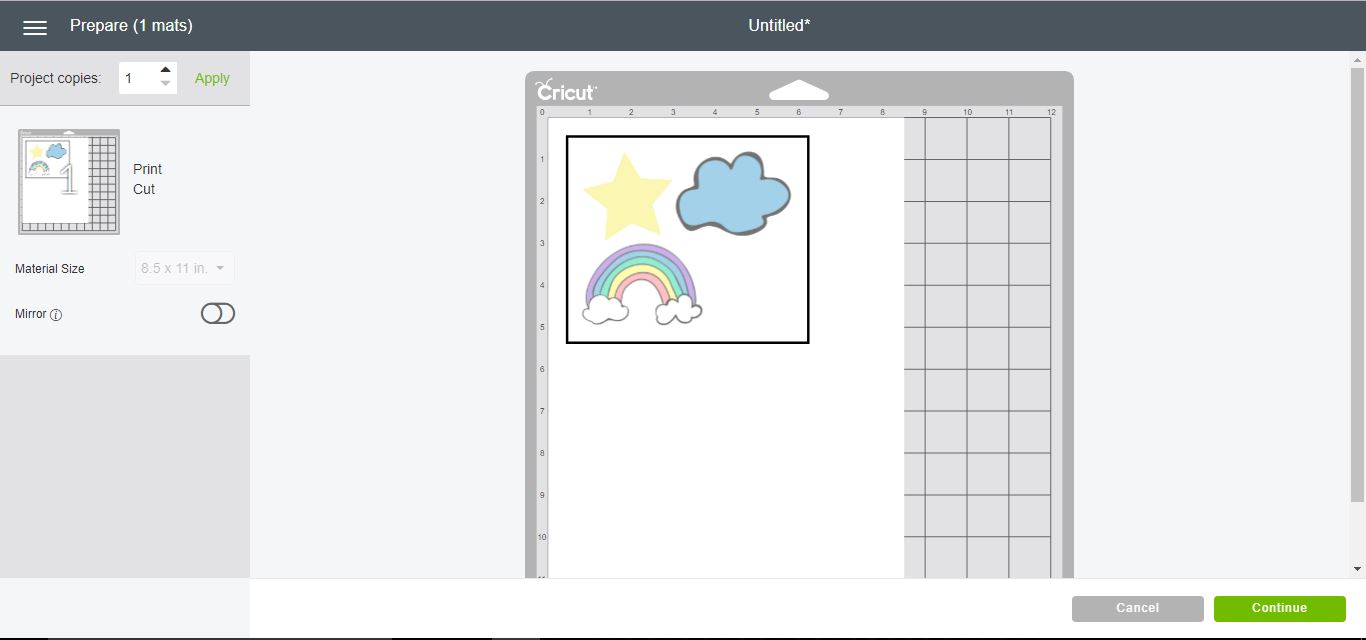
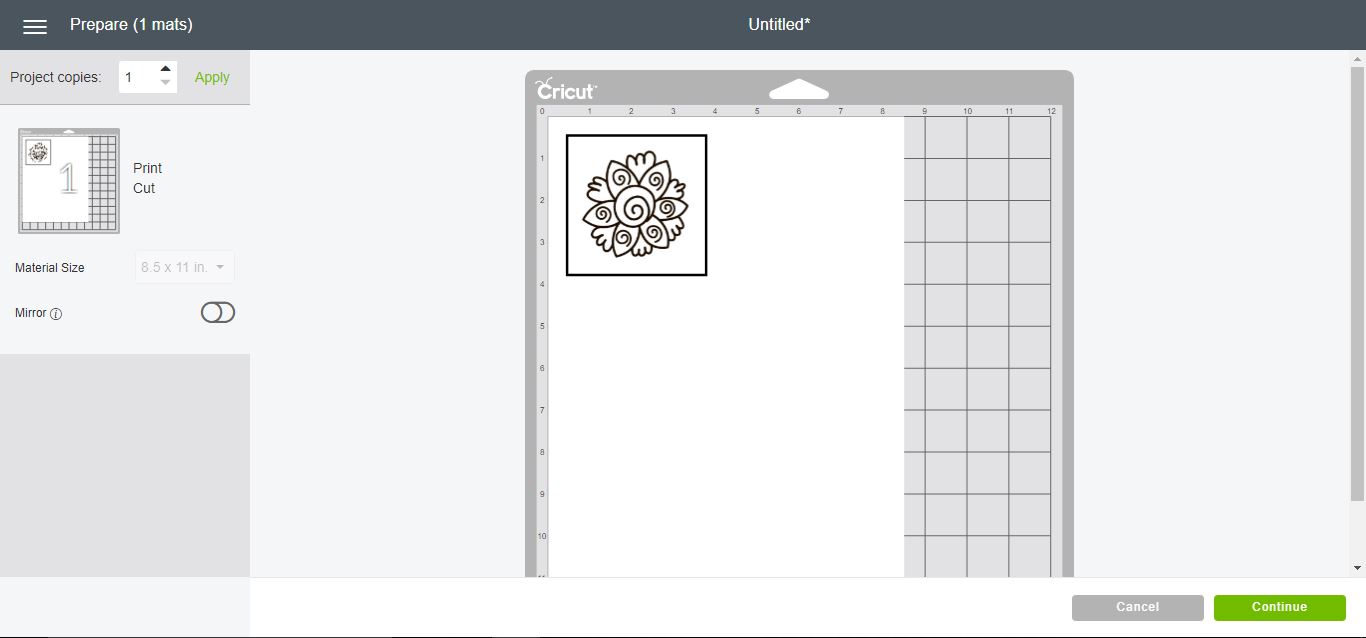
9- The image is now ready to print and then cut.
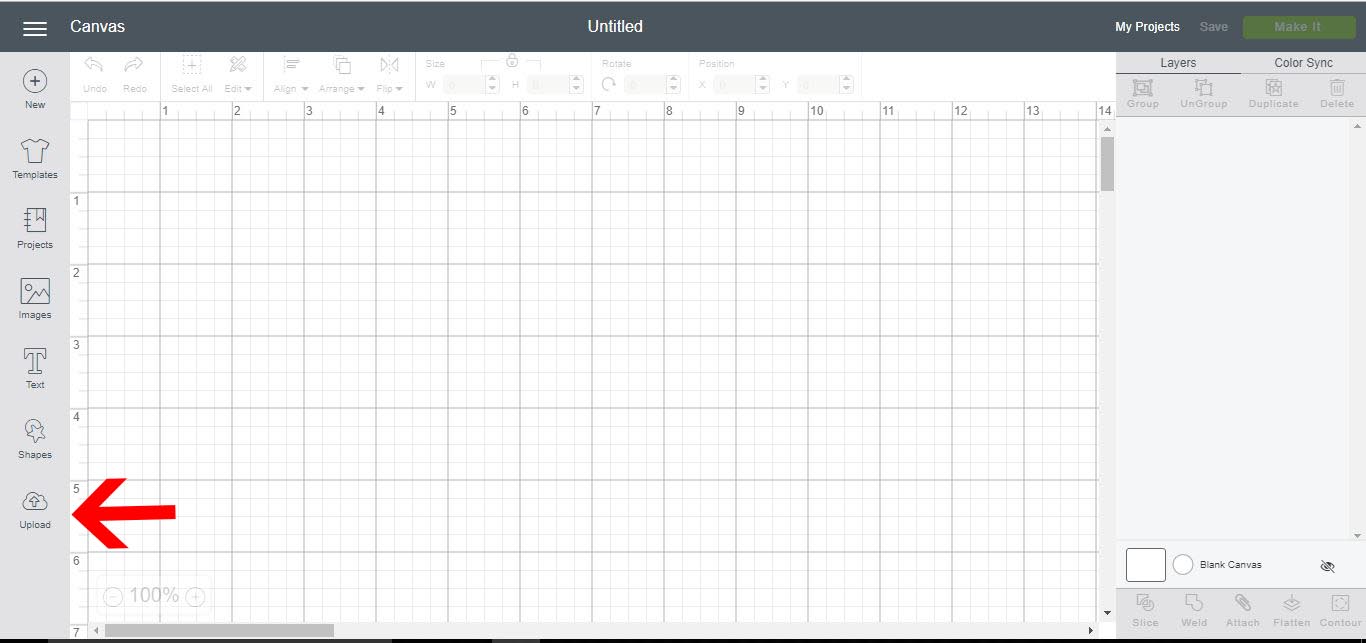
10- You can also insert black and white images like coloring in pages and separate parts of the page from the rest to use as an individual design. Click on upload image.
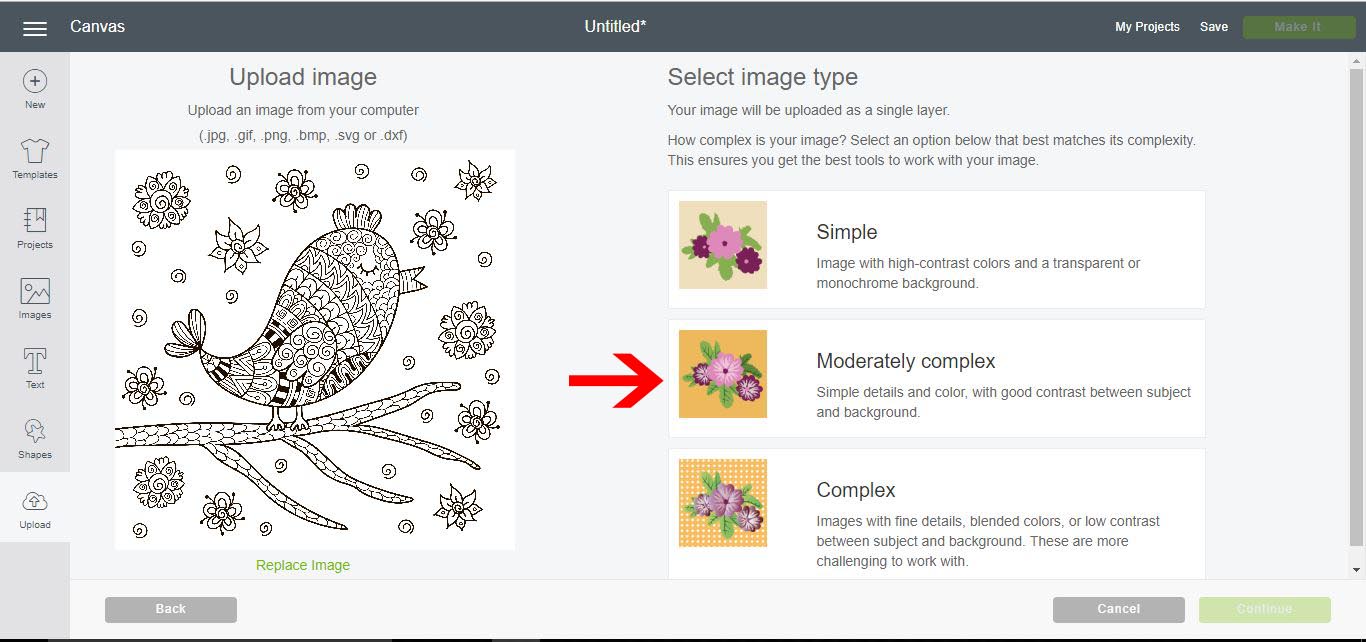
11- With your coloring page uploaded you can select mod complex option.
The image I am using is fromColoring Pages Big Collectionby Gulnara Sabirova.
12- Select the crop tool and crop out the part of the image you would like.

13-Select the magic wand tool and remove any other background you would like.
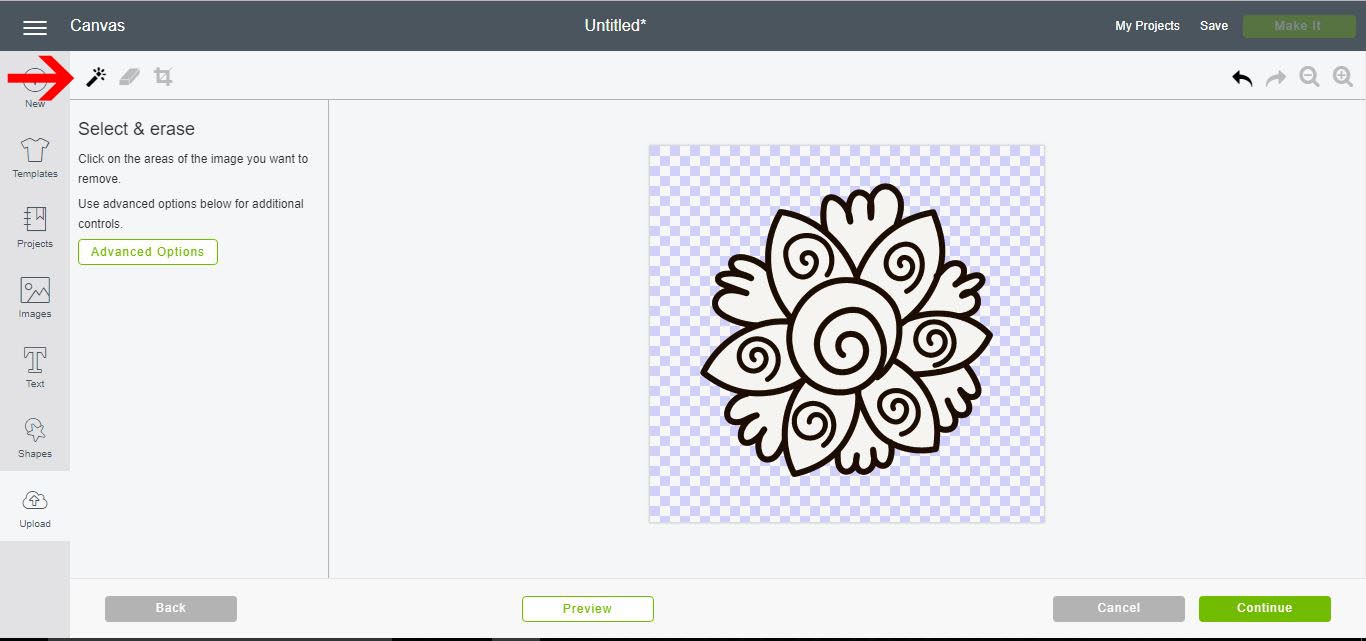
14- when saving you need to remember again to save as a print and cut not just a cut file. rename and save.
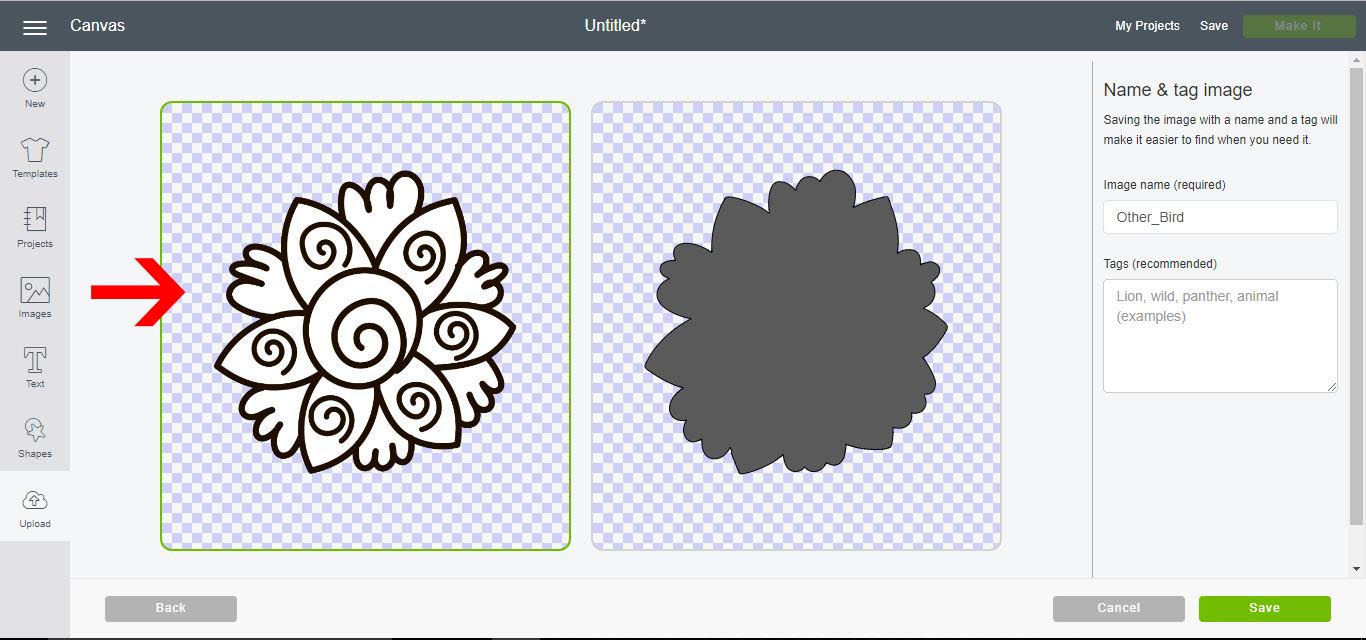
15- You can now insert the image into the design space and the image now has its own cut lines. When you are happy with the design you can click make it to print and cut.
16- In the print/cut screen you can now print and then cut your design.
Being able to separate one or more designs from a single image is a very helpful technique to know. You may want only a specific part of a design for your project. We hope this tutorial was helpful in your Cricut journey.