By Design Bundles
Create a Snow effect in Photoshop
Today we will learn how to add a realistic falling snow effect to our images with Photoshop. This nifty trick is a great way to add some magic to your winter scenes. Creating a snow effect in Photoshop only requires a few simple steps with a brush and filters. So let us get started and have some fun.
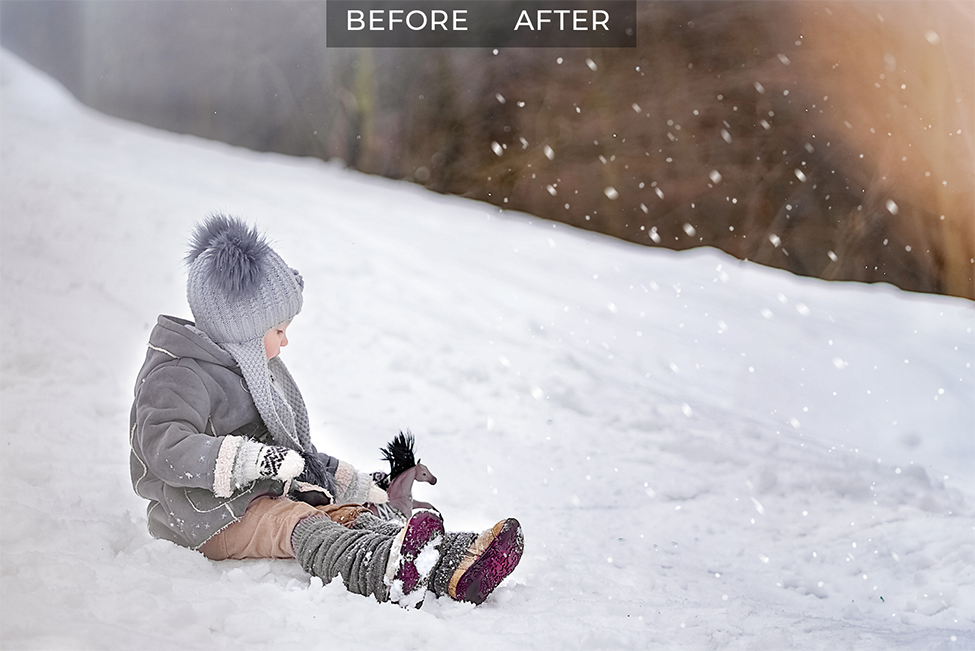
For this tutorial, we will use this child in the snow photo by Oxana Zueva. Feel free to browse our photo selection if you would like to use a different photo.
Step 1 - Create a New Snow Brush
We will be creating a snow brush to use in our Snow Effect. First, open your image in Photoshop and create a new layer. You do this by clicking on the small icon at the bottom of the Layers panel. Change the layer name to Snow 1.
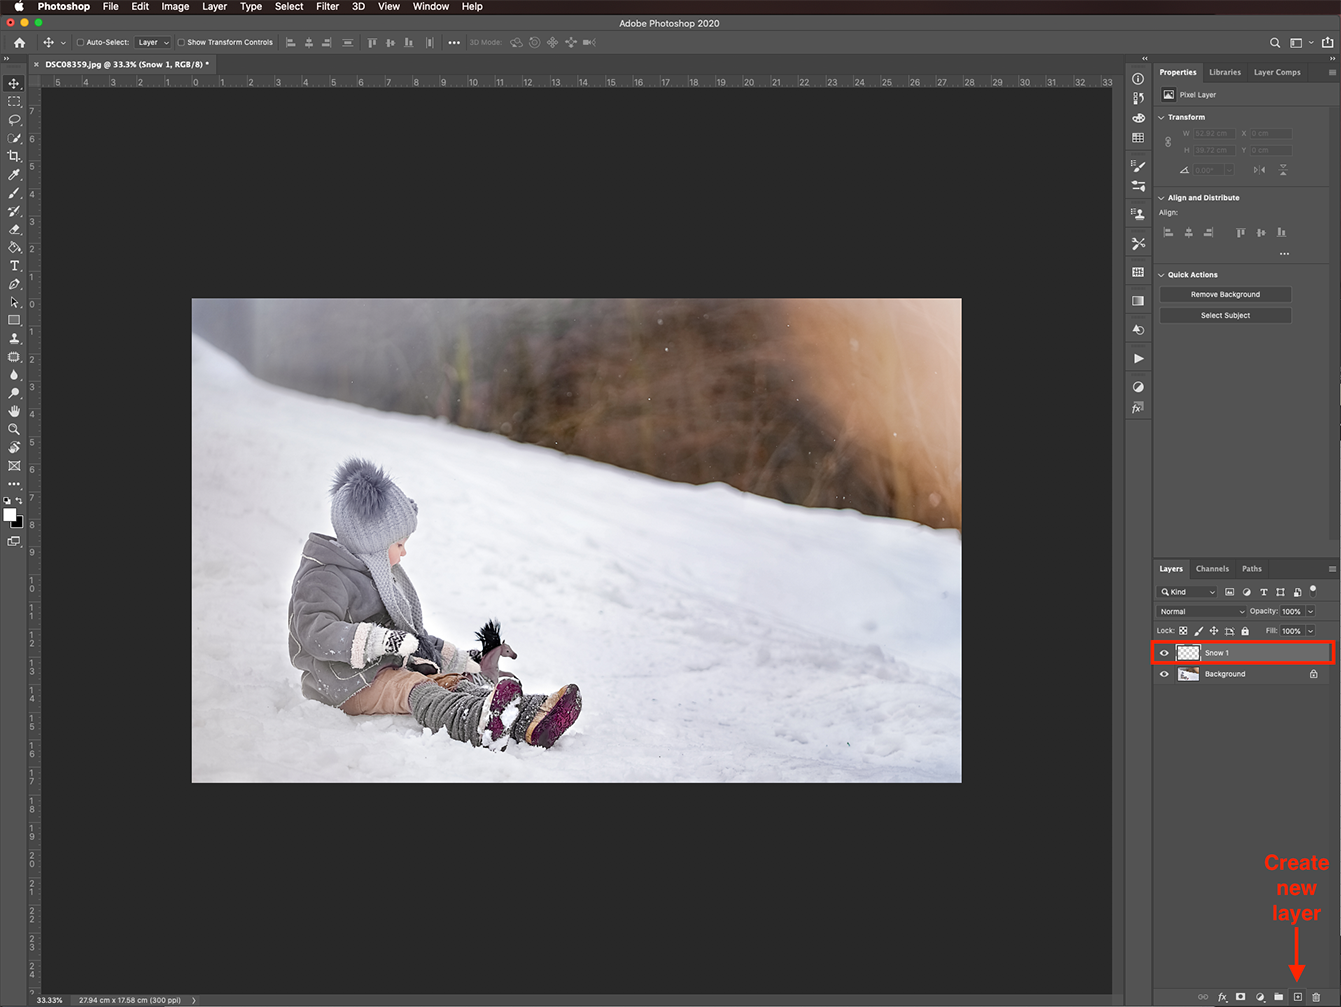
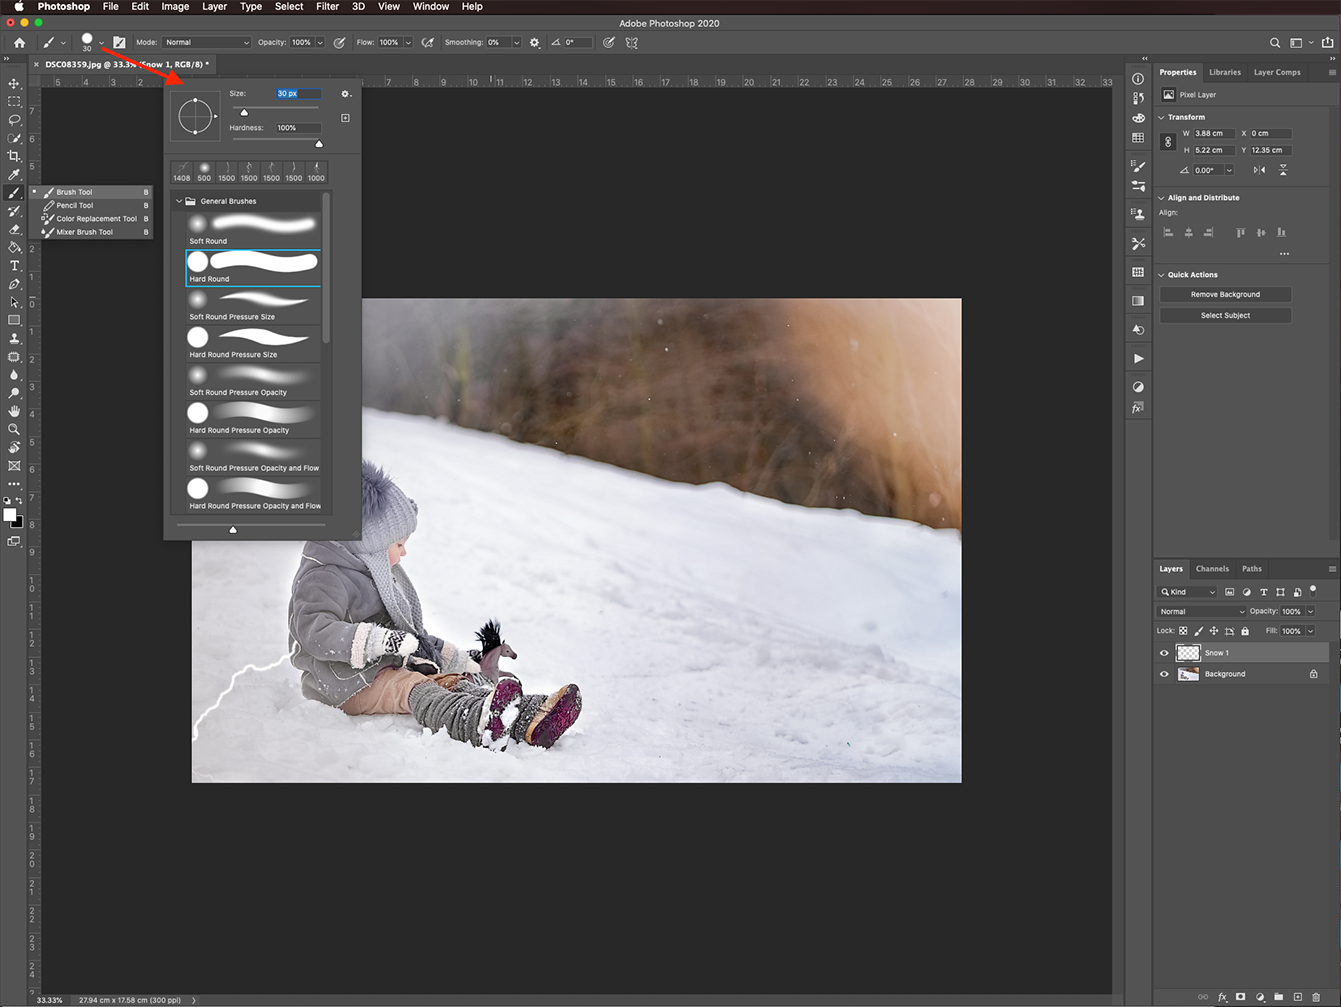
Now, click on the Brush tool on your toolbar. In the Brush Preset Picker on the top menu, select a medium brush with 100% Hardness.
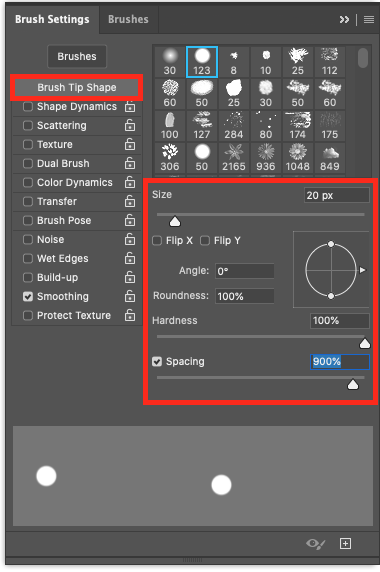
Go to the Brush Settings panel. Then in the Brush Tip Shape tab, set Size to around 13 - 28 px and the Spacing to 900%.
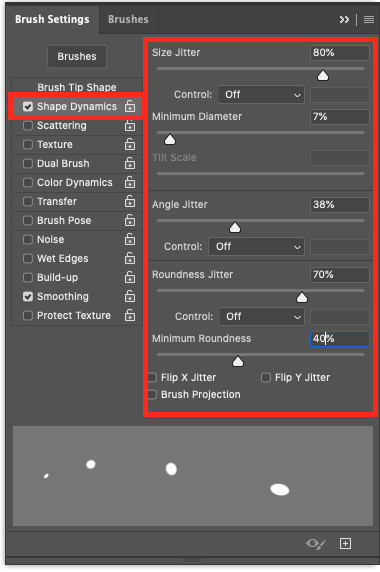
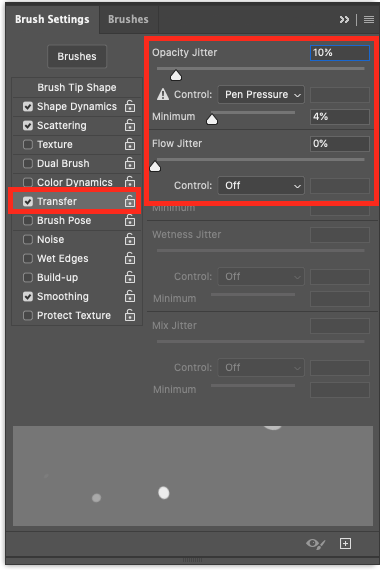
In the Shape Dynamics tab, use the following values:
- Size Jitter: 80%
- Min Diameter: 7%
- Angle Jitter: 38%
- Roundness Jitter: 70%
- Min Roundness: 40%
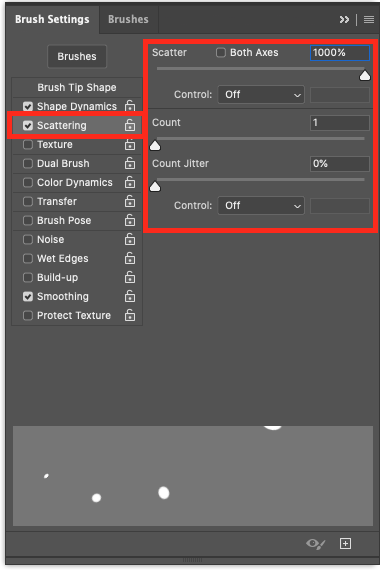
Tick the Scattering box and change the scattering value to 1000.
Finally, in the Transfer tab, change the Opacity Jitter value to 10%.
Step 2 - Add Snow Using the New Brush
We can now use the snow brush that we created. Make sure that white is set as the Foreground color. Be sure to check that the Snow 1 layer thumbnail is also selected. Start randomly painting around the image with the brush to create some falling snow.
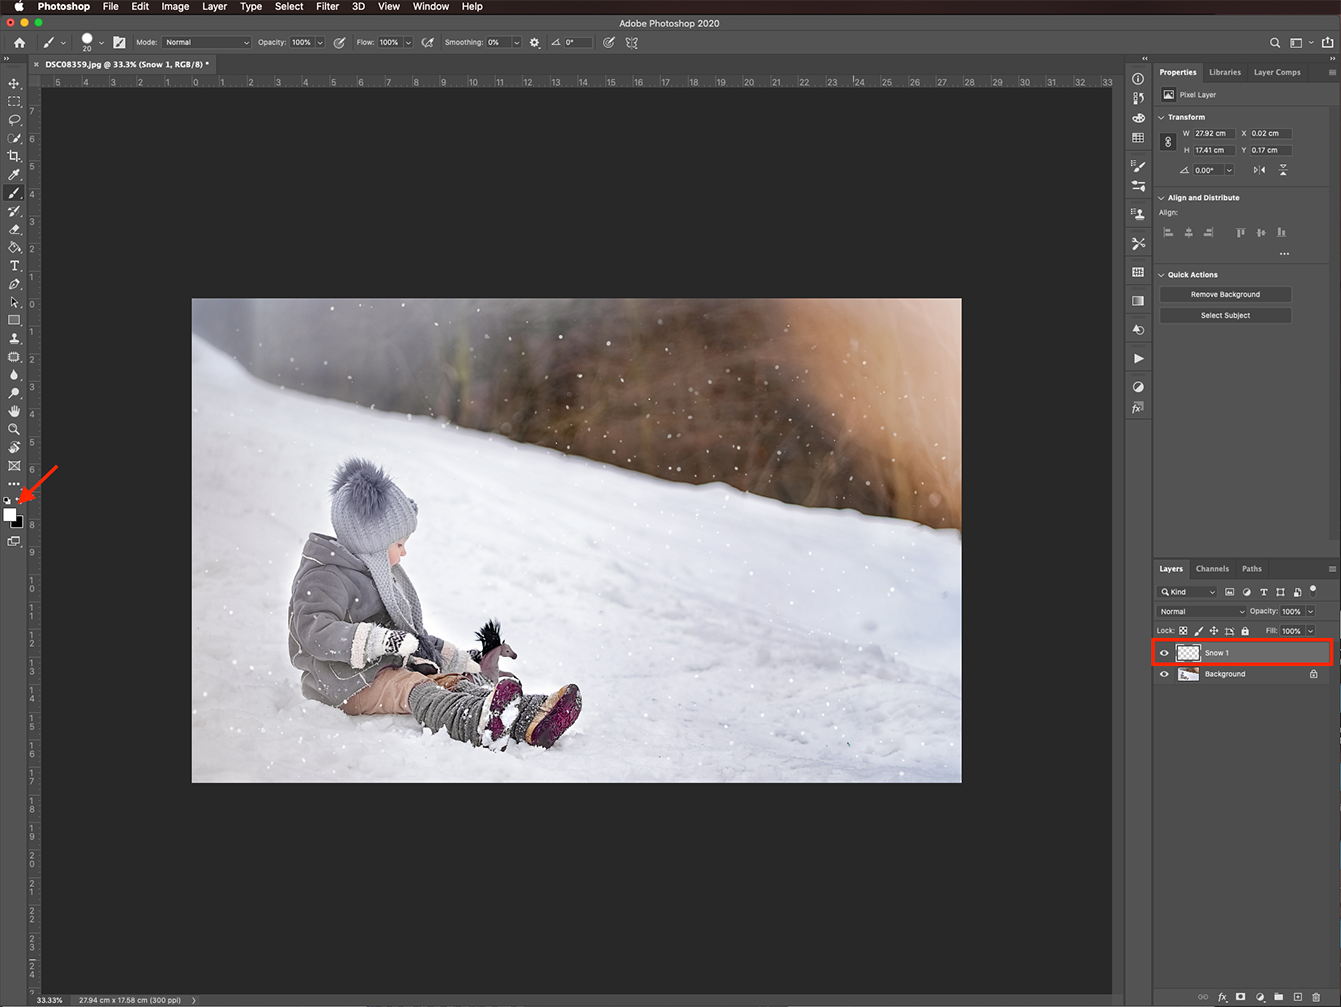
In the next step, we are going to apply some filters. This will smooth out the snow and make it look more realistic.
Step 3 - Apply filters to the Snow Layer
Once you have finished adding the snow to your image go to Filter > Stylize > Diffuse.

In the Diffuse panel set the Mode to Normal and click Ok.

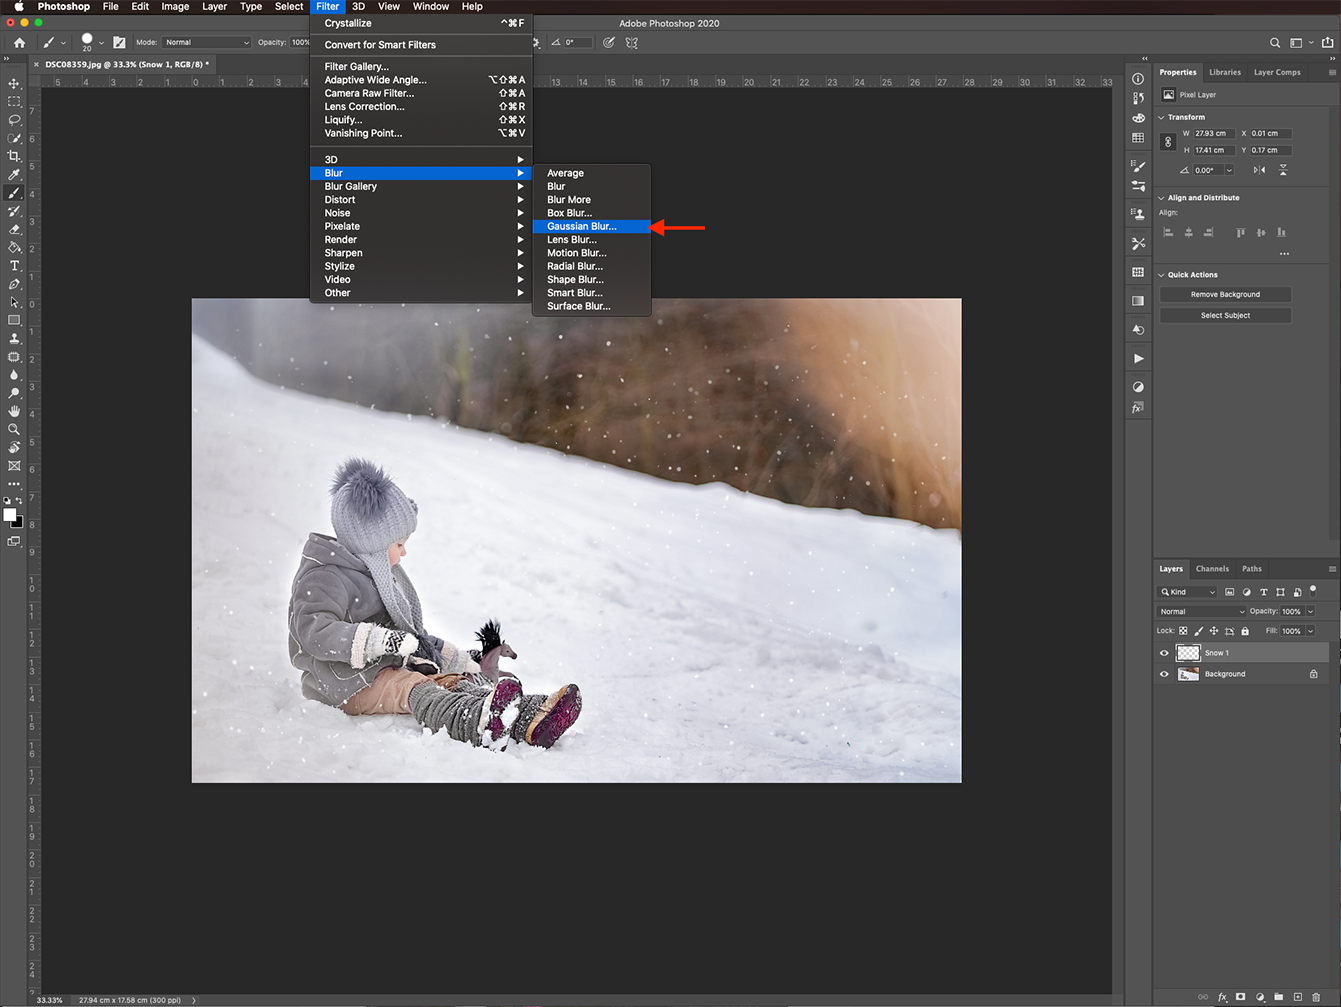
Next, we will add a Gaussian Blur filter to the snow layer. Go to Filter > Blur > Gaussian Blur.
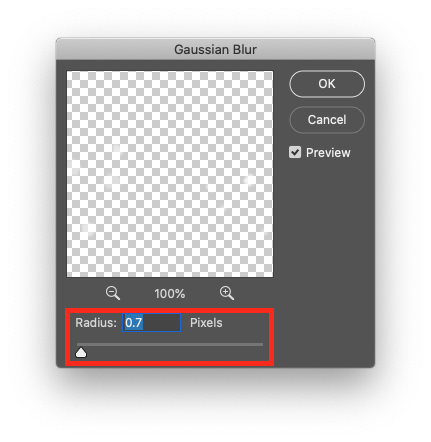
In the Gaussian Blur menu, add a small amount of Blur. We added 0.7 px then clicked Ok.
Step 4 - Build up the Snow in your Image
We want to add more snow to the artwork, but this time make it slightly larger in size. It will give the appearance of distance typical with snow photos.
First, create a new layer on top of everything and name it Snow 2.
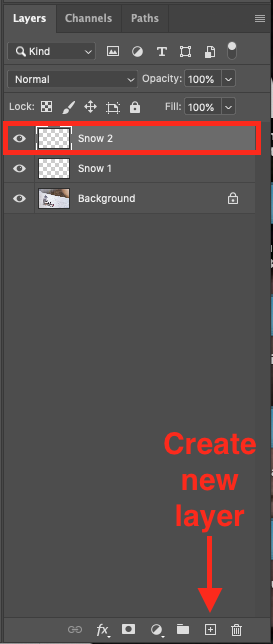
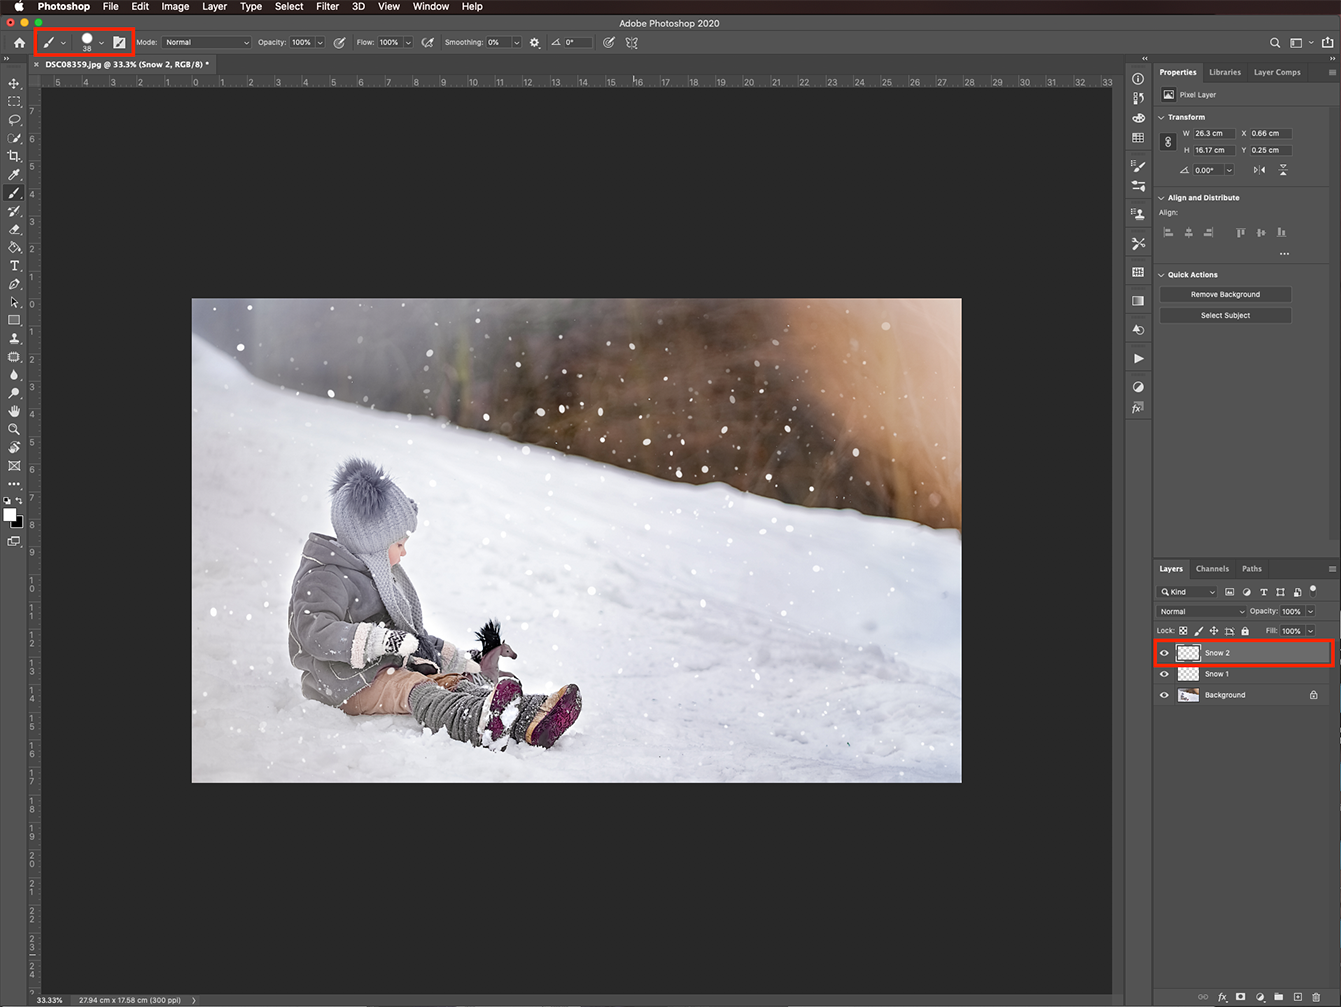
Next, head to the Brush panel, increase the brush size and add more random snow to your image.
Step 5 - Apply Motion Blur Filter to Second Snow Layer
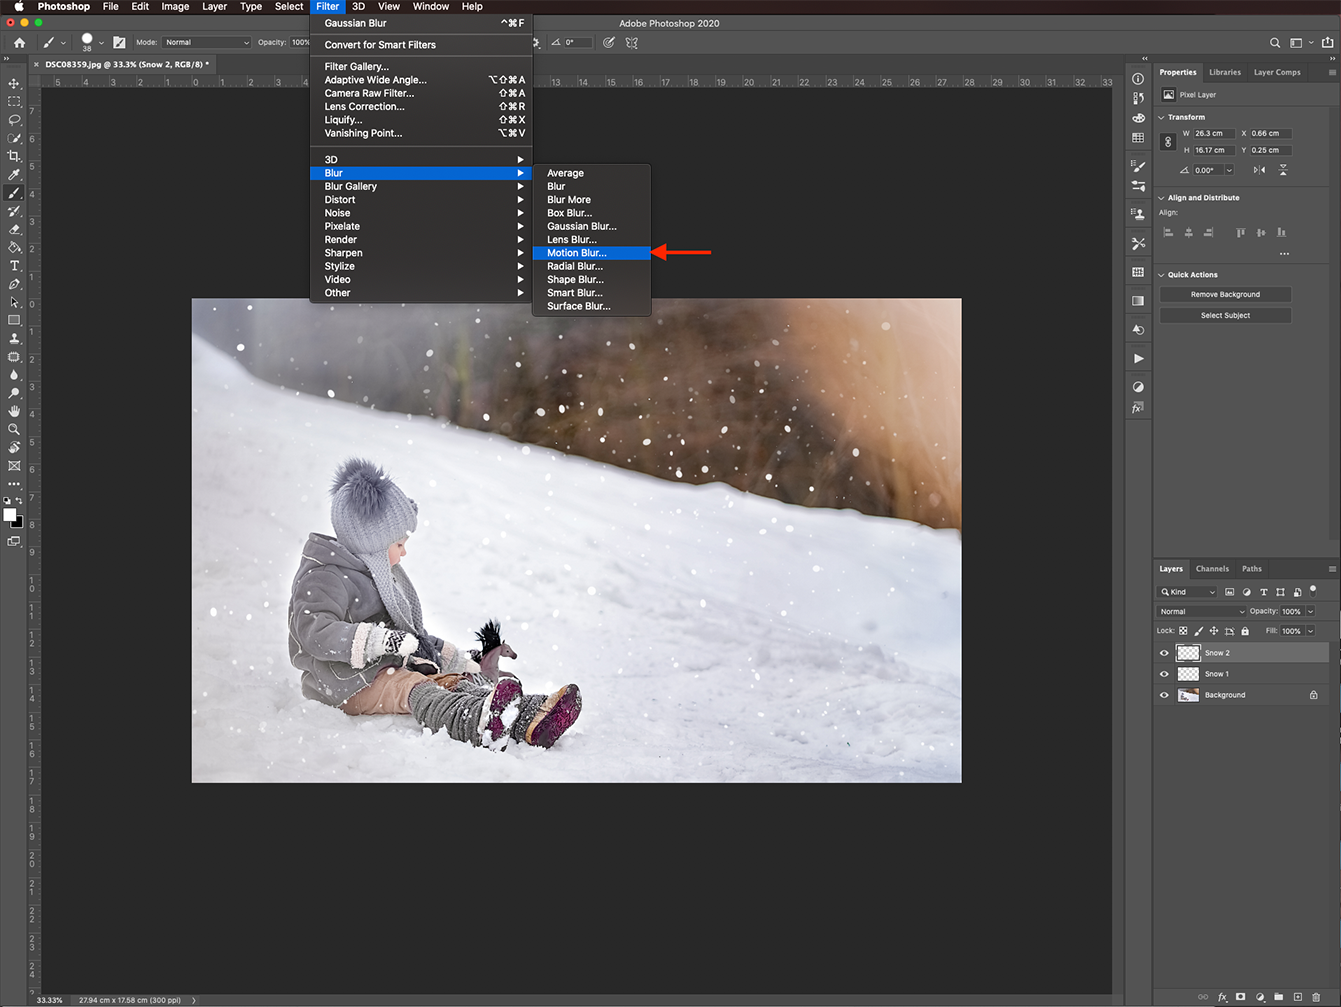
On this second snow layer, we will apply a Motion Blur filter. This will be applied to the larger snowflakes. Since Snow will be falling when a photo is taken, we want to create the idea of movement. So, go to Filter > Blur > Motion Blur.
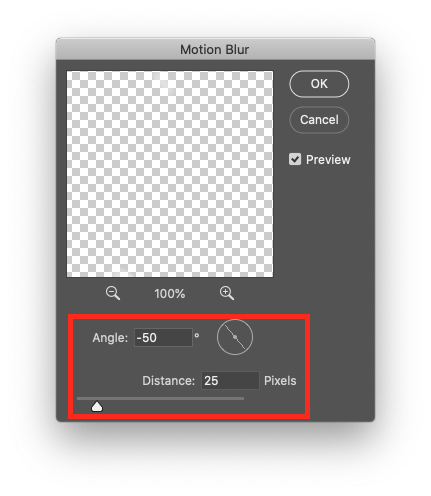
Set the Angle to -50 and the Distance to 25 px, then click Ok.
The image below is our result of adding a snow effect in Photoshop.
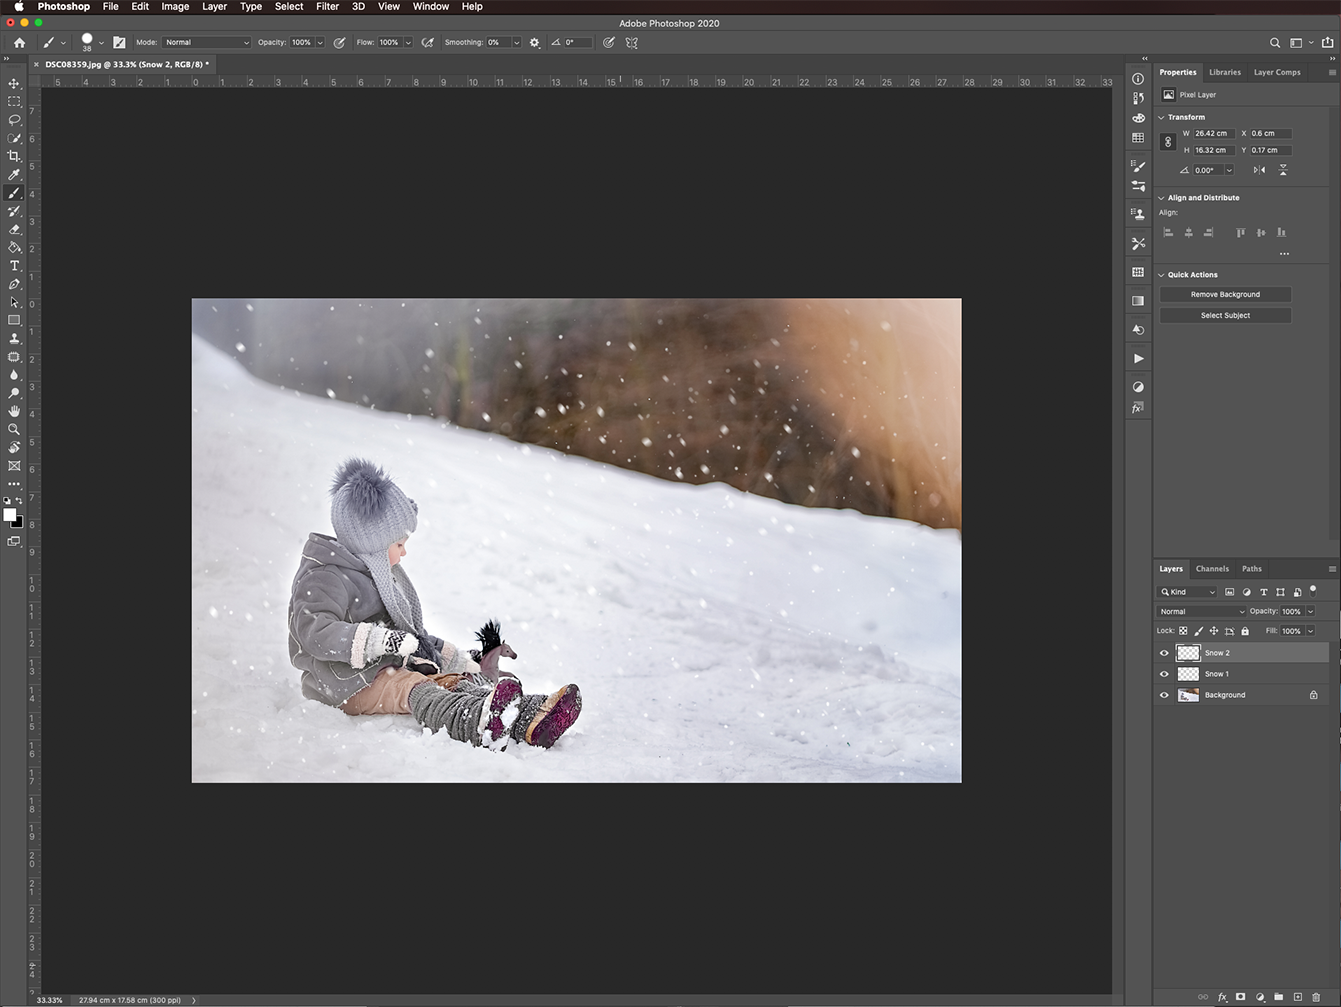
If you want, you can add more snow by repeating the above steps.
Step 6 - Erase Unwanted Snow
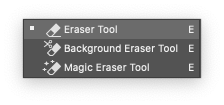
This step is optional once you have finished adding your snow effect. Select the Eraser tool, then go to each layer and remove any snow that is covering your main focus. In this case, the child playing in the snow. You can remove as much or as little snow as you want.
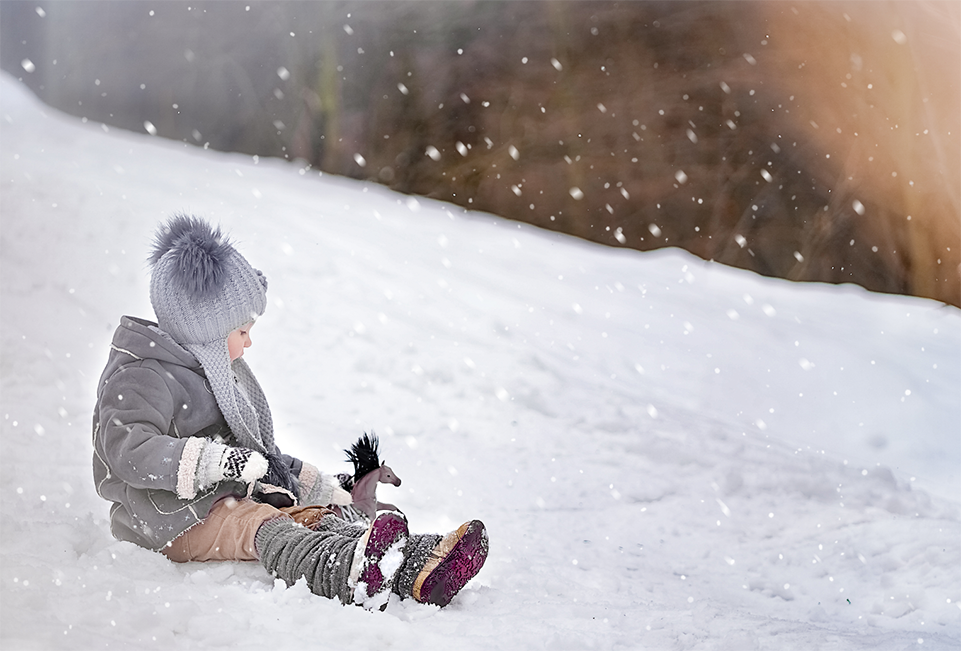
We are now finished applying this really simple Snow Effect in Photoshop to our image!
Make sure to check out our other great Photoshop tutorials like how to blur a background, how to create a smoke effect, and how to combine two images.