By Design Bundles
Scan N Cut Tutorials3 min
How to create a curved line in Brother scan and cut canvas workspace
1- Open canvas workspace.
3- Click on your workspace. a node will appear. you can now draw a line. To draw a straight line hold the Shift key down while you are drawing your line. Double click to end the line.
4- Click on the left node.
5- Click on the + node icon to add a node to your line.
6- With the new node selected, click on the curve icon.Two more nodes will appear these are the handles to use to create a curve.
7- Click and drag one of the handles. The line will curve dependent on how far you move the handle.
8- You can click on the other handle and curve the opposite way.
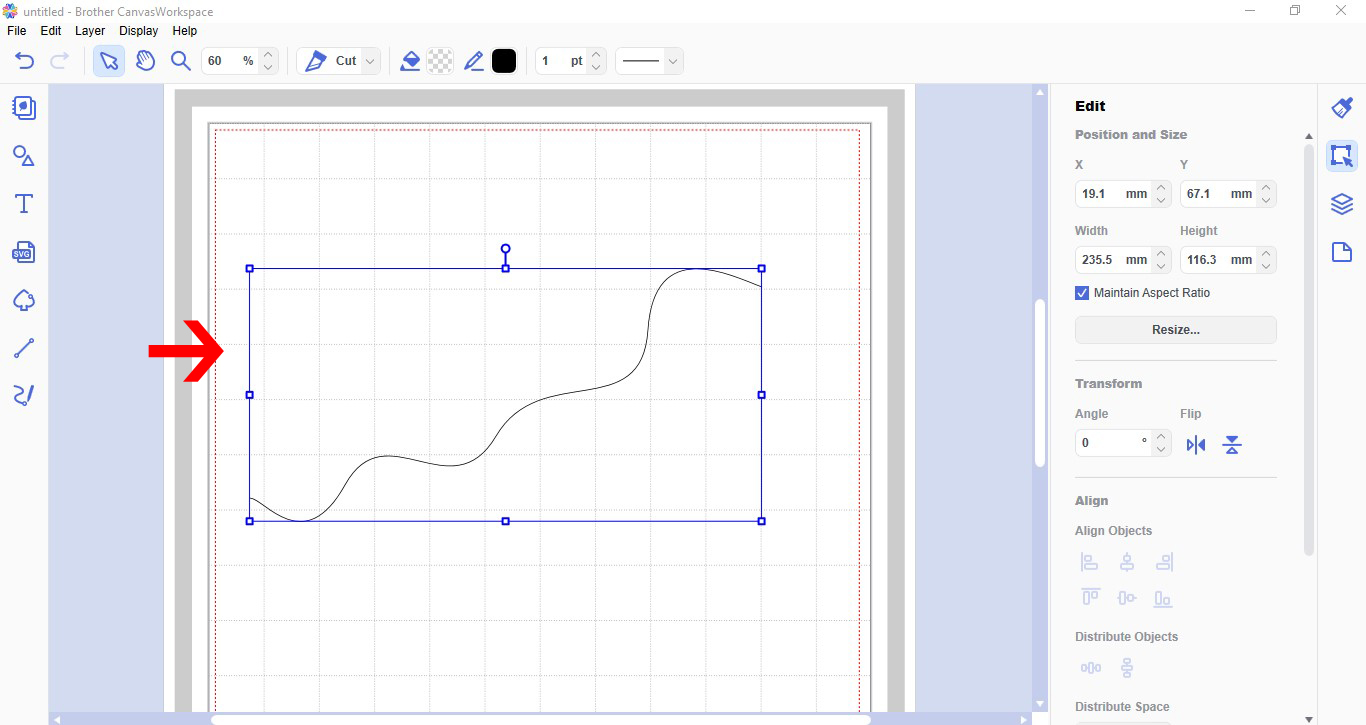
9- You can add as many nodes as you like and curve as many times as you like.
10- Once you are finished you can click away from the design. when you re click once onto your line you are able to make the line smaller or larger.

2- Click on the path tool.

3- Click on your workspace. a node will appear. you can now draw a line. To draw a straight line hold the Shift key down while you are drawing your line. Double click to end the line.

4- Click on the left node.

5- Click on the + node icon to add a node to your line.
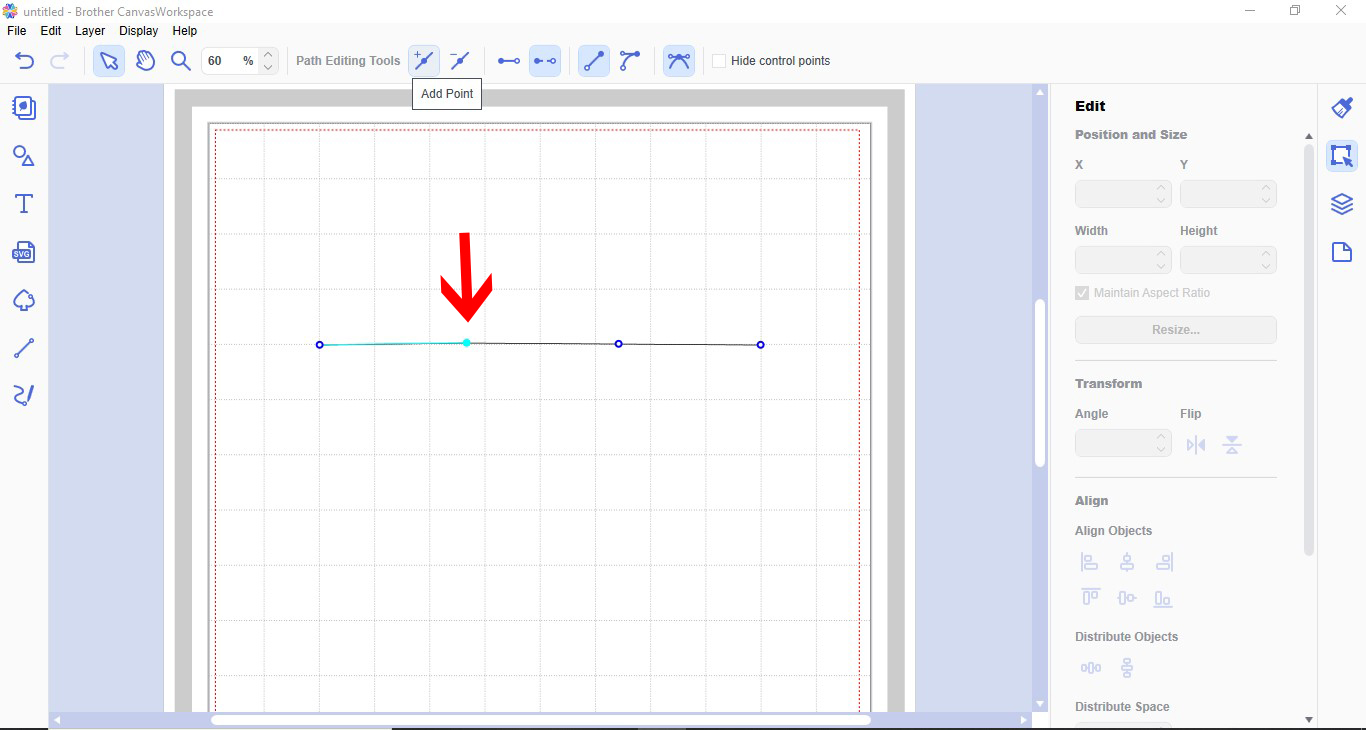
6- With the new node selected, click on the curve icon.Two more nodes will appear these are the handles to use to create a curve.
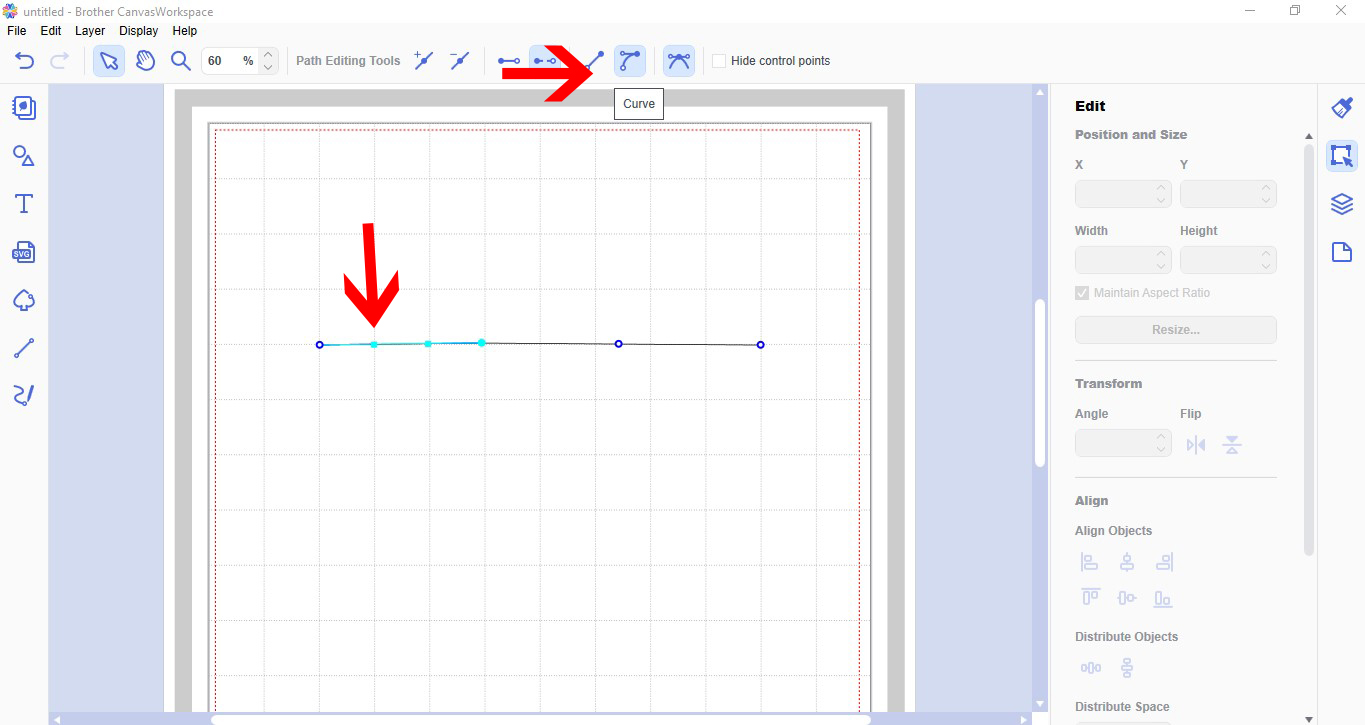
7- Click and drag one of the handles. The line will curve dependent on how far you move the handle.
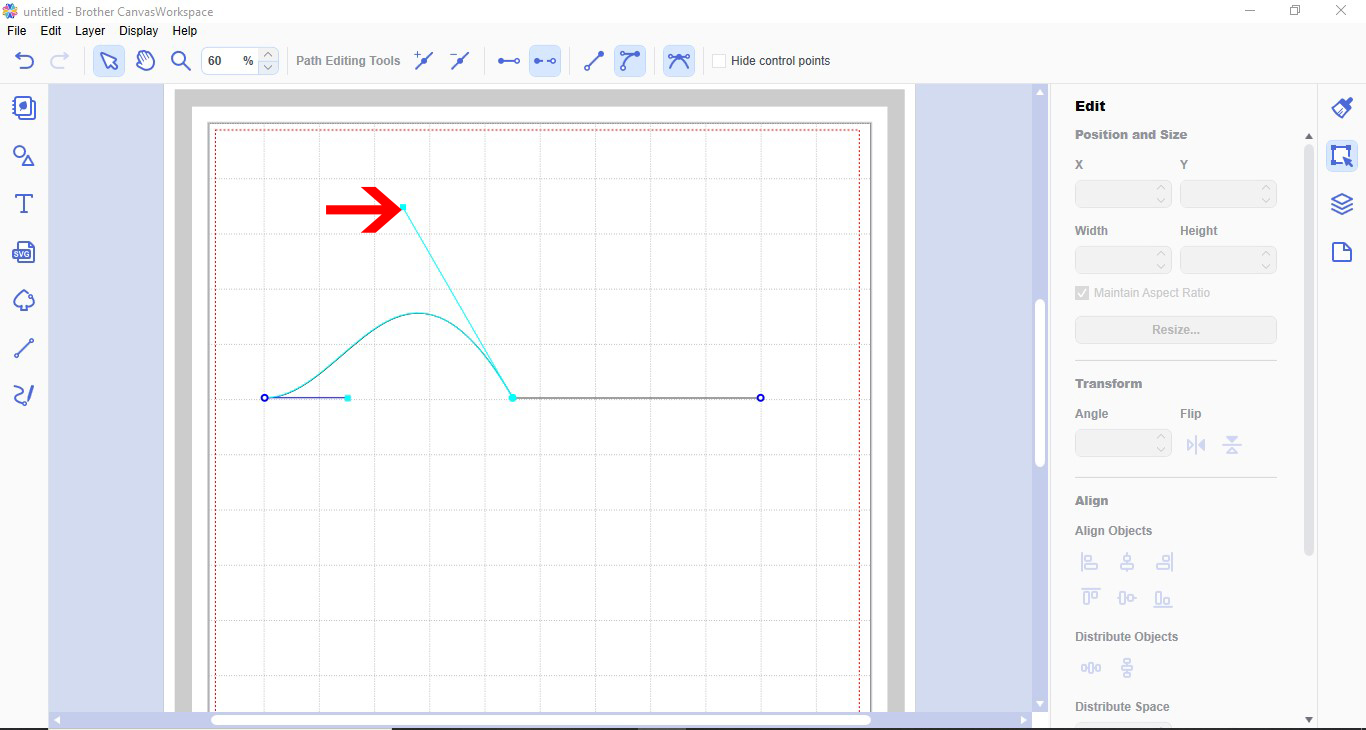
8- You can click on the other handle and curve the opposite way.
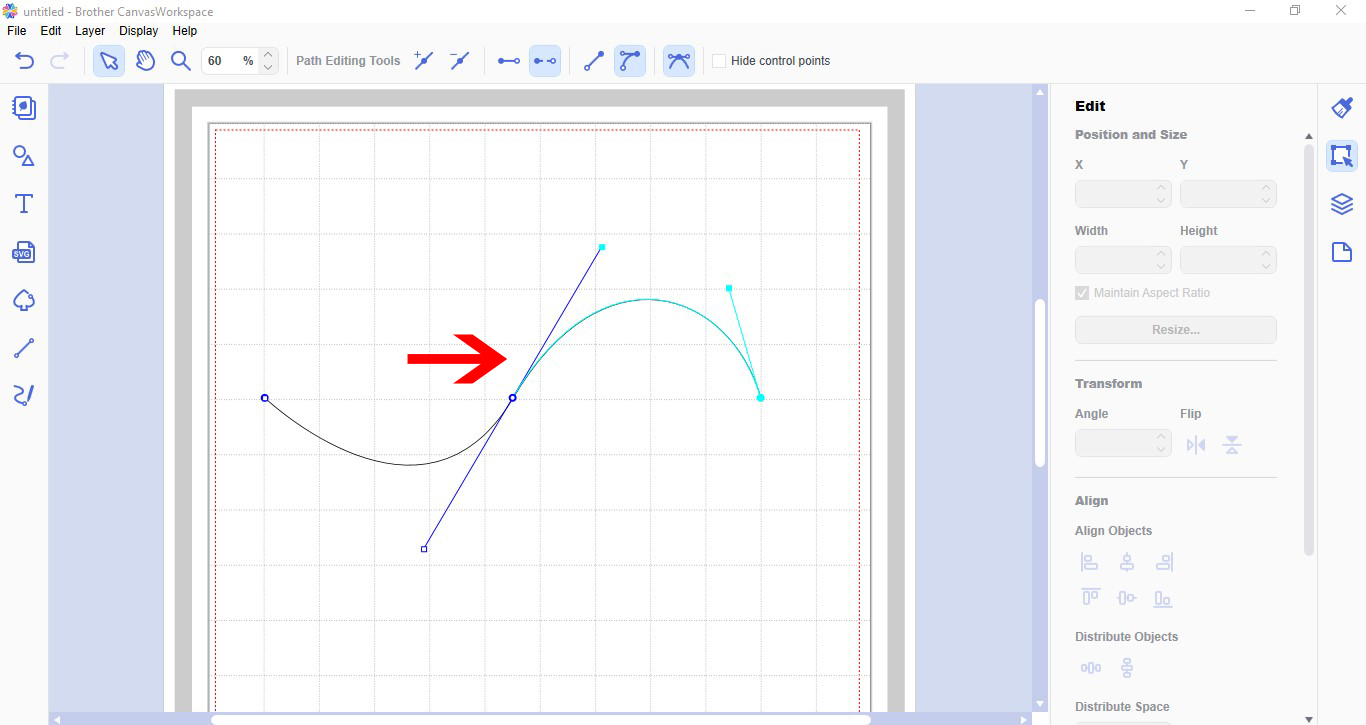
9- You can add as many nodes as you like and curve as many times as you like.

10- Once you are finished you can click away from the design. when you re click once onto your line you are able to make the line smaller or larger.
Related Tutorials
Scan N Cut Tutorials
How to create curved text in brother scan and cut canvas workspace
Learn how to curve text in Brother Scan N Cut
Scan N Cut Tutorials
How to Create an Offset Using the Foil Quill in Brother Scan and Cut Canvas Workspace
Scan N Cut Tutorials
How to create a custom fill pattern in brother scan and cut canvas workspace
Scan N Cut Tutorials
How to create a font into a stencil font in Brother scan and cut canvas workspace
Scan N Cut Tutorials
How to create a knock out effect in brother scan and cut canvas workspace
Scan N Cut Tutorials