By Design Bundles
Silhouette Tutorials3 min
Creating a Stencil Box Using SVG file in Silhouette Alta software
1- Open up Silhouette Studio Software. Click on the open folder icon.
2- Find your SVG file. Open.
3- Your design will open in the software. Resize to your needs. I am using Unicorn SVG, unicorn princess file from designbundles.net
4- Save as a studio file.
5- Open the silhouette 3D alta software.
6- Open your studio file.
7- A new window will appear. click on the stencil box option.
8- The software will convert your SVG file you saves as a studio file to a 3D stencil box.
9- Once you have your box and resized to your needs, you can also ungroup the design. Right click and select ungroup.
10- By ungrouping the design you can then separate each part and print in different colored filament, then adhere together once all printed. If you want to print all together, make sure the parts are grouped so they will print as one.
11- Select the base of your design and select the print icon.
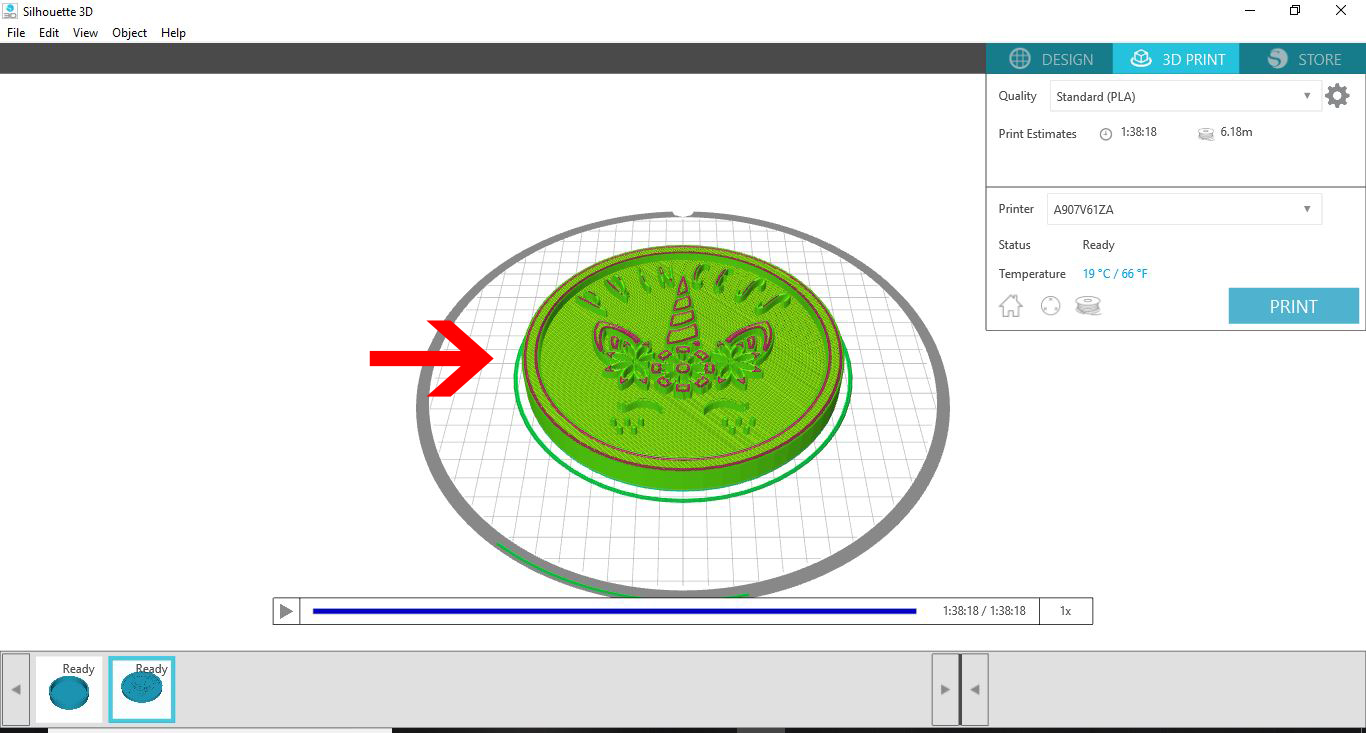
12- Once the base is printed, click on the lid option on the bottom of your screen and then print.
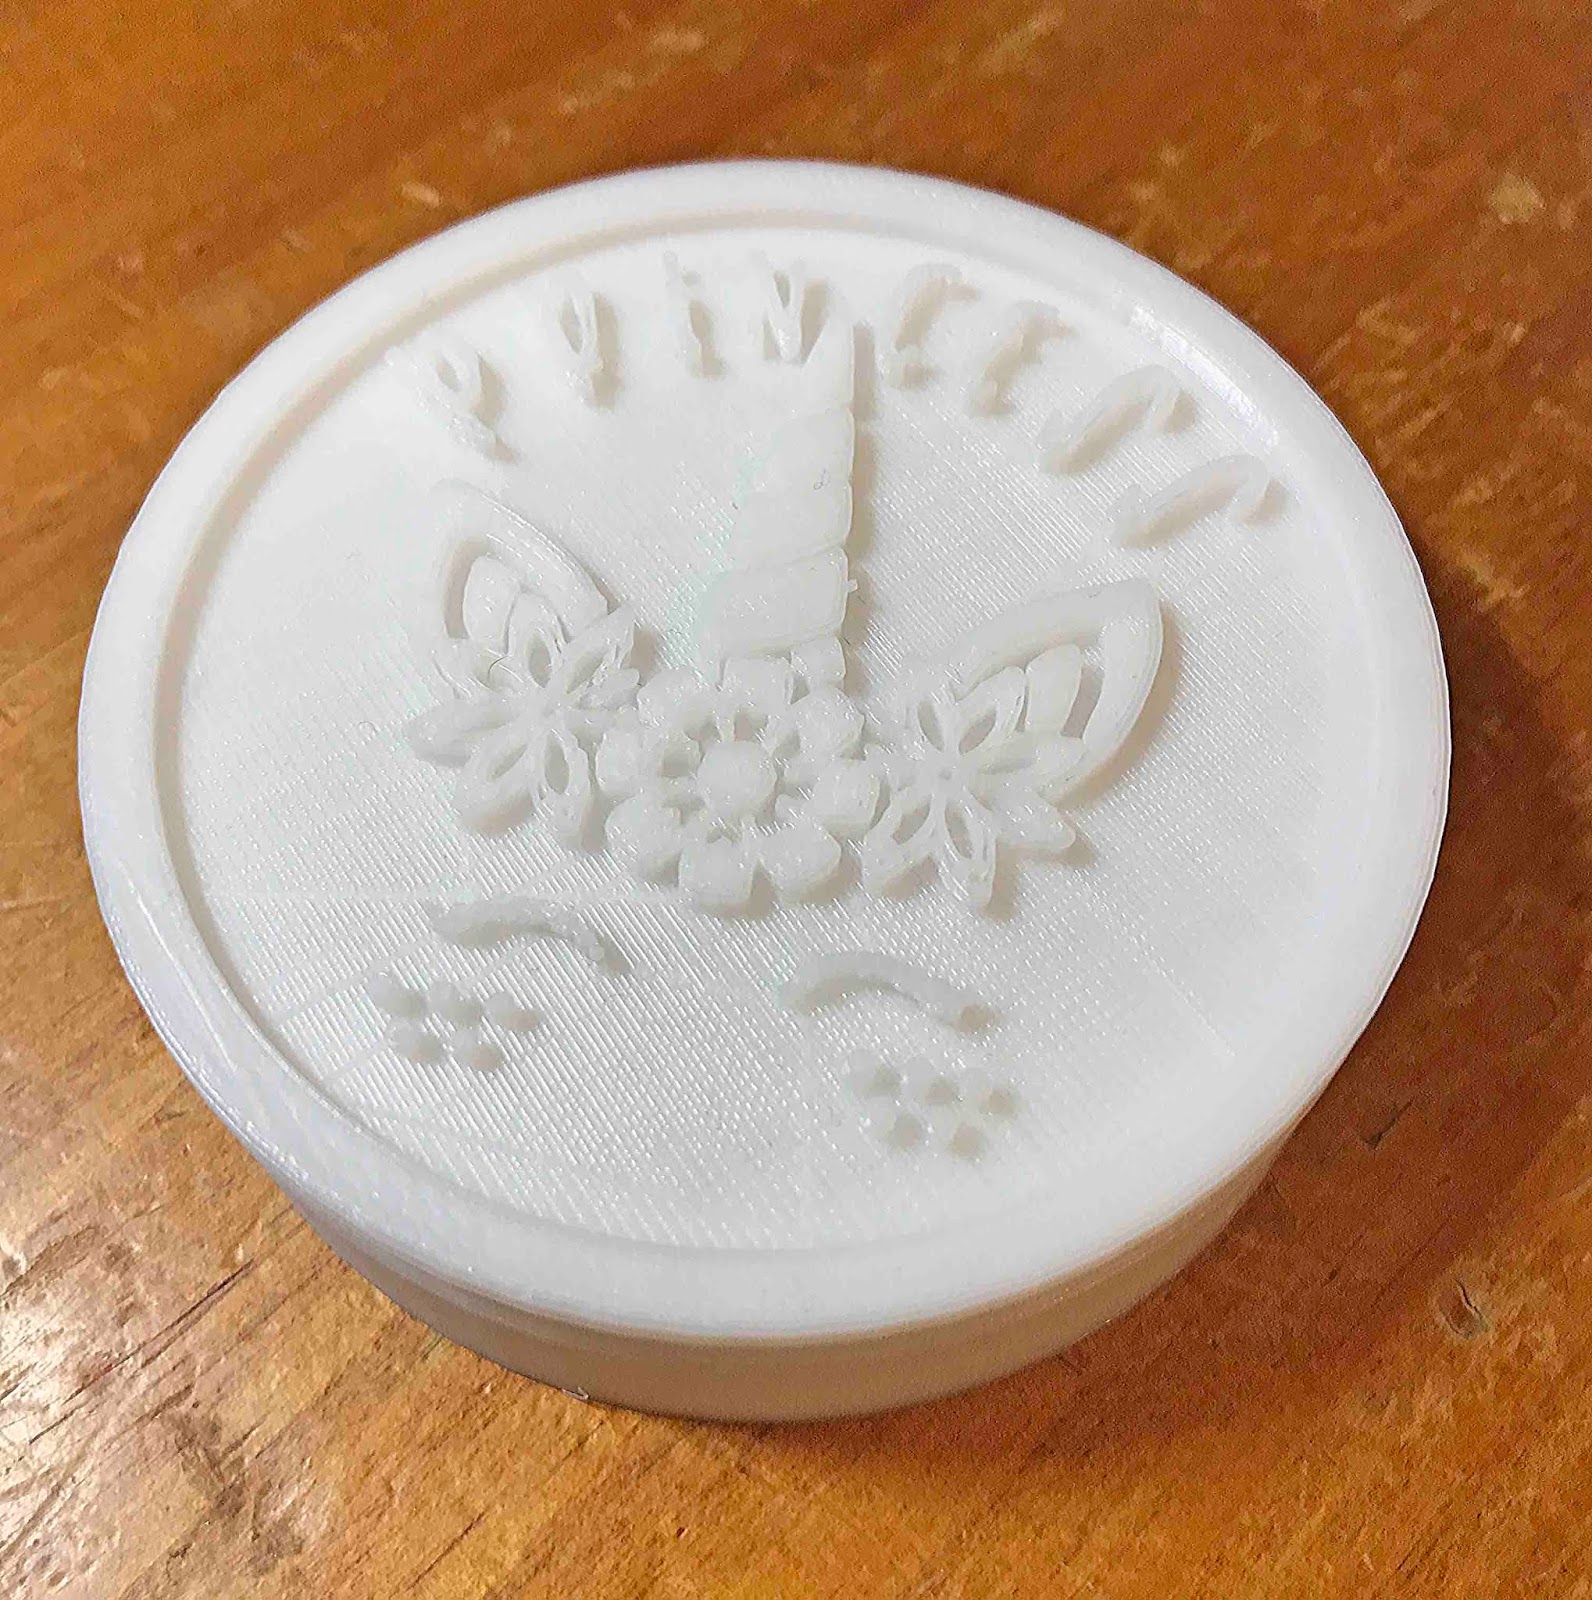
13- The finished lid.
14- The lid will fit the base to create the stencil box.
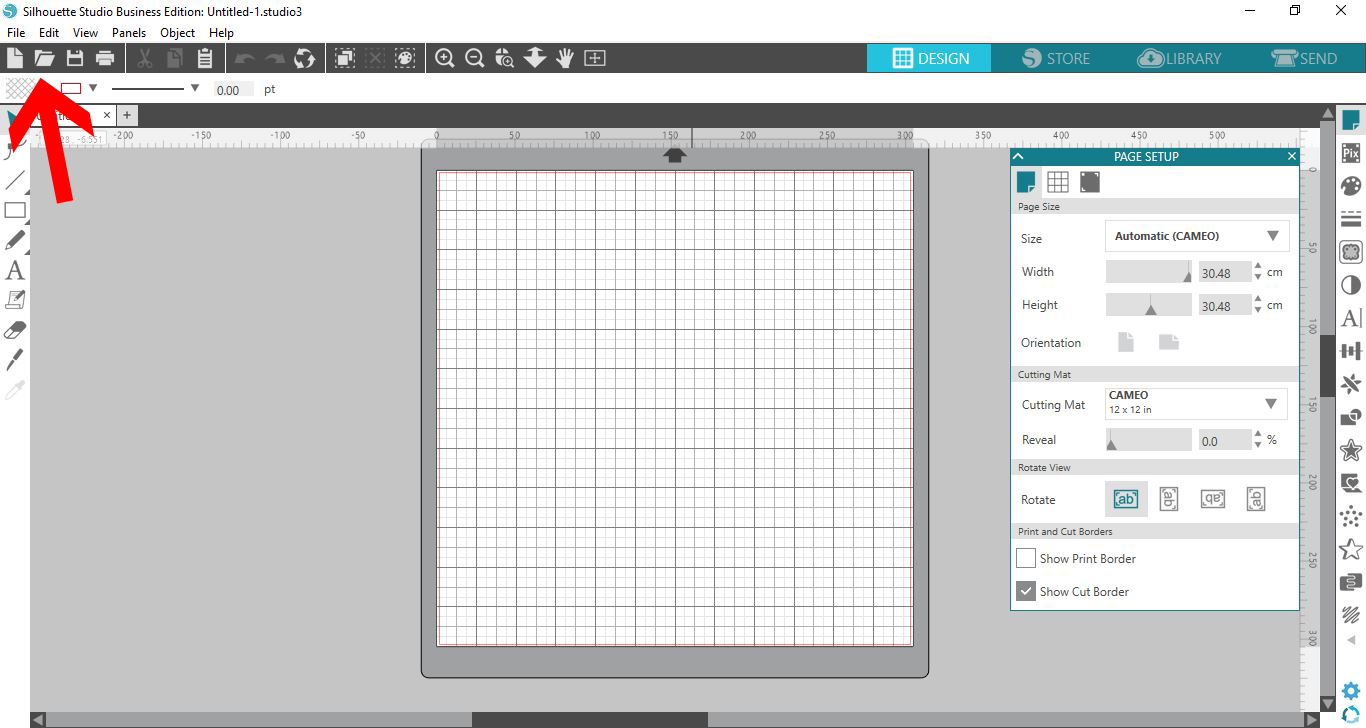
2- Find your SVG file. Open.
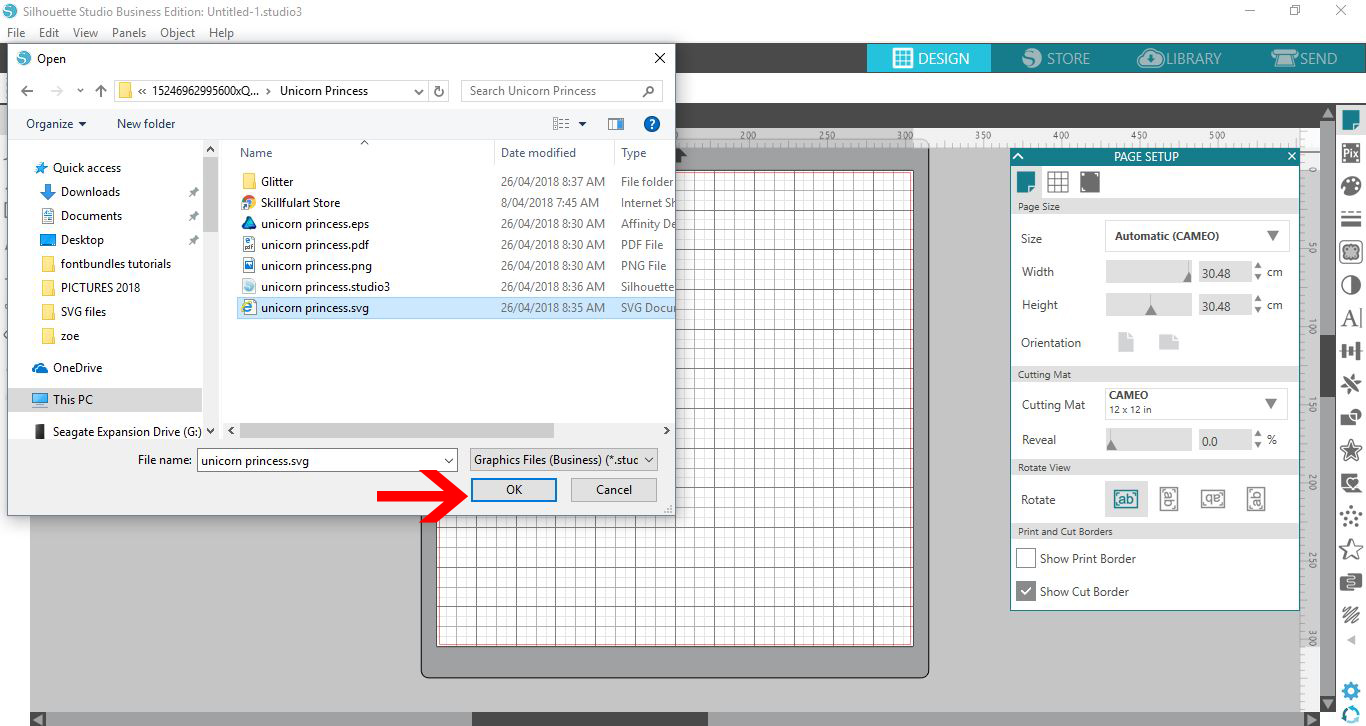
3- Your design will open in the software. Resize to your needs. I am using Unicorn SVG, unicorn princess file from designbundles.net
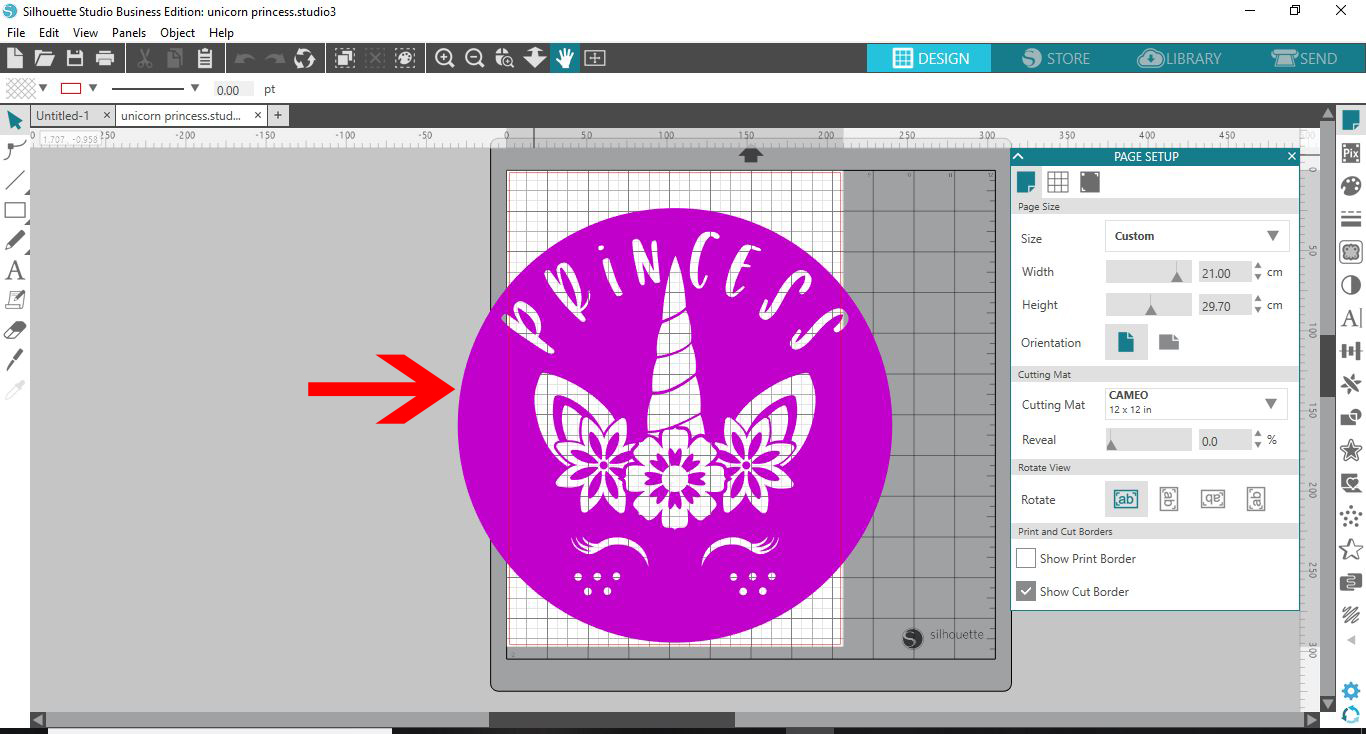
4- Save as a studio file.
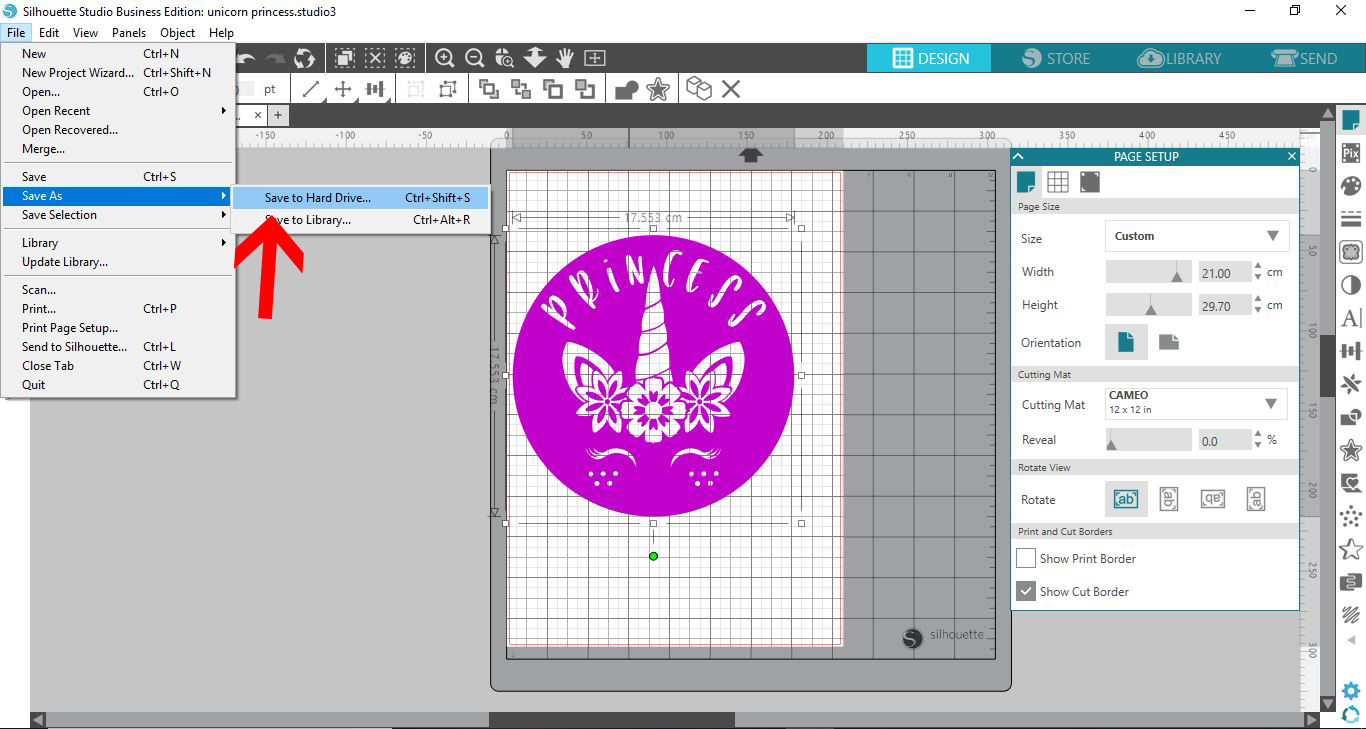
5- Open the silhouette 3D alta software.
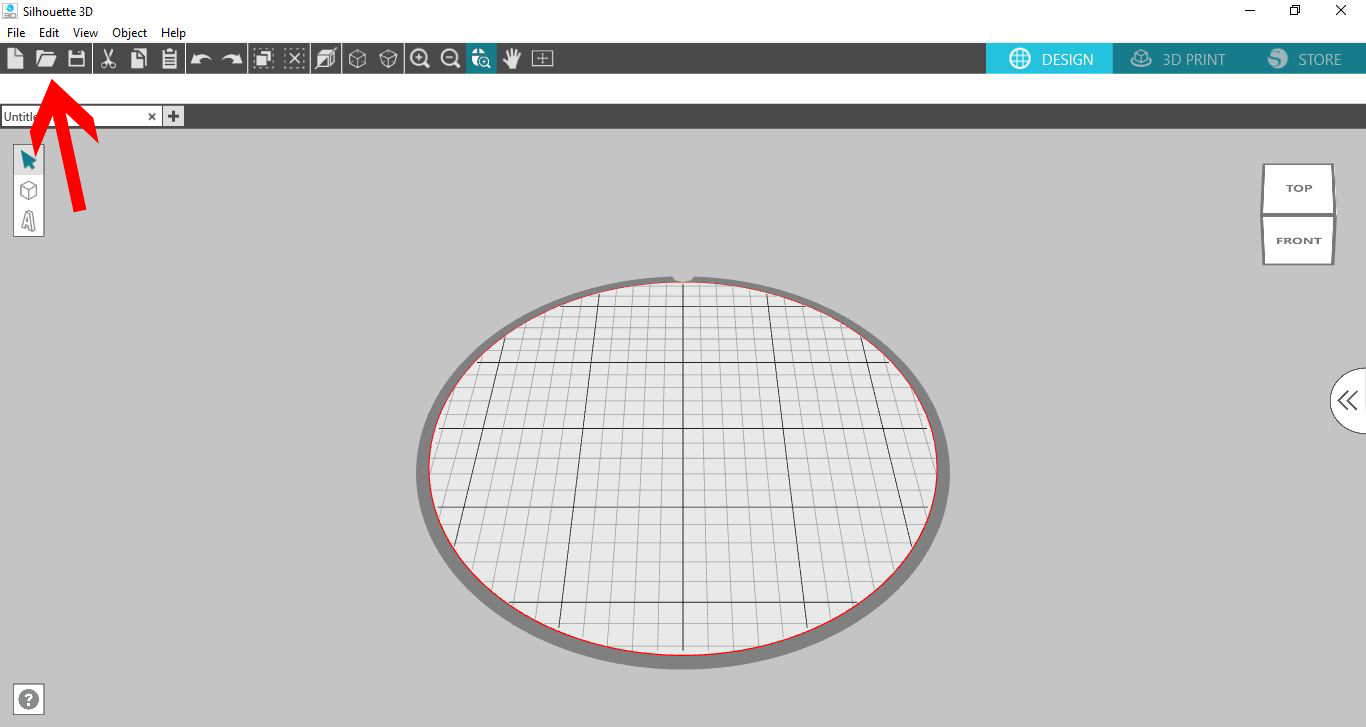
6- Open your studio file.
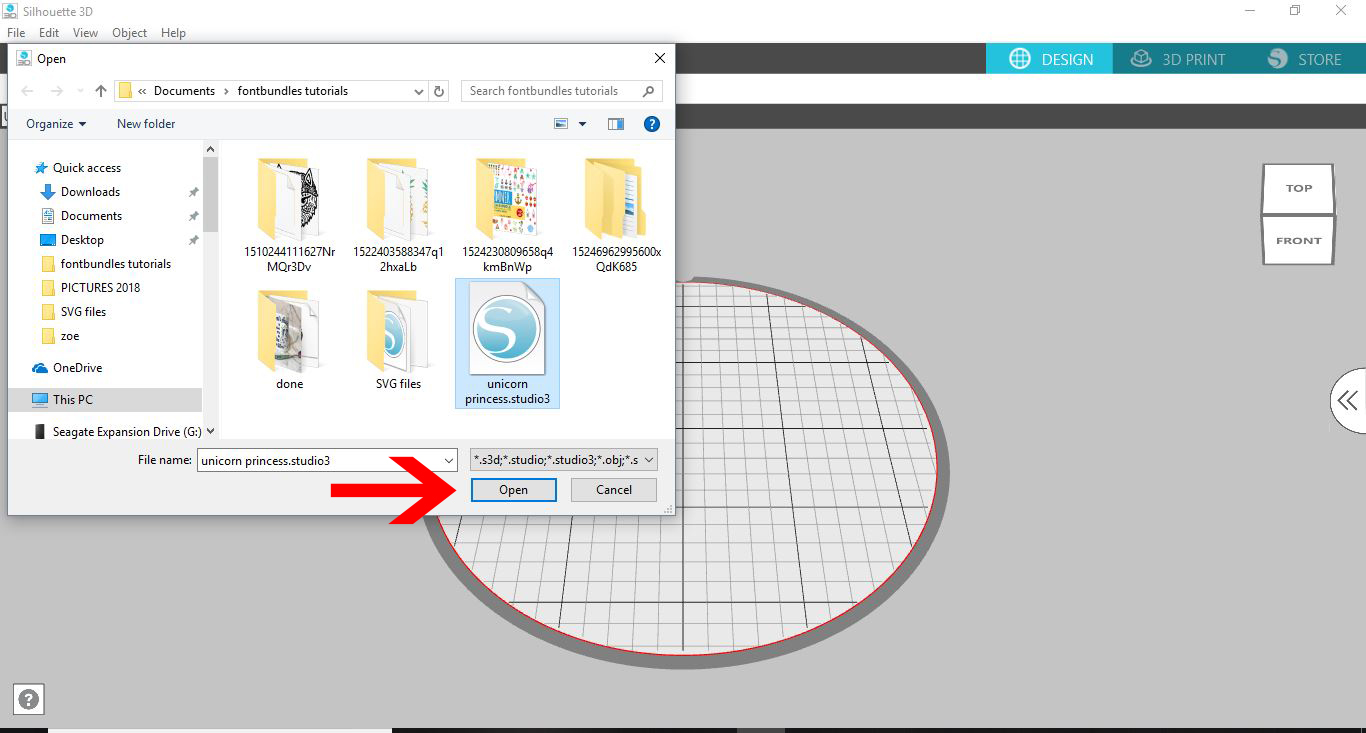
7- A new window will appear. click on the stencil box option.
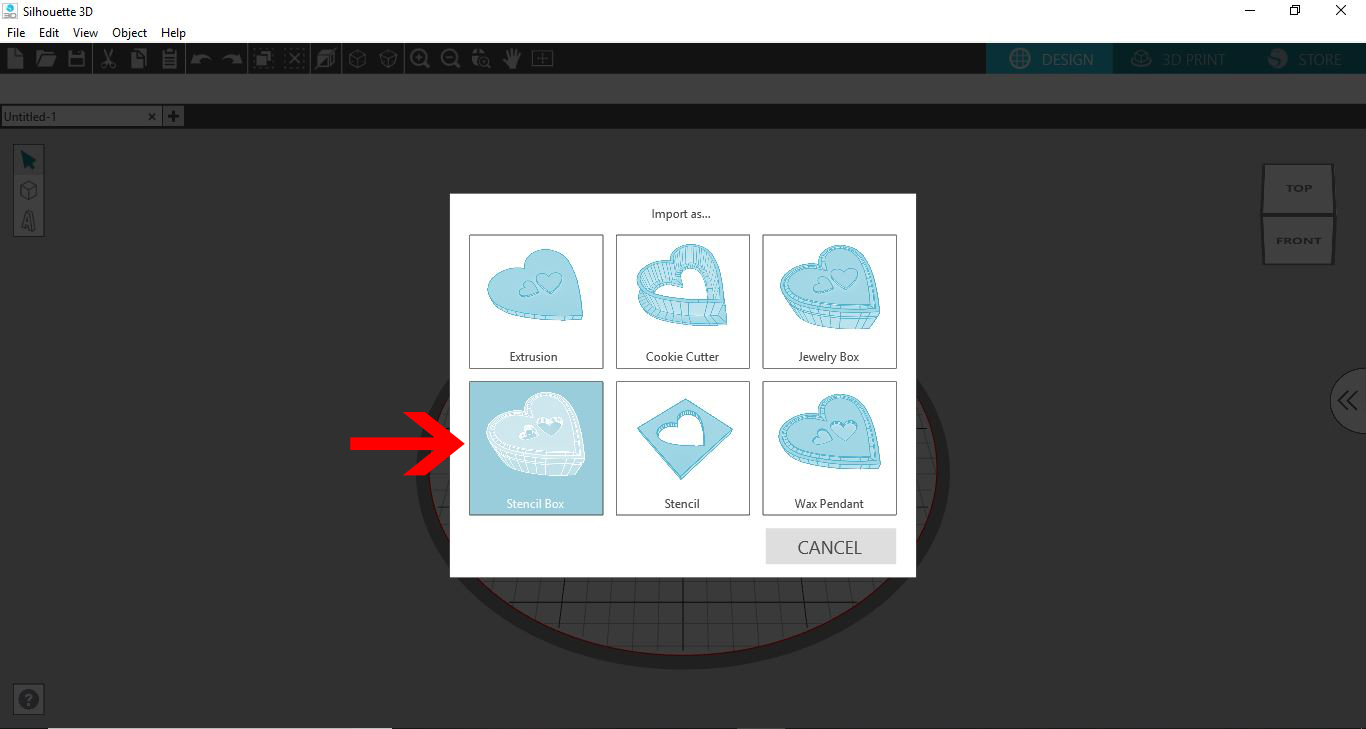
8- The software will convert your SVG file you saves as a studio file to a 3D stencil box.
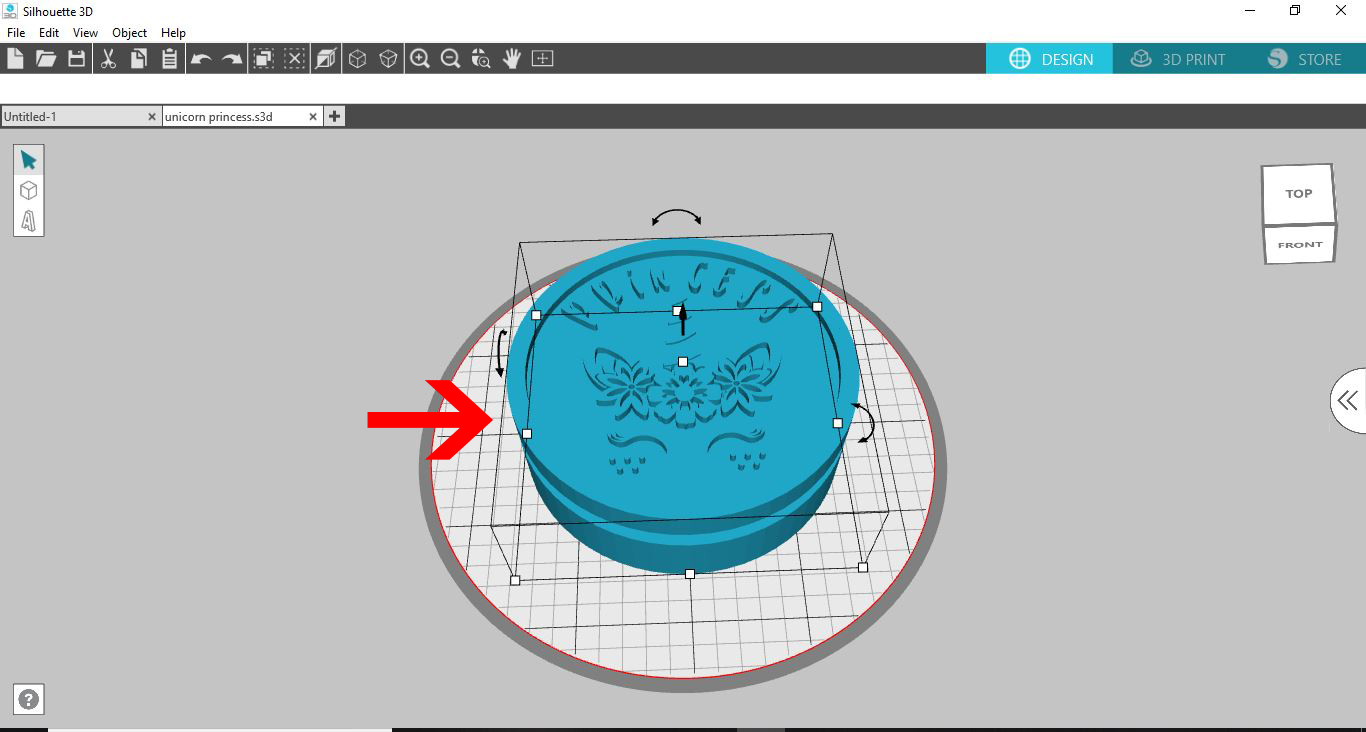
9- Once you have your box and resized to your needs, you can also ungroup the design. Right click and select ungroup.
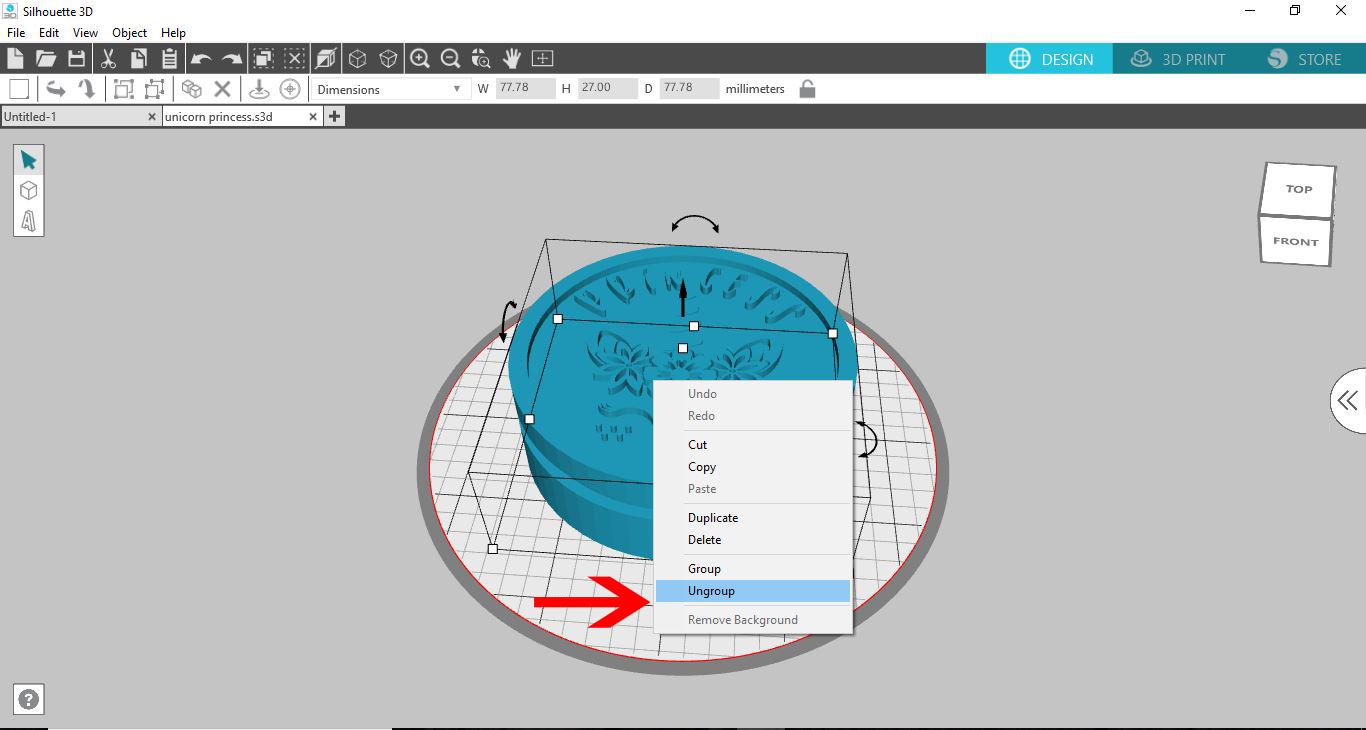
10- By ungrouping the design you can then separate each part and print in different colored filament, then adhere together once all printed. If you want to print all together, make sure the parts are grouped so they will print as one.
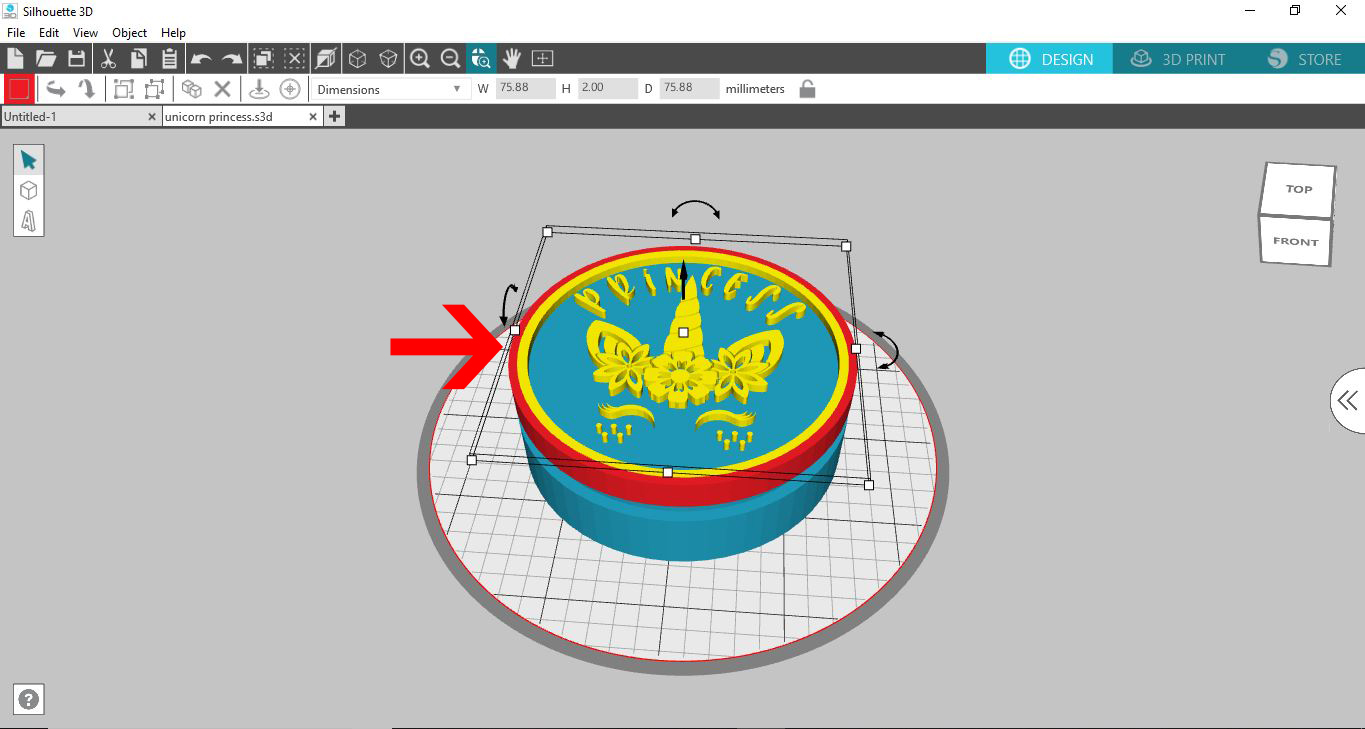
11- Select the base of your design and select the print icon.

12- Once the base is printed, click on the lid option on the bottom of your screen and then print.
13- The finished lid.

14- The lid will fit the base to create the stencil box.
Related Tutorials
Silhouette Tutorials
How to Add Embossing Effect to Cookie Cutter Using a SVG file In Silhouette Alta 3D Printer Software
In only 4 steps, discover how to make an embossed cookie cutter with the Silhouette Alta 3D printer.
Silhouette Tutorials
How to Use a PNG File in the Silhouette Alta software
Silhouette Tutorials
Using Silhouette Studio to Create Text for the Silhouette Alta 3D Printer Software
Silhouette Tutorials
How to Use an AI File in Silhouette Alta 3D Software
Silhouette Tutorials
How to Create a Basic Stencil Box in Silhouette Alta
Silhouette Tutorials