By Design Bundles
Using Warp Templates in Silhouette Studio
Silhouette Studio V4.2 now includes Warp Templates. With this feature you are able to warp shapes and images with preset templates. Warp Templates are a fun way to manipulate your designs to create something completely different. In this tutorial we will guide you on how to use Warp Templates in Silhouette Studio.
The Warp Template feature is only available in Designer Edition and higher. If you decide to upgrade, we have a great tutorial on activating your upgrade to get you started.
You can use any SVG file. We have tons of Spring SVG products to choose from on Design Bundles. In this tutorial we will be using a mixed case font called Garlic Butter.
Step 1 - Open the Warp Panel
Open Silhouette Studio, then open your file. Do this either by clicking the File icon top toolbar or File > Open.
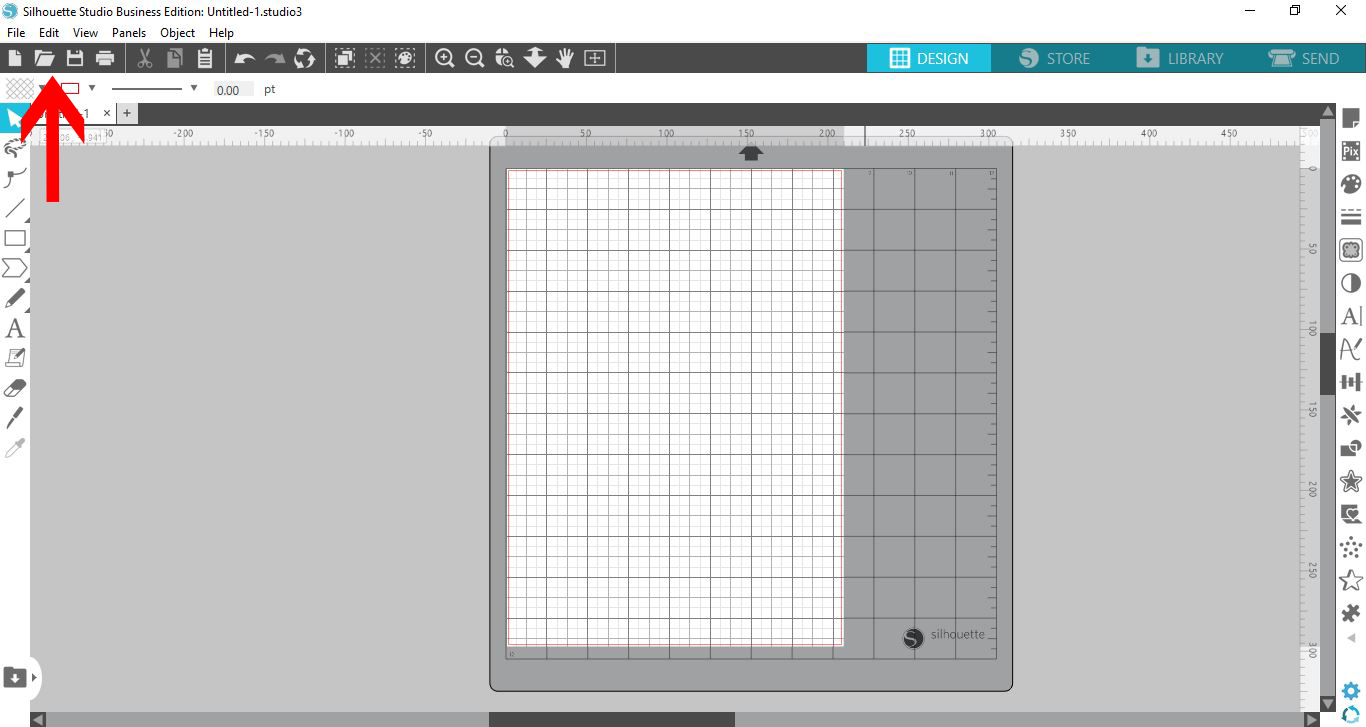
Locate your design and click to open in Silhouette Studio.
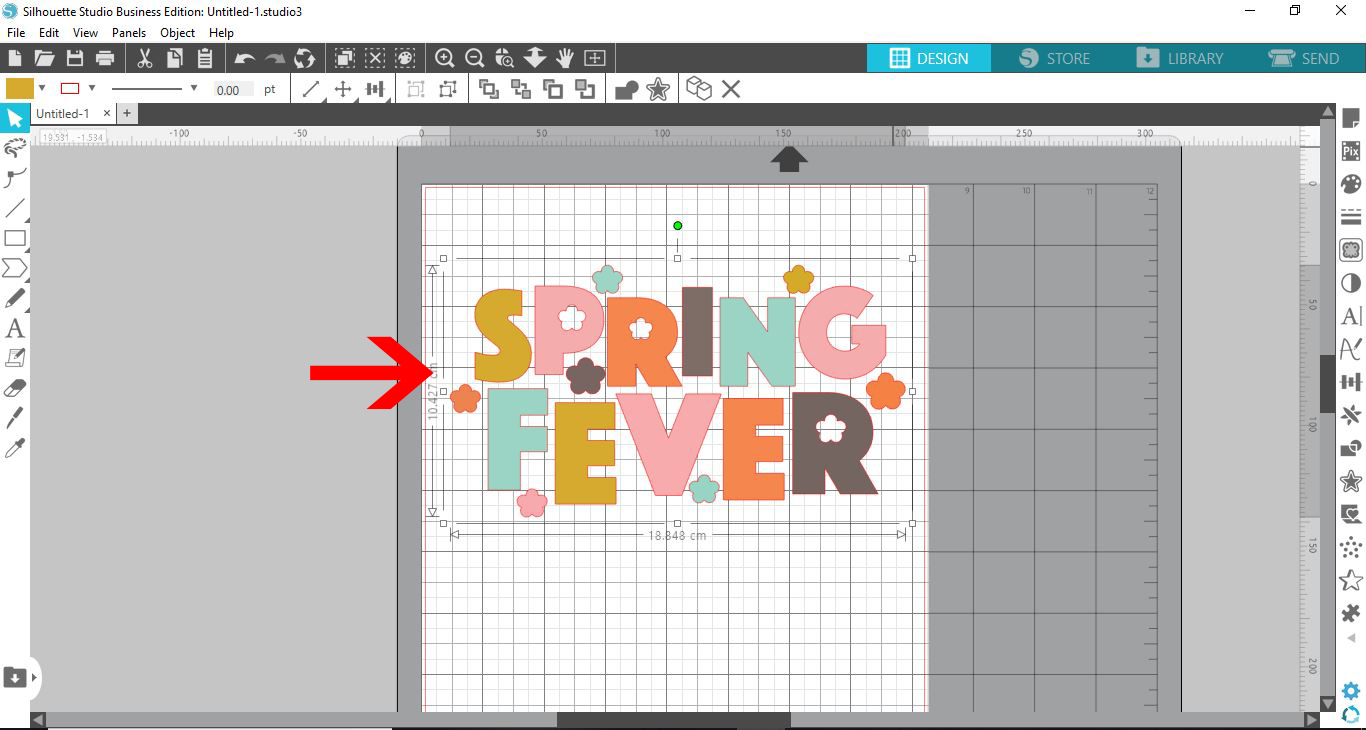
The Warp Template features can be found under the Warp Panel on the right side toolbar. You may need to click on the arrow to open more menu options. Now, click on the blocked wavy icon.

The Warp Panel will appear on the right side.
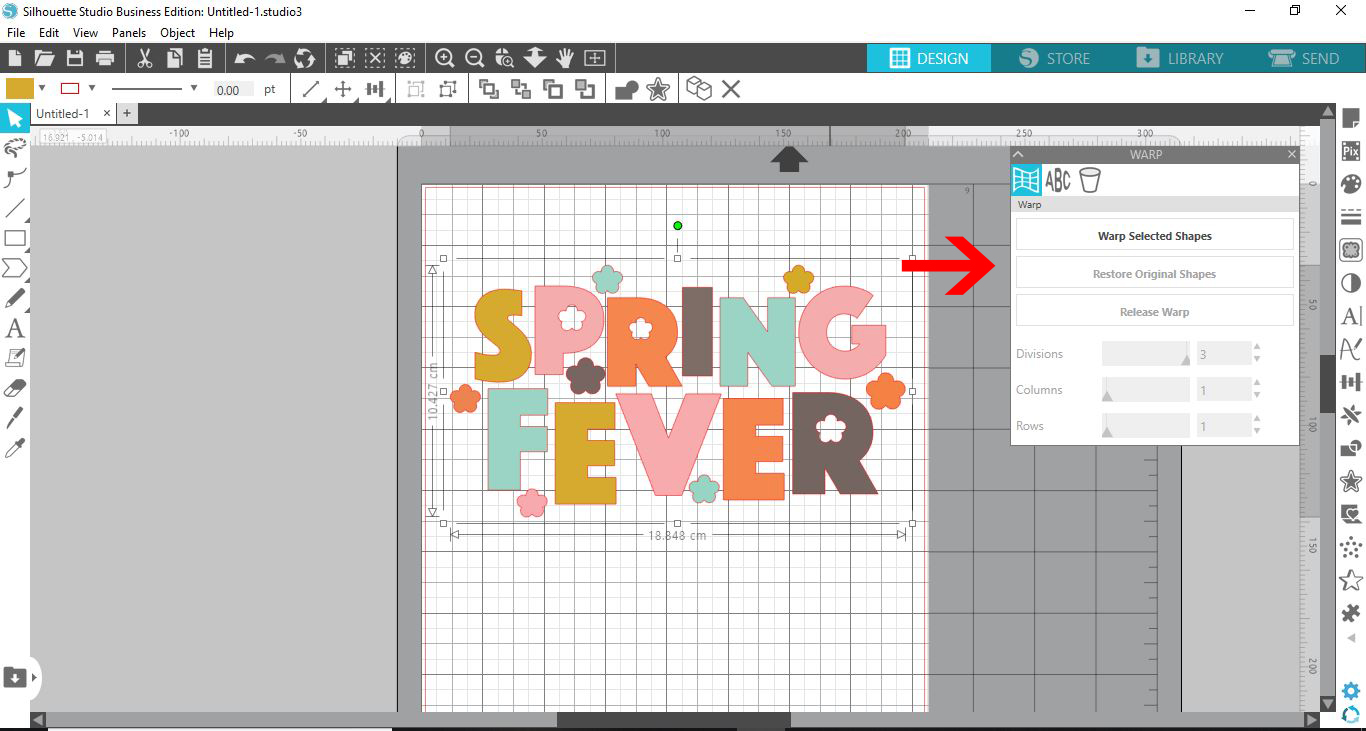
Step 2 - Use the Warp Templates in Silhouette Studio
In the Warp Panel, click on the second icon called Warp Templates. Here you will get a preview of the different templates available.
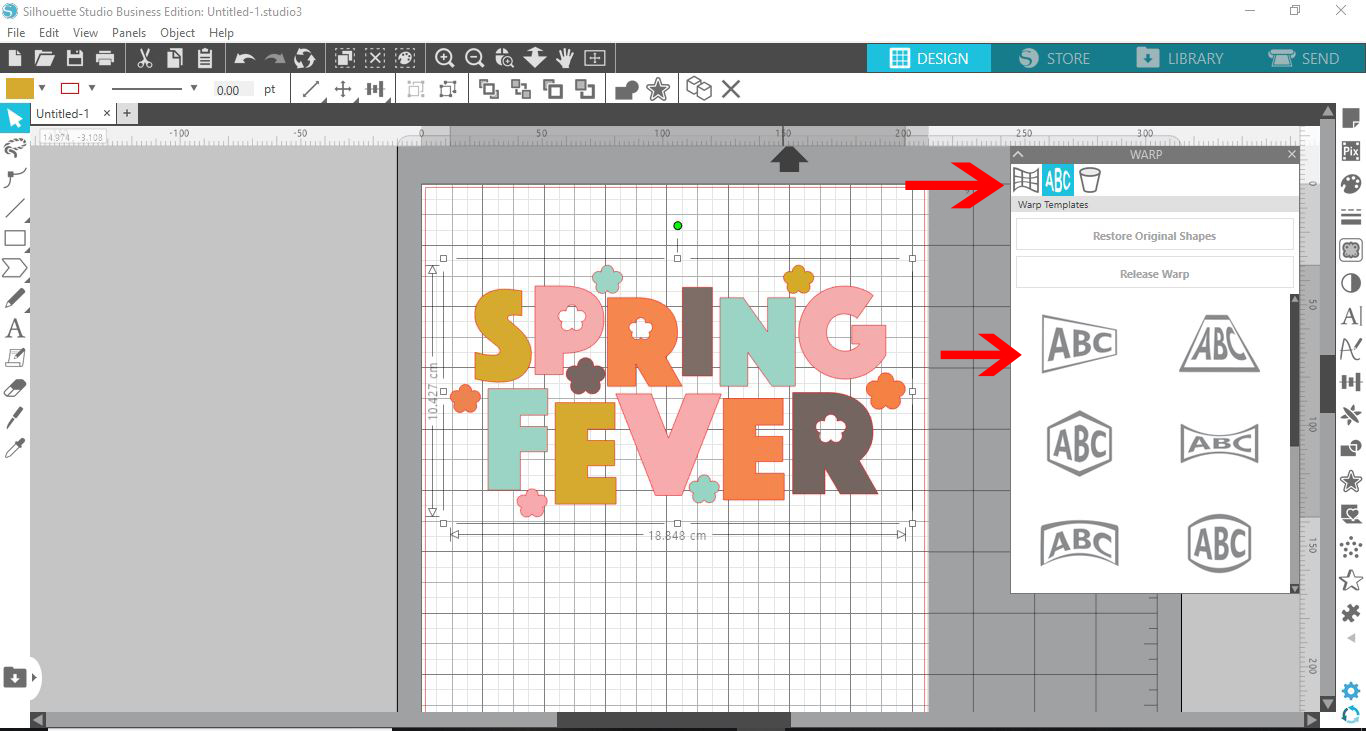
Each time you click on a template, it will be applied to your image. The template previews give you an idea of how the image will warp.
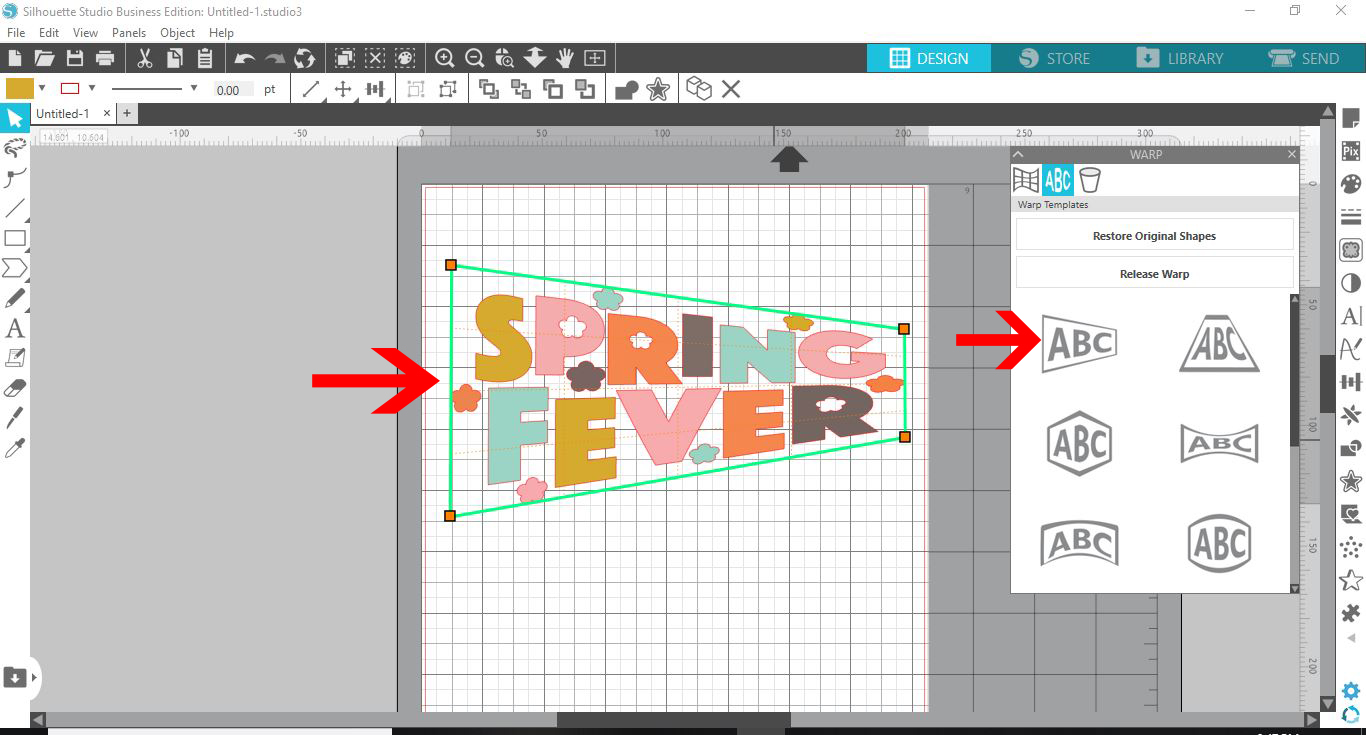
You can toggle between the templates to find the one that best works with your image or design.
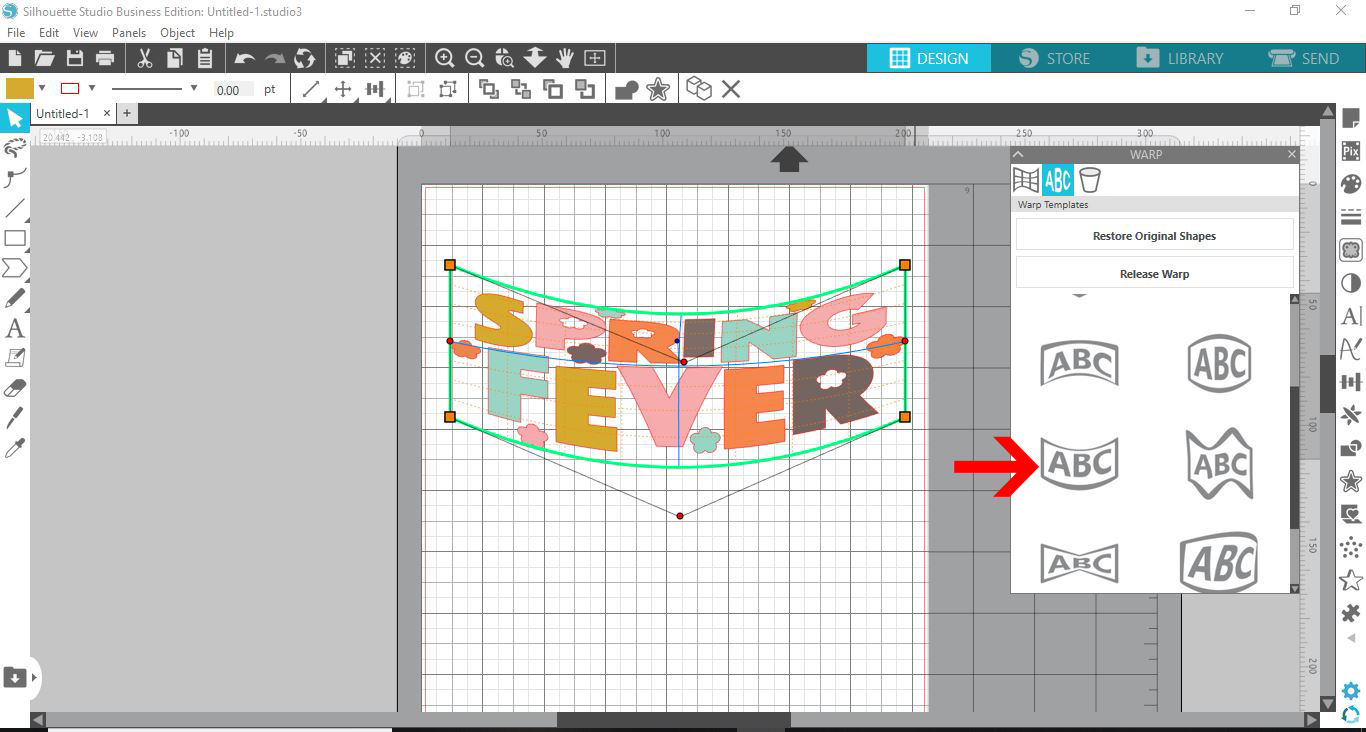
Step 3 - Adjust the Warp Template
Each template has a different set of nodes or dots. These are used to adjust the warp. In the image below the selected template has additional nodes. Every single node can be moved to fine tune the warped image.
To edit the node, click + drag to adjust. Here, we adjusted the position of the blue dot to edit the middle of the warped shape.
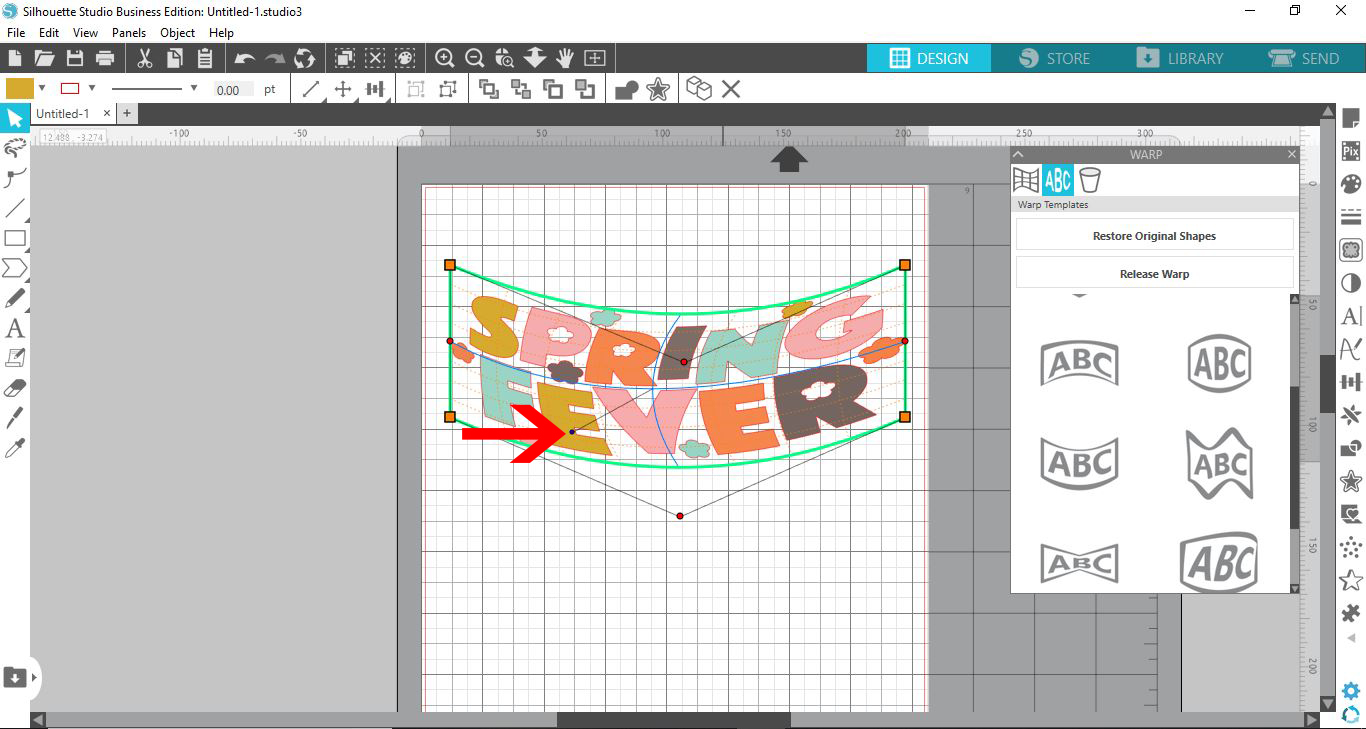
The red circles can adjust the overall size of the design.
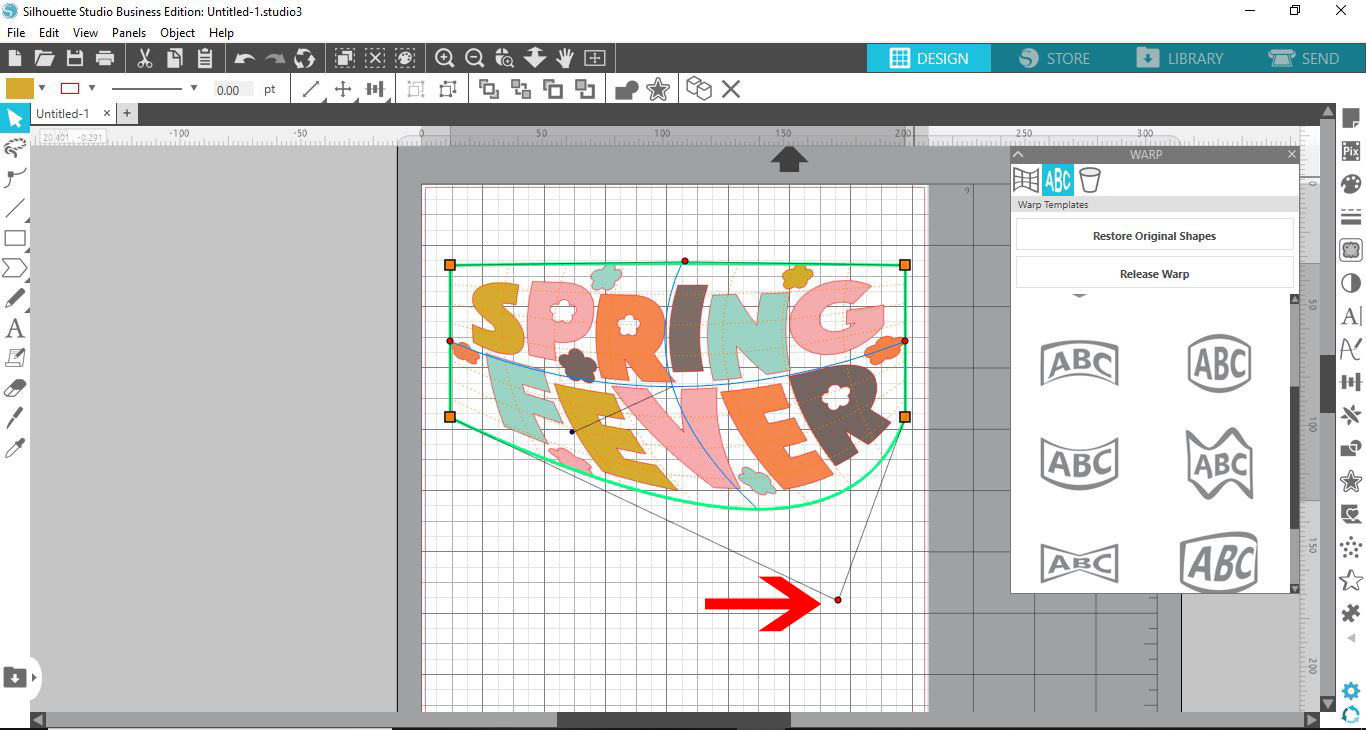
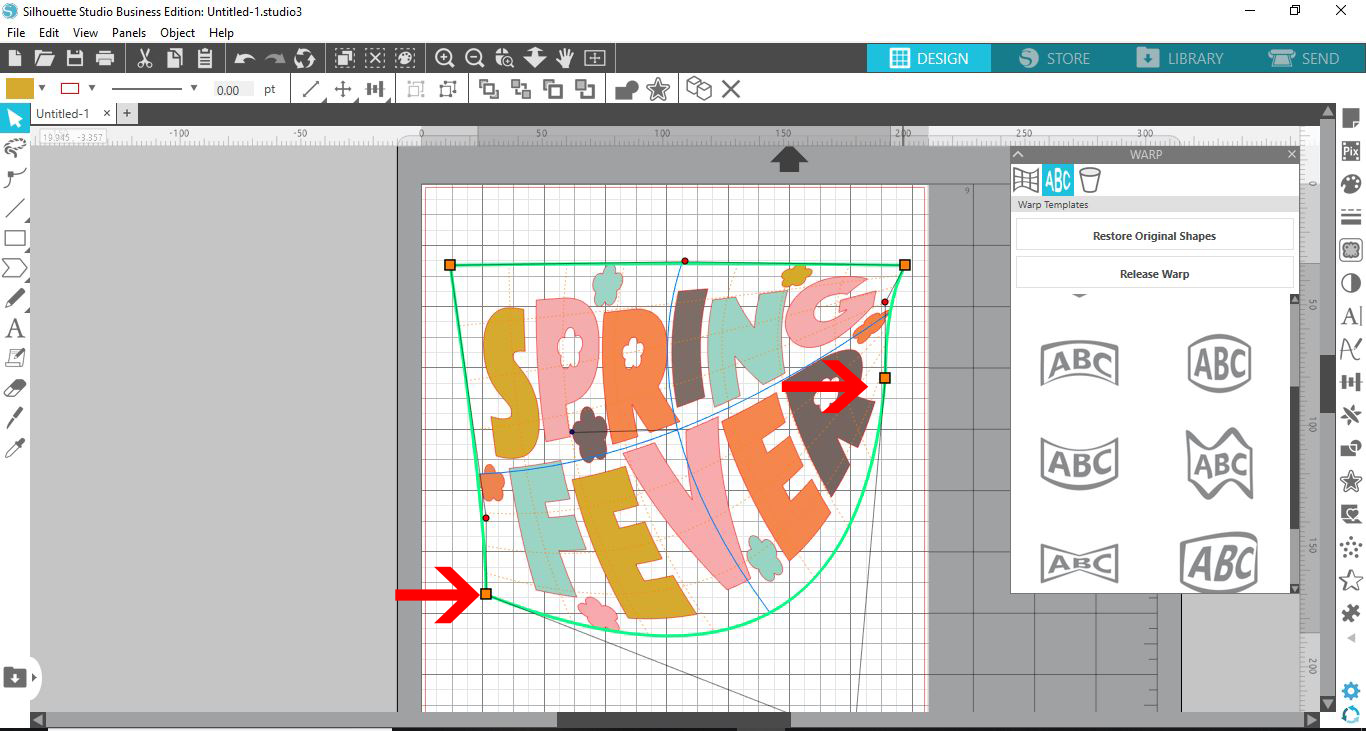
Edit the orange corner squares to further change the shape of the warp.
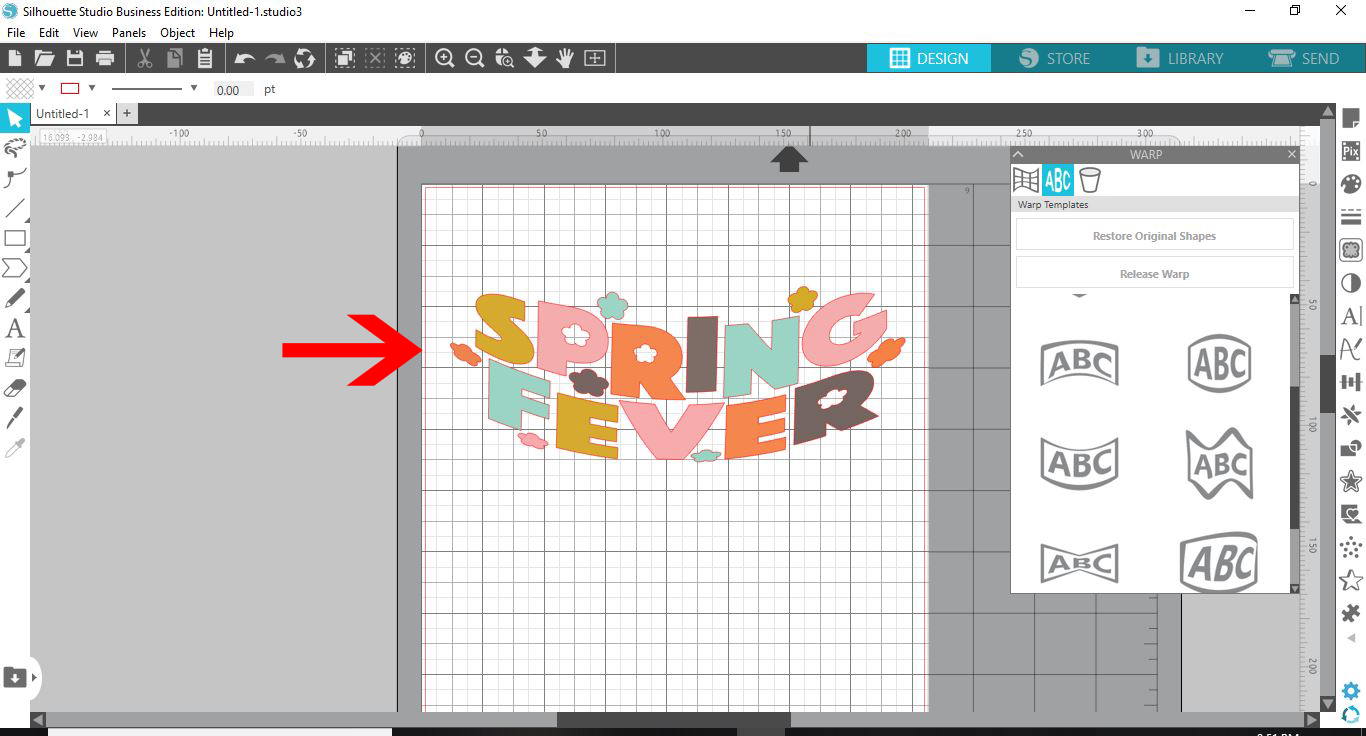
To get an idea of how the design looks without the visible mesh, click once away from the design.
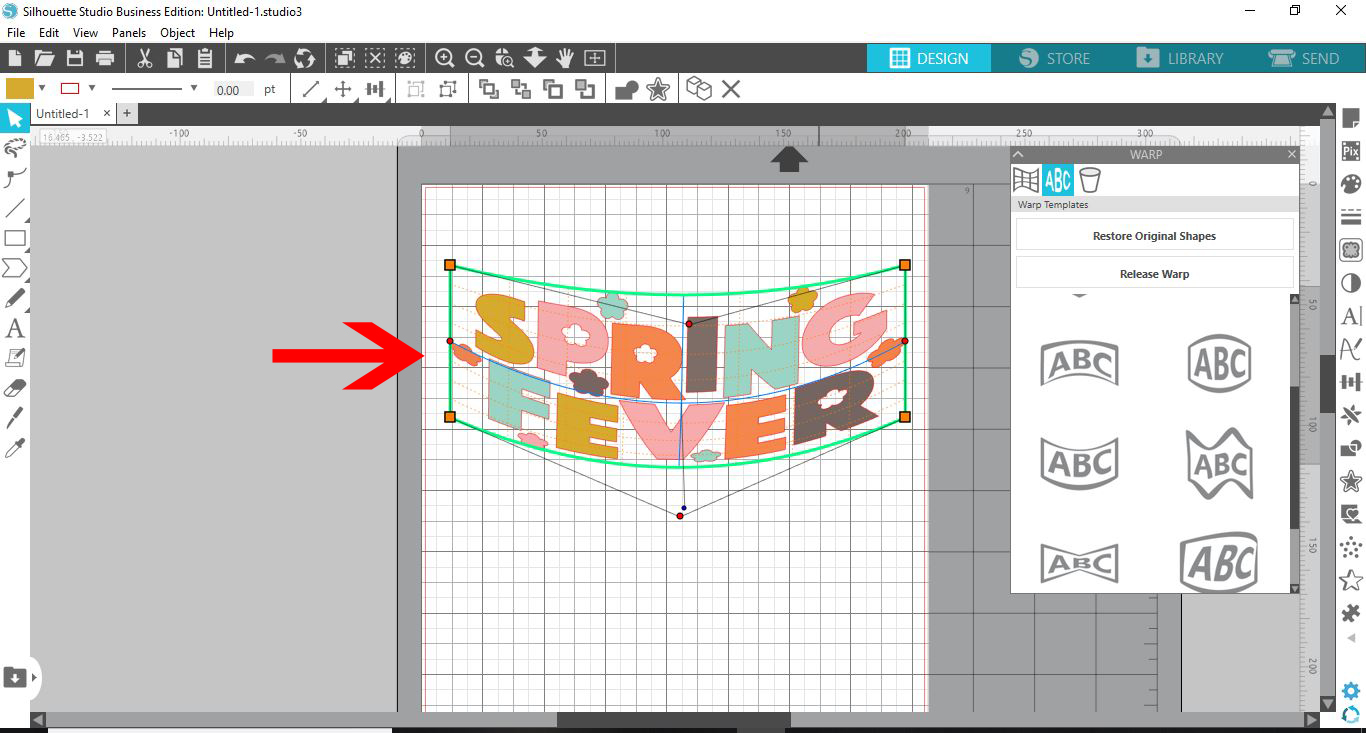
Depending on your software version, you can click once on the design to see the mesh again. If this doesn’t work, double click and the mesh should appear.
Once done, finalize the warp by clicking on Release Warp. Keep in mind that once you do this, you won’t be able to edit the mesh further. The design will also be broken up into individual parts.
If you want to start over again with the original shape, click on Restore Original Shapes.
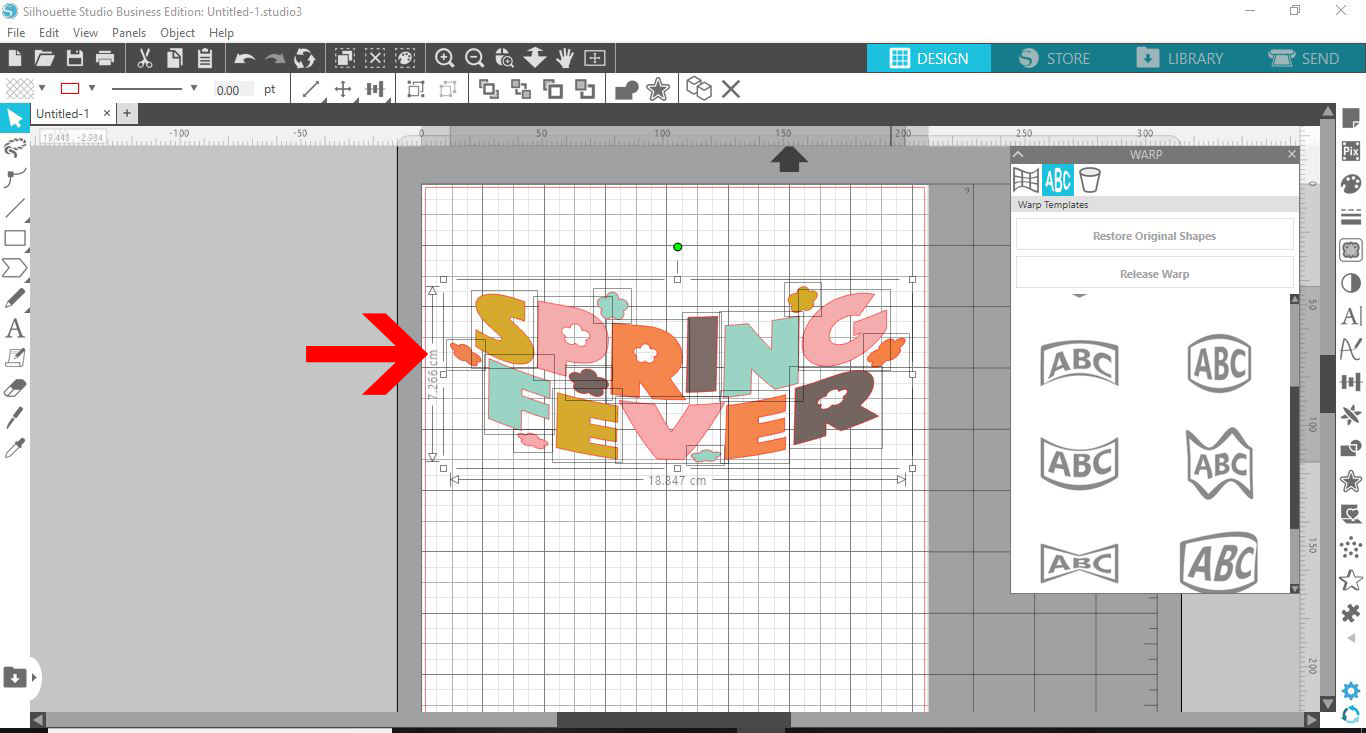
Step 4 - Use Warp Templates with Text
The Warp Template feature also works great with text. Select the Text Tool on the left side of the toolbar then type out your text.
You can also edit your text if needed. Next, choose a Warp Template.
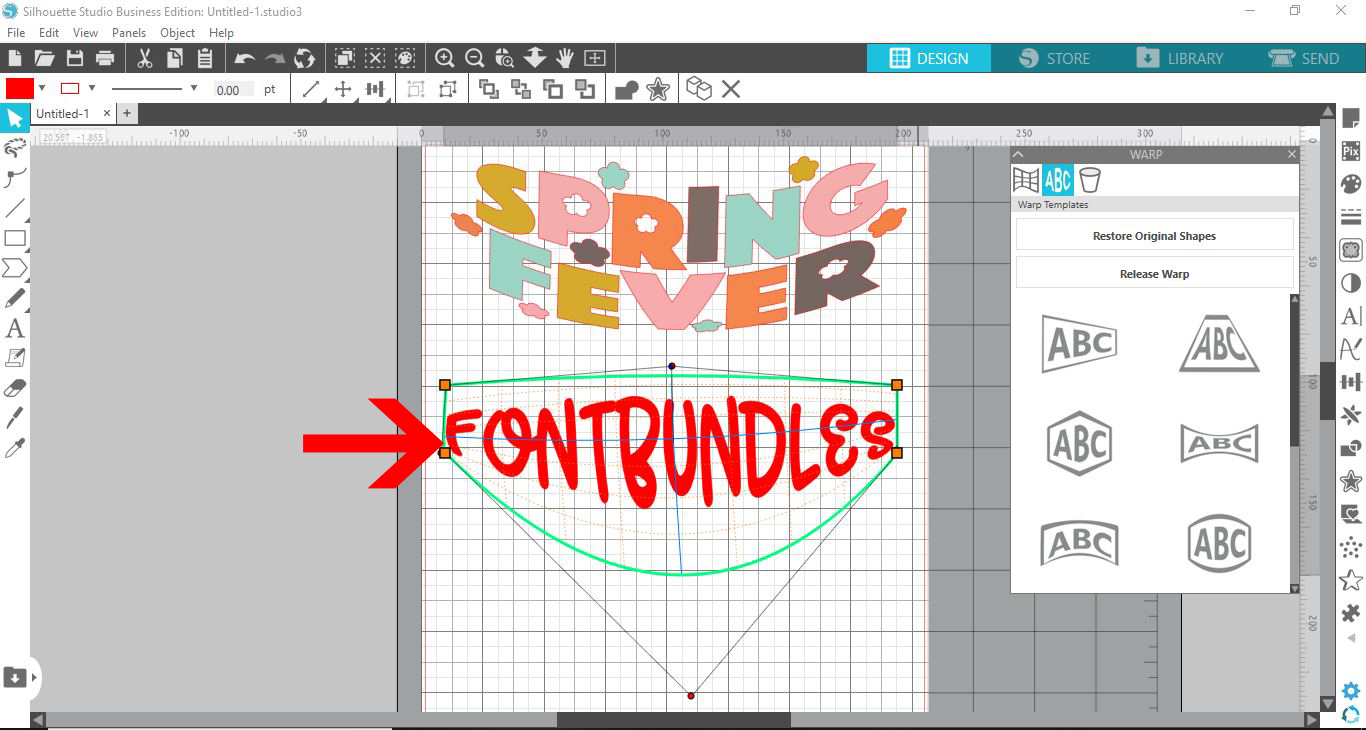
As we did with the image in Step 3, toggle between viewing the text with and without the mesh.
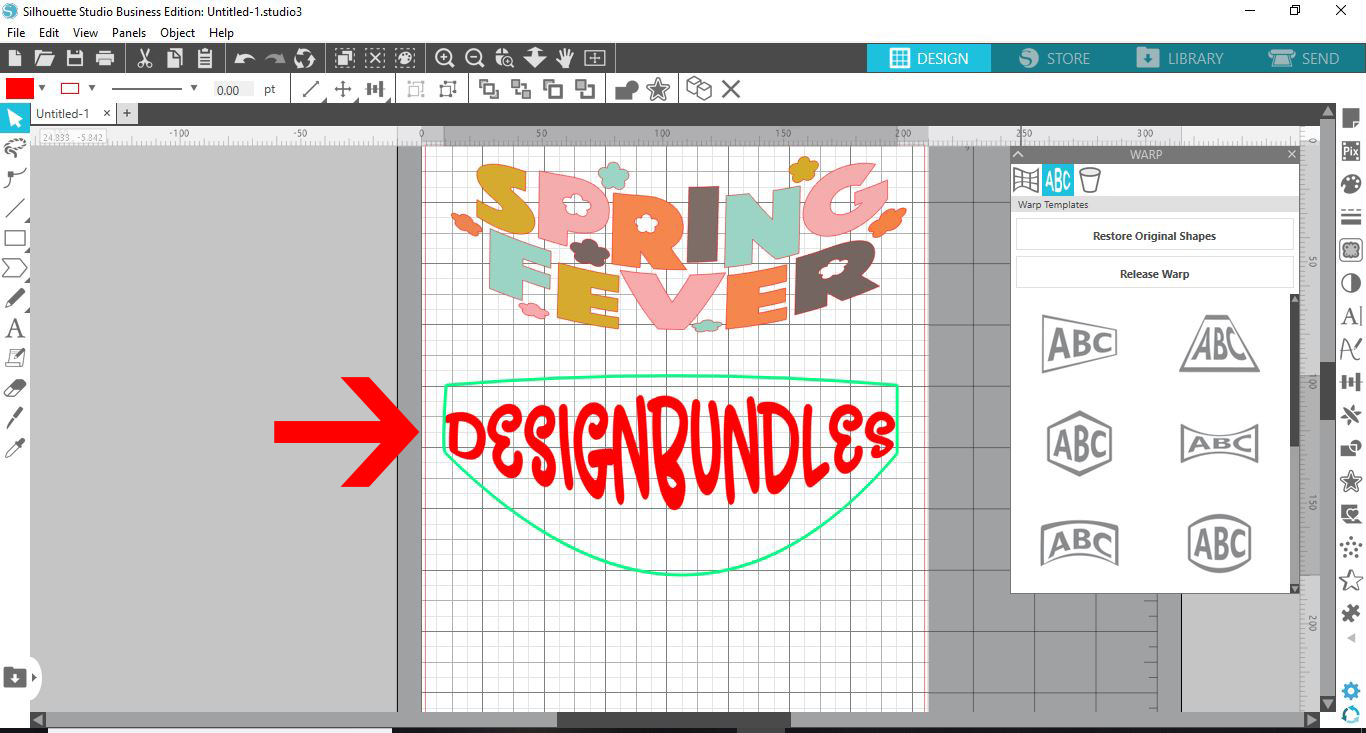
Make any edits you want to the warp mesh like we did below.

Now, click on Release Warp to finalize. Once applied the letters will become individual objects. You can select all of the elements with the Move Tool, then right click > Group. This will make the design easier to move and resize.
There you go! You have just learned how to use the Warp Templates in Silhouette Studio. Warp Templates are particularly useful as a starting point when editing. From there on, it’s so easy to warp your design exactly as you want.