By Design Bundles
Photoshop Tutorials7 min
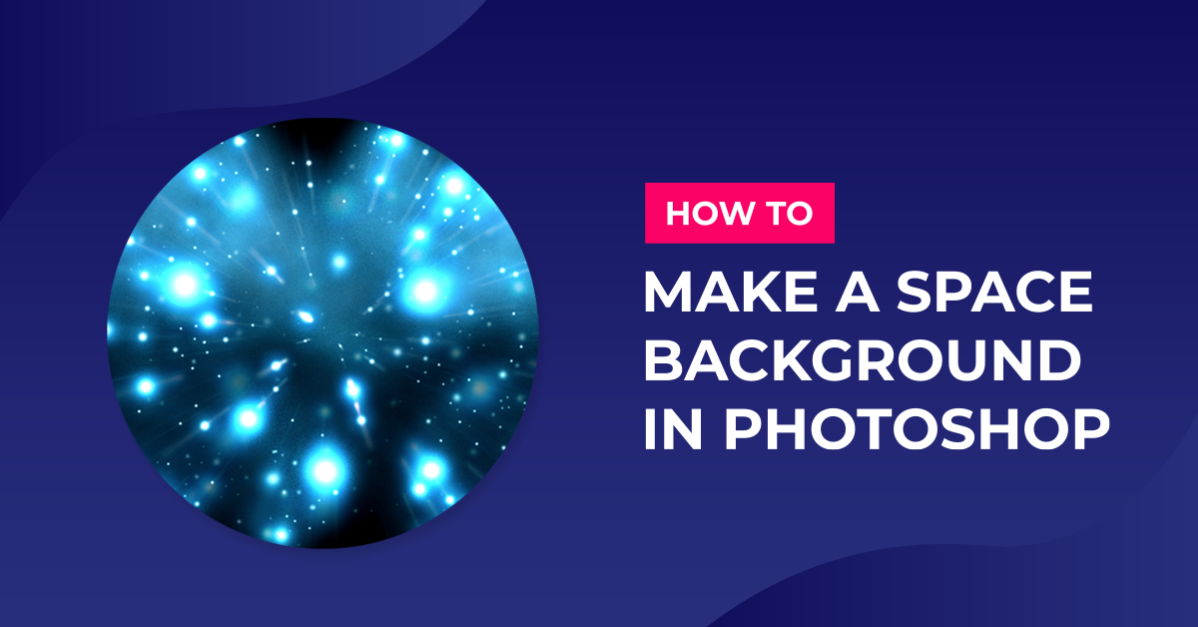
Space Background in Photoshop
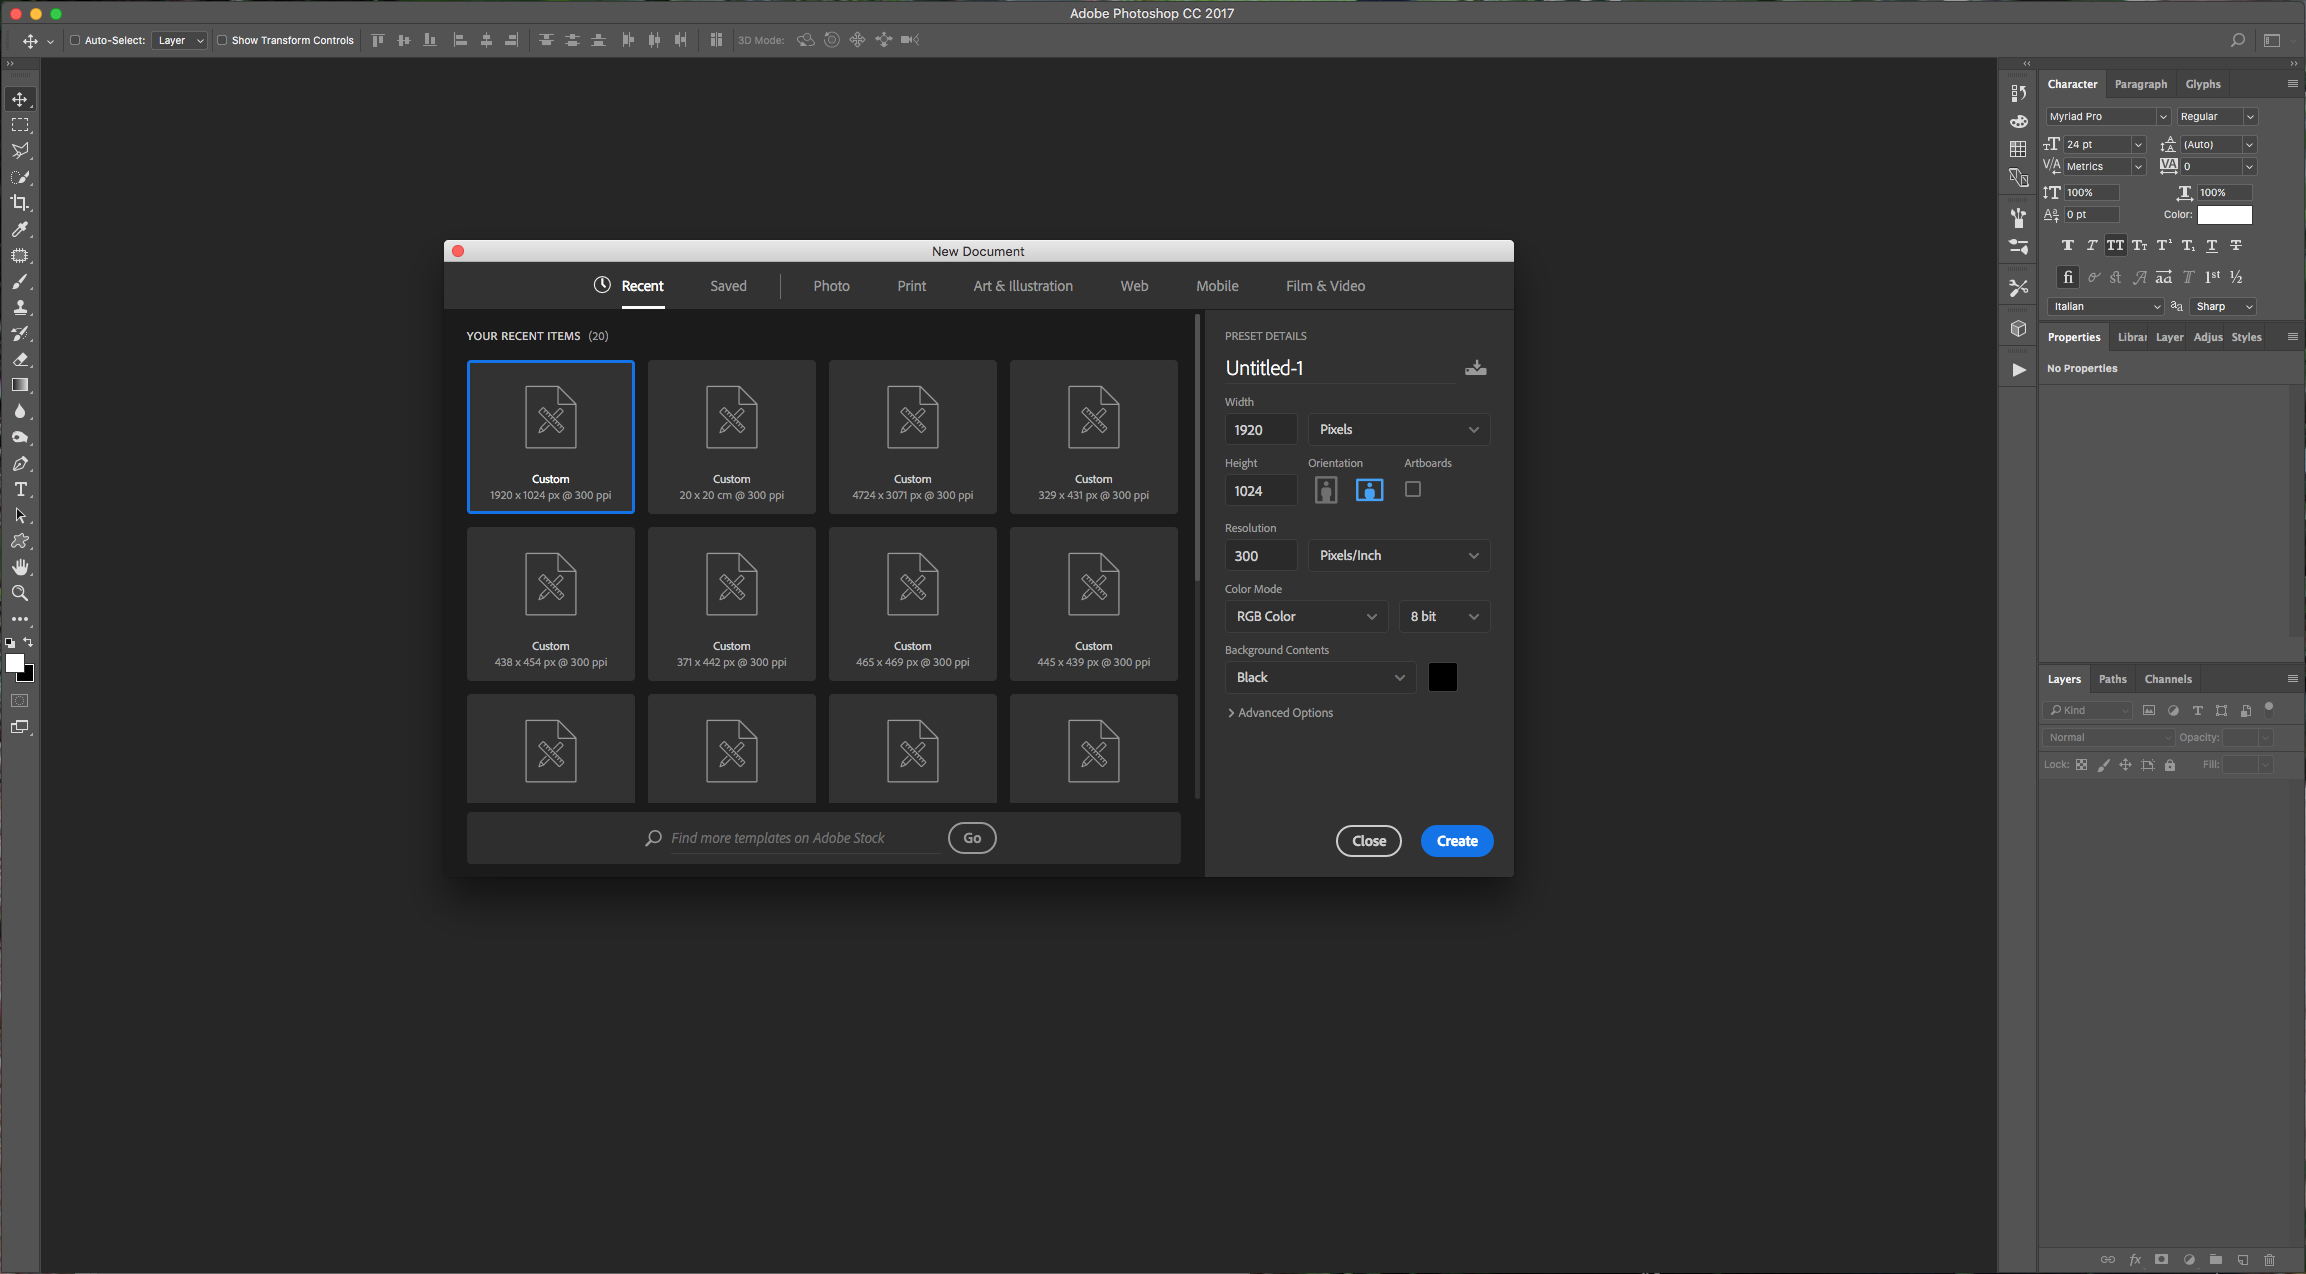
1 - In Photoshop, create a “New Document” make sure black is your “Background” color.
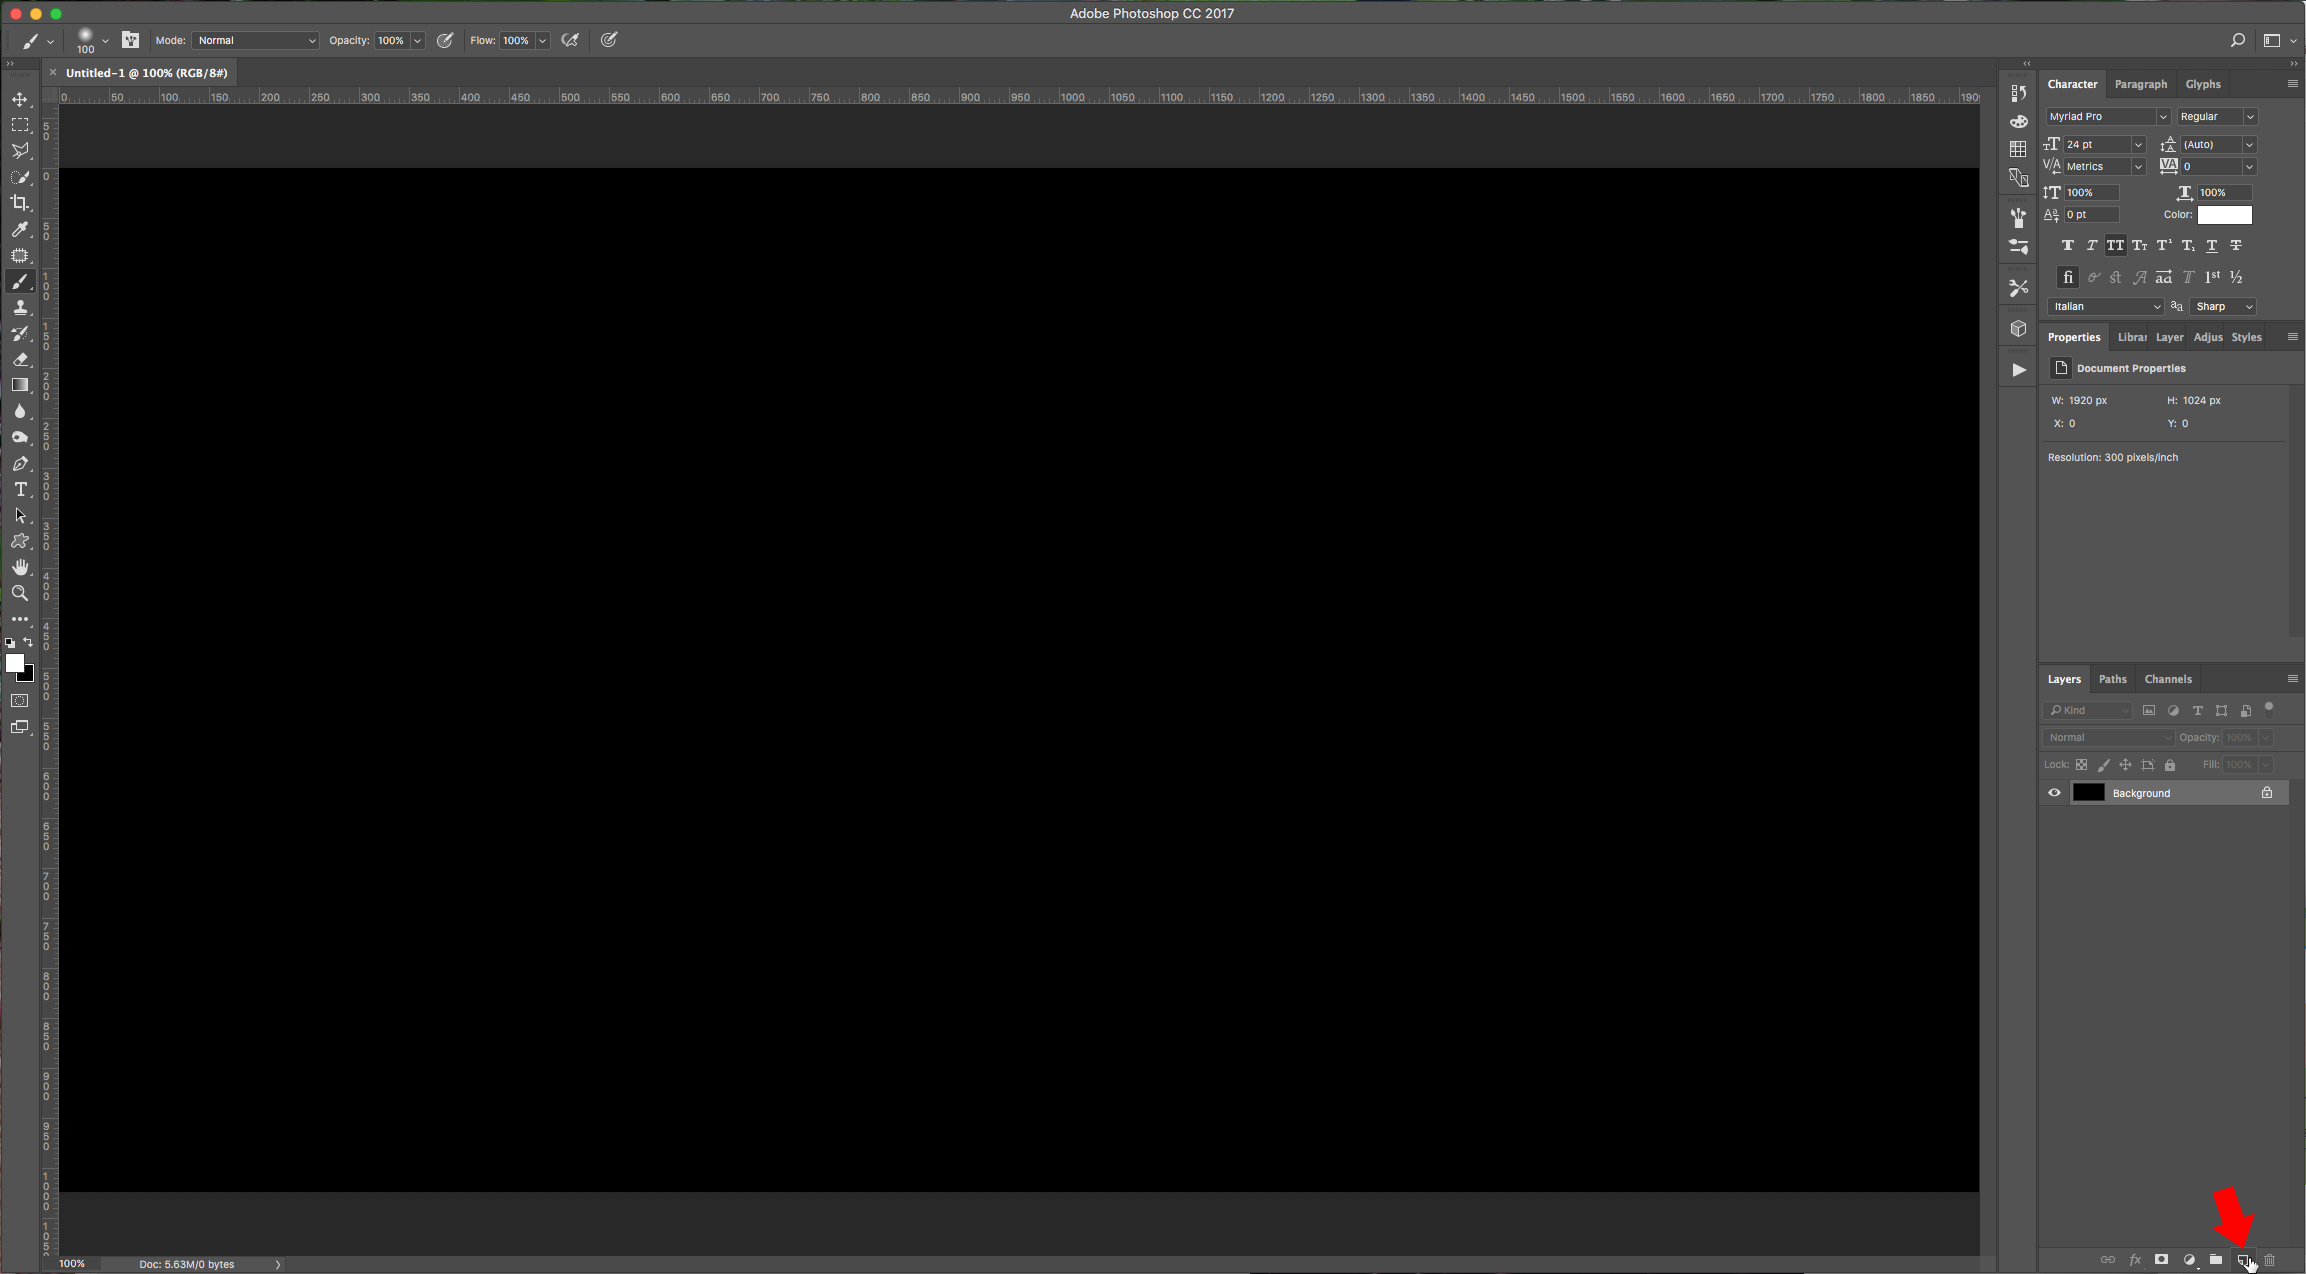
2 - Create a “New Layer” by clicking the button at the bottom of the “Layers” Panel.
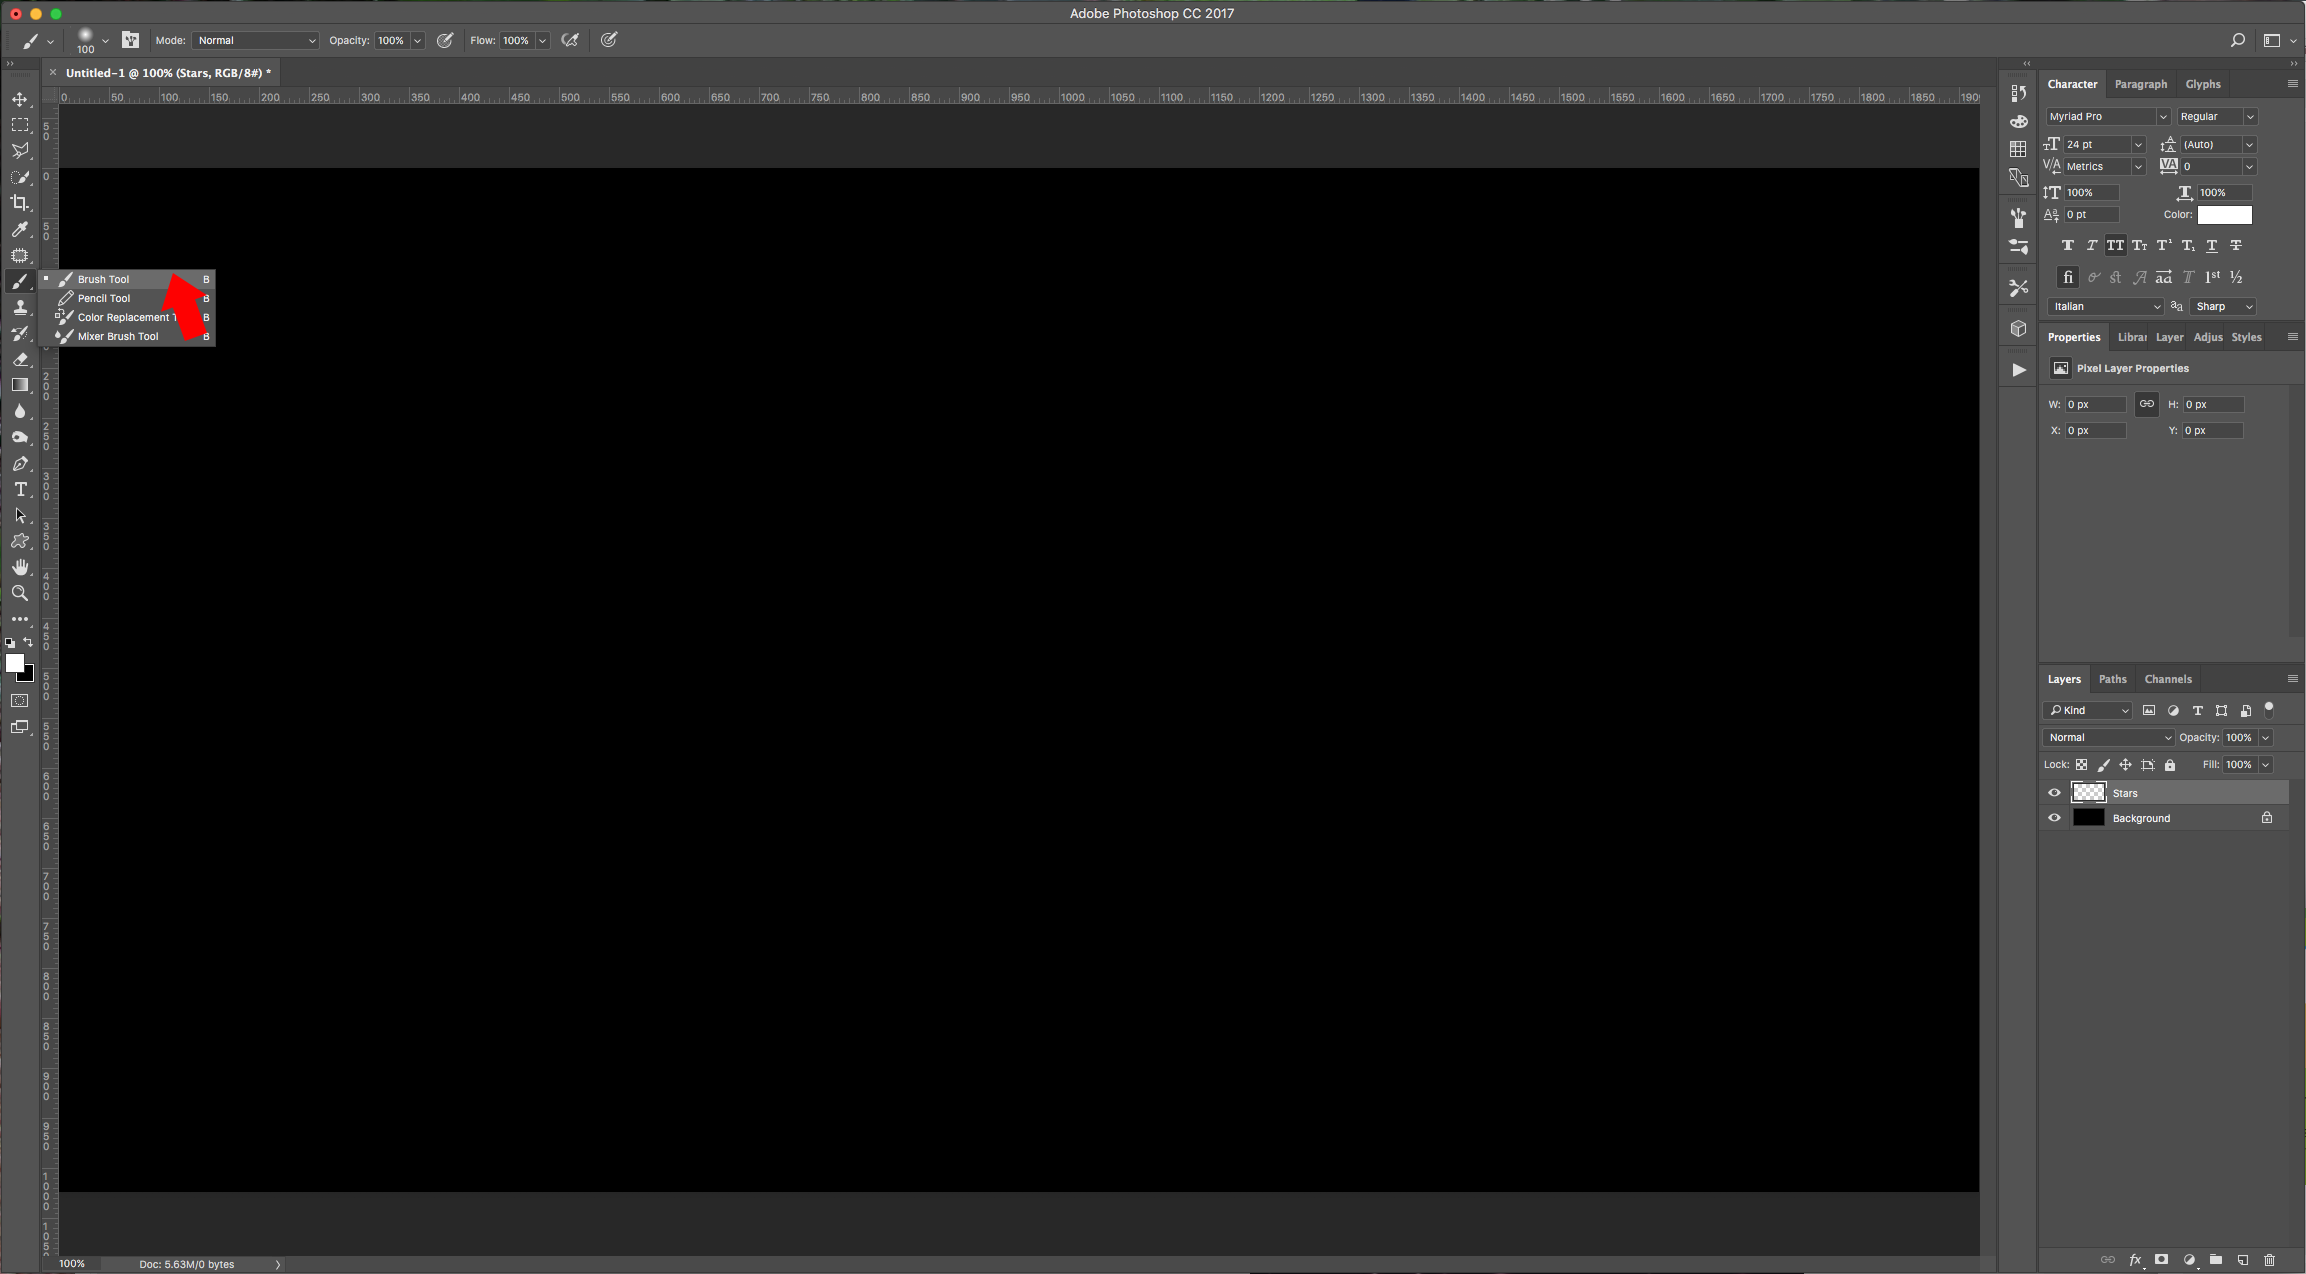
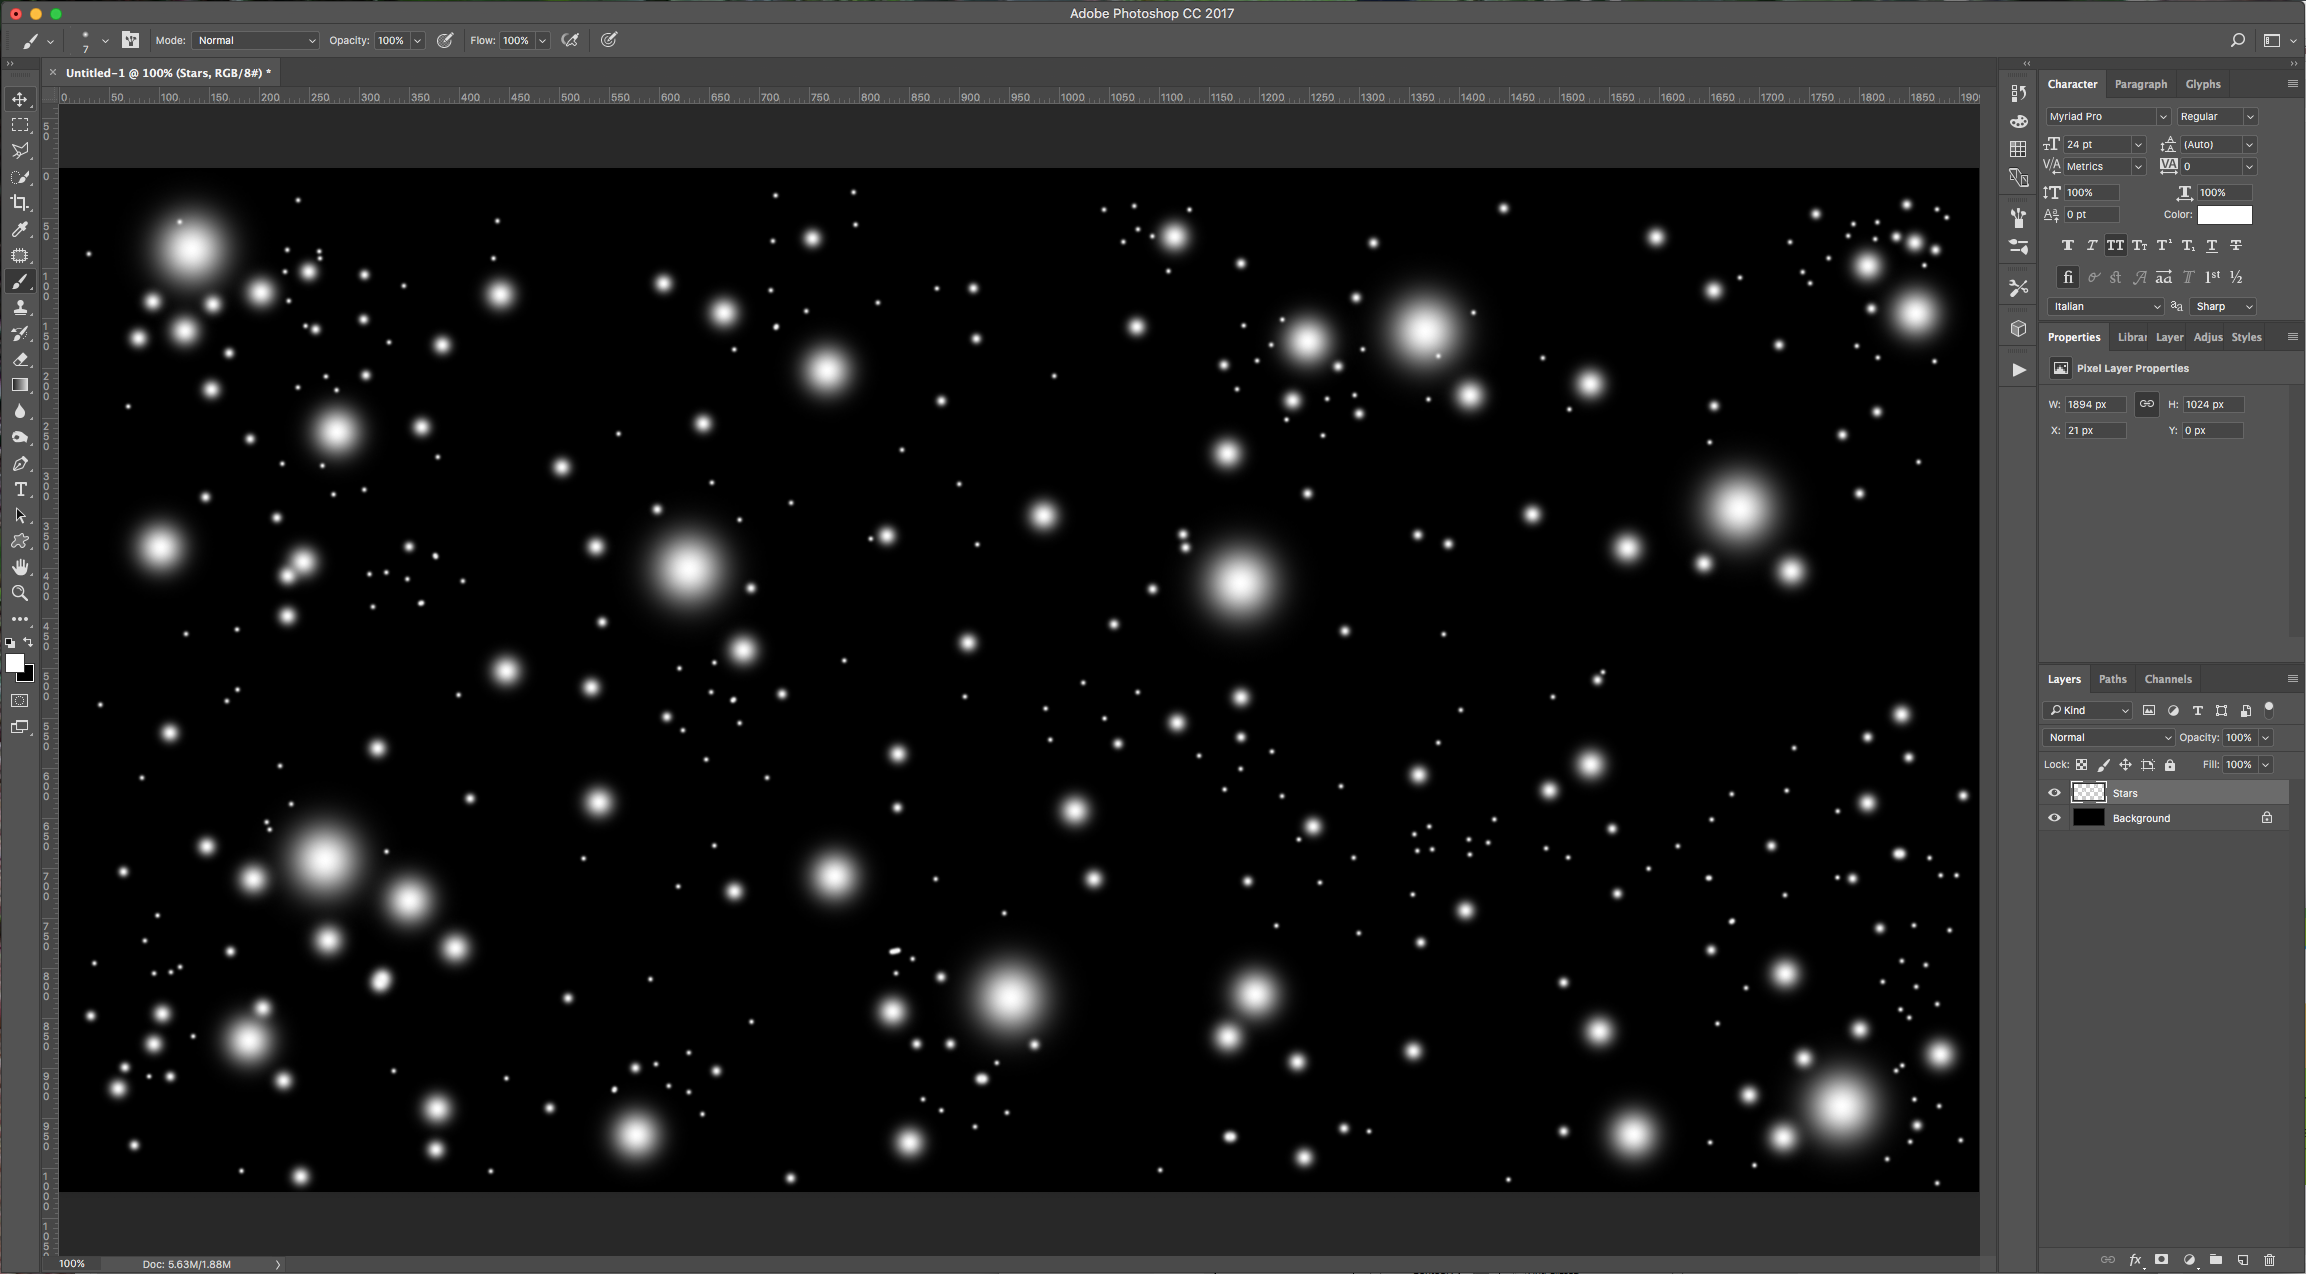
3 - Select the “Brush Tool” (B), pick up a Soft (0% “Hardness”) Round Brush with a size of 100 Pixels approx. And use white as “Fill” color. Paint many dots around your document changing the size of your brush. The idea is to get something similar to a starry night sky.
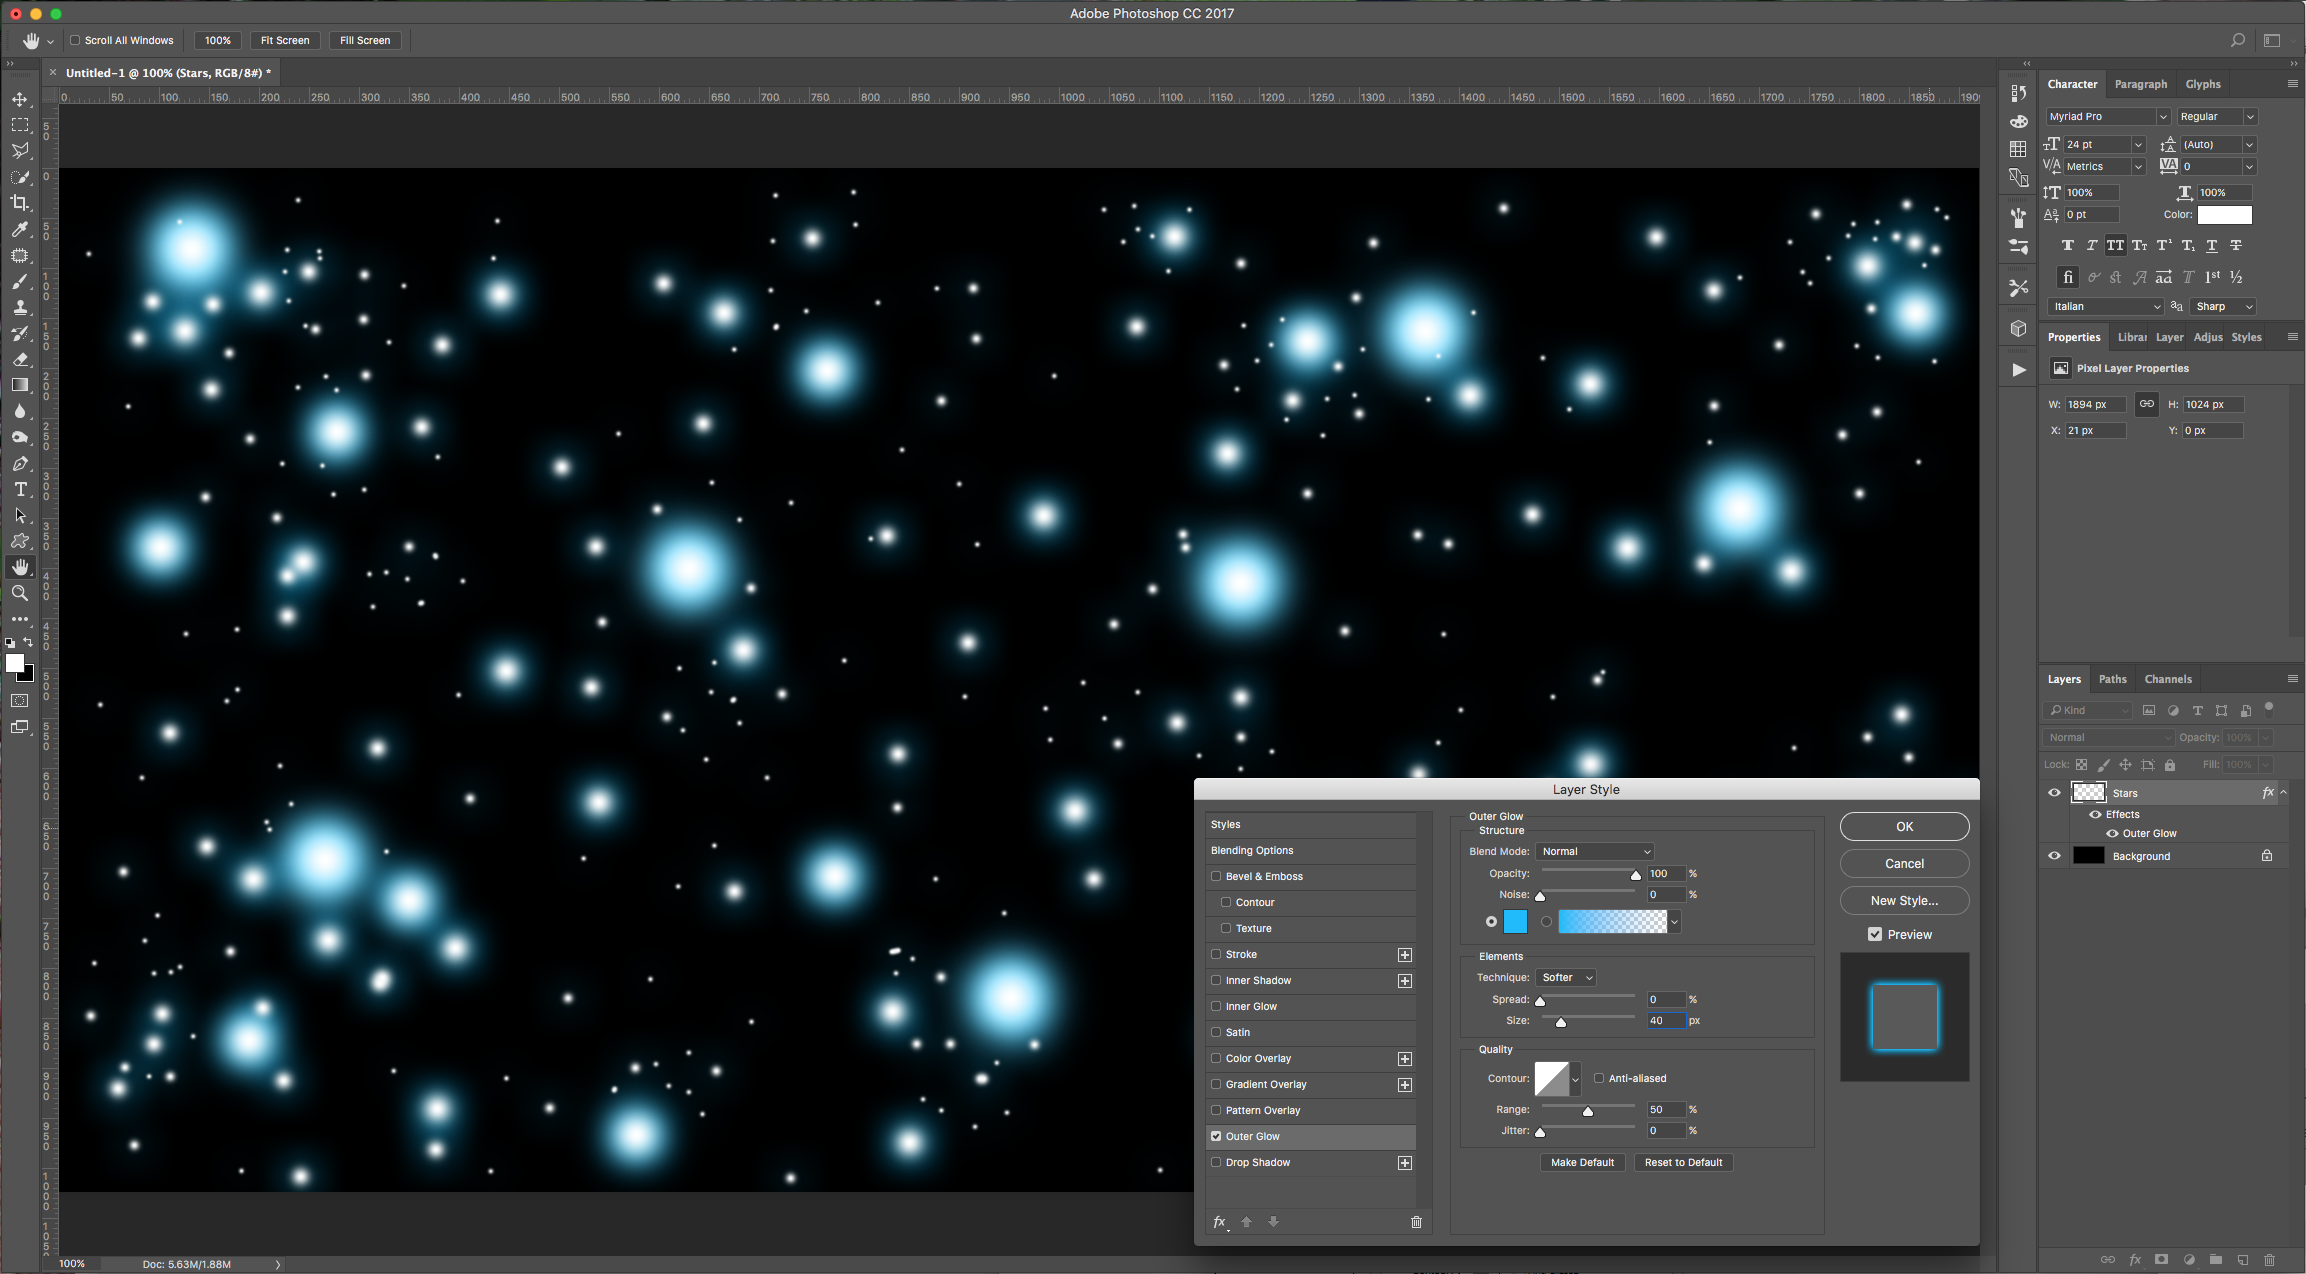
4 - Double-click on your layer’s thumbnail to apply the following “Layer Styles”:
Outer Glow: (#03b9fd)
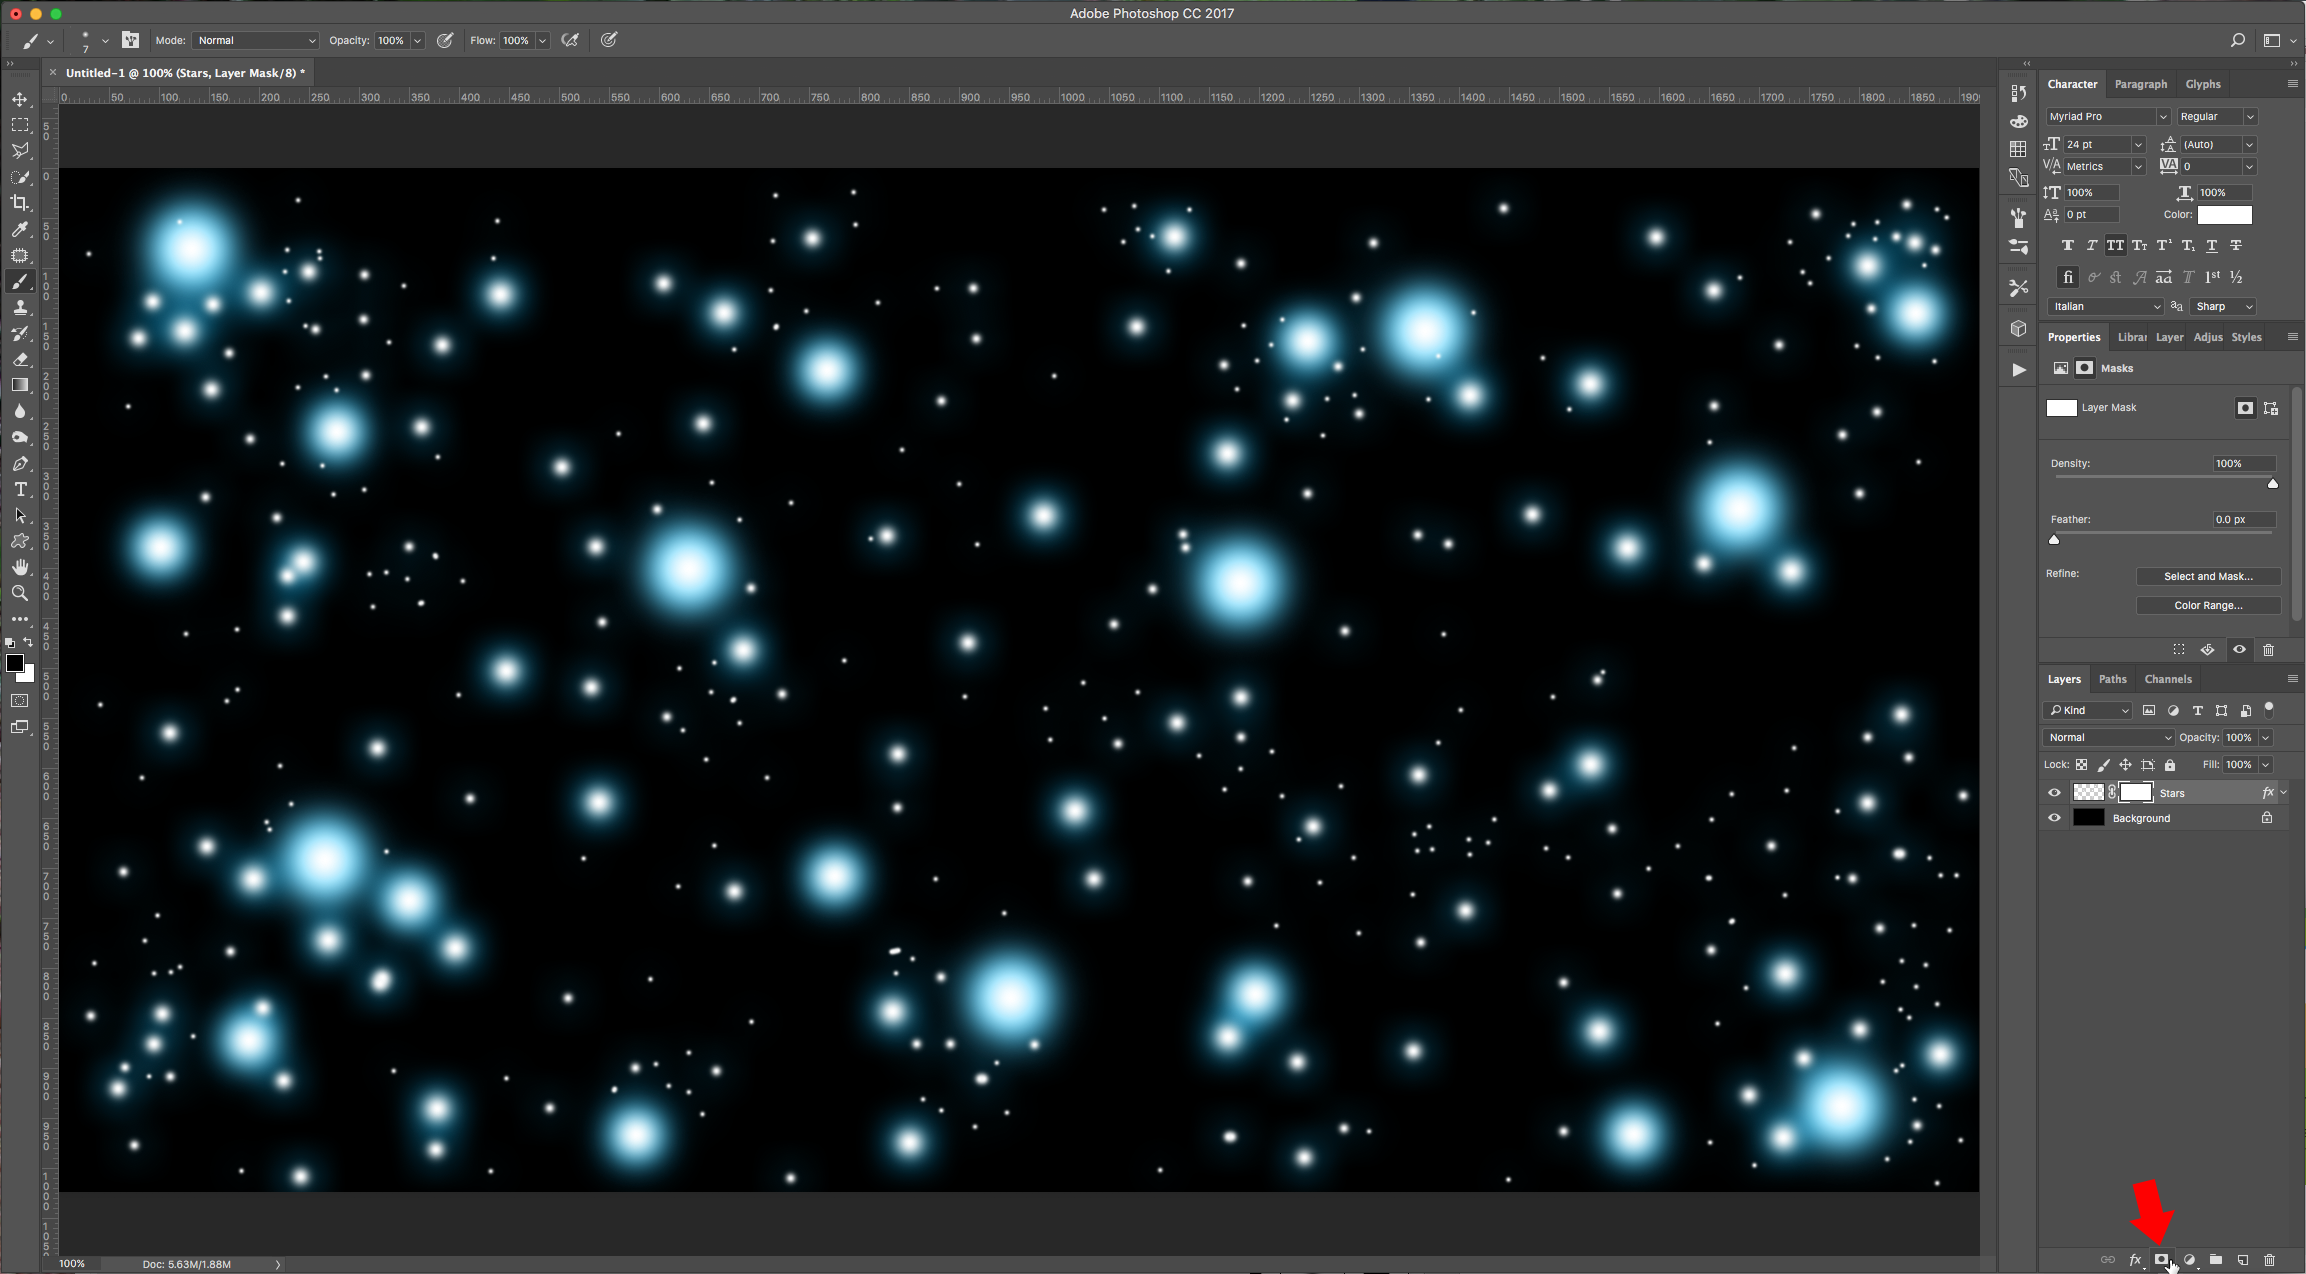
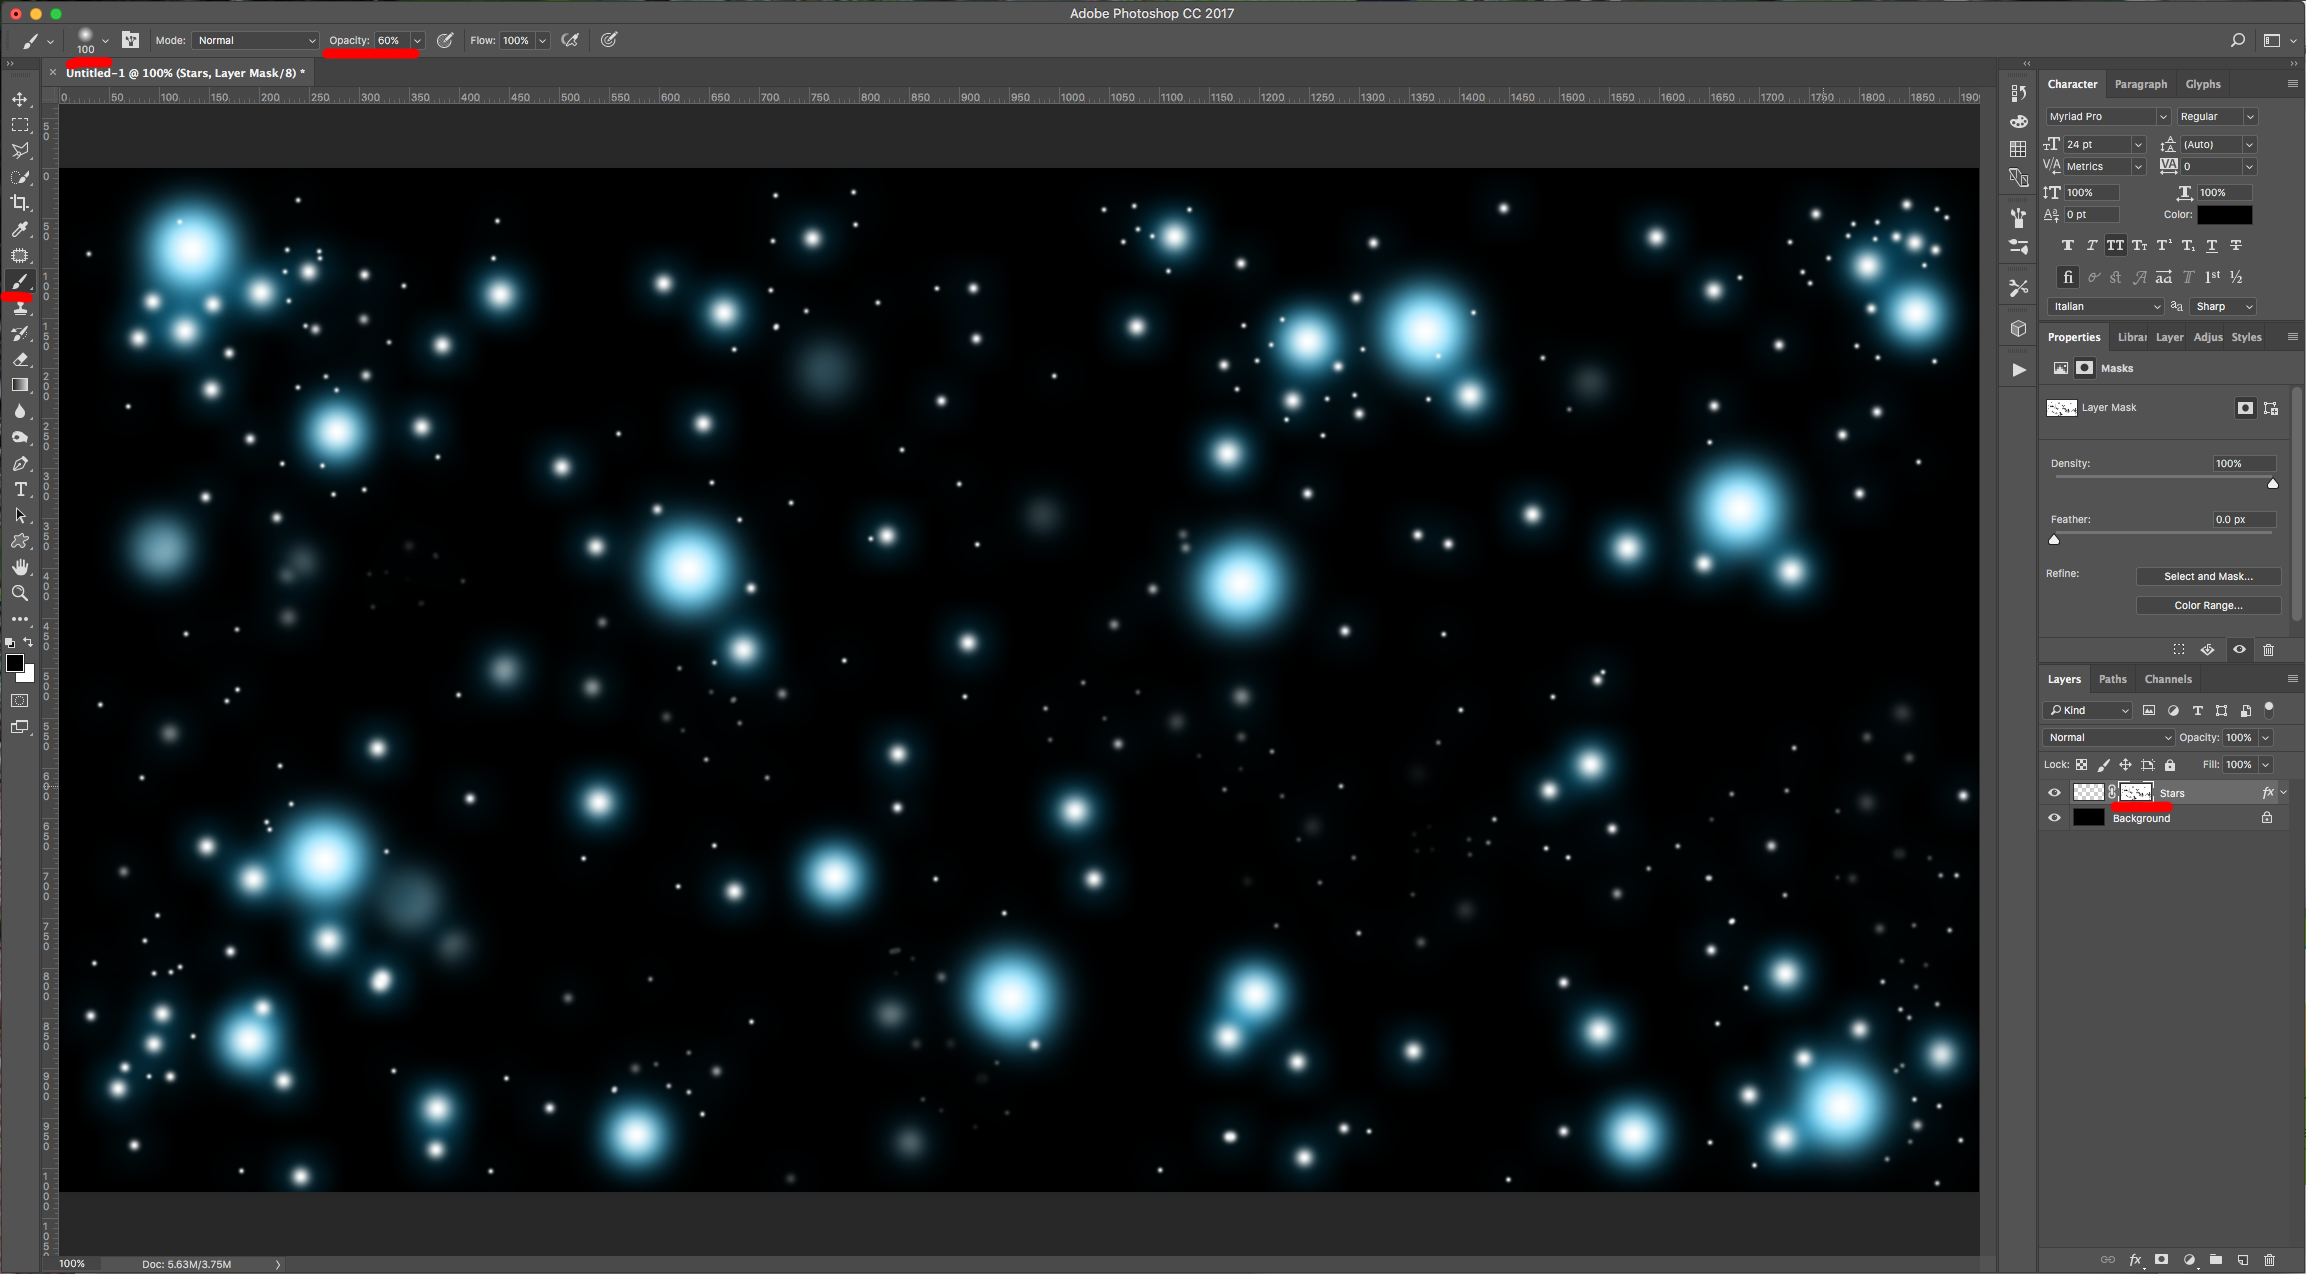
5 - Click on the “Add Layer Mask” button at the bottom of the “Layers Panel” and choose a Soft (0% “Hardness”) Round Brush with a size of 100 Pixels approx., this time use black as “Fill” color and set the “Opacity” to 60%. Select the “Mask” and fade some of your “Stars” to make them look like they are far away.
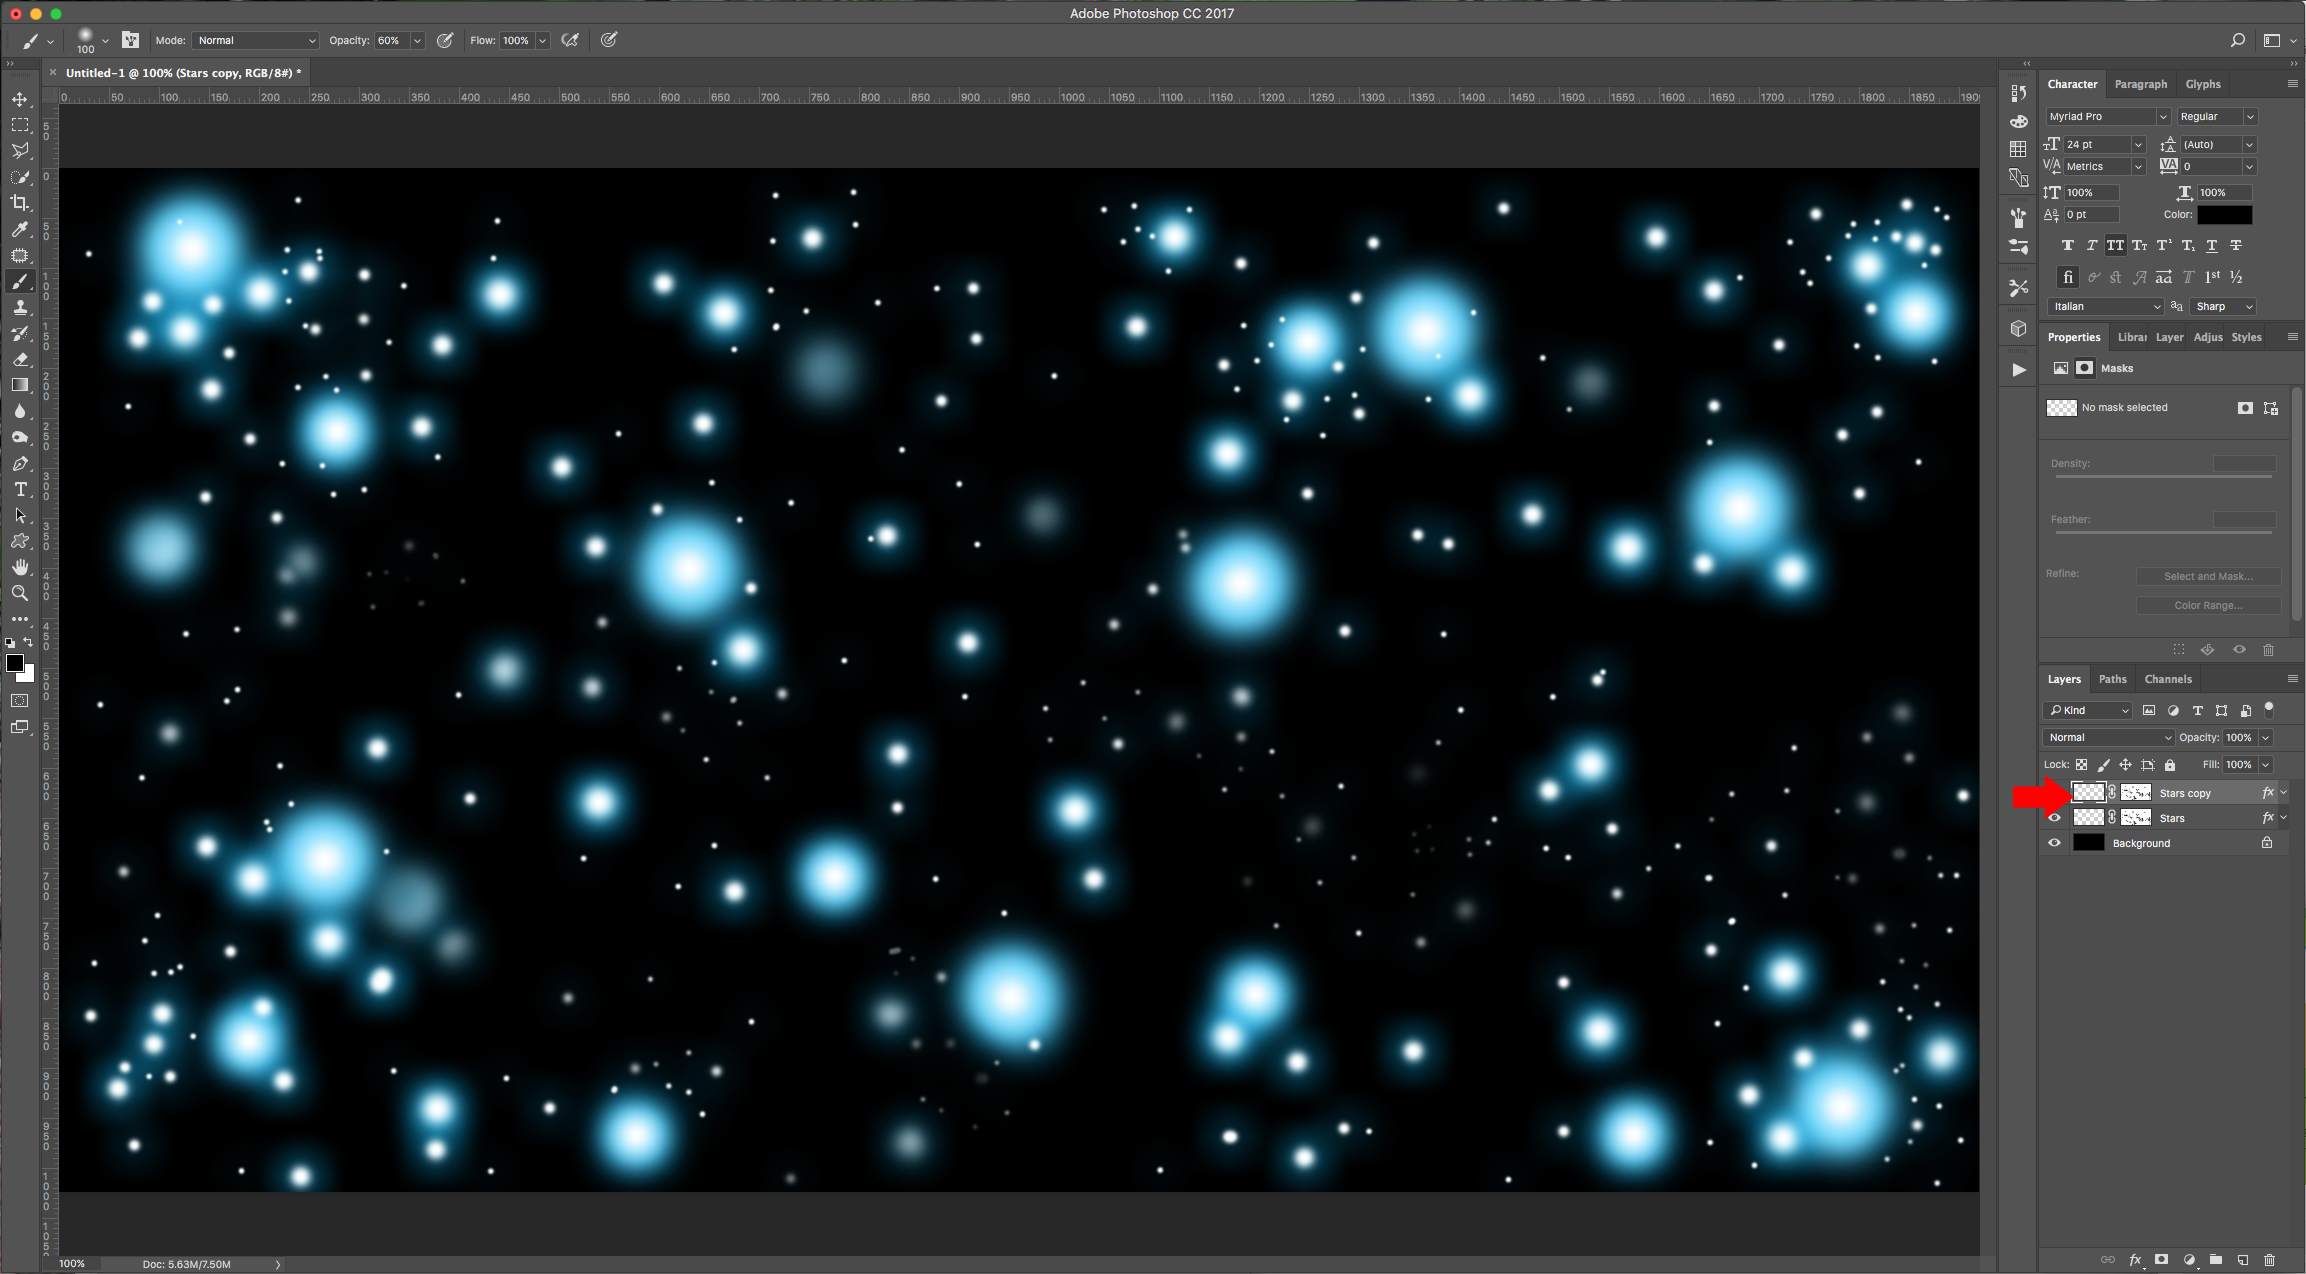
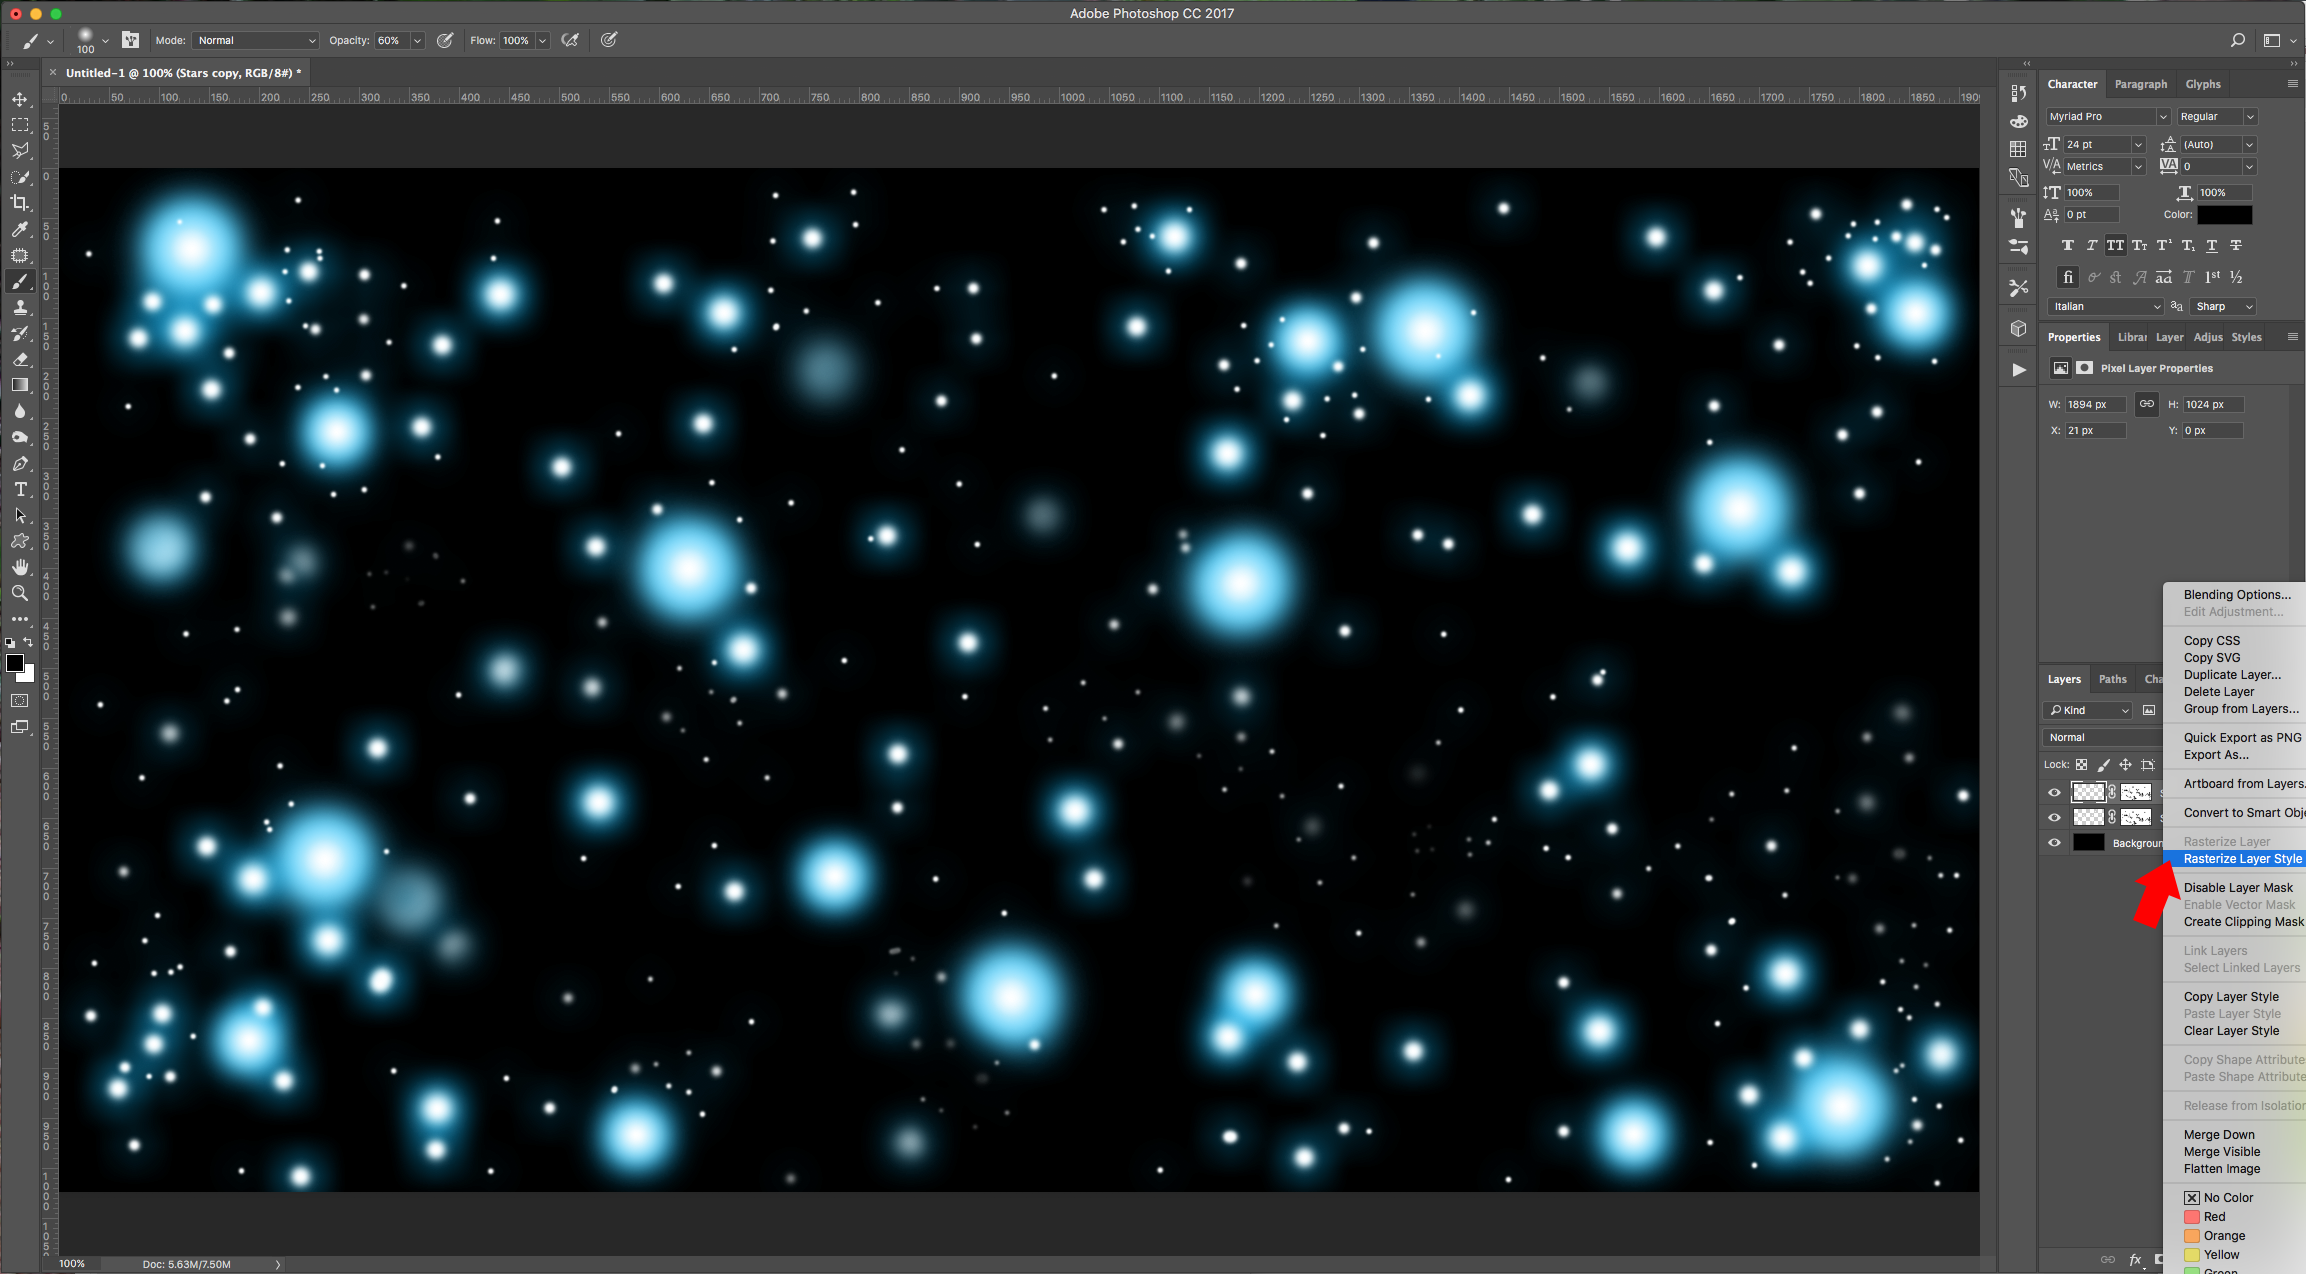
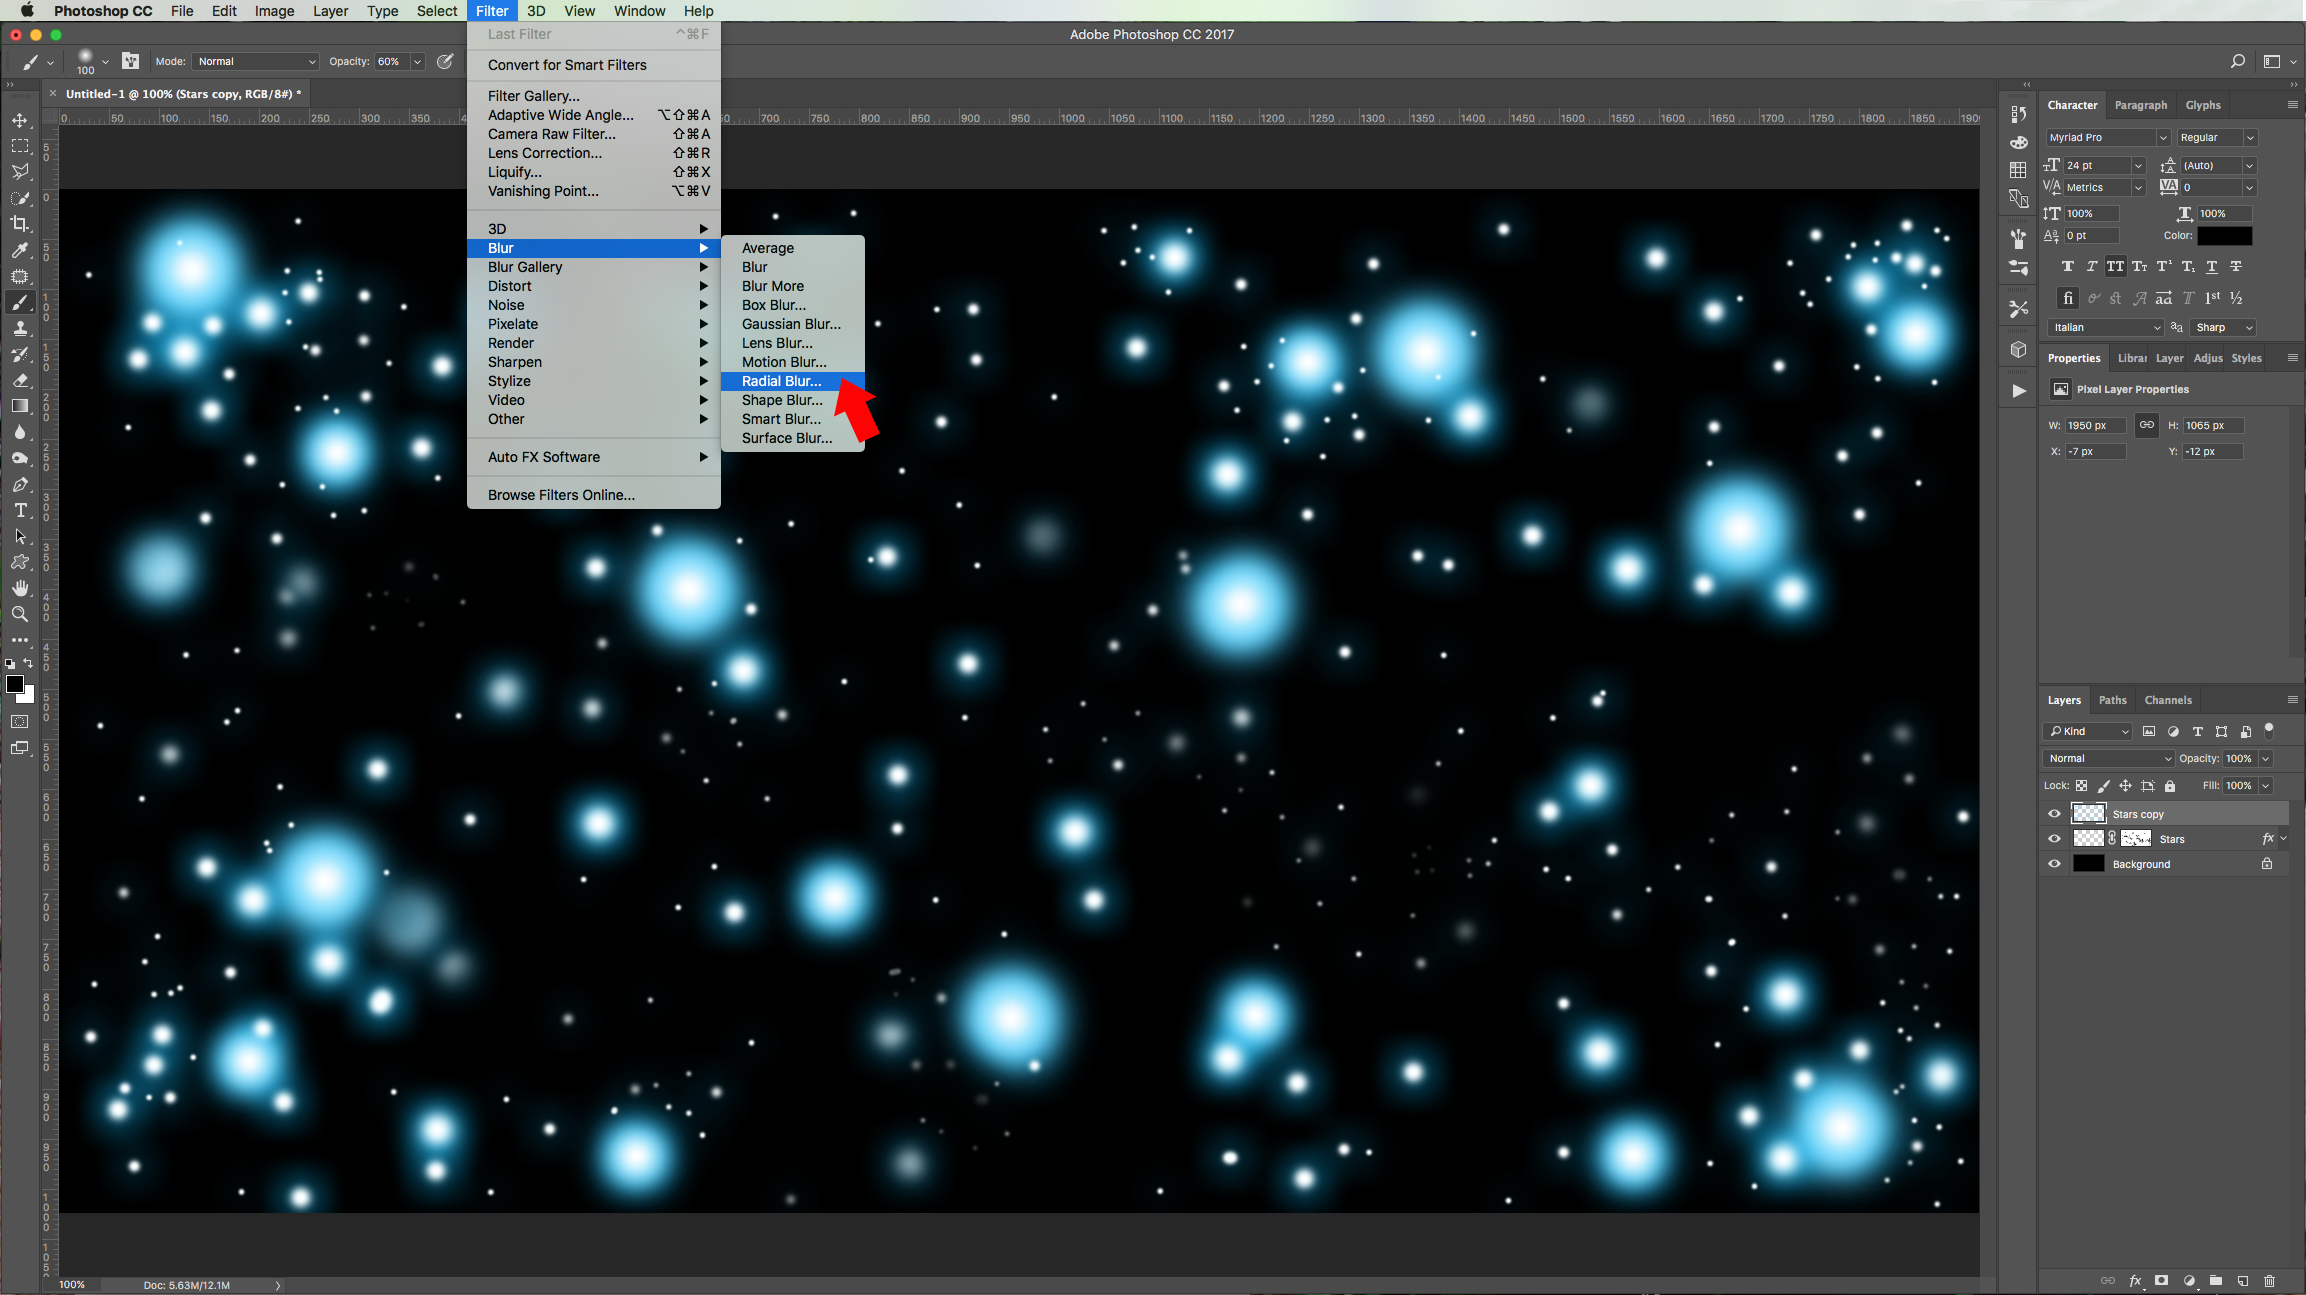
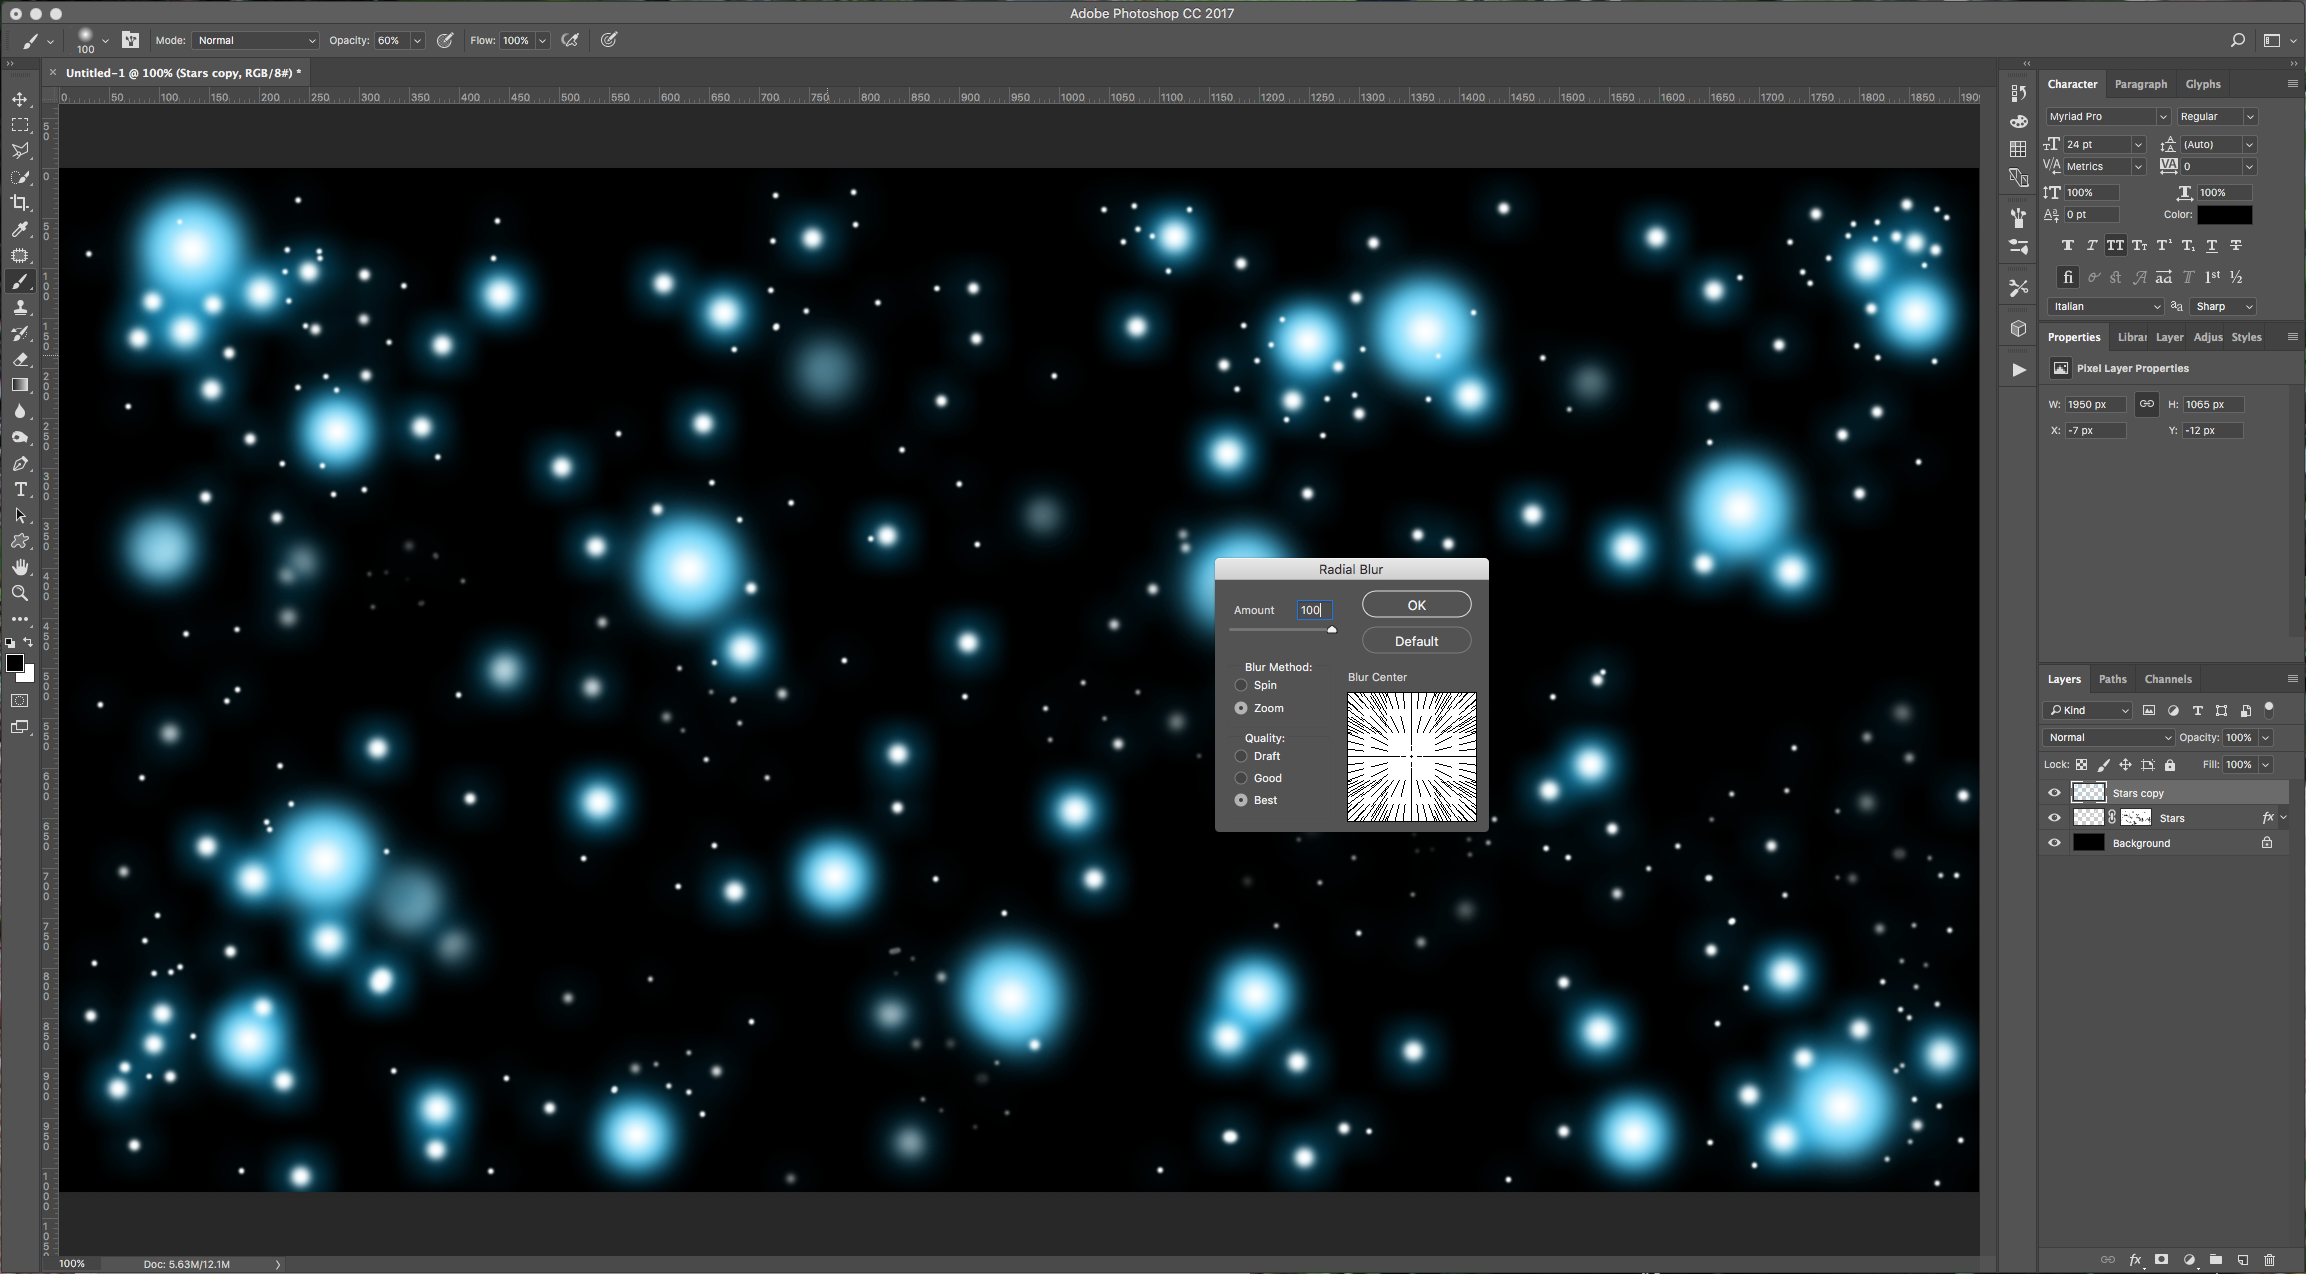
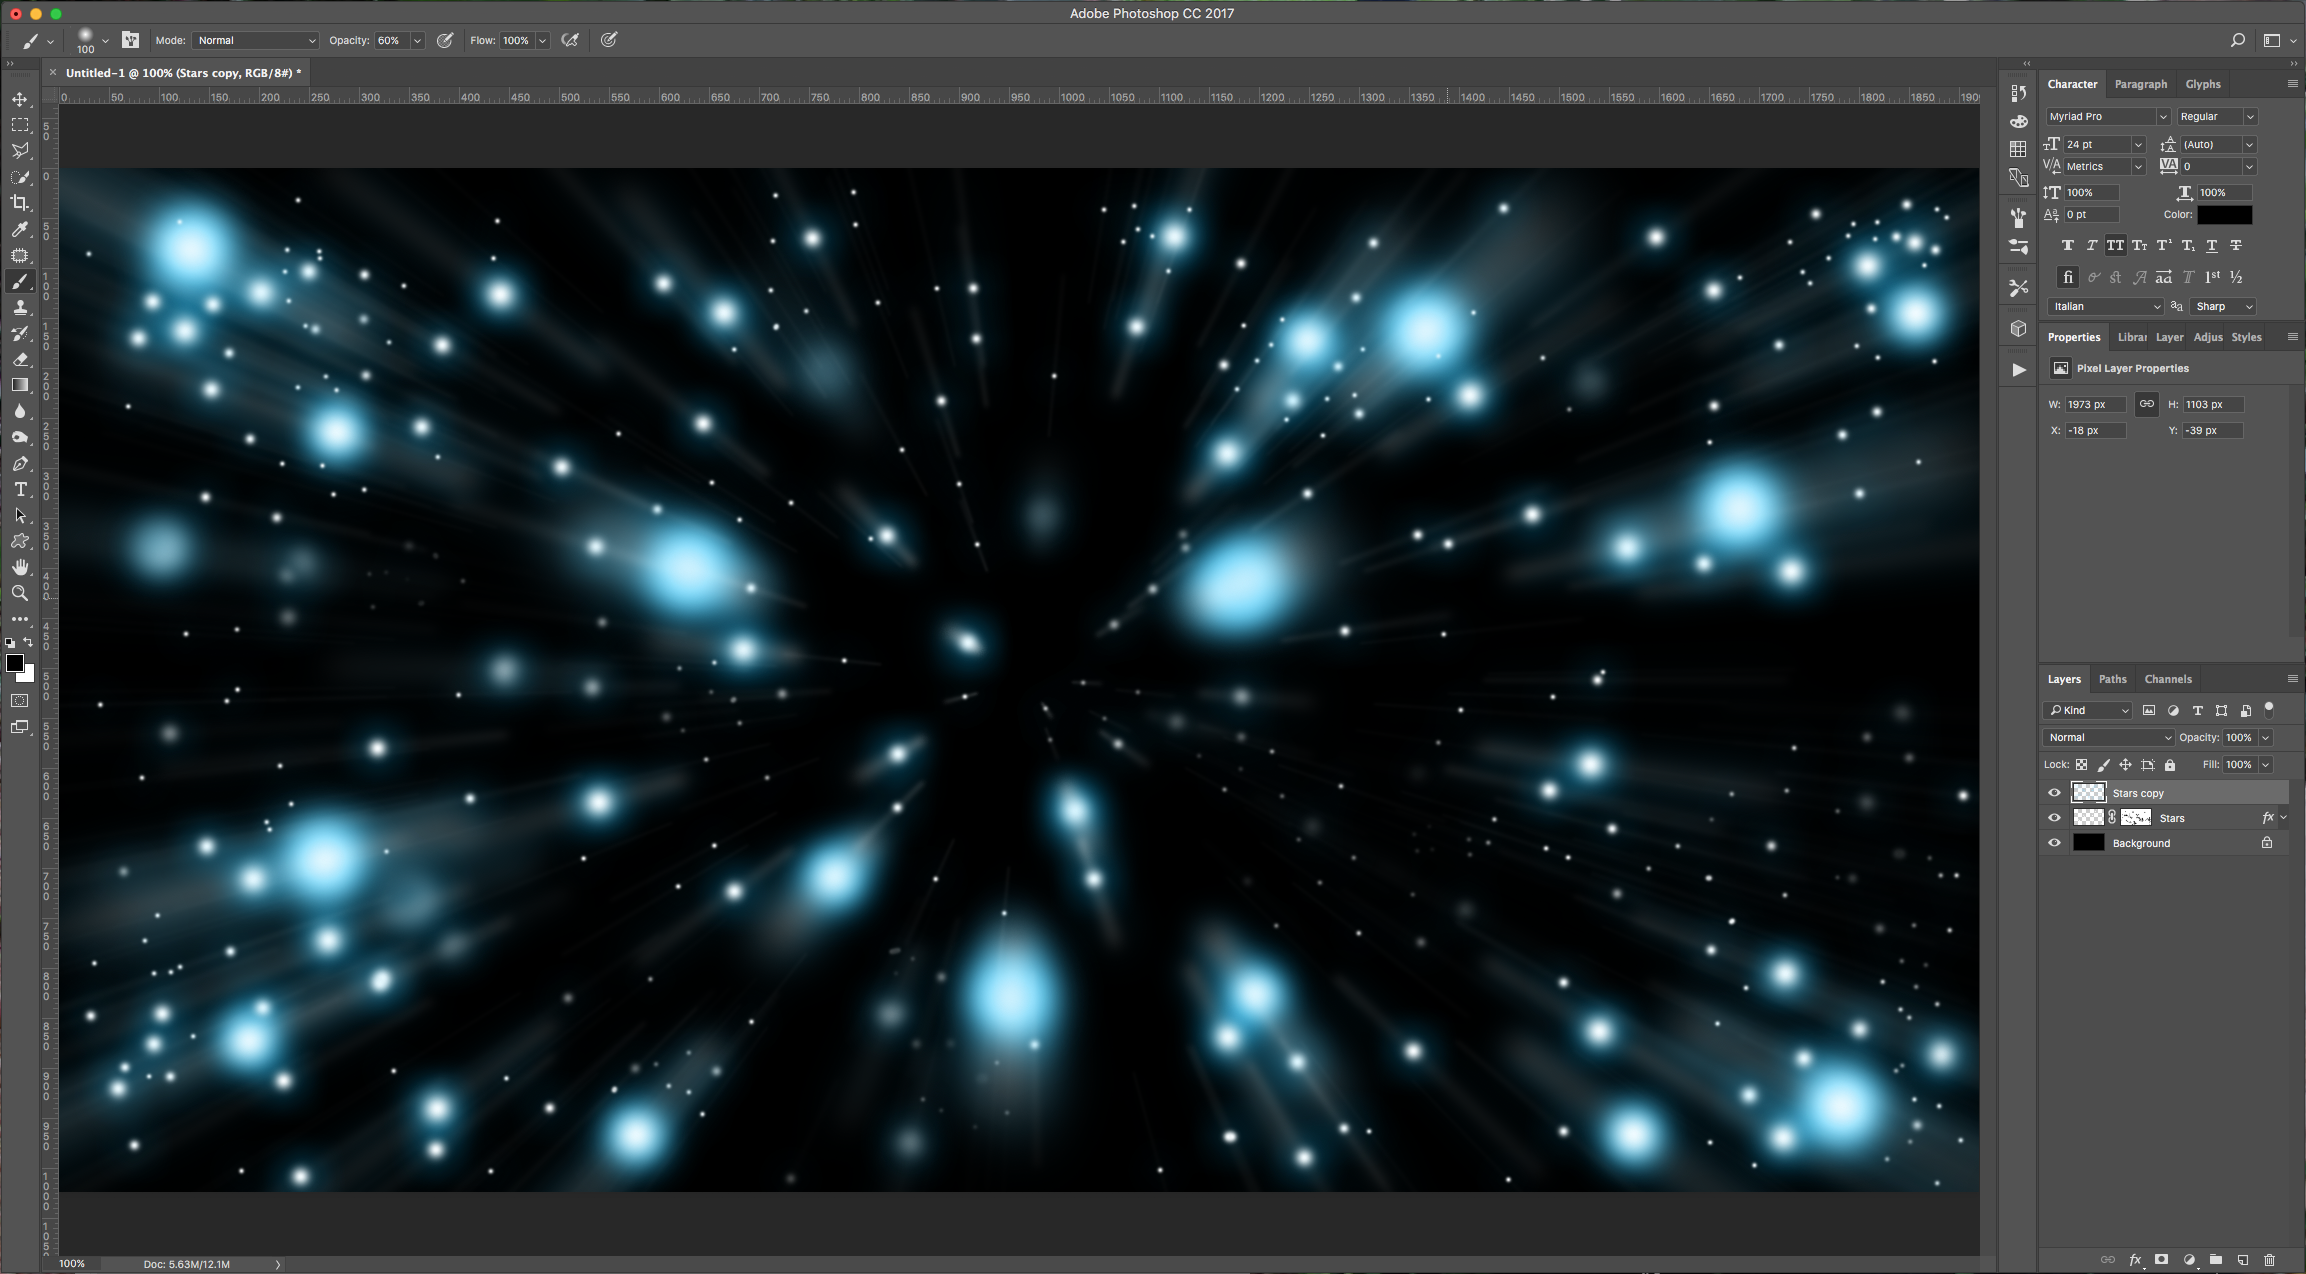
6 - Duplicate your Layer (Command/Control + J), right-click on the duplicate’s thumbnail and choose “Rasterize Layer Style” to merge the “Image” and “Mask” together. Then, go to Filter > Blur > Radial Blur and use the following values:
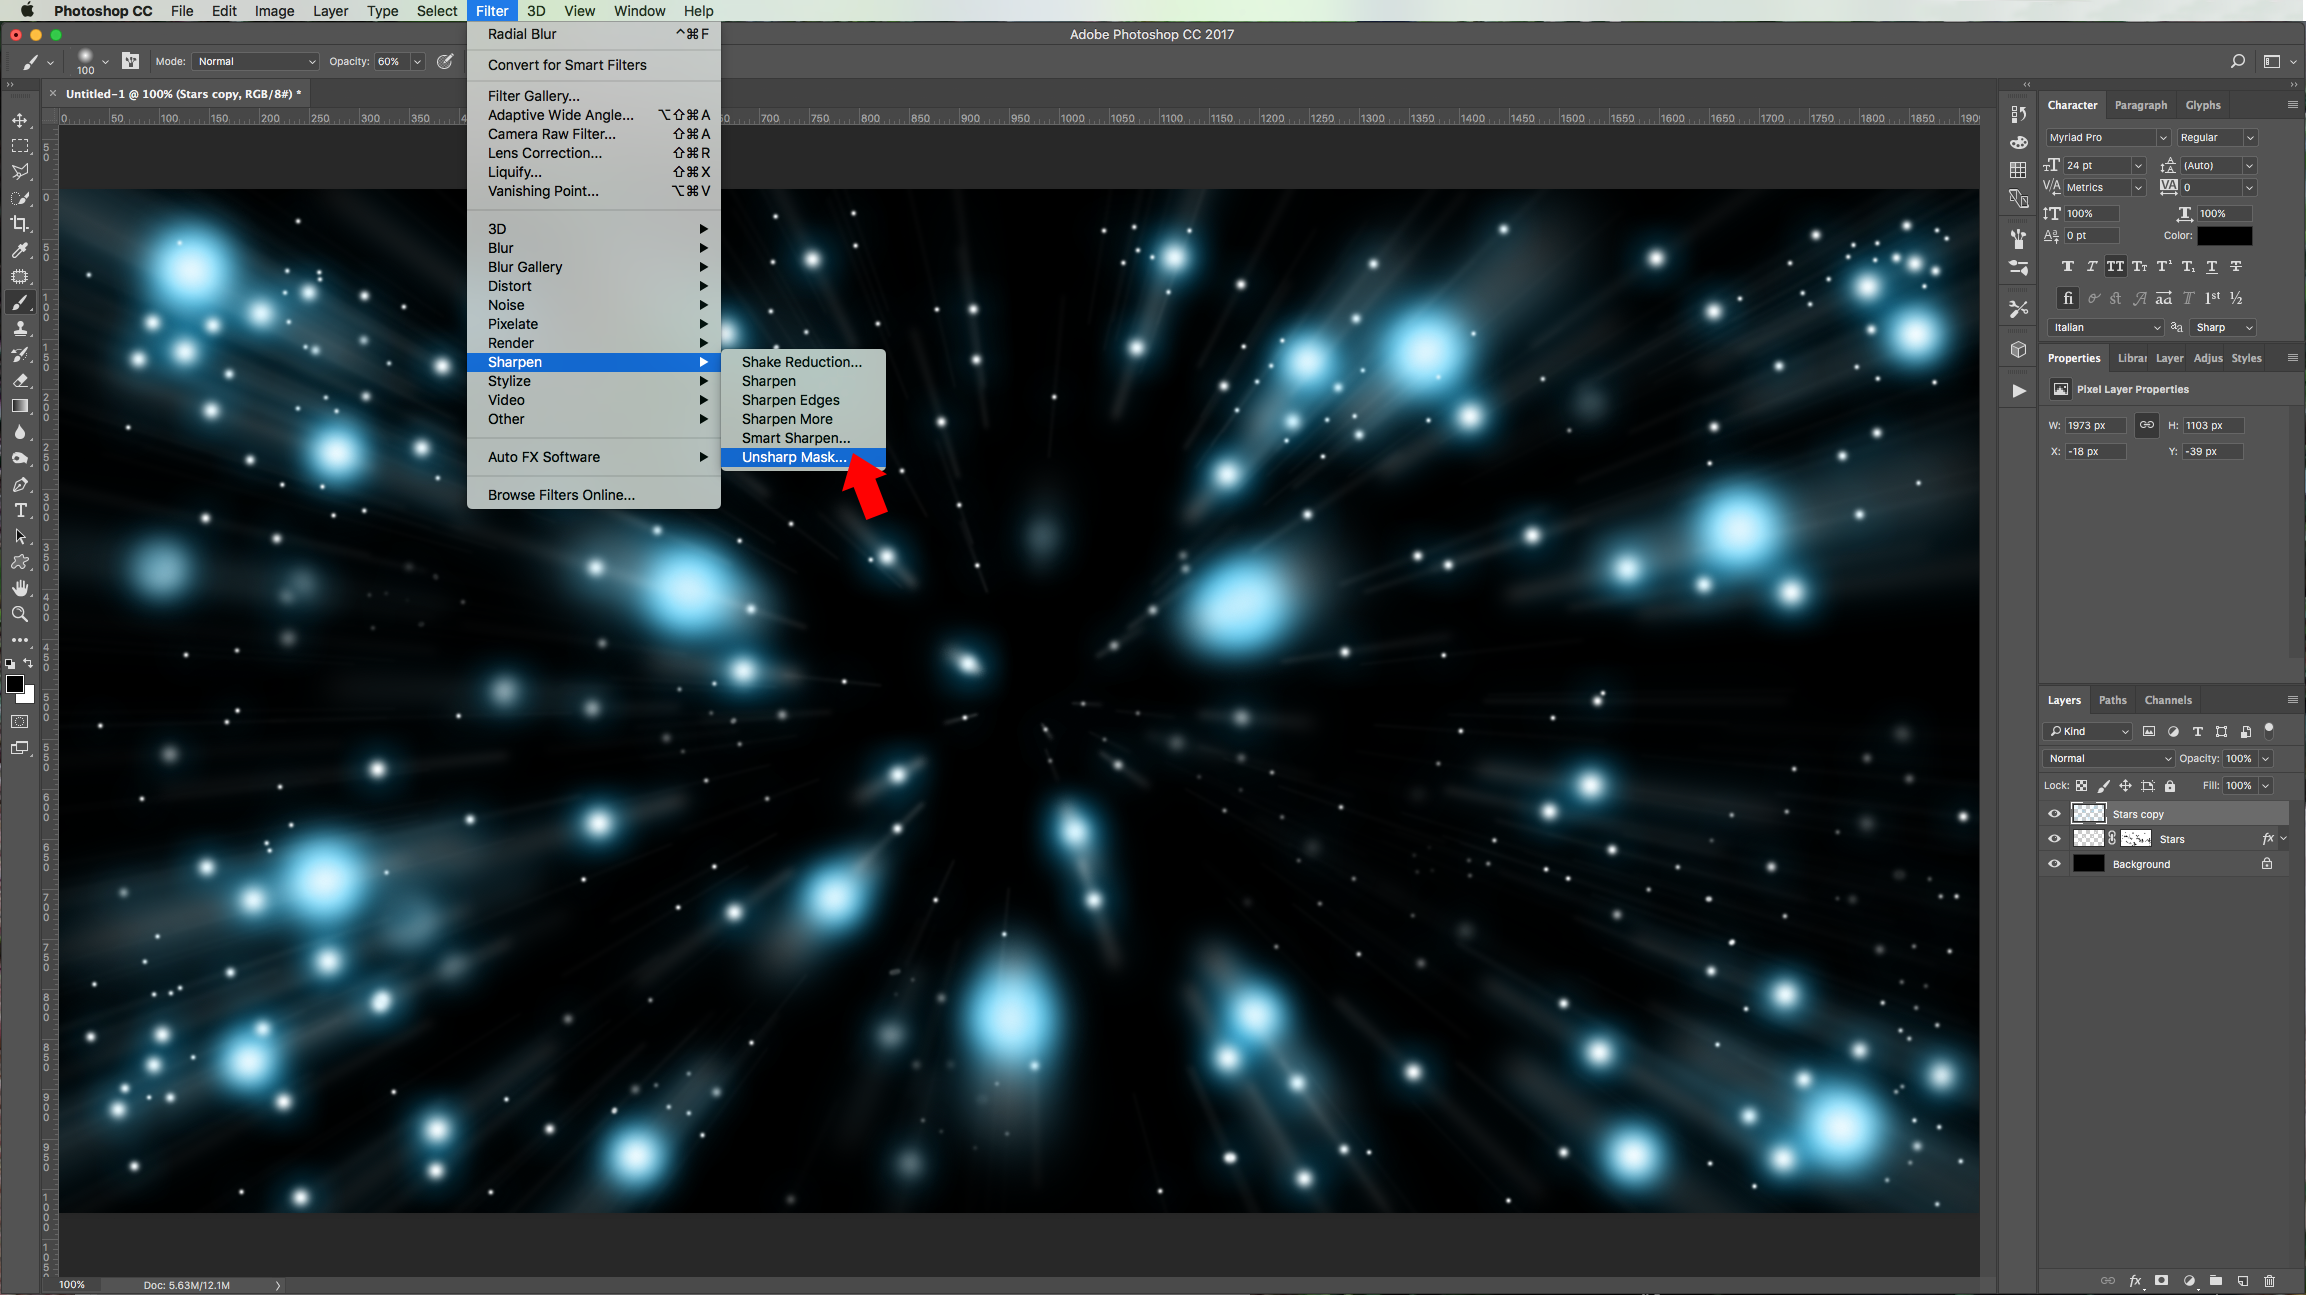
7 - Now, go to Filter > Sharpen > Unsharp Mask and use the following values:
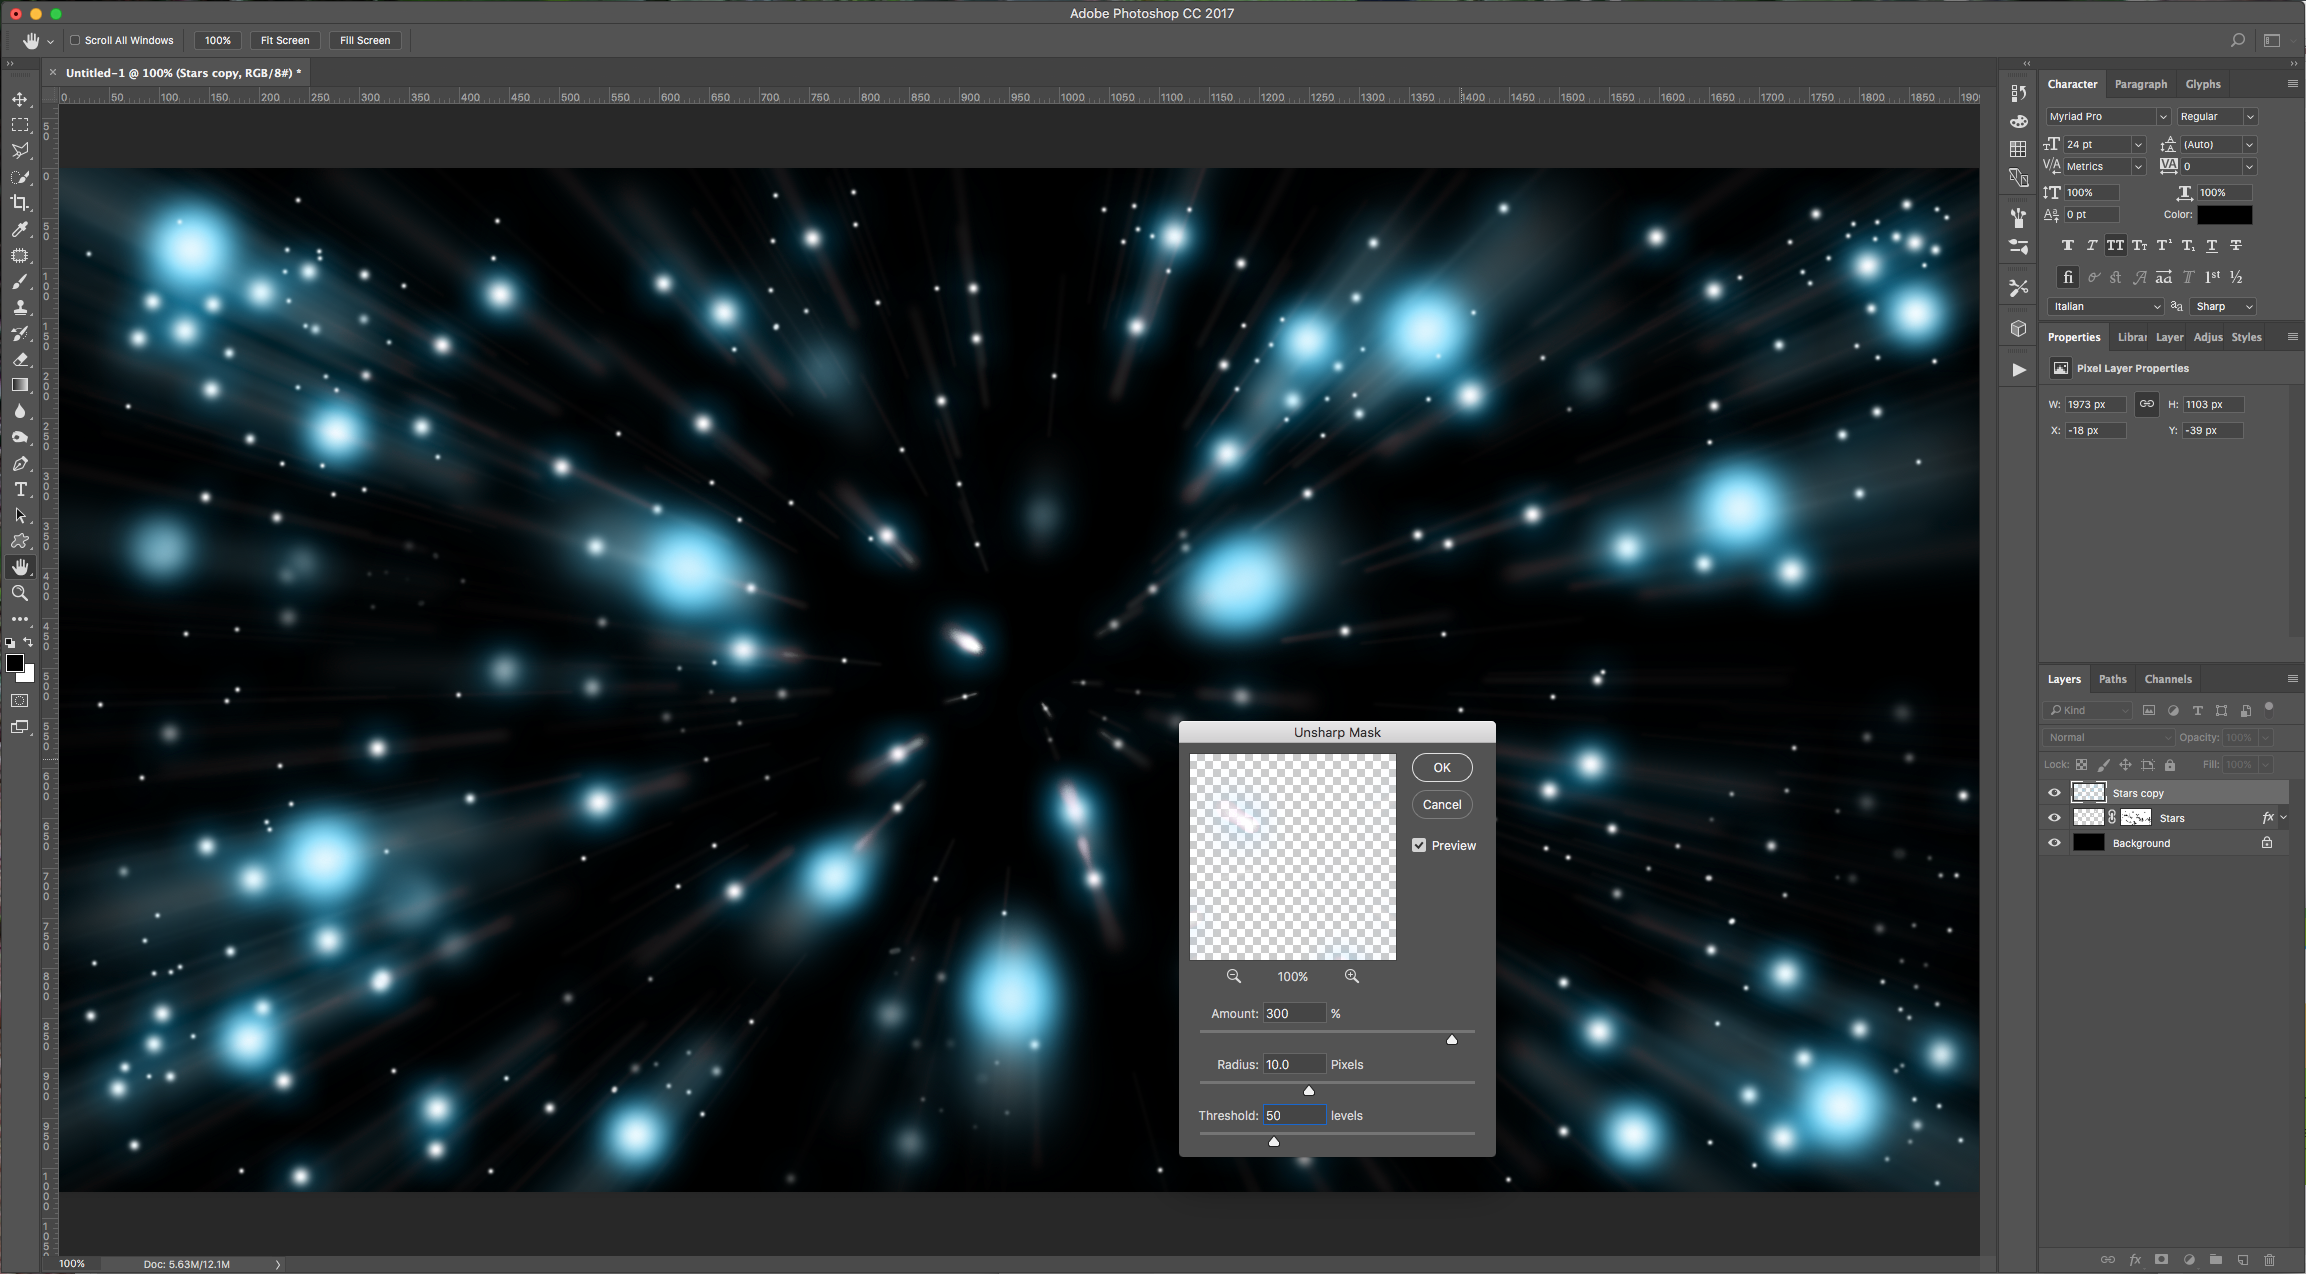
Change the “Blending Mode” to “Pin Light”.
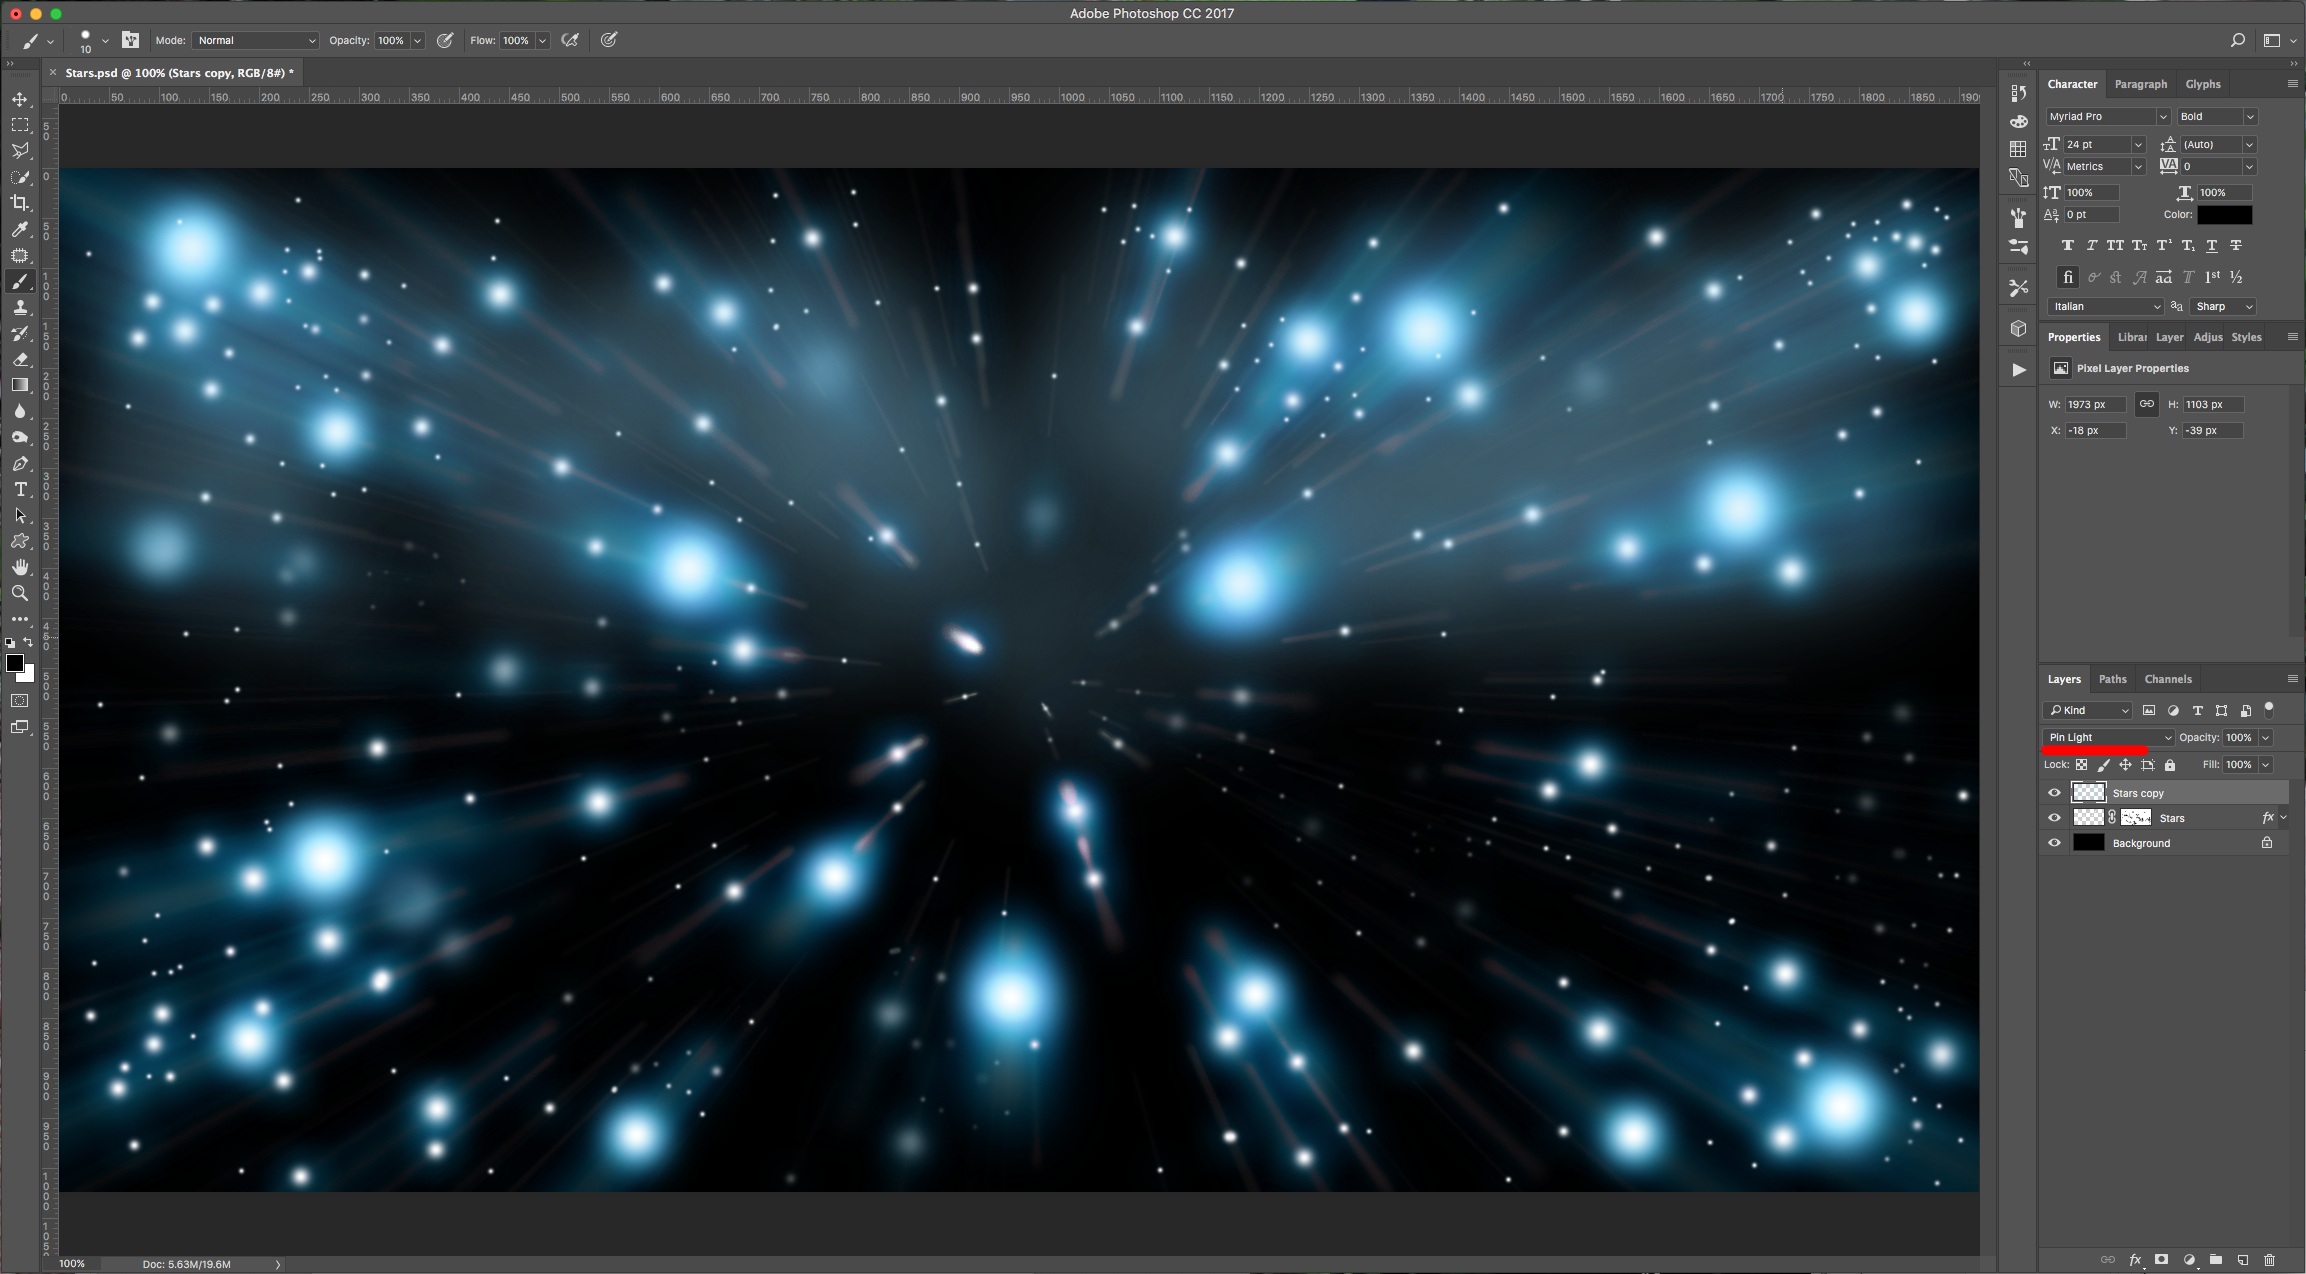
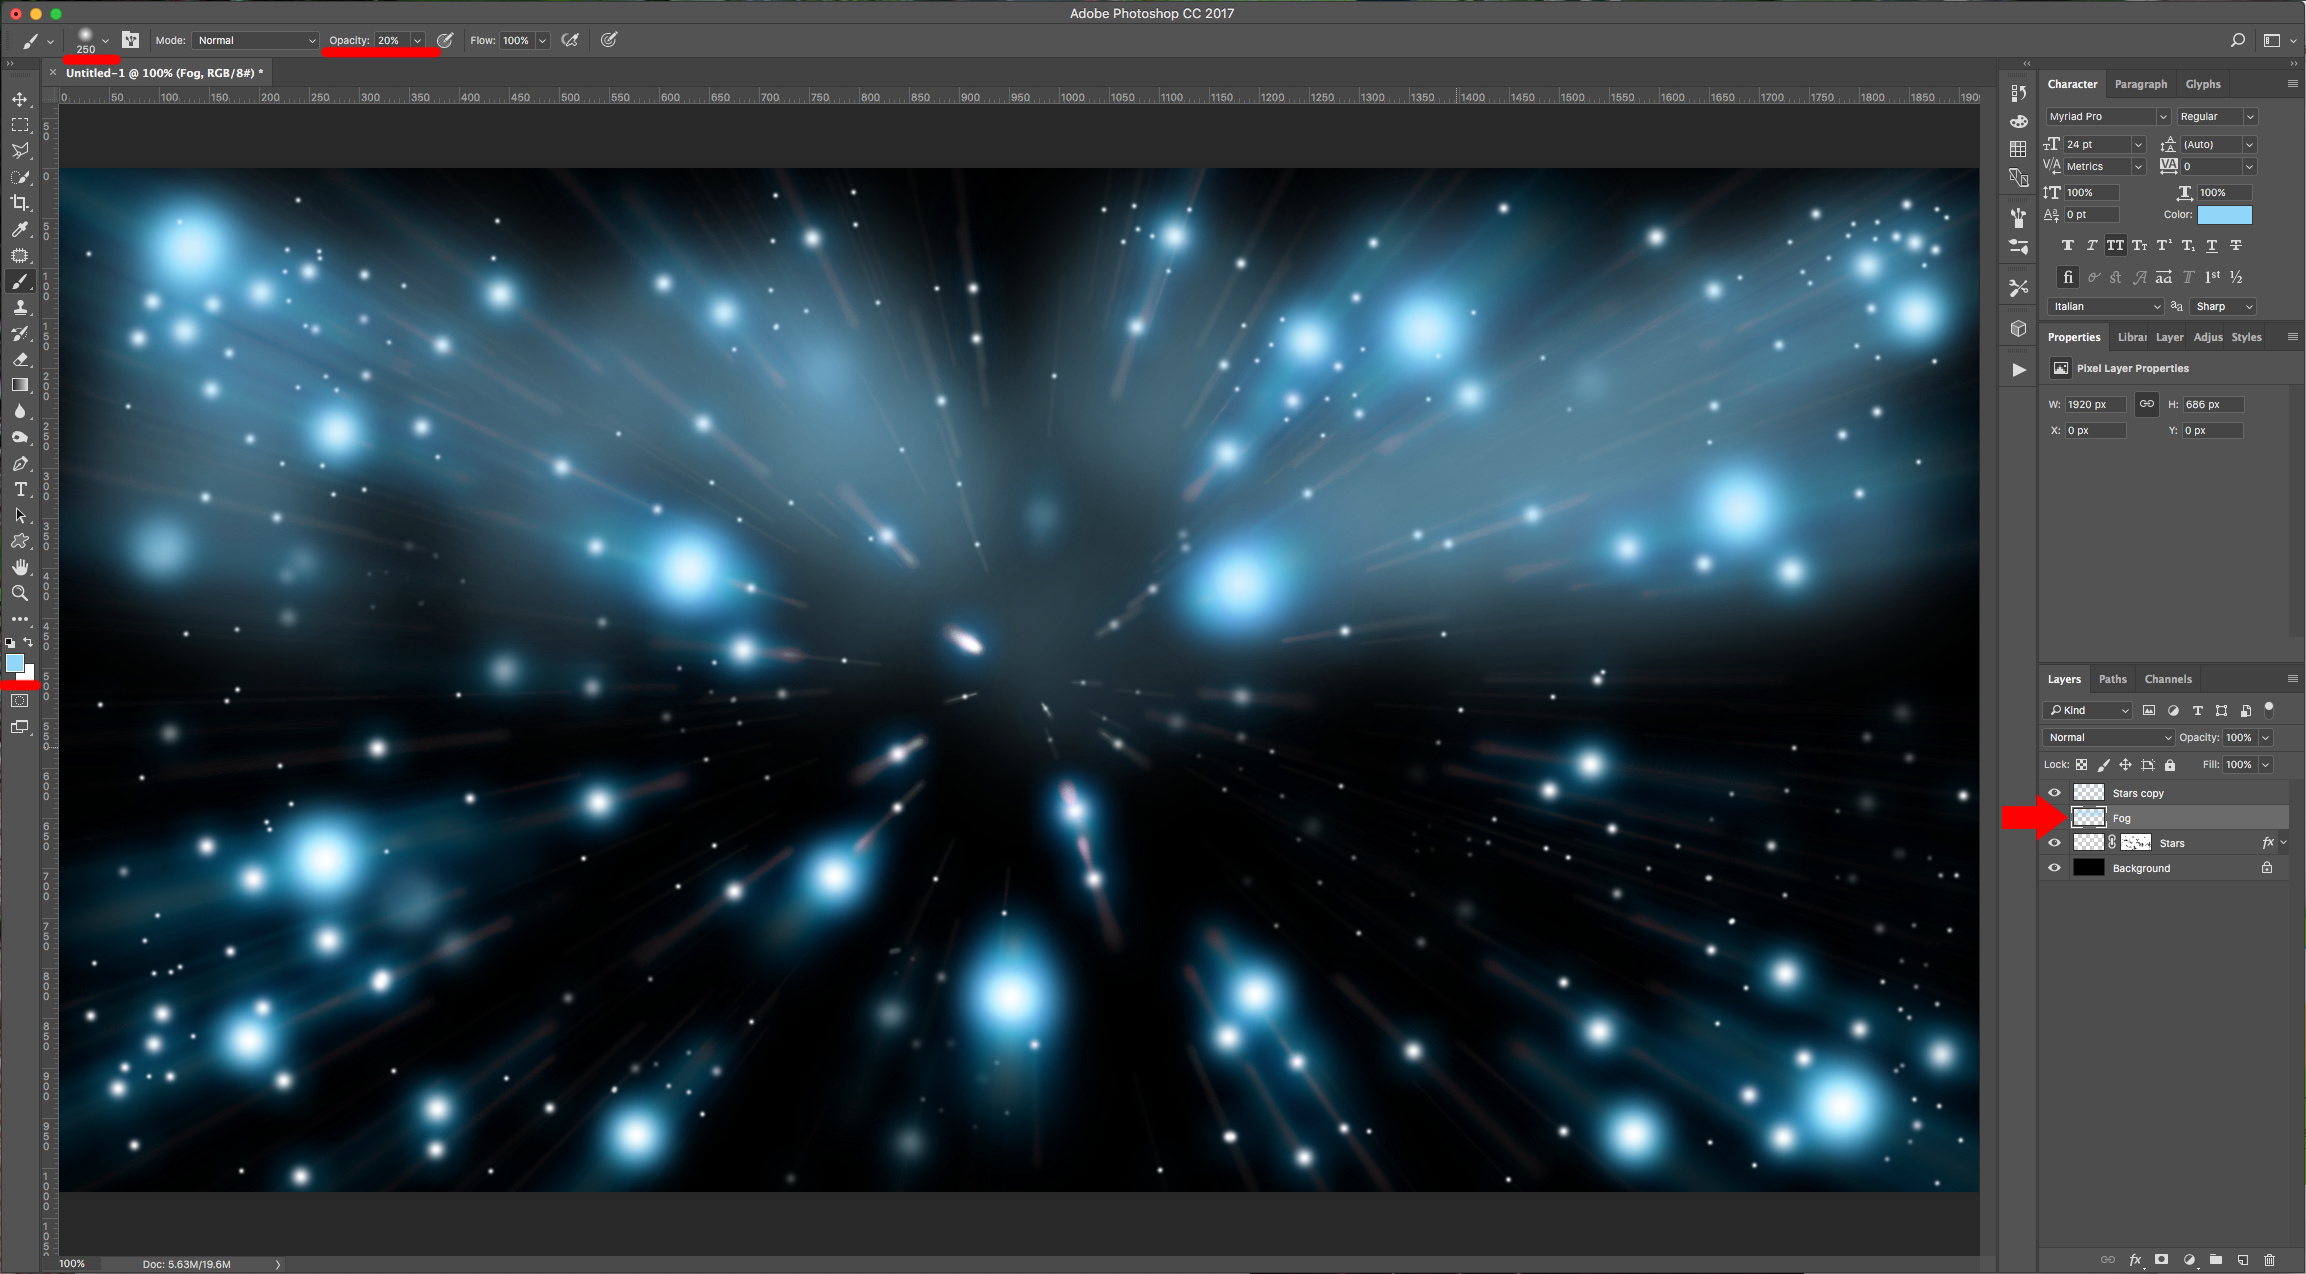
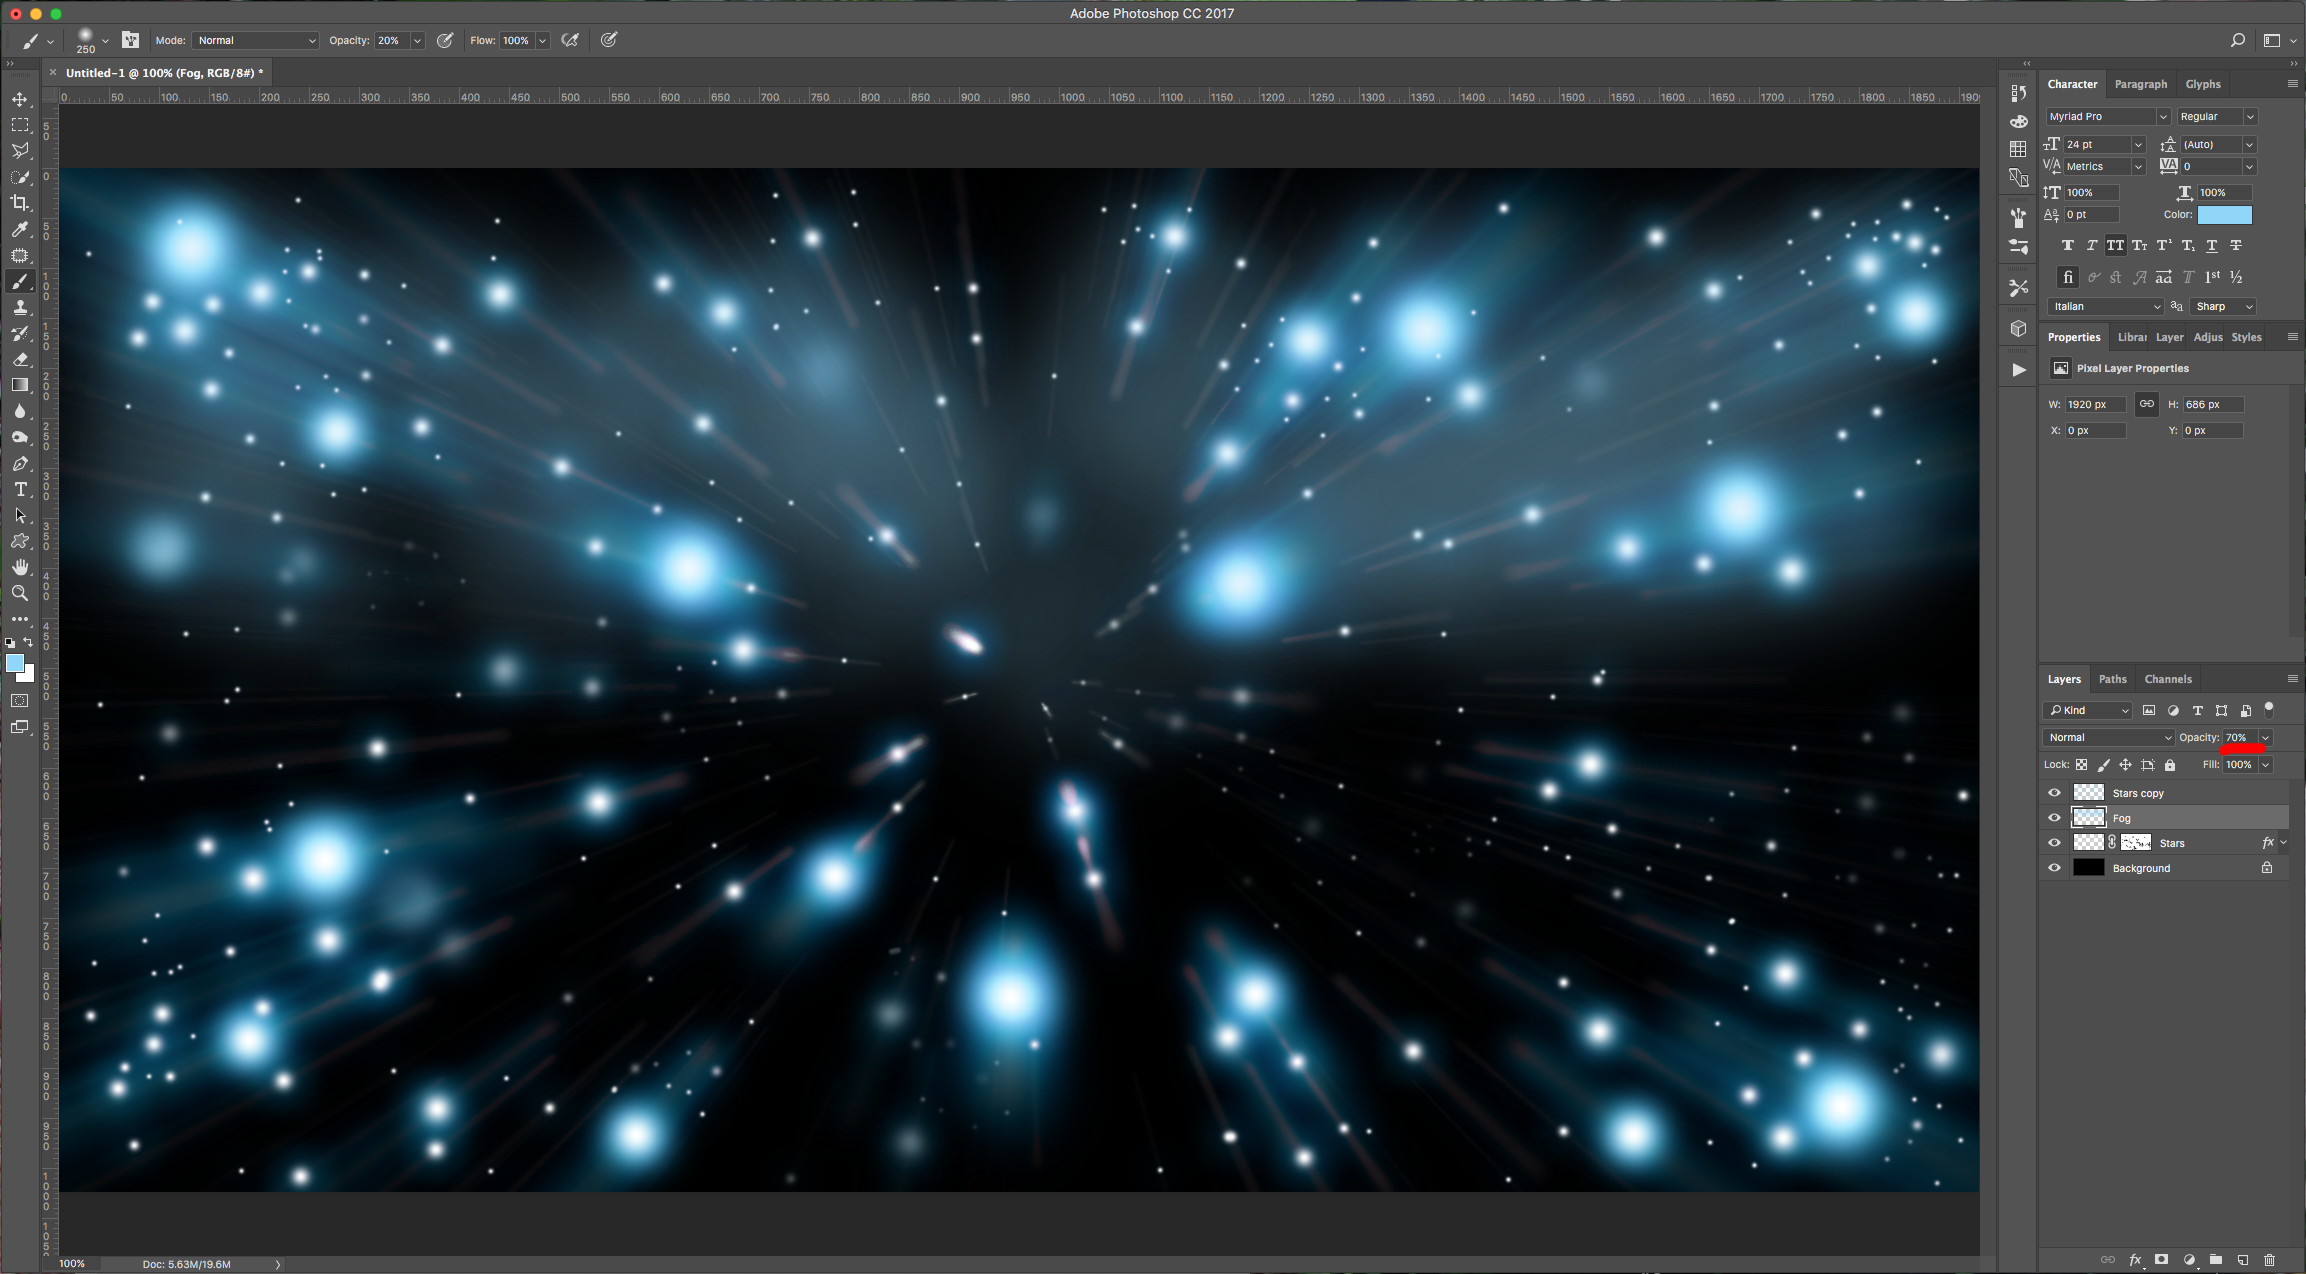
8 - Create a “New Layer”, place it under your “Stars copy” Layer. Select a Soft (0% “Hardness”) Round Brush with a size of 250 Pixels approx. Using a light shade of the color used in “Step 4” (#8dd6fa) as “Fill” color with a Brush “Opacity” of 20%, paint around the top portion of your document to create a foggy effect. Lower the “Opacity” to 70%.
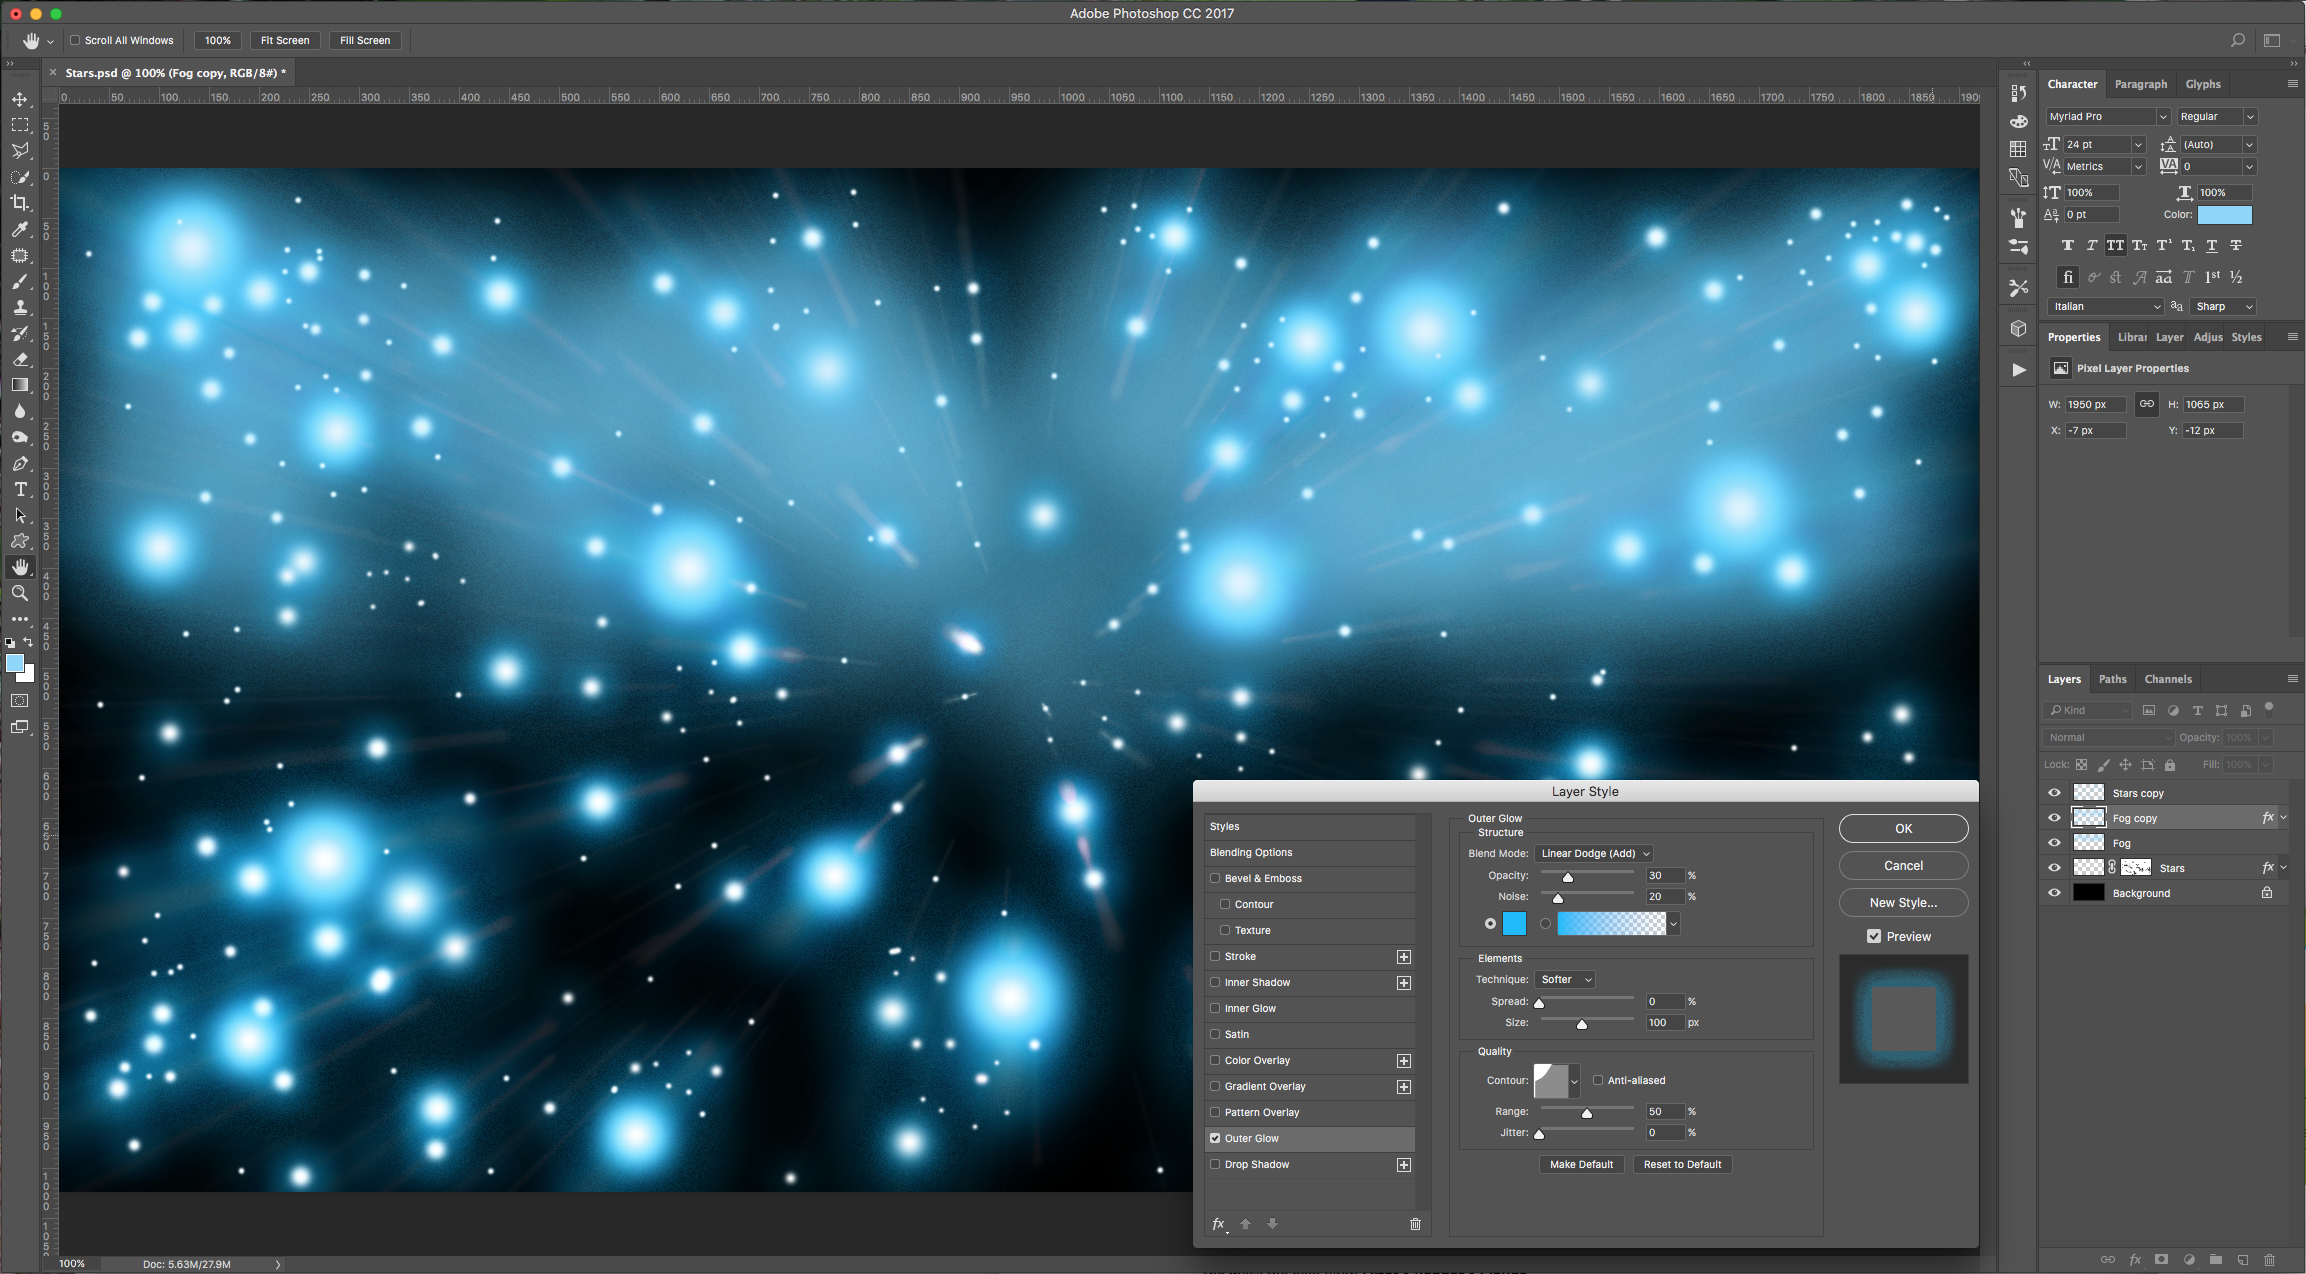
9 - Duplicate your original “Stars” Layer and your “Fog” Layer. Delete the “Mask” from the first one, then select them both, right-click on top of their thumbnails and choose “Merge Layers”. Position this layer under your “Stars copy” Layer, double-click on its thumbnail and apply the following “Layer Styles”:
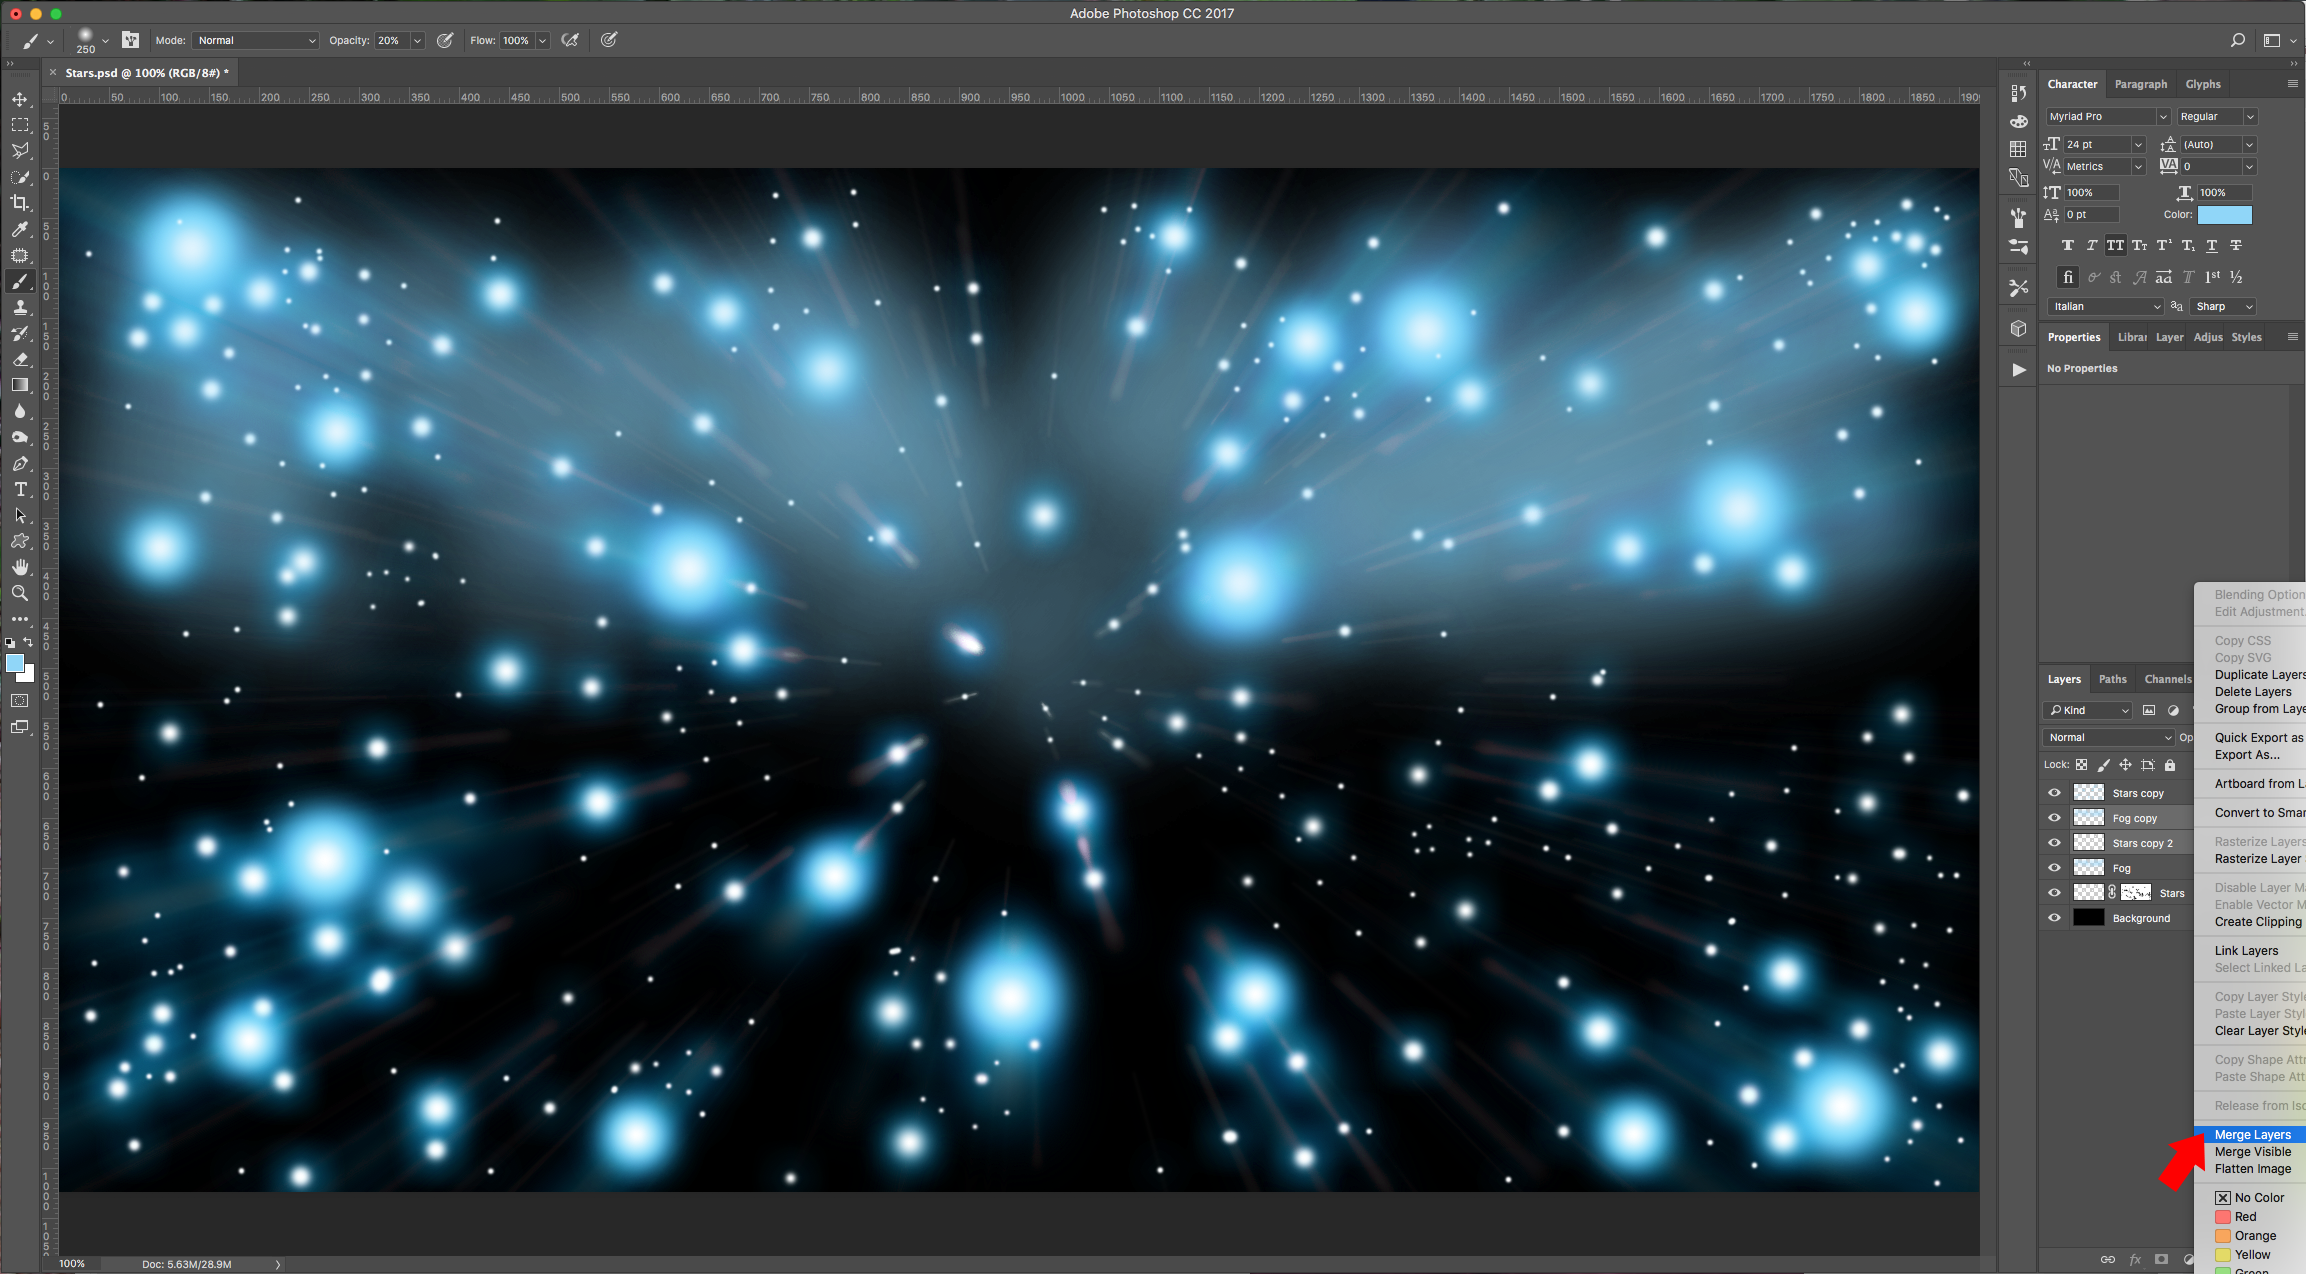
Outer Glow: (#03b9fd)
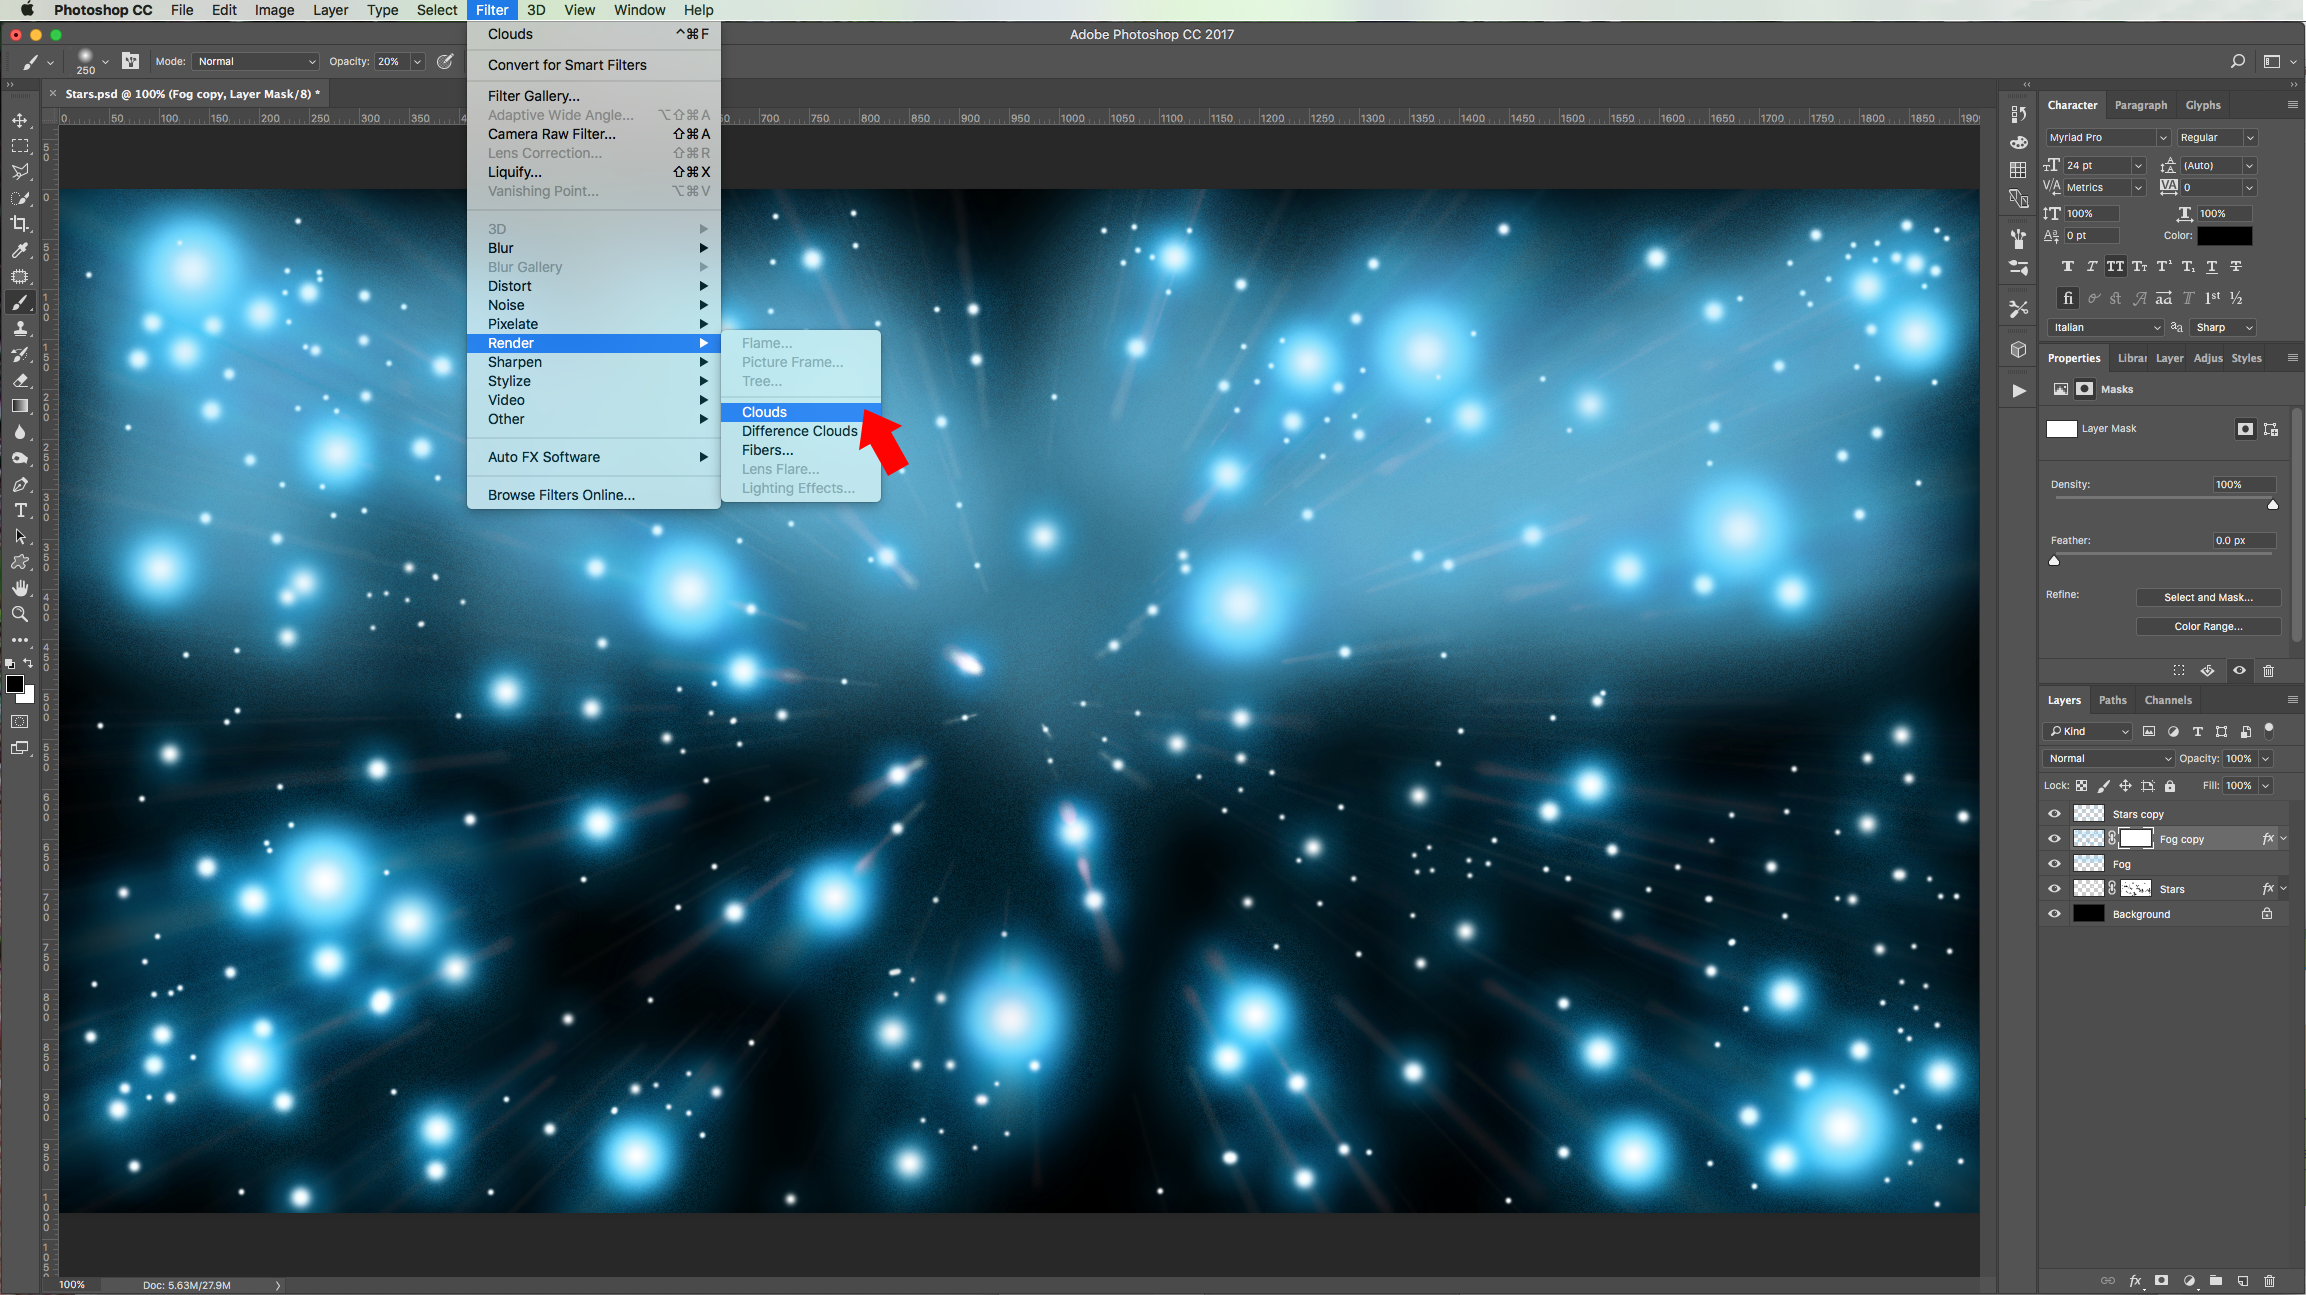
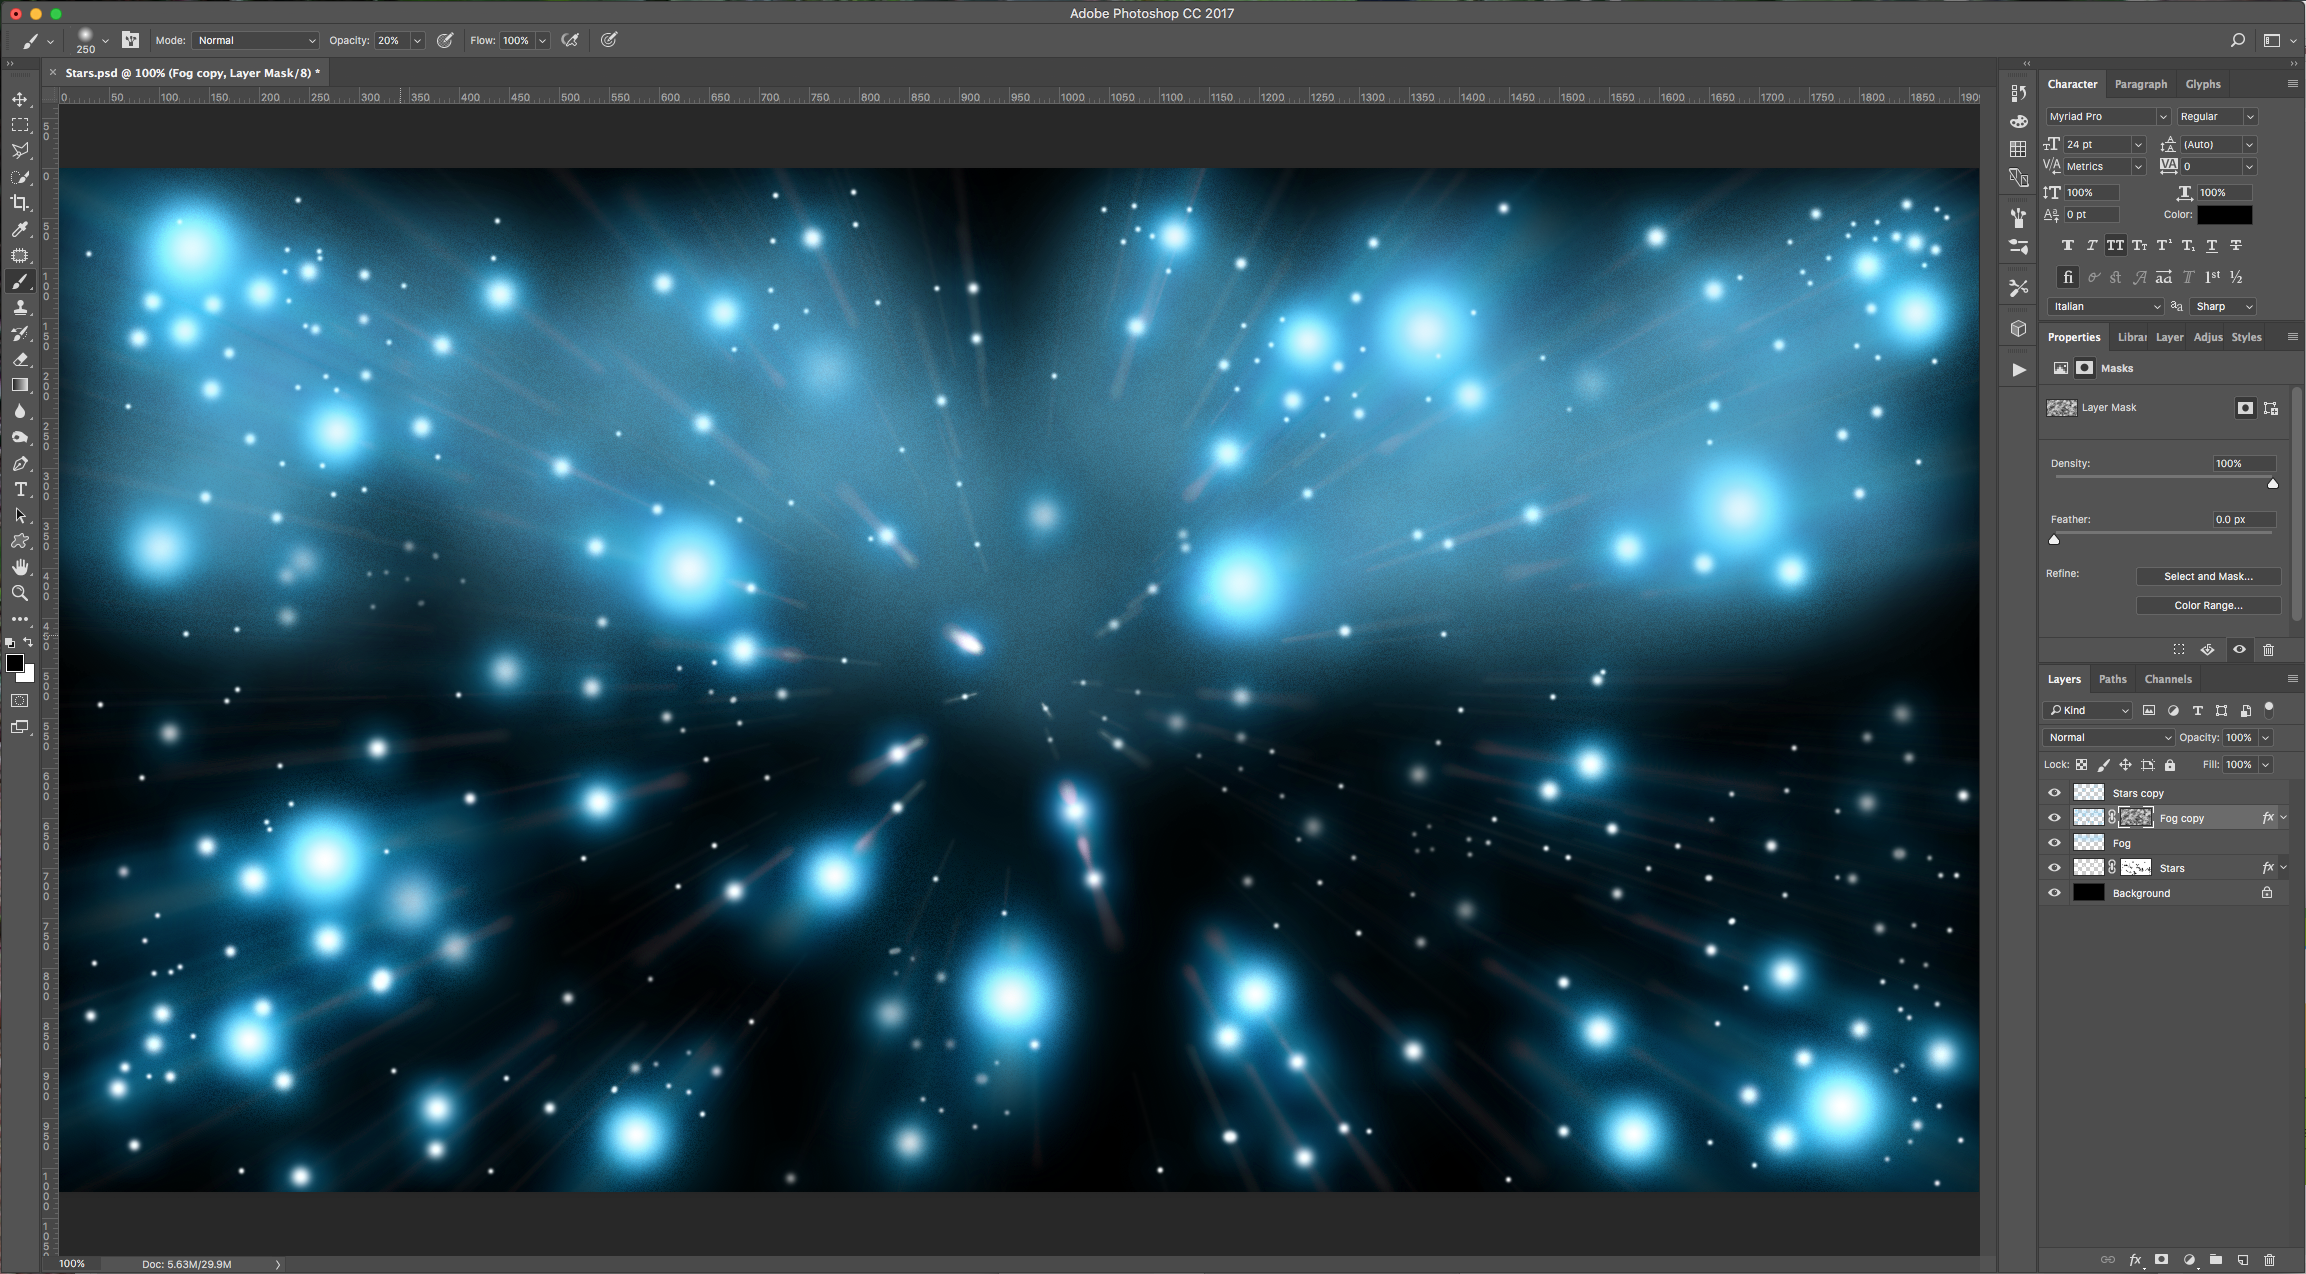
10 - Make a “Layer Mask” of this layer and making sure you are selecting the “Mask” thumbnail got to Filter > Render >Clouds.
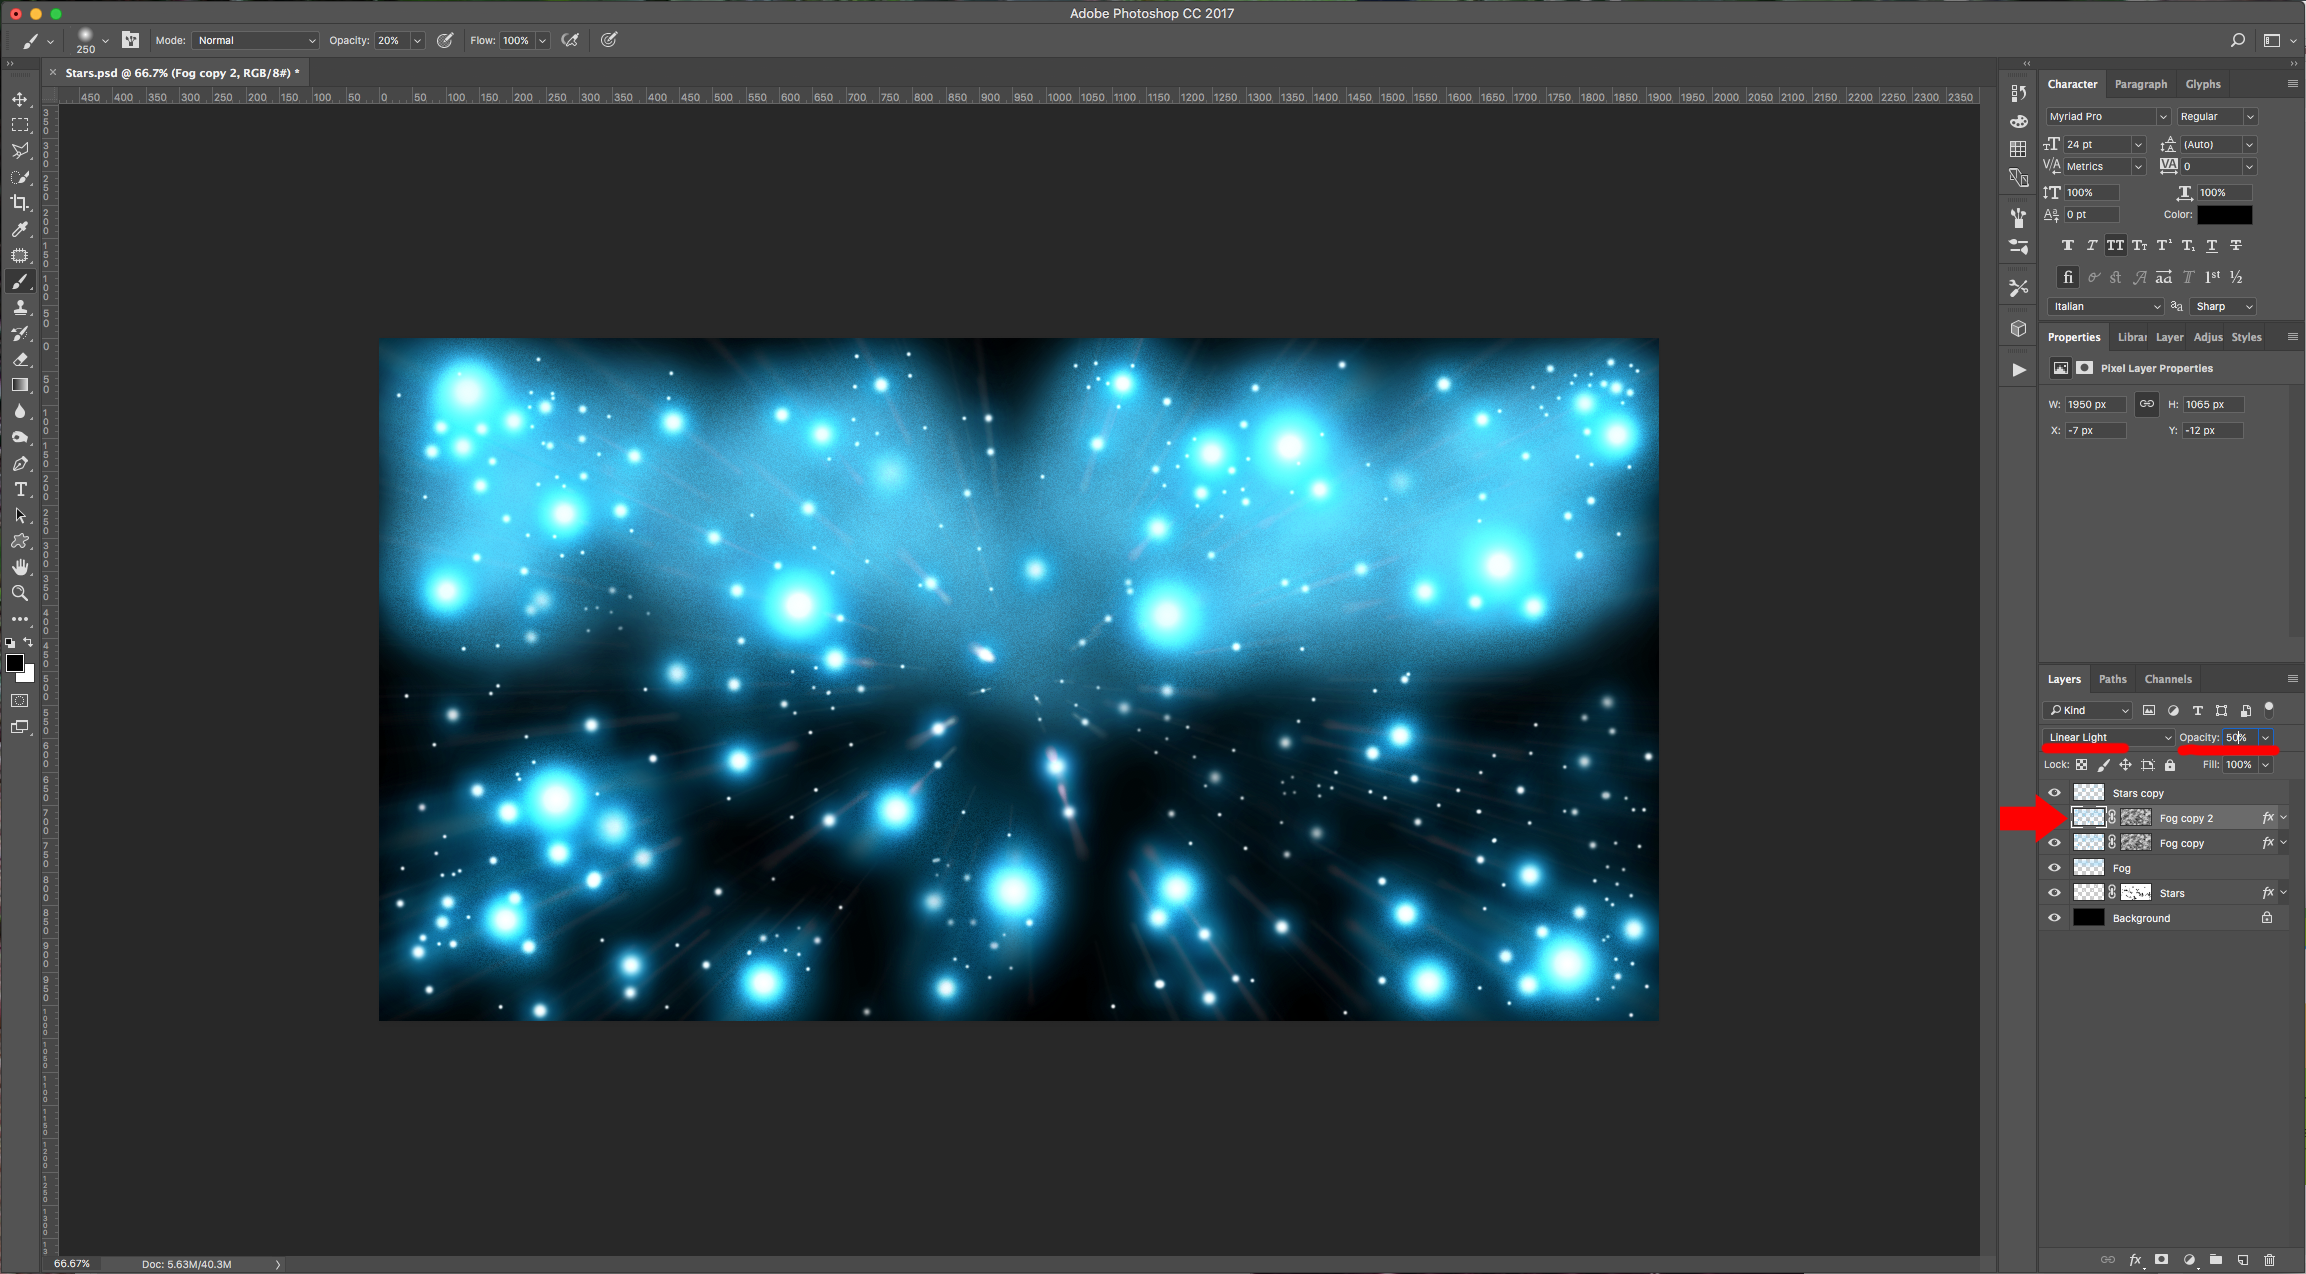
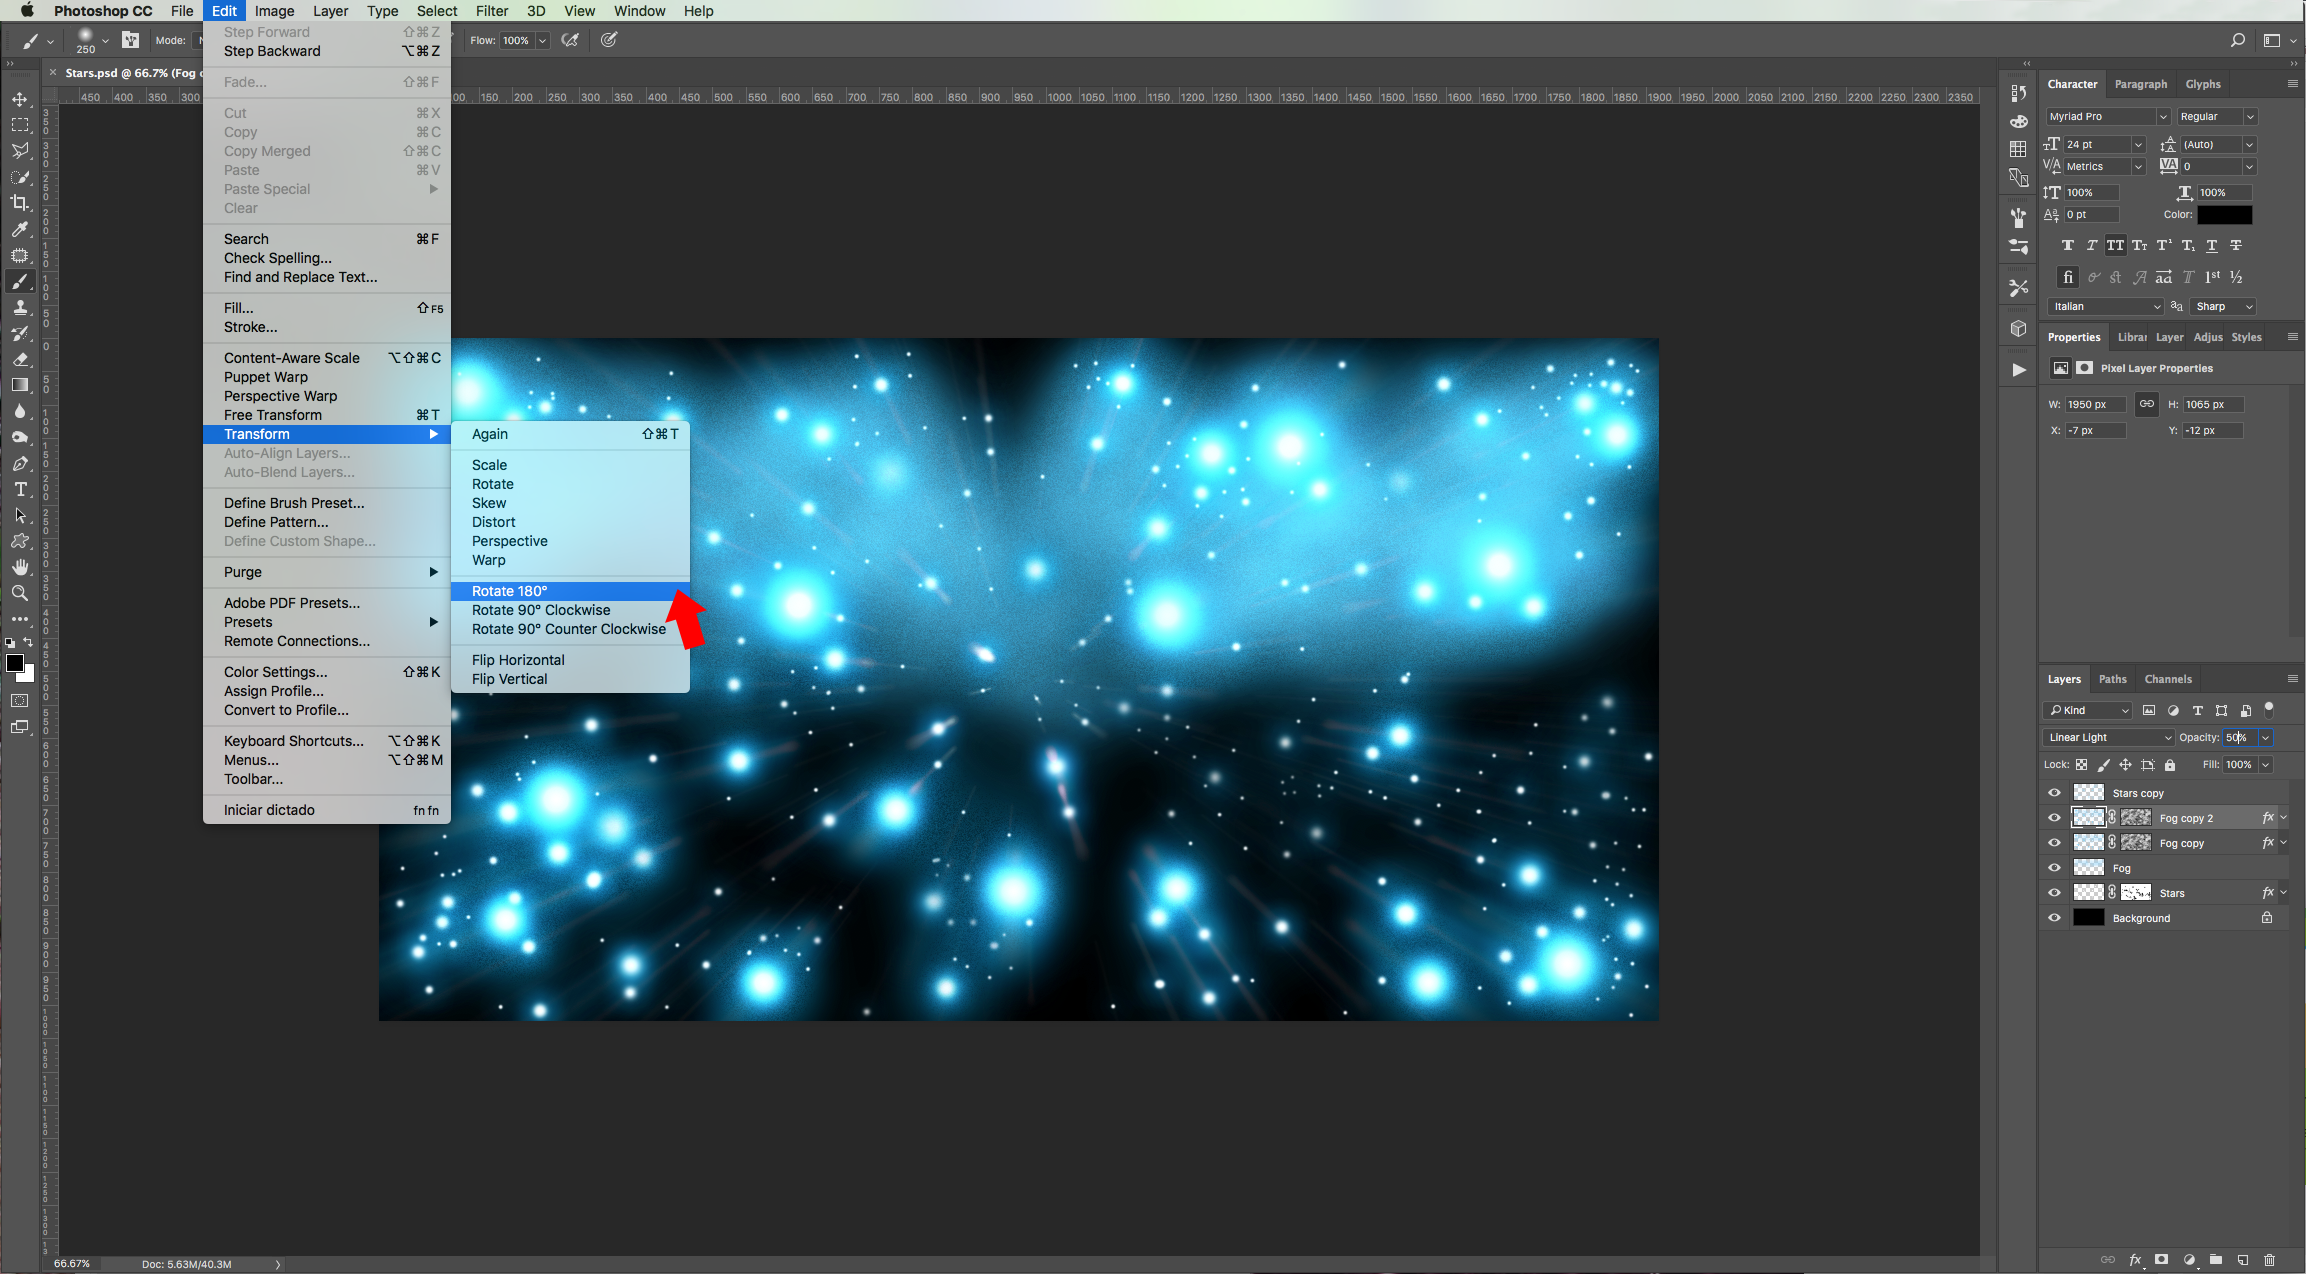
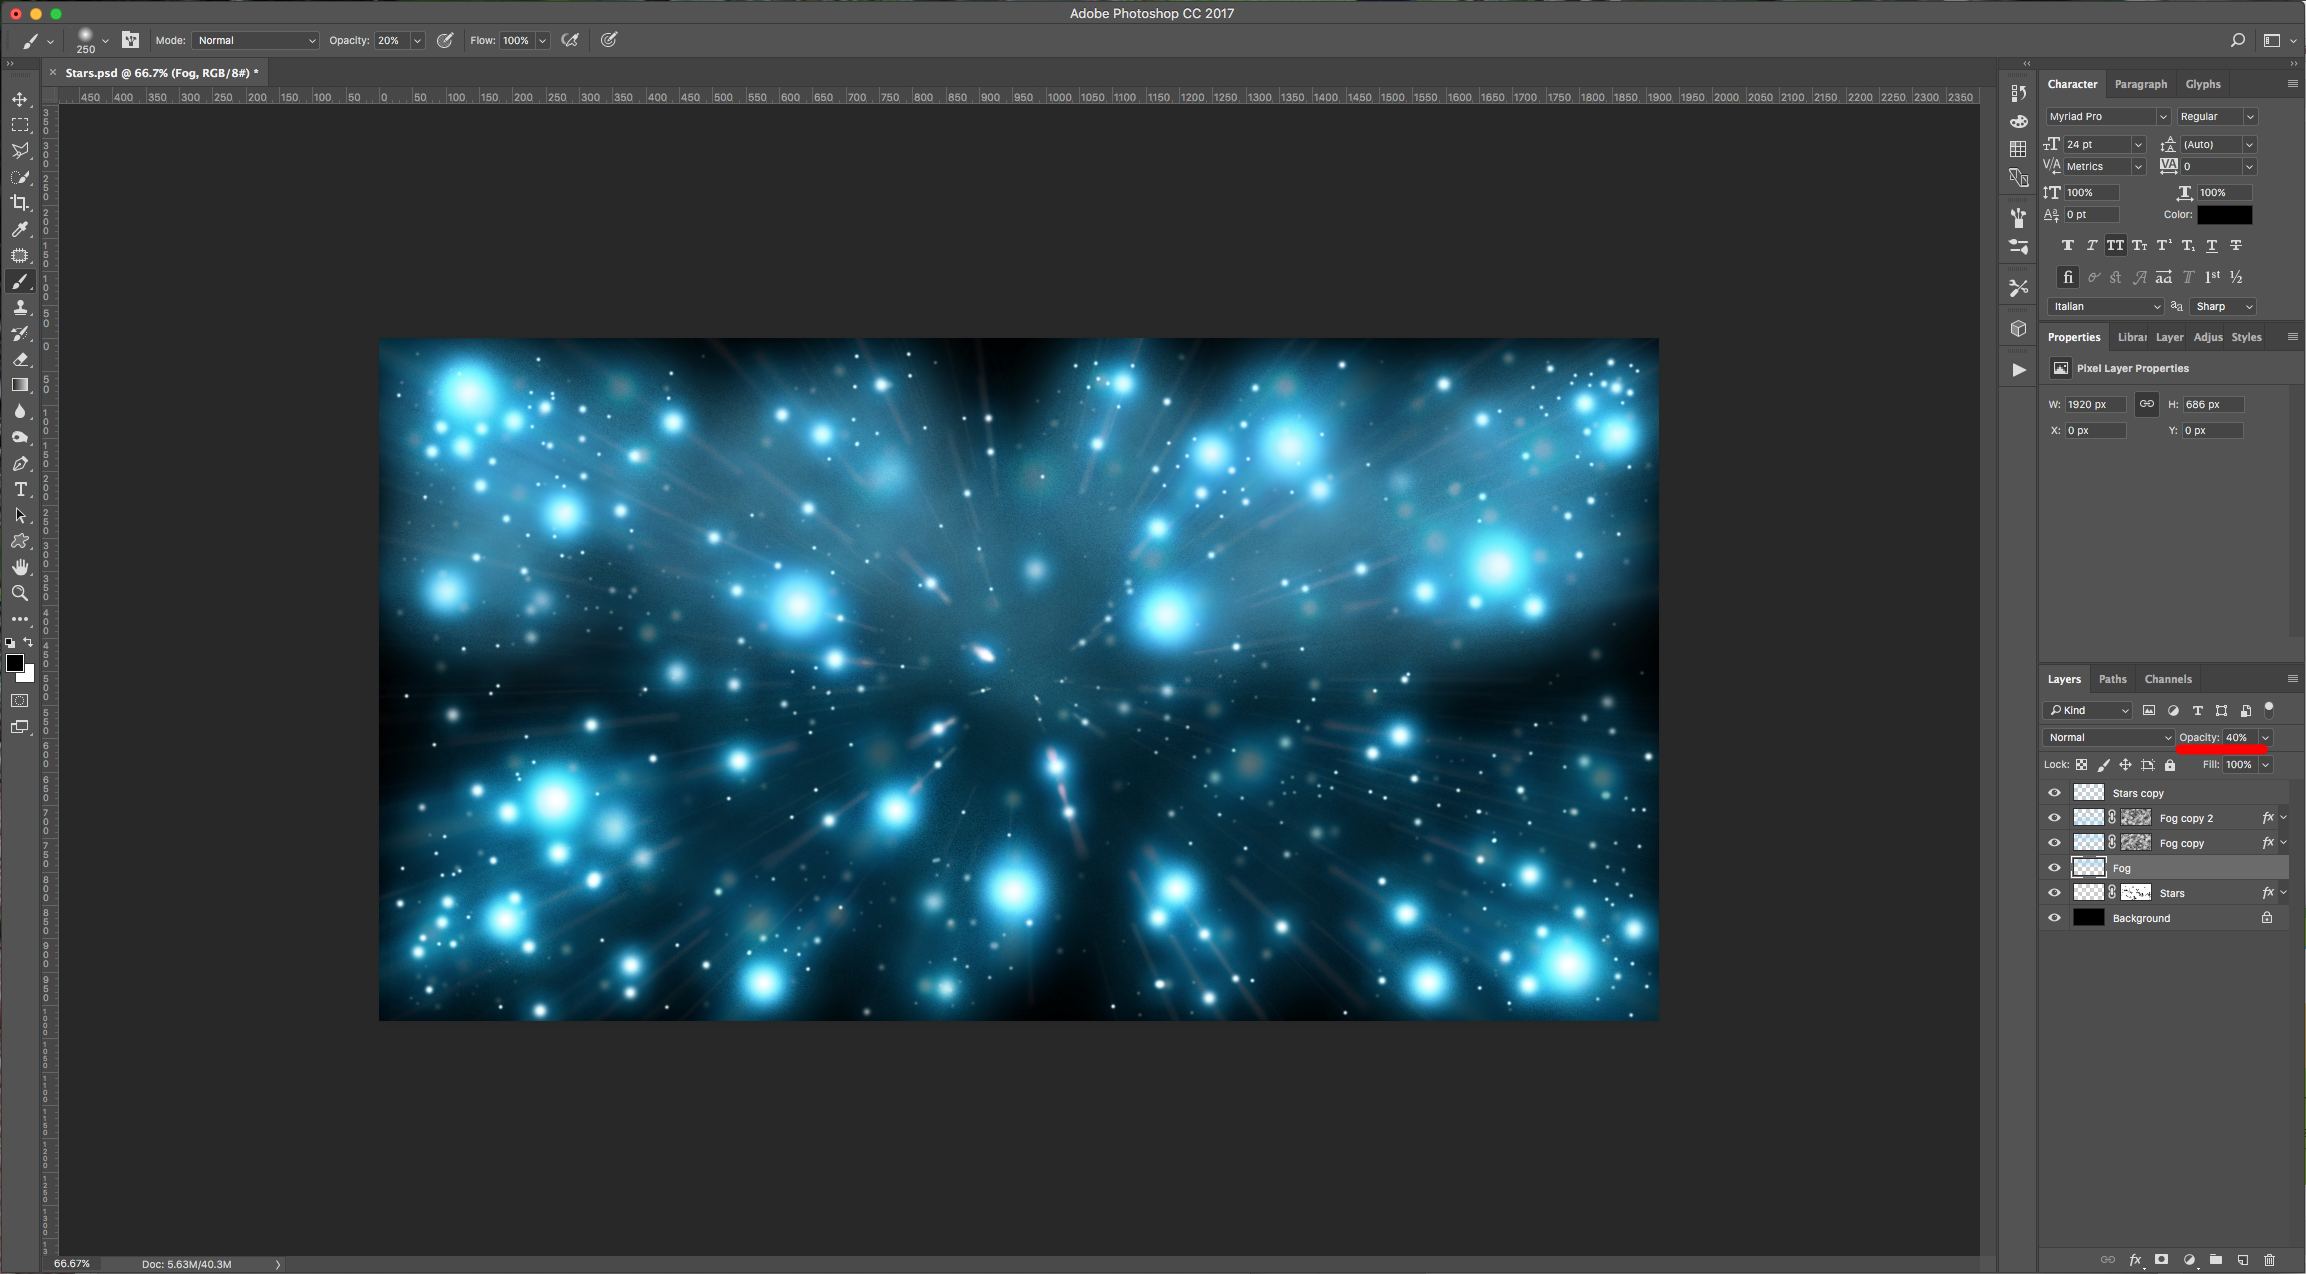
11 - Duplicate your last layer, change the “Blending Mode” to “Linear Light” and the “Opacity” to 50%. Go to Edit > Transform > Rotate 180°. Lower the “Opacity” of the “Fog” Layer a little bit more (we made it 40%).
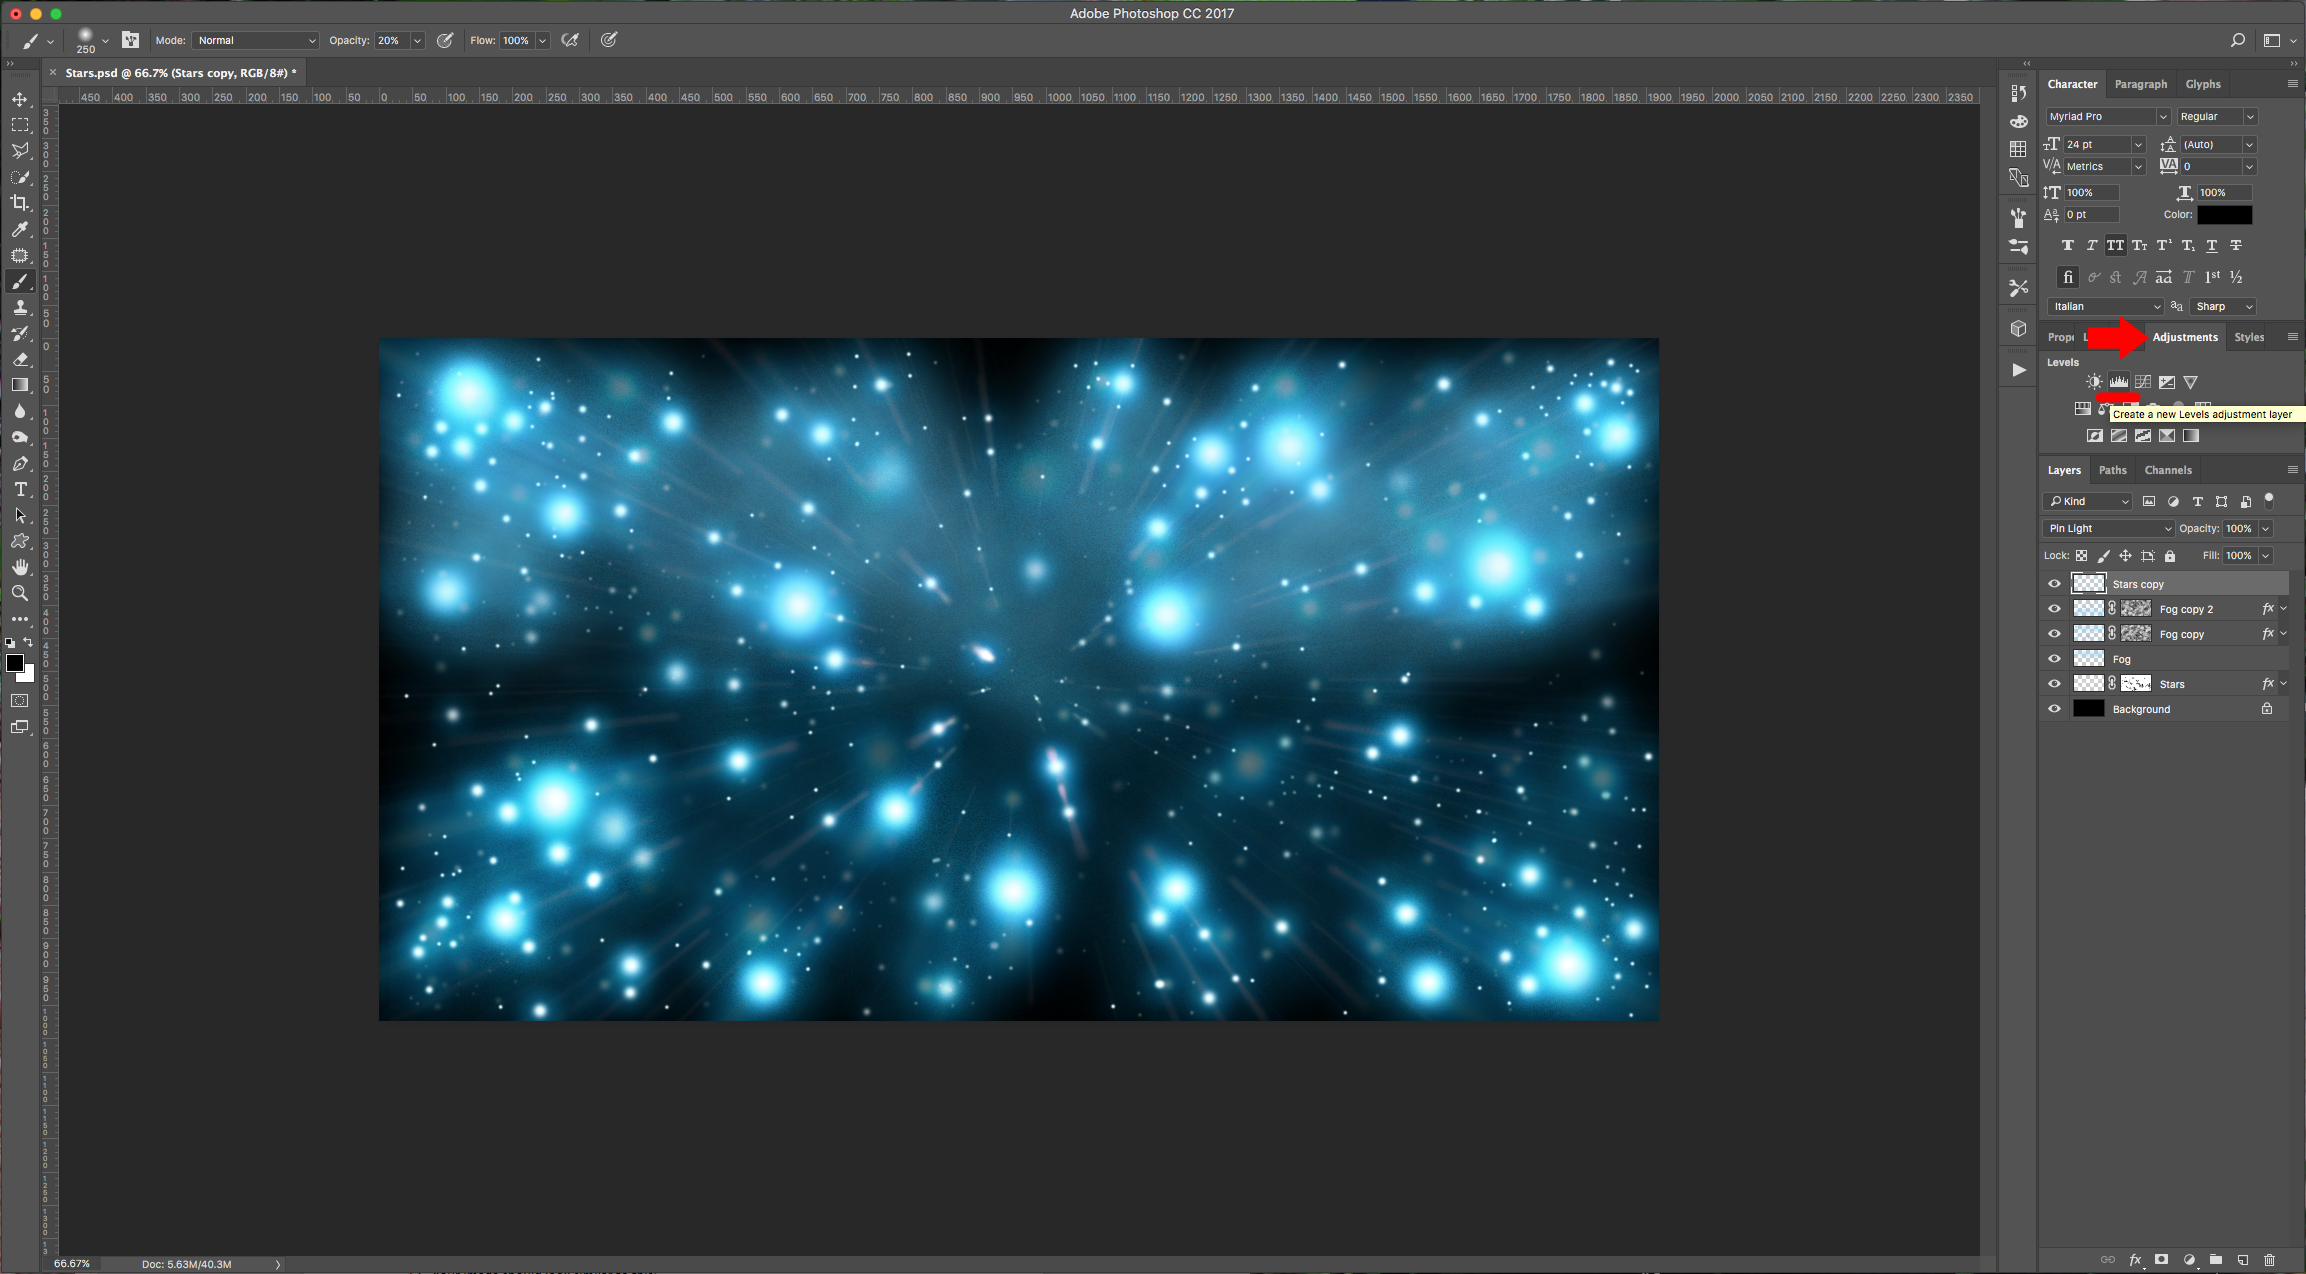
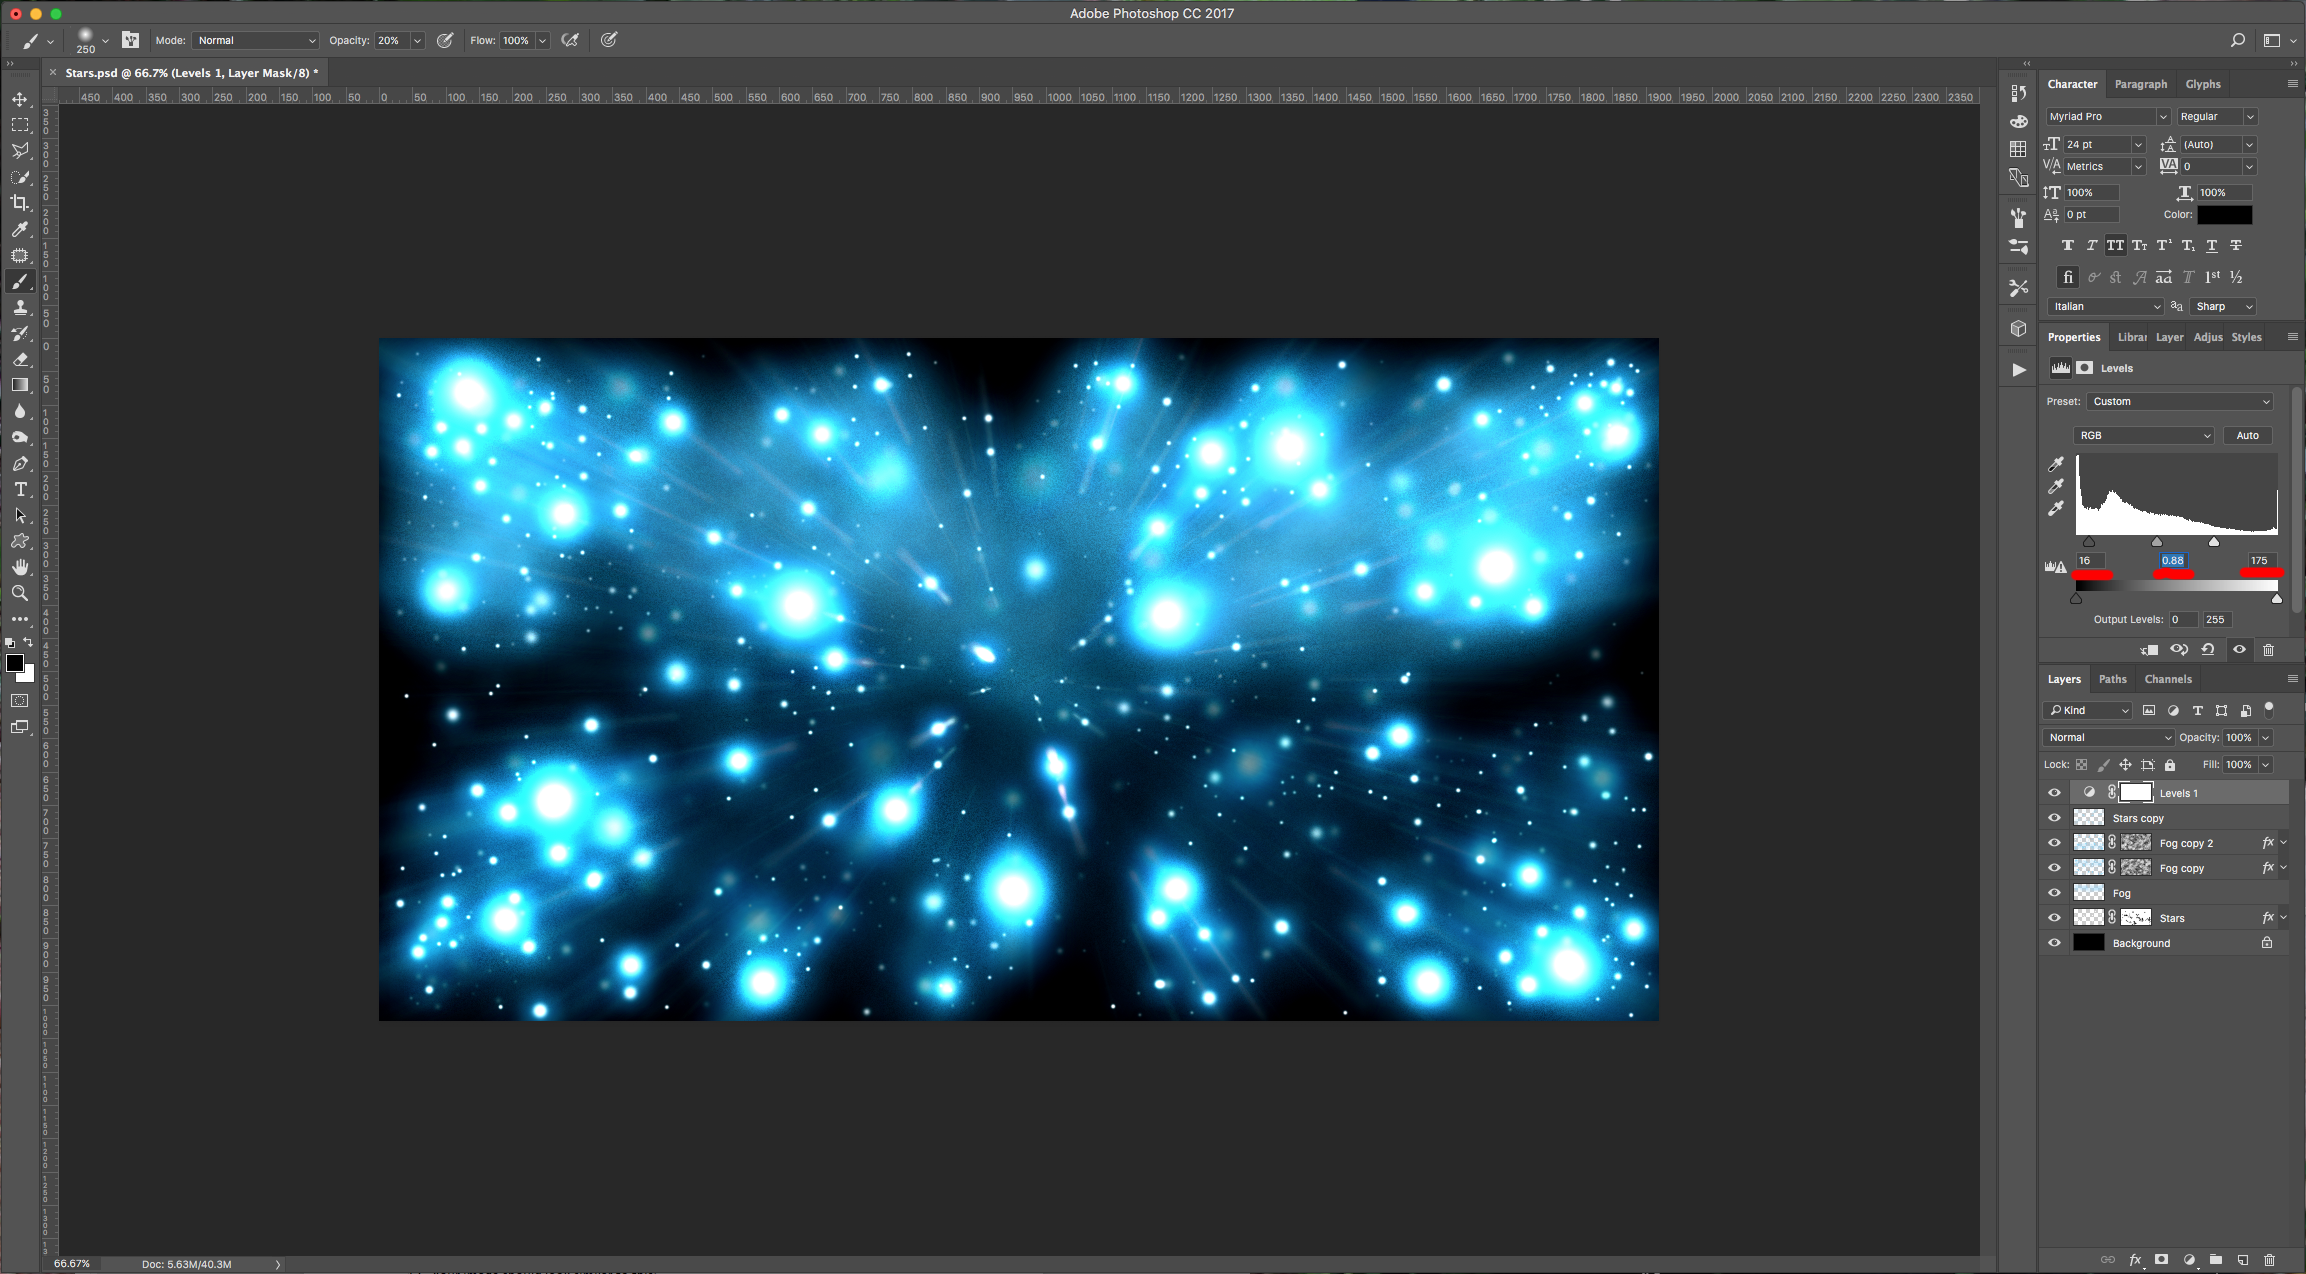
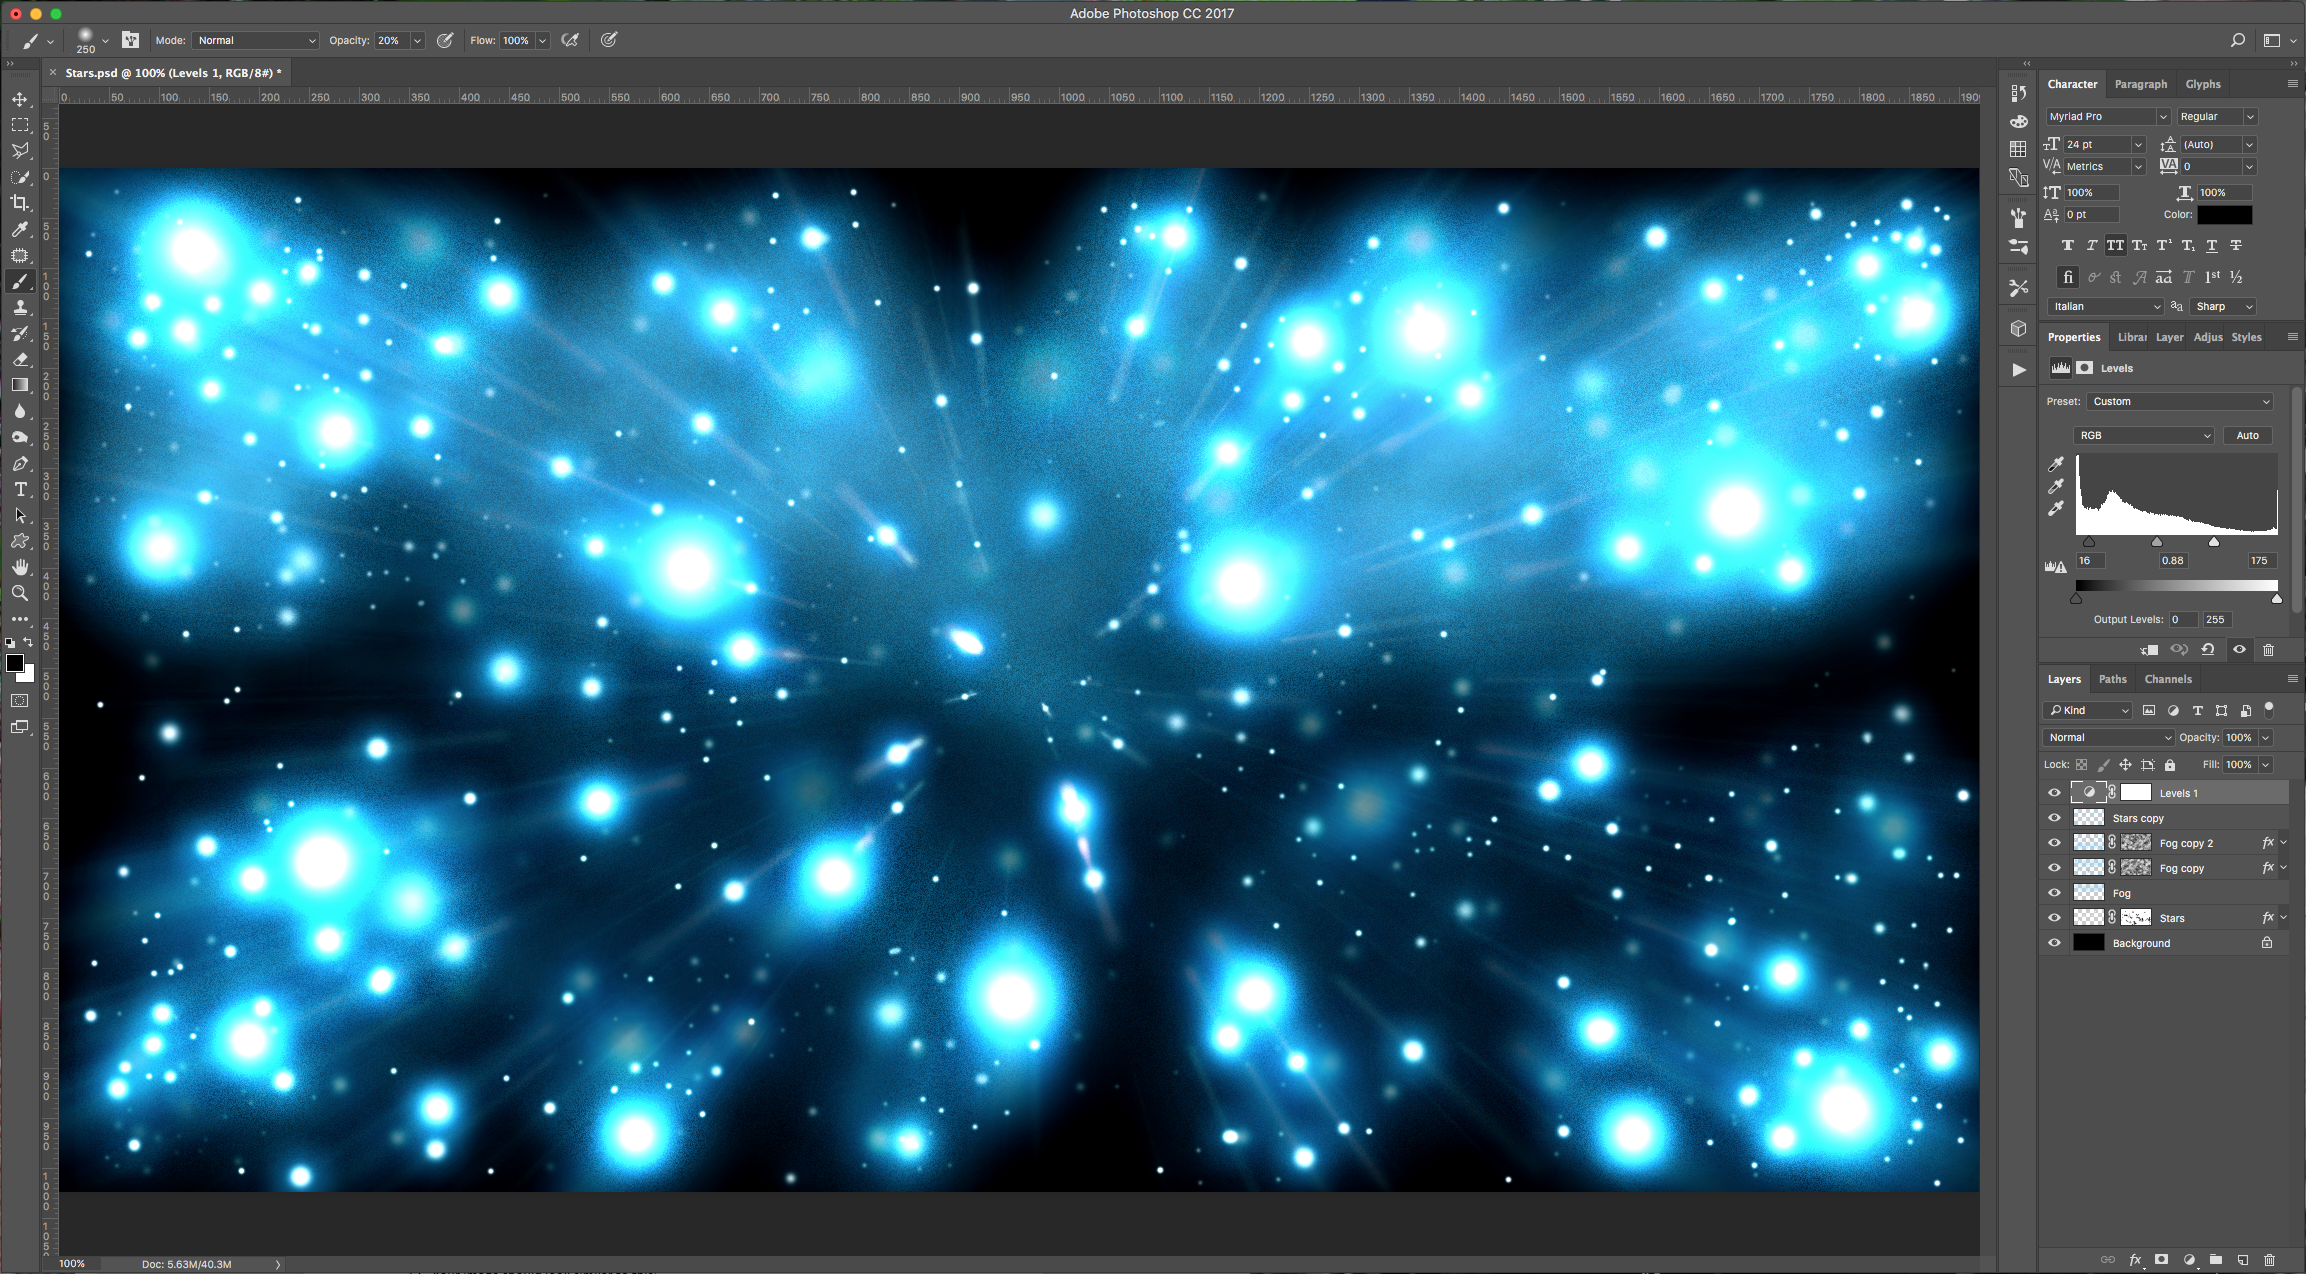
12 - Finally, in the “Adjustments” Panel create a new “Levels Adjustment Layer” on top of everything and use the following values:
13 - Your image should look similar to this:
2 - Create a “New Layer” by clicking the button at the bottom of the “Layers” Panel.
3 - Select the “Brush Tool” (B), pick up a Soft (0% “Hardness”) Round Brush with a size of 100 Pixels approx. And use white as “Fill” color. Paint many dots around your document changing the size of your brush. The idea is to get something similar to a starry night sky.
4 - Double-click on your layer’s thumbnail to apply the following “Layer Styles”:
Outer Glow: (#03b9fd)
5 - Click on the “Add Layer Mask” button at the bottom of the “Layers Panel” and choose a Soft (0% “Hardness”) Round Brush with a size of 100 Pixels approx., this time use black as “Fill” color and set the “Opacity” to 60%. Select the “Mask” and fade some of your “Stars” to make them look like they are far away.
6 - Duplicate your Layer (Command/Control + J), right-click on the duplicate’s thumbnail and choose “Rasterize Layer Style” to merge the “Image” and “Mask” together. Then, go to Filter > Blur > Radial Blur and use the following values:
7 - Now, go to Filter > Sharpen > Unsharp Mask and use the following values:
Change the “Blending Mode” to “Pin Light”.
8 - Create a “New Layer”, place it under your “Stars copy” Layer. Select a Soft (0% “Hardness”) Round Brush with a size of 250 Pixels approx. Using a light shade of the color used in “Step 4” (#8dd6fa) as “Fill” color with a Brush “Opacity” of 20%, paint around the top portion of your document to create a foggy effect. Lower the “Opacity” to 70%.
9 - Duplicate your original “Stars” Layer and your “Fog” Layer. Delete the “Mask” from the first one, then select them both, right-click on top of their thumbnails and choose “Merge Layers”. Position this layer under your “Stars copy” Layer, double-click on its thumbnail and apply the following “Layer Styles”:
Outer Glow: (#03b9fd)
10 - Make a “Layer Mask” of this layer and making sure you are selecting the “Mask” thumbnail got to Filter > Render >Clouds.
11 - Duplicate your last layer, change the “Blending Mode” to “Linear Light” and the “Opacity” to 50%. Go to Edit > Transform > Rotate 180°. Lower the “Opacity” of the “Fog” Layer a little bit more (we made it 40%).
12 - Finally, in the “Adjustments” Panel create a new “Levels Adjustment Layer” on top of everything and use the following values:
13 - Your image should look similar to this:
by @lornacane
Related Tutorials
Photoshop Tutorials
How to Make a Holographic Background in Photoshop
Learn how to create a shiny holographic effect in Photoshop with this step by step tutorial.
Photoshop Tutorials
How to Blur Background in Photoshop
Photoshop Tutorials
Starry Space Text Effect Photoshop
Photoshop Tutorials
How to remove the white background from images in Photoshop
Photoshop Tutorials
Colorful Backgrounds in Photoshop
Learn to create a colorful gradient background in Photoshop with this beginner tutorial.
Photoshop Tutorials
How to Use Backgrounds in Photoshop
Learn how to easily add, transform and rearrange a background image in Adobe Photoshop.