Posted 12th August 2016 •
By Design Bundles

Its always good to know a few top tips when starting out using a new crafting tool.
Today I will be sharing 10 of my top tips when using the Cricut Explore Air machine.
It is good to note that many of these tips can be implemented with other electronic die cutting machines like the Silhouette Cameo and Portrait.
Lets get started!!!
1- Keep your mats clean
Mats for the Cricut Explore are not cheap.
Here in Australia a 2 pack of mats can cost up to $22aud, so its important to ensure you get the most from each one.
By keeping your mat free of debris it will stay stickier for longer and therefore your materials will stick on it easier.
The other reason for keeping your mats clean of debris is to ensure your projects cut cleanly. If there is any debris on your mat, the blade may hit it while cutting your project and cause the blade to stick or rip your project.
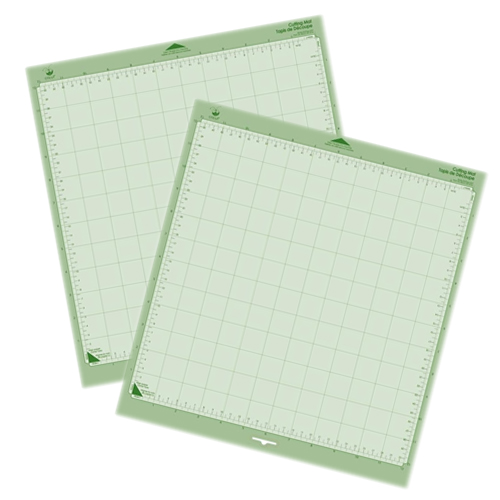 |
image- www.scrapbook.com |
2- Do NOT use Google Chrome
So, I use google chrome on my PC all the time, but for whatever reason the Cricut Design Space and Google Chrome don't seem to like each other. I have had issues with calibrating my machine, the program freezing, and even the machine not cutting correctly, even tho all my settings on the screen and machine are correct. After contacting Cricut HQ I was told there are issues with Chrome and their program, so I now use Firefox specifically for Cricut Design Space.
 |
Chrome V's Firefox |
3- Use Multiple Blades
This goes for any electronic cutting machine. Have separate blades for different materials. I have a different blade for my vinyl, card stock and sticker paper.
The reason for this is different materials will wear your blade differently. Vinyl for instance is an easy material to cut. I am still on the same blade that came with the machine because I have only ever cut vinyl with it. Card stock on the other hand can be not very forgiving on your blade. I will use a new blade every few weeks when I cut a lot of card stock. Then you have things like sticker paper, I have found that the adhesive likes to stick on the blade, so combine that with the paper, stuff gets stuck on the blade quite easily.
By using a different blade for each main material type you can extend the life of your blades. The small outlay at first for several blades is well worth it in the long run.
4- Use your own files
You can import your own files into the Cricut Design Space. Files like SVG can be imported with ease. This means you can use 3rd party files in your designs and don't have to rely on the Cricut Access files.
5- Test your materials before cutting
TEST TEST TEST!!!! No matter what you turn on the dial or select in the custom cut settings, ALWAYS test your materials with a small cut. A small square with a triangle in the centre is more than enough. By doing this and testing your materials, this can save you time, money and frustration when cutting with a new material for the fist time.
I personally have a small book that I write what brand card etc I cut and what setting I used. It is amazing the difference in even cutting 2 brands of textured card stock that state they are the same GSM.
6- Peel your mat away from your project not the project from the mat
There is nothing worse than spending time on a project, buying expensive card stock, cutting it and then only to pull it from your cutting mat and it becomes all curled and unusable.
By pulling the mat away from your project, rather than pulling the project off your mat, you can avoid your project curling. This can also help when your mat is a little too sticky and your project is stuck.
7- Don't use a Laser Printer
I learnt this first hand. The Cricut Explore machine does not like laser printers! I must have tried 10 times to calibrate my Cricut Explore before realising it was not picking up the registration marks because it was toner not ink. Apparently the light that is used in the machine to pick up the registration marks can heat the toner so it can not be read by the machine.
Always use an inkjet printer.
8- Take advantage of the free designs in Cricut Access
In the Cricut Access online section there are weekly free designs. Take advantage of these by creating your own files with them and save them. Then you will have them for future use. Some of the free files are quite good and worth having a look at.

9- Attach your files
OK so this sounds a little odd if your newbie, but Attach is a function in the Cricut Design Space software.
When you create your project in the software and go to cut, Cricut Design Space automatically places each part of your design in the most economical way to cut on your media. This is a great function, but if your making a project and you need the cut files to stay where they are in design space layout, the attach function is your friend.
By selecting all your cut files and then selecting attach, when you go to cut the files will stay in the order you have them in the design space, rather than them getting moved about to cut more economical.

10- Use your own fonts and Glyphs-
Cricut Design Space comes with a variety of installed fonts online. But if you purchase fonts from places like
Fontbundles.net and install them into your PC/Mac you can then automatically access them via the Cricut Design Space software.
You can also access the Glyphs can can come with some fonts in the software too. It is as easy as using Character maps on a PC and Font book in Mac.
This can open up even more possibilities for your projects.
There are many more tips and helpful ideas for using the Cricut Explore Air and the Design Space studio, but I hope that these 10 tips will get you started and help you create your projects.
Until next time....


