Fonts can be used for so many uses. One of the things I love to use them for is to personalise my children's belongings.
One item that I need to every year for my youngest is a library bag. Usually I grab some Heat Transfer Vinyl, cut it out and pop it on a fabric library bag.
This year I thought why not try a different technique.
In this tutorial I am going to share with you today how to make a stencil and use it with screen ink to personalise library bag.
You will need the following-
Auction style bundle- Honey Bunny
Heidi Swapp Minc Reactive screen Ink
Silhouette stencil vinyl
Heidi Swapp foil- holographic
Sponge
Scraper
Silhouette die cutting machine
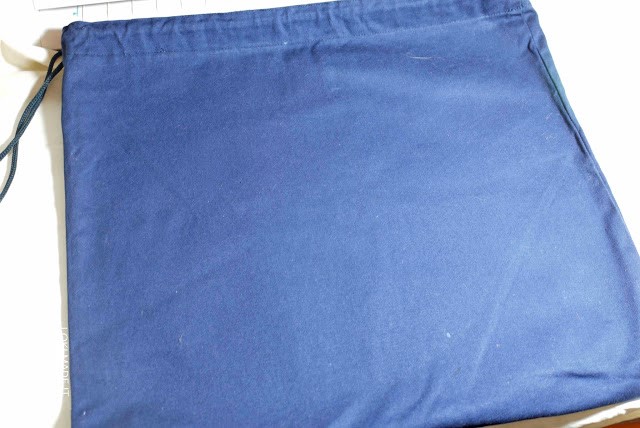
Blank library bag.
Iron
Baking paper
1- Open Silhouette software and type what you would like to put onto your fabric.
2- Choose the font you would like to use. Today I will be using Honey Bunny from the Auction style bundle.
3- Click on the ungroup icon and ungroup all the letters.
When creating a stencil you need to ensure that your letters are not touching each other so by ungrouping the letters you can adjust the gap in-between each letter.
4- Once you have adjusted the letters, select them all and group them together.
5- Rotate the words 90 degrees. I am doing this so when I cut the vinyl there will be a strip of uncut vinyl either side of my words. I will also be adding a excess of vinyl at the top and bottom of the stencil.
6- Adjust the size to what you require. Select the appropriate cutting depth and speed. If you are unsure do a test cut.
7- place the stencil vinyl onto your mat. Leave a small amount of excess at the top and bottom of your mat.
8- Cut the vinyl.
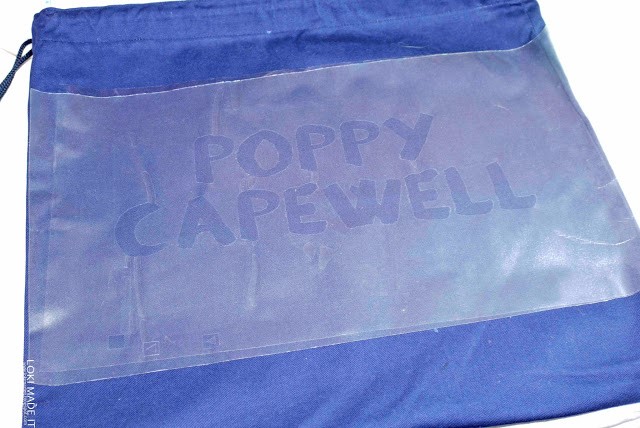
9- weed the letters out of your stencil. remembering to leave in the middle pieces of letters like "P "and "A".
10- Place the transfer tape over your stencil. This is so you can pick up the stencil and place onto your item for inking. Make sure you rub it well.
11- Iron the library bag. You need to ensure the media you are stencilling is perfectly flat as not to get bleeding.
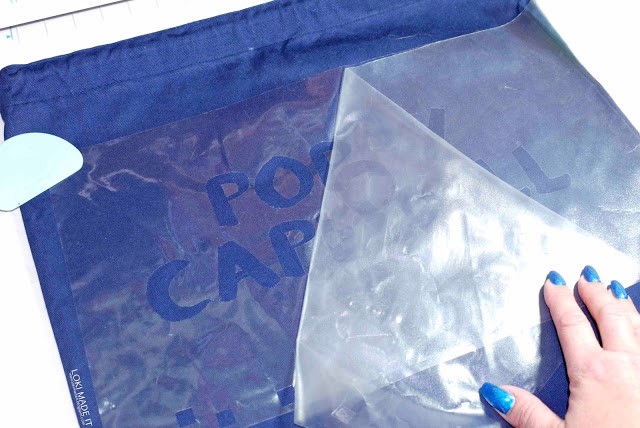
12- Peel off the backing from the stencil and place on your material. Ensure you apply it straight.
13- Rub down really well with a scraper and then carefully peel off the transfer tape. leaving the stencil behind.
14- Once the transfer tape is removed, rub well again with the scraper, making sure it is completely flat.
15-Take your reactive screen ink, the sponge and scraper and place some of the screen ink on a not stick surface. Dab your sponge in.
16- Carefully apply the ink to your stencil. take your time so as not to let it bleed under the vinyl stencil.
17- Once you have put all the ink onto your stencil, use a scraper to remove any excess.
18- Remove the stencil carefully and leave to dry. This can take up to an hour.
19- Once dry lay your chosen foil colour over the stencilled screen ink.
20- Now at this point, if you were stencilling onto a thin medium like paper or card you would run it through the Minc Machine. But as we are doing this on a library bag, we will need to use an iron.
So take a piece of baking paper and lay it over the foil. this is to stop the foil from melting.
21- On a hot setting like cotton, and the steam turned off, press hard onto the iron over the baking paper. Slowly move the iron over the whole stenciled area. I held the iron down for 15 seconds then moved and repeated this.
22- Wait till the foil has cooled. DO NOT try to take the foil off while hot. it will only stick.
Once it is cool slowly remove the foil. If any areas have not adhered to the foil, replace and re heat with the iron.
And there you have it!!!! A holographic foiled library bag!!!
I totally love this font! it really looks like my daughter had written her name with paint on her bag!
The foil is now adhered well and should be hand washable with no issue in cool water.
I really hope you have enjoyed this tutorial.
The reactive screen ink is an awesome medium to work with and combined with the stencil material and the awesome font Honey Bunny, this has made a perfect library bag for my daughter.


