How to Add Embellishments to Your Handmade Projects
Share
How to Add Embellishments to Your Handmade Projects
Posted 10th May 2016 •
By Design Bundles
When creating handmade cards, cost is a big factor. Between purchasing different patterned paper, stickers, ribbon, dies and other embellishments it can become quite a pricey hobby!
Fonts are an inexpensive addition to anyone's stash as they can be used over and over again and you only have to purchase once, but did you know that fonts are not just something you can use to make sentiments!
With most fonts from Fontbundles.net you not only receive the fonts, they come with glyphs that can be accessed in character maps on a PC and Font Book on Mac.
Today I will be showing you how to use these glyphs to create embellishments for your handmade projects.
To make the card I created today you will need the following-
Patterned paper/stickers (Doodlebug Designs- Spring Garden)
Coloured Cardstock
Blank Card - 6x6 inch square
Thin metal dies - (Paper Smooches)
Sequins/gems
Adhesive
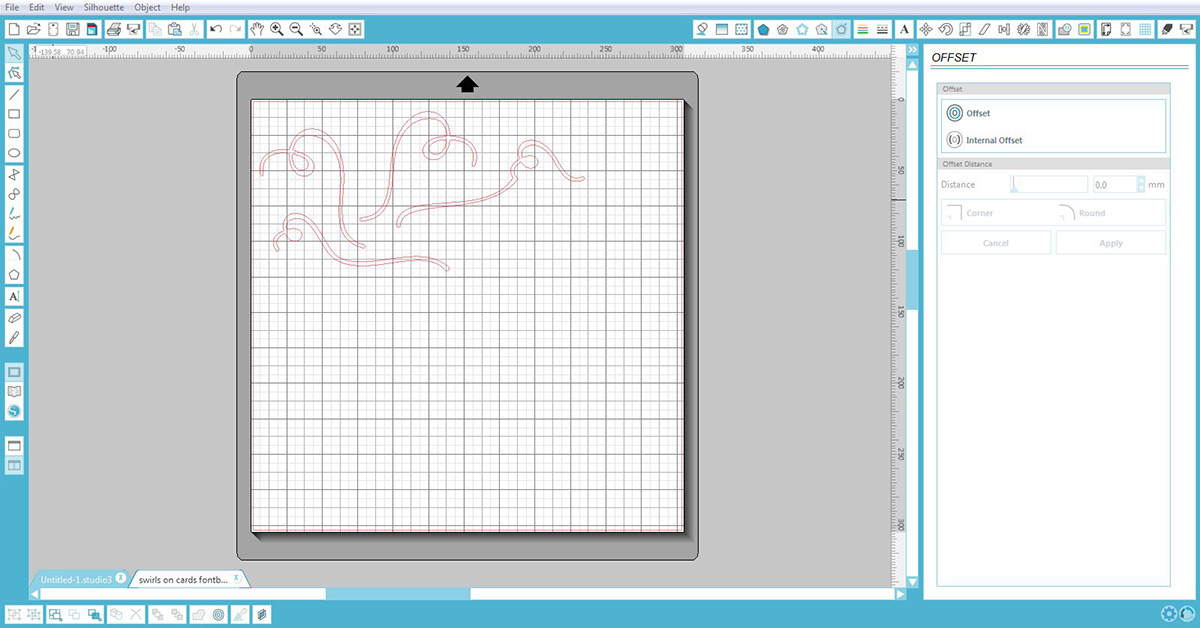
1- Open up Silhouette studio and select the text style icon. Select the font Monica Script from the Calligraphy Font Bundle
2- Select Character Maps on your PC (Font Book if you have a Mac). Select your font in the drop down box, click on the group by drop down box and select "Unicode Sub-range". A pop up box will appear. Scroll to the bottom and select "Private use characters" This will access all the glyphs in the font you have selected. Double click on the swirl glyphs you would like to use and then click on "copy".
3- Click back onto your silhouette software and then click "paste". Your glyphs should appear.
4- Ungroup your glyphs.
5- Adjust the size to what you would like to fit on your card. If you need them to be opposite for your card, copy and paste then flip. Next use the offset button to make a slightly thinner version of your glyphs.
6- Separate the offset from the original glyph and delete what you do not require.
7- Move them on the page to fit your cardstock.
8- Select the desired cut settings and cut your file.
9- Once they have finished cutting separate them from the cutting mat.
10- Take your blank card and fold. Cut the following pieces of patterned paper
1 x 4 cm x 14 cm
1 x 3.5 cm x 14 cm
1 x 4 cm x 14 cm
1 x 8 cm x 14 cm
Adhere them all together overlapping each one slightly. the total size together should be approx 14cm x 14 cm. Adhere this to the front of your card.
11- Manually die cut 2 circles and layer them. Adhere to your card with 3D foam tape.
12- Add adhesive to your newly cut glyphs and adhere under the circles.
13- Place the sticker on top of the circles, then add a die cut sentiment.
14- Lastly add sequins and gems to the card.
The glyphs in a font are a fantastic way to add embellishments to your projects.
If you have any fonts from Fontbundles.net there is a good chance you have some hidden glyphs you can use to make your next project extra special!!!!


