
Easter is only a few short weeks away! I don't know about you, but now I'm scrambling to get the house decorated for Easter/Spring since it's so early this year. See you later Valentine's day décor!
You know me, I don't like to spend lots of money on seasonal décor but I do like a festive home. Here's a super colorful word art sign made with heat transfer vinyl, paper, and a cheap wood sign from the Target dollar spot.
The Supply List:
I know that there are pre-existing word art designs for Easter already, but I like having control over the fonts and words. This is going to look more intimidating than it actually is, trust me! There are a lot of screenshots but I wanted to show you every step.
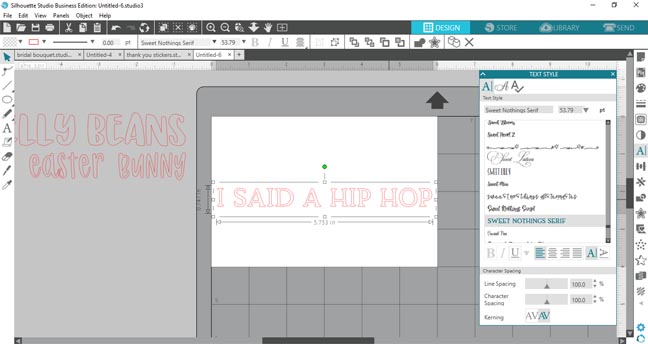
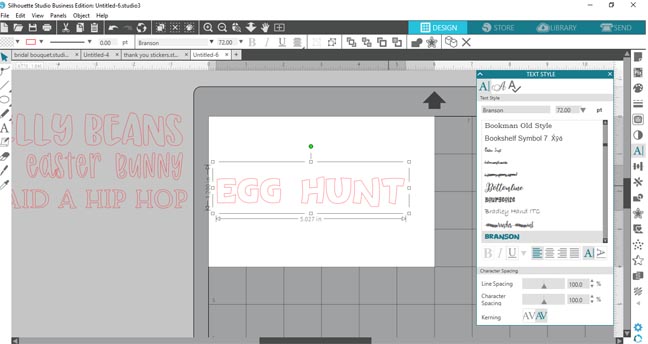
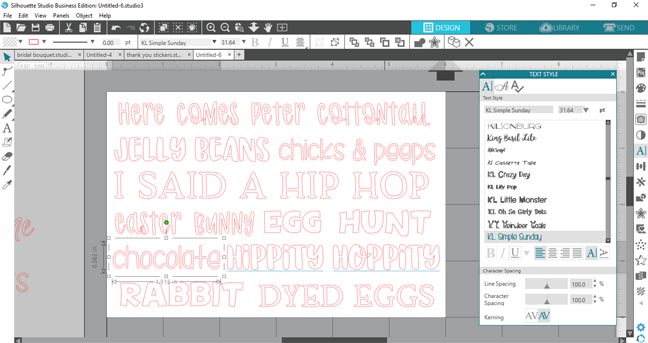
Simply start by typing out your words and changing them to the font you like.
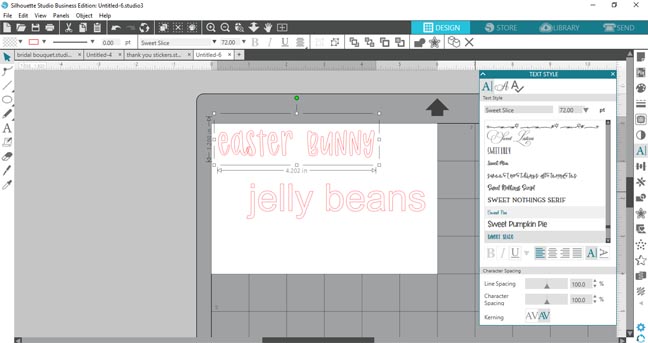
I used Sweet Slice, Mystical Woods Smooth Caps, Branson, Sweet Nothings Serif, and Simply Sunday. They are all part of the Tremendous Font Bundle 2.(Seriously this is an awesome bundle of fonts! I love them all, go buy it!)

I'm showing you screenshots of each font so you can see which ones are which.
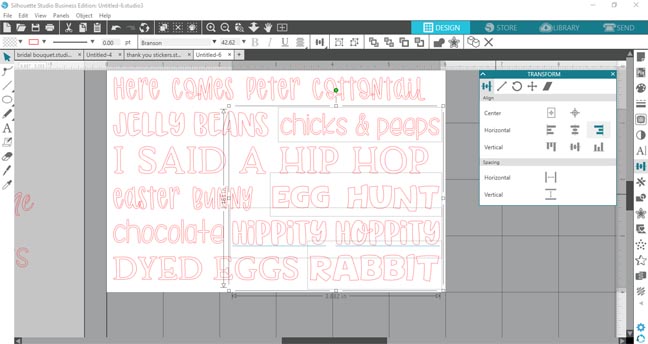
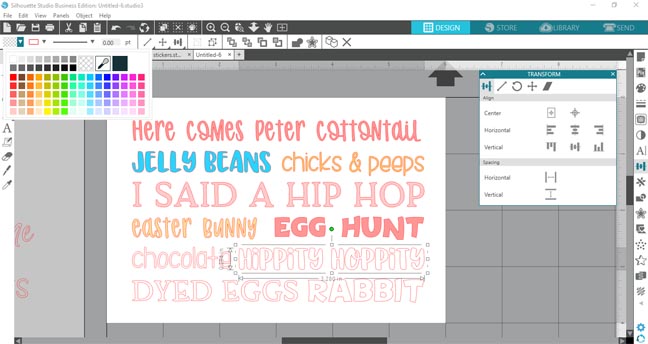
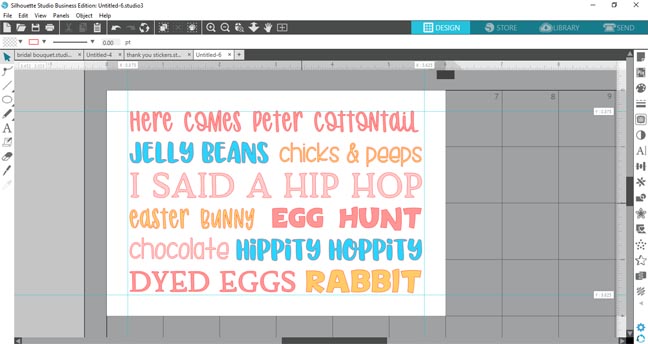
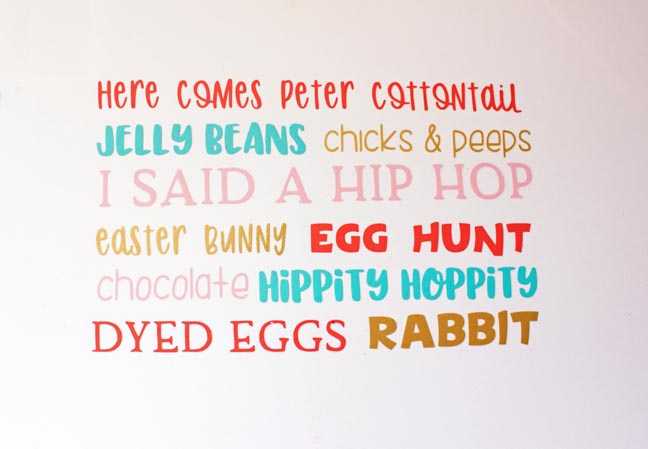
Ok, you get the idea. Once you have all of your words typed out in the fonts you like, start arranging them into your space.
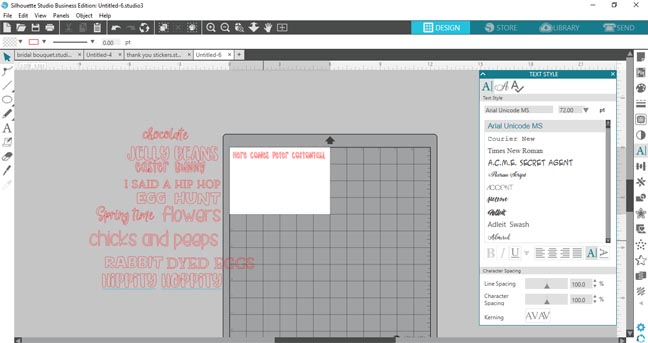
Simply size the words to fit a rectangle shape trying to keep the margins consistent. You'll have to move and play a bit. I didn't end up using all of the words I had originally typed out.
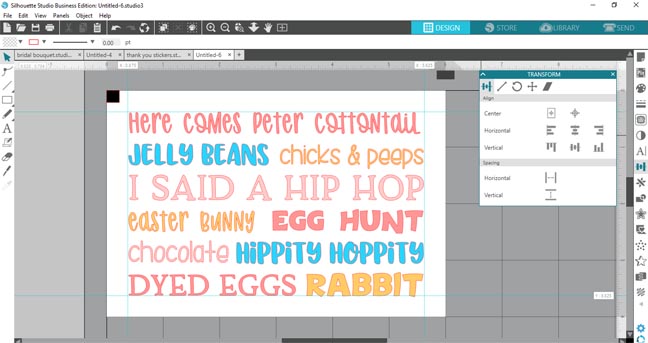
Use the Transform panel and the align tools to get everything evenly spaced.
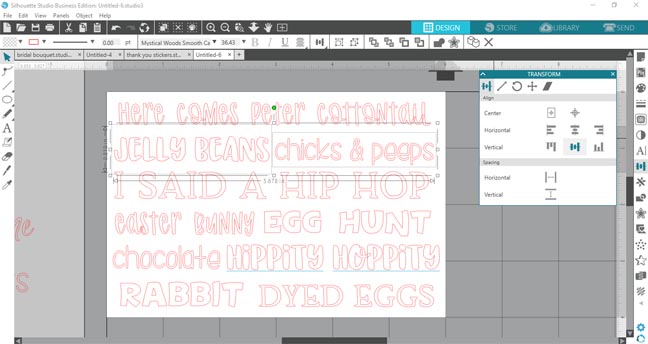
Seriously, the align tools are what I use most in the Silhouette Studio software. It makes life so easy!!
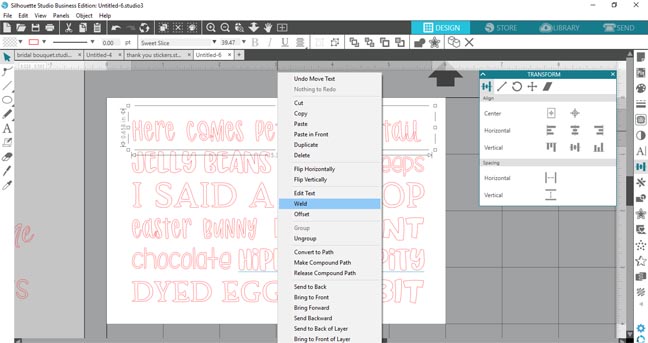
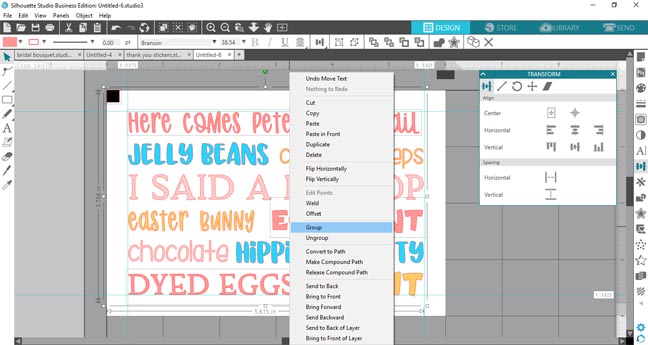
Some of the fonts need to be welded together so they cut properly. I waited until I was happy with the arrangement to do this.
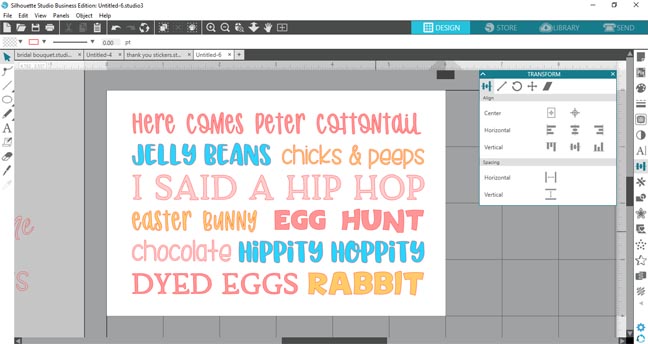
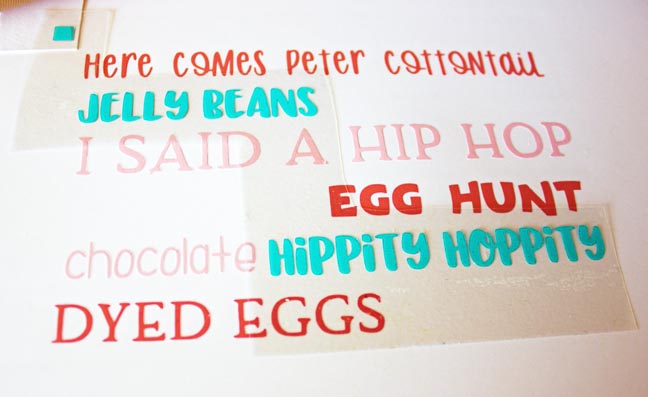
Since I'm using 4 different colors of heat transfer I wanted to fill the words with the colors planned so I could visualize the finished project.
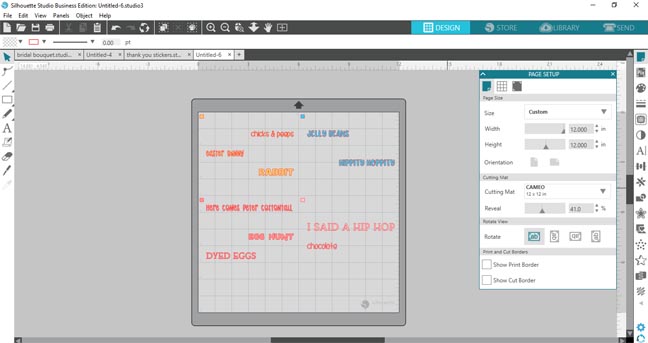
This is what I decided upon. I tried to keep the colors evenly distributed throughout.
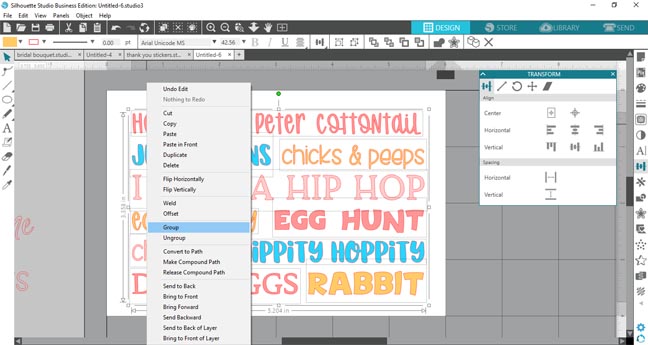
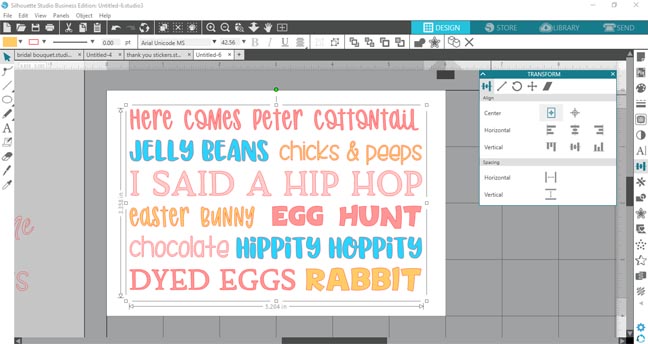
Group it all together so you can center it on the page.
Use the align tool and click on the center button with the rectangle around it, that centers it to the page.
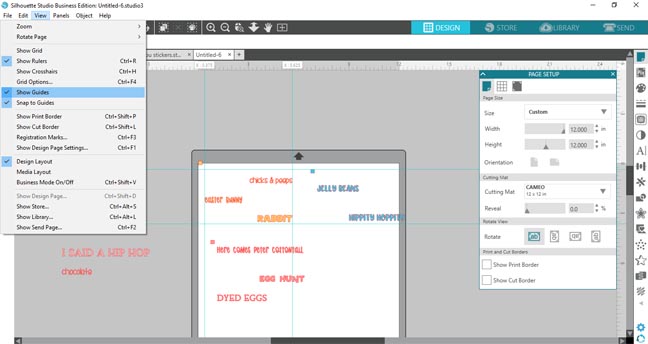
I wanted to make sure the edges were nice and clean. Guidelines come in handy for that, simply click on the rulers at the top and side of the screen and drag down. That creates a blue guideline so you can make sure everything is aligned.
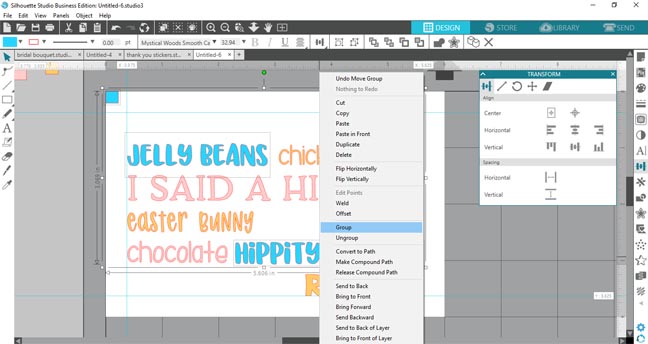
Now draw a square in the top left corner. You are going to need to make 4 copies of that and align them on top of each other. This will be what you use as a guide to align each color grouping.
You'll need to ungroup the block of words to select the individual words as needed.

Now start grouping the same color words together along with the square in the top left.
You can change the color of the top left square to match the word colors for your own organizing purposes.
To turn off the guidelines, go to view in the top tool menu and click show guides, that will uncheck the space next to it.
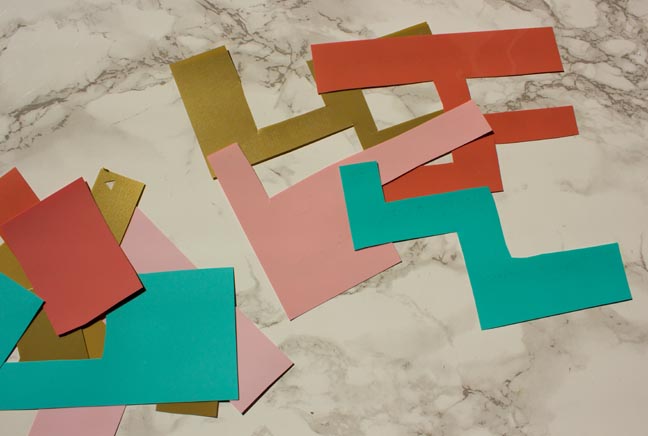
Separate out the various colors on your cutting mat which you'll want to make 12" x 12" again.
You can change the opacity of the mat so you can see the gridlines on the cutting mat by sliding the reveal bar to the right. Now move the word groups so they are easy to match up with your heat transfer material on your actual mat.
The last step is to mirror everything since this is a heat transfer project. If you opt to use regular vinyl instead you can skip this step.
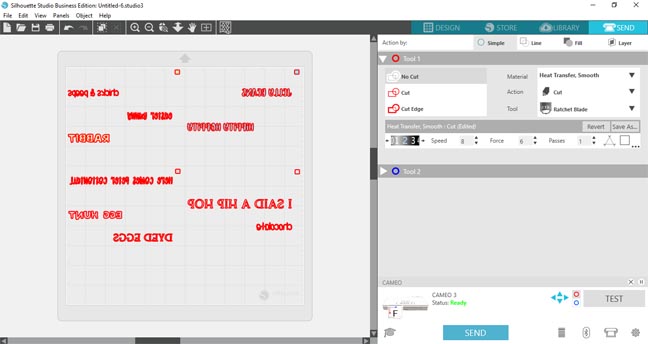
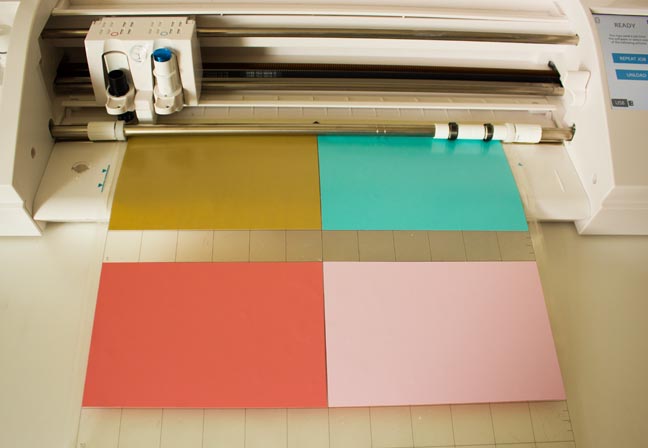
Place the heat transfer material on your cutting mat so it matches up with your placement on the screen and send it to be cut. This saves a ton of time doing all 4 colors at once.
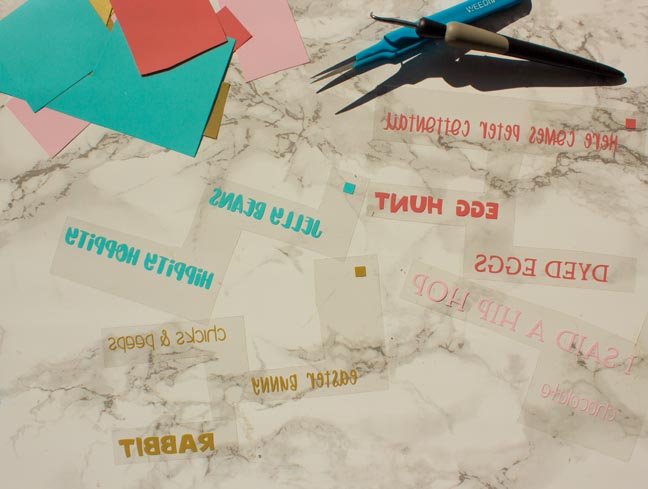
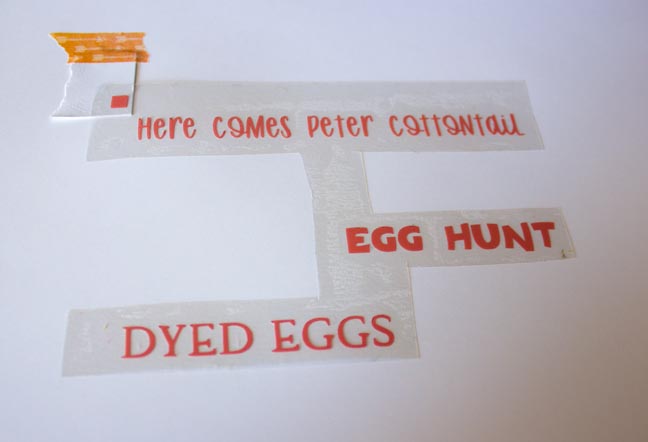
I hate wasting material so I cut out any unused portions so I had scraps for future projects. Make sure to leave all of the words connected though so all that work you did aligning them in the software isn't wasted.
Weed out the excess material.
I'm just attaching the words to white cardstock. So I placed them in the center of the page. Use a little scrap of paper to keep the square for aligning from attaching to your surface.
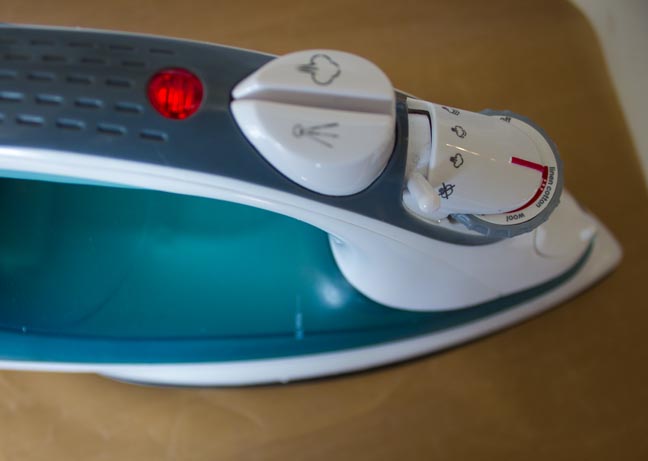
Use your iron or heat press to attach the material to the page.
Keep repeating the process with all four colors, making sure to align the top left squares.
Everything is attached now! Pull off the scrap paper for the corners.
Trim down the cardstock to the correct size. I also used my CAMEO to cut a piece of patterned cardstock to layer the sign with.
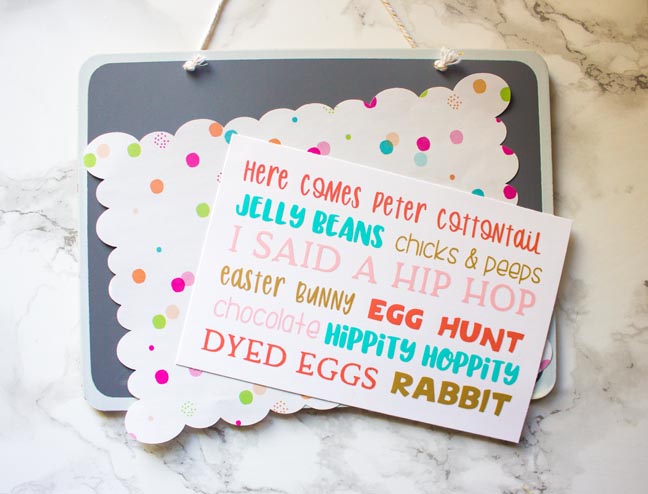
I just used double stick tape to attach everything down, that way I can remove it easily if I want to reuse the wood sign for another future project.

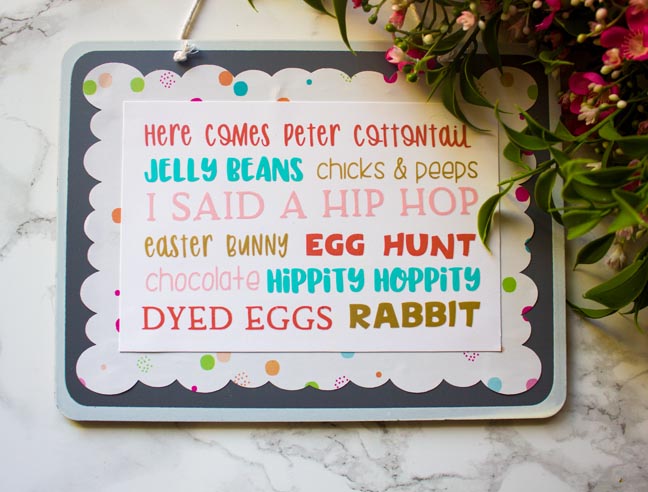
Now you have a cute, colorful, and festive word art sign to display for the holiday!
Stay tuned for other fun Easter craft ideas!!

DTF vs Sublimation Printing: Which Is Better for Your Craft Business

Beginner Cricut Project: How to Make a Paper Cut Gift Tag with Cricut
