
Every year I make my family a fun craft involving my kids as part of their gift.
We actually had an early snowfall this fall and built a snowman in our front yard. I took a bunch of pictures of the kids and thought it would be cute to make our own little snowglobes using those photos.
The Supplies Needed:
First, you'll need to edit the photos to have the image of the person by themselves. I used photoshop to clean up the image from this:

To this:

I repeated the process to get a clean image of my other son as well.


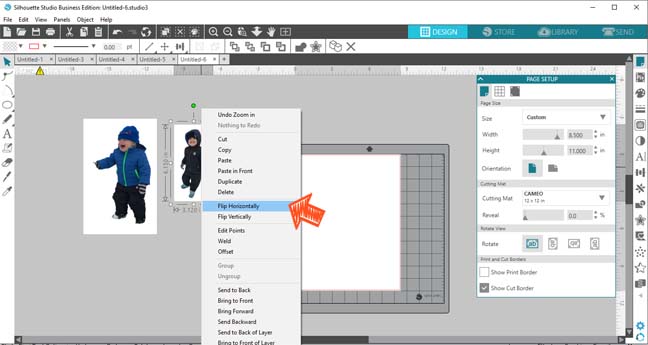
Next, I opened the pictures in Silhouette Studio so I could create sticker sheets to print and cut the images out.

I flipped one photo so I could put them on both sides of the Styrofoam snowman.
Resize the photo to fit into your snowglobe scene using the scale tool.

Add the registration marks to your page so you know the boundary lines for where to put your pictures.

Next, you'll need to trace the images to get the cut lines set up. I had to up the threshold to get a clean trace and then hit "trace outer edge".

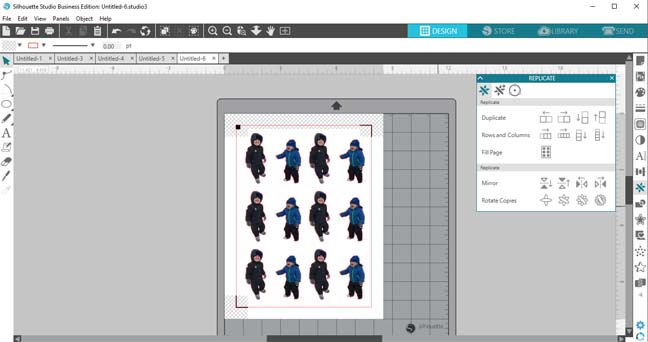
Now you can replicate the images to fill the page. I'm making multiple snowglobes for the family so I need a bunch.

Fill the page and then print.
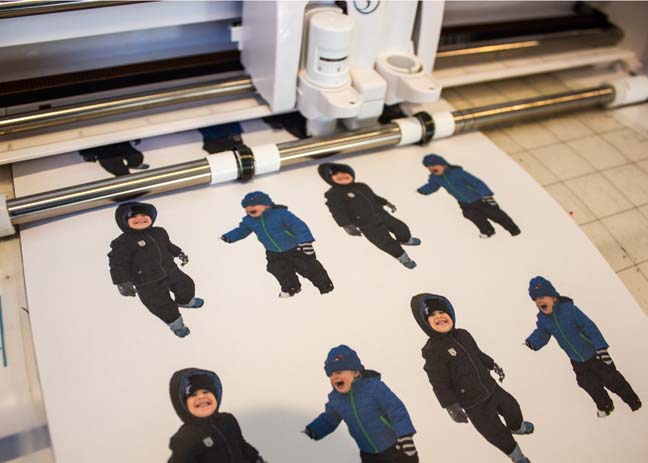
I made sure to change my print settings to best so I had really nice prints to work with.

After it's printed place the sticker sheet onto your cutting mat and send it to be cut.

Finally, take the traced shapes and design your chipboard to be cut. This makes them nice and sturdy so they stand in your snowglobe without drooping.

Now you can attach the stickers to the chipboard. I also printed mirrored sticker images so both sides of the chipboard were printed.

Now it's the fun of assembling all the pieces!

I cut a toothpick in half to attach the two Styrofoam balls to create the snowman.

Use hot glue to attach the snowman and photos to the base. I also used a tiny dab of glue on the kid's knees to attach them to the snowman to keep them in place.

Pour a little bit of the faux snow into the snowglobe ball, then attach the base to the globe.

All that's left is to decorate the outside to make it extra festive and fun!
I used washi tape around the lid and glued a pom-pom on top.

Now you have a really fun keepsake for the family to use at the holidays for years to come!! Think of how fun it will be to look at in 10 years remembering how little they once were. Don't forget to date it on the bottom.

So.... Do you want to build a snowman?

DTF vs Sublimation Printing: Which Is Better for Your Craft Business

Beginner Cricut Project: How to Make a Paper Cut Gift Tag with Cricut
