Planners are very popular at the moment. There are so many different types of planners on the market, and trying to find the right stickers to use on your planner to keep you up to date with your daily life can be tricky. With different size stickers, colours and designs, wouldn't it better if we could just make our own to suit our own planner needs?
Well we can! With a electronic die cutting machine, sticker paper, a printer and a great font, you too can make planner stickers, just like the professional ones.
For this tutorial you will making a Print and Cut file. You will need the following-
1- Open up your Silhouette Design Studio software. Go to the design page settings and select A4 to match your sticker paper.
2- Select registration marks icon and select style 1 this will place 3 black marks on your page, and some cross hatch. When designing your print and cut file you will need to ensure that you do not put any cut lines over this area, anything in the hatched area will not cut when you run it through the silhouette.
3- Measure your planner page, and the boxes for each day. This will give you a accurate idea of what size to make your planner stickers. My planner had 30mm x 30mm boxes, so I have decided to make my stickers 30mm x 10 mm. With the rounded rectangle too draw a rectangle 30mm x 10 mm.
4- Once you have your rectangle, create a 2mm offset. While the offset is highlighted change the line colour, then it is easy to see what needs to be cut and what does not.
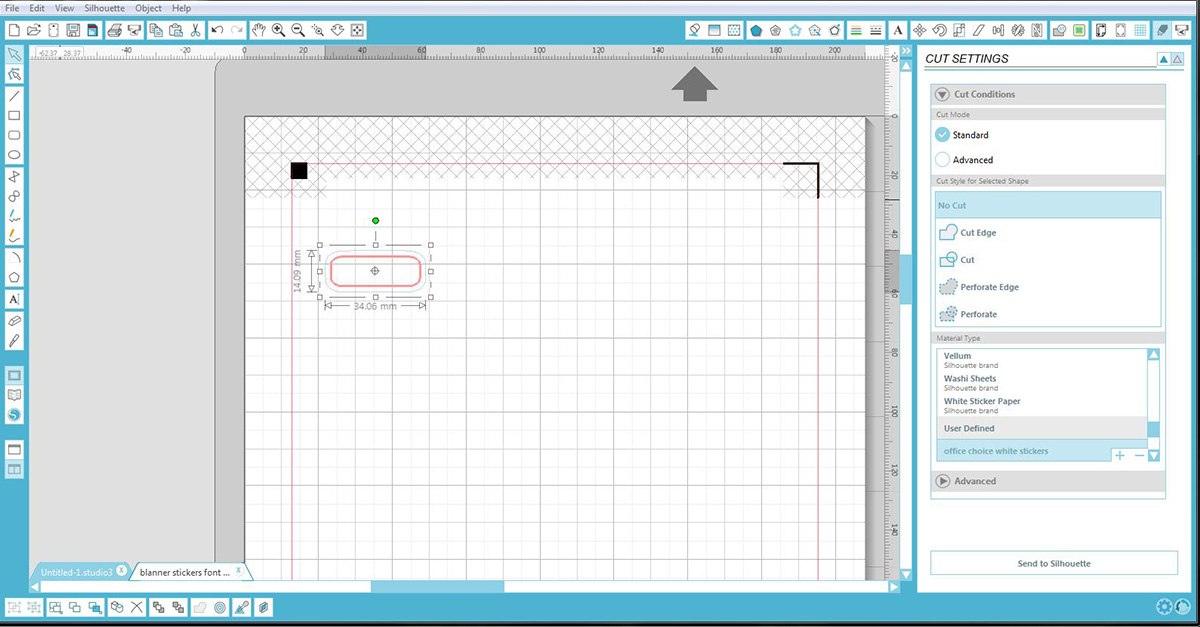
5- Select cut settings and while the offset is highlighted click no cut. this will ensure when you do the cut part of your print and cut, the offset will not cut but the planner sticker will.
The main reason we create an offset for print and cuts where we can, is when the machine cuts, if it is not 100% on center you will not end up with white edges.
6 - Highlight both your planner sticker and offset. Group then fill with a colour.
7 - Using the Dreams Liem font, Type the word you would like on your planner sicker.
8 - Ungroup the word. We need to do this so we can remove the letter "A" and replaces it with a Glyph.
9 - To access the Glyphs, open your Character Map tool. Select the font you are using. Once the font is selected, click on the "group by" drop down box. Select Unicode sub-range. A separate box will appear. Scroll all the way to the bottom and select "private use characters" This will now access your glyphs and they will appear in the character maps box. Double click on the glyph you would like to use and then select "copy"
10- Right click on your page and click Ctrl V. This will paste the Glyph on your page.(if for any reason the glyph does not appear and a box appears, highlight the box and re select the font used. this will convert it to the glyph.)
11- Delete the regular letter "A "and replace with the glyph. Select all of the letters apart from the glyph. Click weld to join all the letters. Line up the welded word with the glyph and group.
12 - Fill the word with white, so the word shows up on the planner sticker.
13 - While the word is selected, click cut settings and then "no cut" this will then stop it from cutting when you run it through the silhouette machine.
14 - Resize and place on your planner sticker.
15 - With the replicate tool, copy the planner sticker till you have the number you would like.
16 - Repeat the above steps to create different coloured and worded stickers, until you have enough you need.
17- Once you are ready, print your file on to the sticker paper. You will see that there will be a black box in the top left corner and other marks in the top right and bottom left corners. These are so the silhouette machine can register your print and cut file.
18- At this point place your sticker sheet on your cutting mat. There are several points you need to ensure when you are about to cut your file.
* Make sure when you printed the file it was printed straight.
* Ensure you lay the sticker paper straight on the cutting mat.
* Ensure that your silhouette is in a well lit area, as the machine will not detect the registration marks if it is not well lit.
Select the correct settings to kiss cut the sticker paper and cut.
19- Once they are cut, remove the sheet off your cutting mat. Your stickers are now complete and ready to be used in your planner.
These planner stickers can be made in any side and colour. You could even add more glyphs from your fonts or images.


