Font Bundles has just released their new website Design Bundles. This fantastic new site Will be sharing some great new products for us to purchase. From vector images to brushes you can use in Photoshop and Ai there will be many new products for you to create professional finished products with.
One part of the new Design Bundle are digital papers. Most people just print digital papers off for scrapbooking or insert them to create digital scrapbooking pages.
Today I will be sharing with you how to use these digital papers in Cricut Design Space, and how to use them with the print and cut function.
We will be making some planner stickers to use with your planner.
You will need the following- Cricut Design Space Software
Cricut Explore Air
Sticker Paper
Watercolour Tropical Digital Papers from the new Design Bundle.
Printer
1- Open up Cricut design space. Select insert shape and put a square in the design space.
2-Select edit. click on the lock icon to change the size of the rectangle and then adjust the size to fit your planner page.
3- Once you have the right size you can select the duplicate button to repeat the rectangle as many times as you need.
One note with Cricut Design Space- when doing a print and cut make sure you keep the total size to approx 6 inch square. Cricut design space will not let you print and cut larger than this size.
4- When you have the desired amount of rectangles, you can use the align function to evenly place the rectangles and align them.
5- Next we are going to make a weekend 1/2 box. Insert a new square, select edit and again adjust the size to fit the weekend part of your planner.
6- Duplicate the weekend box to the number you would like.
Then next thing we need is a banner. Duplicate one of your rectangles and then select edit to resize the rectangle.Make the rectangle approx 1/2 the width for the banner.
7- To cut the bottom part of the banner insert a triangle. We will be using the Slice function to create this part of your banner.
8- Place the triangle over the base of your rectangle. Select both the triangle and rectangle together.
9- Select slice. They will cut both the rectangle and the triangle where they intersect.
10- you can click and drag the cut triangle and rectangle from your new banner. Delete the parts you do not need.
11- Duplicate the banner the number of times you require.
12-Select upload images. You will get a new screen. there is an image option and a pattern fill option.
Select upload pattern.
13- A new screen will appear. select browse.
14- Once your files open find the digital papers you would like to use and select the paper.
15- The paper will appear in the preview box and you can rename the digital paper and tag it so it is easy to find in the future. This will be saved on the cloud for you to use so you will not have to upload again. Select save.
16- Repeat the above steps until you have all the digital papers you need to use. Once finished select the upload images icon again, this will take you back to the design space.
17- Select one of your rectangles. then select layers, and select the rectangle in the layers tab. This will bring up a new window. Select the print option.
18- Select the pattern option. The digital files you have uploaded will appear in the patterns section.
19- Select the digital paper you would like. A tick will appear. The digital paper will also appear in your rectangle.
20- Repeat this process to fill in all your boxes and banners.
21- Move your boxes and banners about to fit into a 6 x 6 inch square so you can print and cut.
22- Select the Go button, If your images are too large the print and cut will let you know with a orange bar across the top of your screen. If the size is OK you will go to the next screen.
Once you are in the print and cut screen select the bleed function. this will give you an over print on your images to when you cut there will be no white edges. Select Go button.
23- Print your File.
24- Set your cut setting. With thin sticker paper I recommend the custom setting and then select the washi paper setting in the drop down box. This will kiss cut your image.
Finally load your file on the cutting mat and select go again to cut.
25- Cut your file.
26-You can see the file cut withing the bleed print.
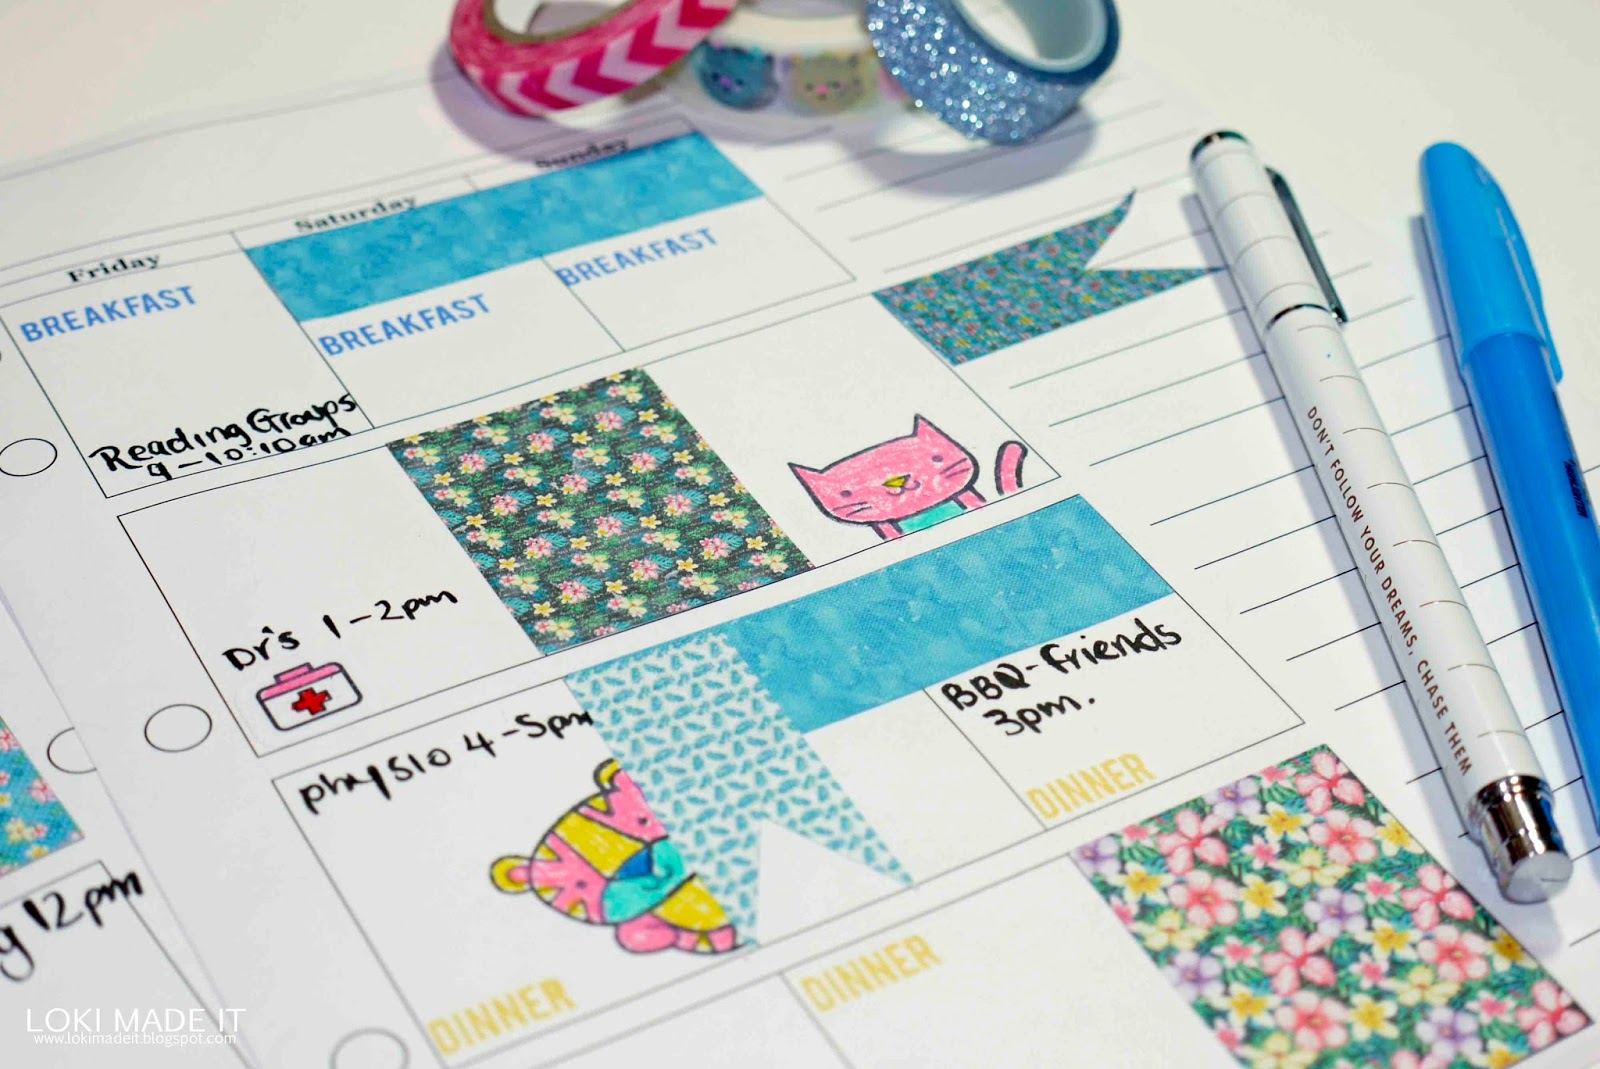
27- Once your file is cut you can use on your planner pages. This is a cheap way to create your own planner stickers. The fill pattern option is also great for other projects. The process is exactly the same.
The new Design Bundle has many digital files that you can use to for this effect. There is also plenty of digital images as well that you can use to make matching stickers for your planner or other projects.


