
Do you want to make festive cupcakes but don't really have the piping skills? Me too! Trust me, I keep practicing and watching cake decorating videos (how do they make it look so easy?) but I just can't quite get there.
You know where my skills are on point?!Crafting!!You've got this too! I'm showing you some very simple ways to make cupcake toppers and honestly, you really only need a computer, printer, and scissors to make them.
Since it's Valentines Day coming up I'm showing you how to make those types of toppers but you can apply these same skills for any occasion.
Here are 2 ways to make them:
Print and Cut for Graphics:
Supply List:
This is literally one of the easiest tutorials I've ever done. Ready for it?
Find an awesome graphic paper print or graphic designs for your occasion.
I'm using a floral paper print from the Valentines Set in the Valentines Design Bundle
Simply open it in your design software.

Size it to fit your printer paper. I'm using heavy cardstock paper.

Send it to print! Make sure to adjust the print settings to be their best.
I wanted to fill the page up so I copied the design again and lined it up since they are a seamless design.

It printed beautifully! I'm impressed that the glitter print looks like real glitter!

Grab those scissors and cut out the flower shapes. I also cut out the leaves separately so I could attach them to the flower. No fancy cutting machines needed for this one!!Sometimes the simple method is best.

I'll show you how to attach them in a minute. First, let me show you the other cupcake topper idea.
Word Cupcake Toppers:
If you read my other post about Valentine's décor then you'll recognize this heart. I wanted to keep my theme consistent so I used the same shape.
Open your shape and size it to the desired size. Also, add the registration marks since this is a print and cut.

Replicate the shape to fill a row. There's an easy tool for that in the replicate menu.

Add your text inside the shape. I'm using Just Love from the Valentines design bundle.

Use the align tool to make sure it's centered in the shape.

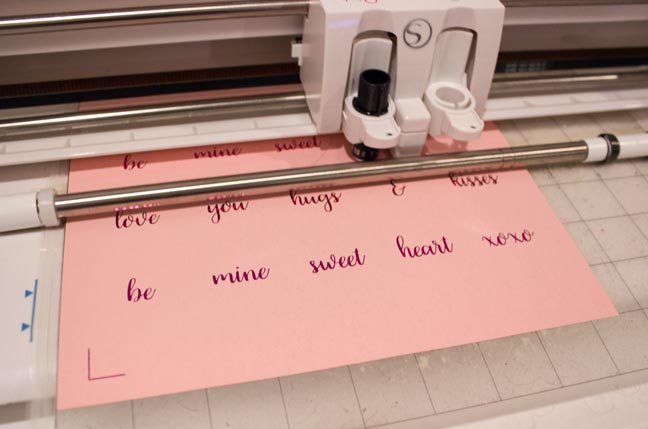
Repeat this process for all of the words you want to use. I'm going for the conversation heart look.

Replicate the first row below again and change out the words to say something else.

These are the only phrases I wanted so now I'm going to copy more rows to fill the page.

Originally I was going to simply print the words in pink so that's why I had them filled with that color. I decided to use my laser printer instead and add foil over the words so I changed the fill to black instead.
Obviously, you can just print the words in your color of choice and skip the foiling part.
Note: In order for the words to print you must fill them with color OR change the line weight to anything higher than 0.

Next, I printed that sheet with my laser printer. I'm going to add minc foil on top and it only reacts with toner ink. And yes, I bought a cheap black laser printer only for working with my minc! lol

Cut the foil to cover all of the black ink and run it through the machine.
Note: I've seen others simply use a laminator machine for foil and it seems to work. I've personally never tried it so I can't guarantee it.

You can see that where the black ink was is now pretty hot pink foil! I LOVE this machine!

Back to the computer to set it up for cutting. You'll see that the words are currently set to cut out, make sure to change them to "no cut" so that only the heart shapes are highlighted in red.

Go ahead and send it to cut.
I learned that the foil made it hard for the machine to read the registration marks so I ended up turning them off again. If I were to do this again I'd cover the marks with plain paper so they don't get foiled. Live and Learn!!
Now that you have all of the topper decorations cut out, let's assemble them into cake toppers.
I used some decorative washi tape and attached the paper to a toothpick. Repeat this process for all of the toppers.

Add the toothpick toppers to the centers of your homemade (or store bought-no judgments from over here!) cupcakes.
Look how pretty and festive they are!!
I tried getting fancy with the frosting piping, still a work in progress.

The cupcakes complete the full Valentines look and they were delicious.
True story: My youngest son is just out of the photo shot eagerly awaiting for me to be done so he could steal a cupcake. The perks of a being a bloggers kid!!

Make sure to check out the post showing you how to DIY the other fun decorations in this shot.

DTF vs Sublimation Printing: Which Is Better for Your Craft Business

Beginner Cricut Project: How to Make a Paper Cut Gift Tag with Cricut
