When we think of fonts, we think of them printed on paper or card, as they are placed on your media. But a font can be used in so many other ways, and today we will be using several fonts as a negative format rather than a positive one.
The road to summer Bundle - Amira Beauty, Naonweh, Lemonfish, Captain Jack, Brother, Rochesten, Scripy Calm, Cemporeng.
Cardstock- Black, White, Glitter Red
glue
3D foam tape
clear gems
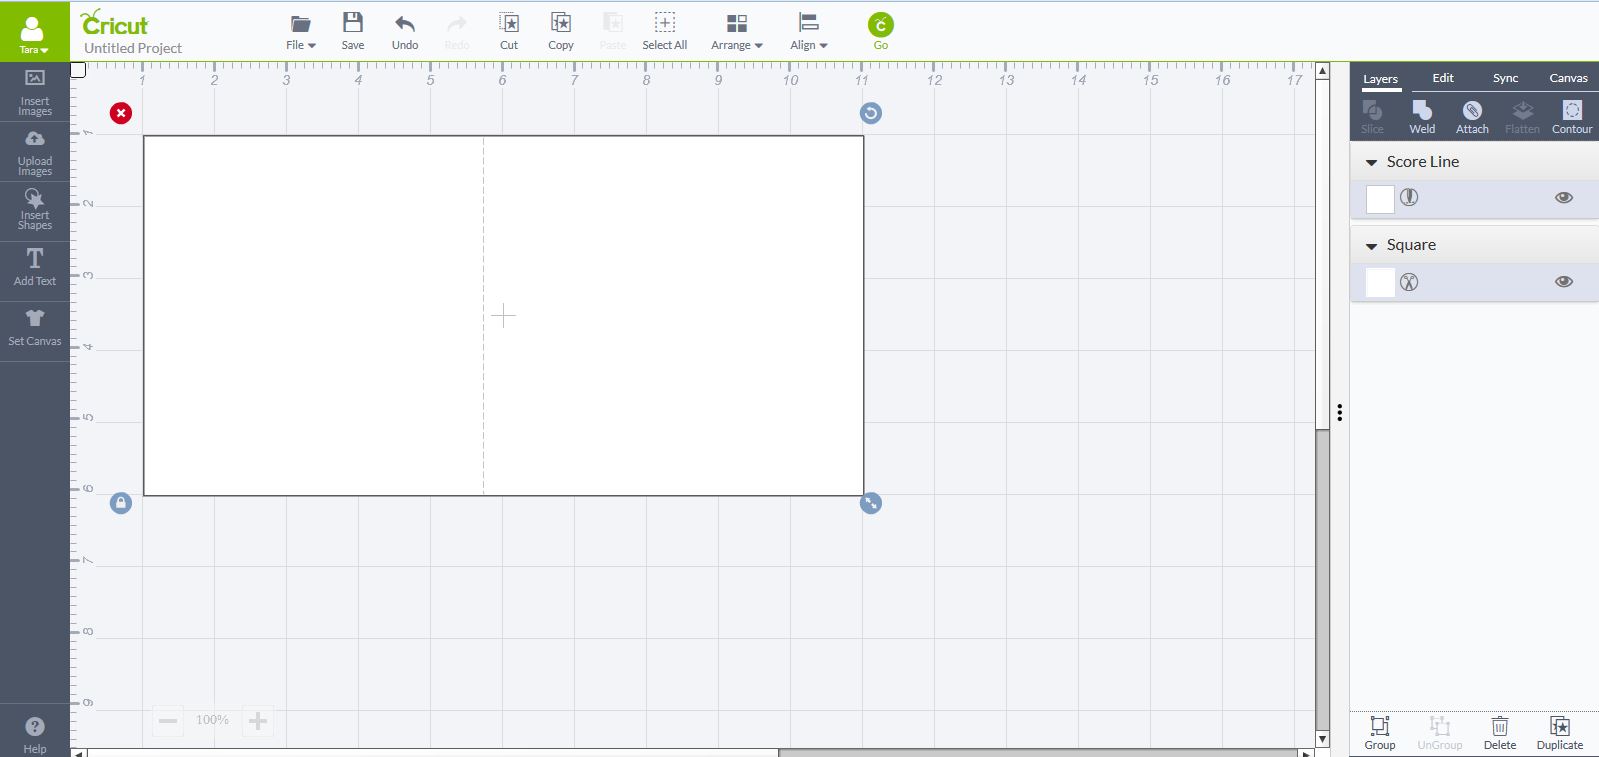
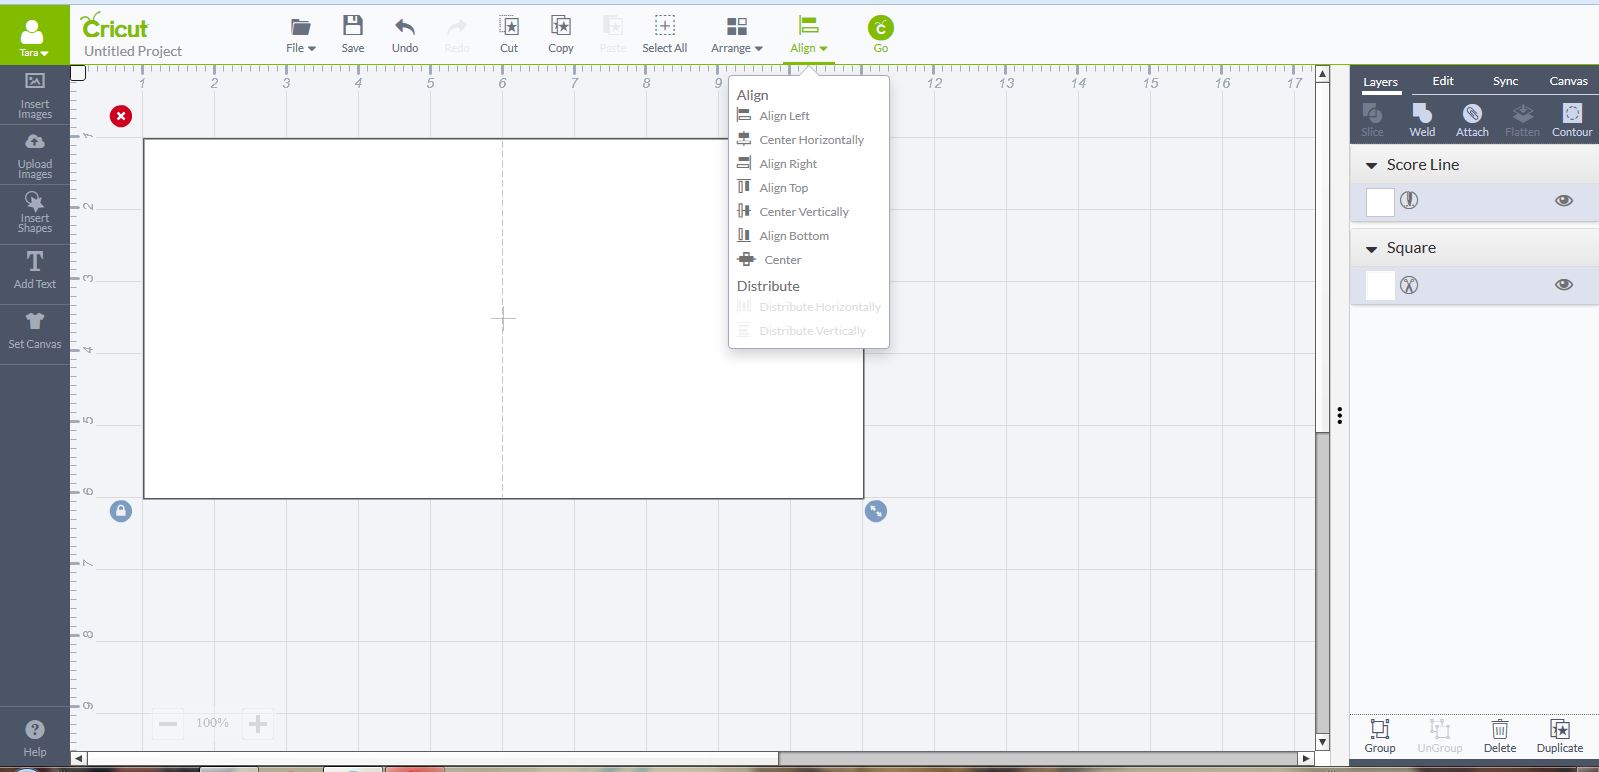
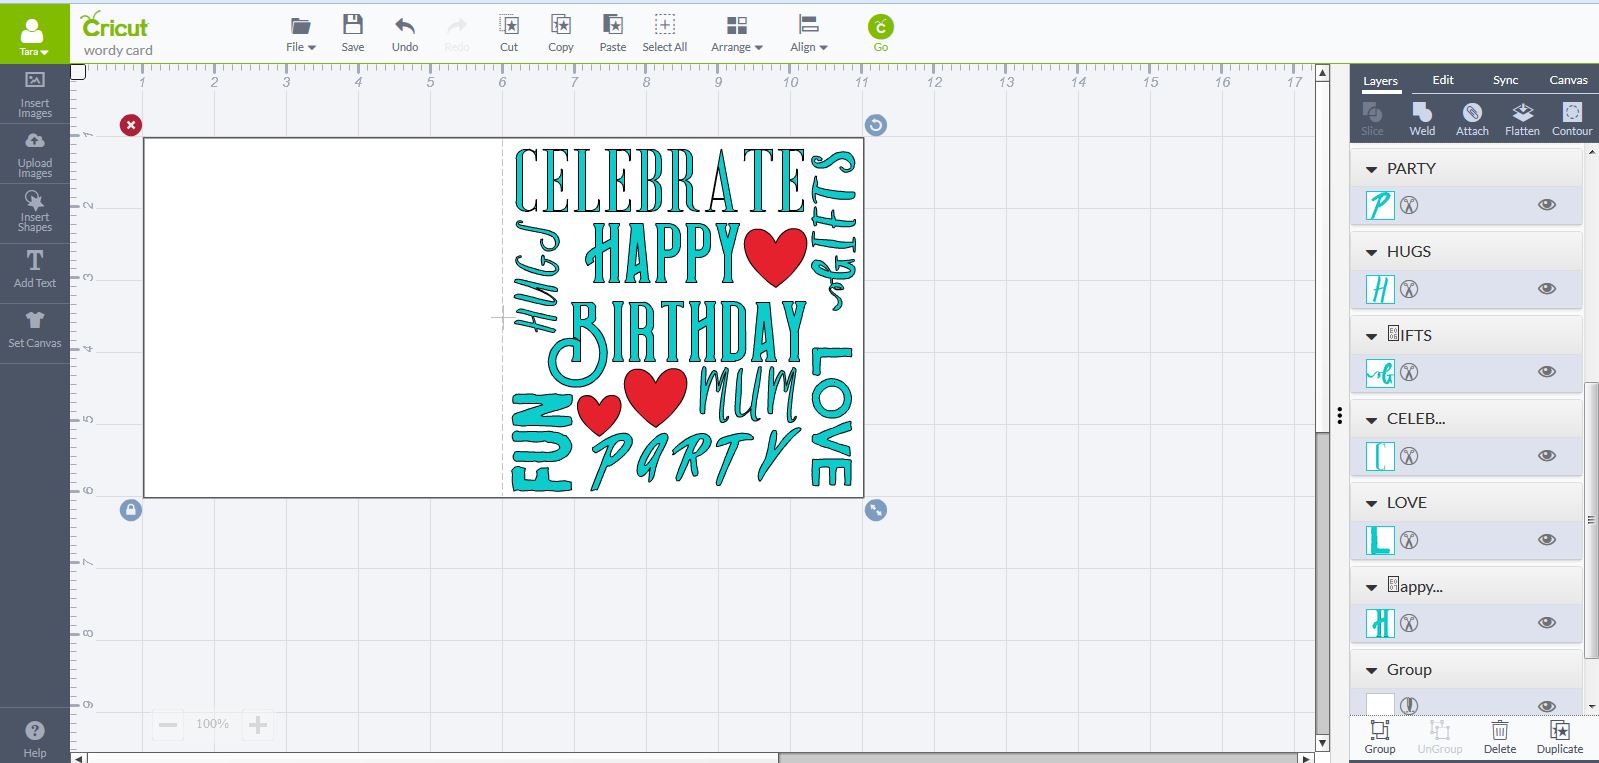
1- Open up Cricut design space and create a rectangle 10 x 5 inches wide. Place a score line over the rectangle then align to the centre.
2- Change the colour of the rectangle to white, then group them together.
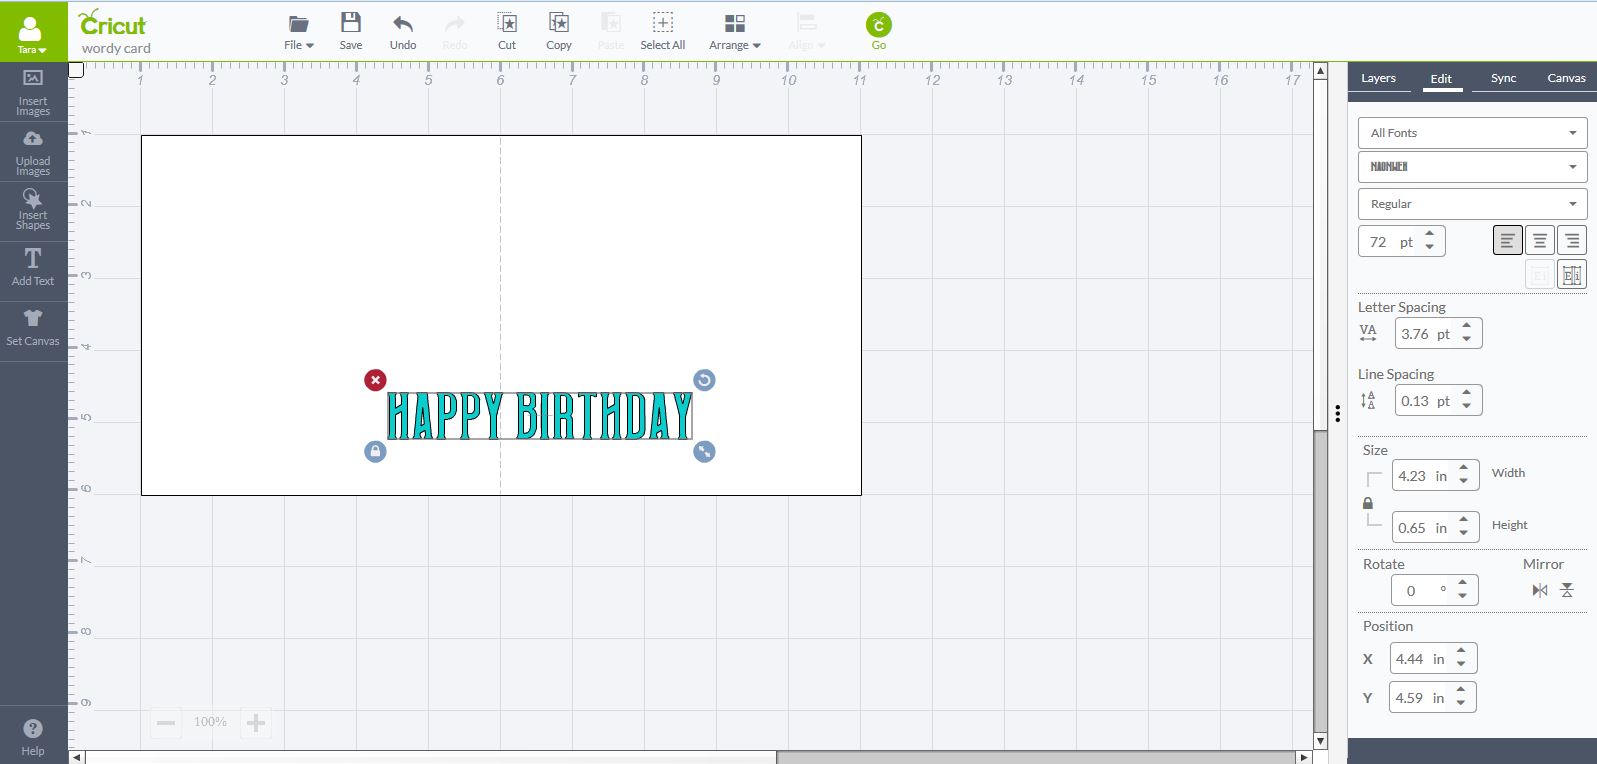
3- Click on the text box and write your first words.
4- Select the text and change the font to Naonweh.
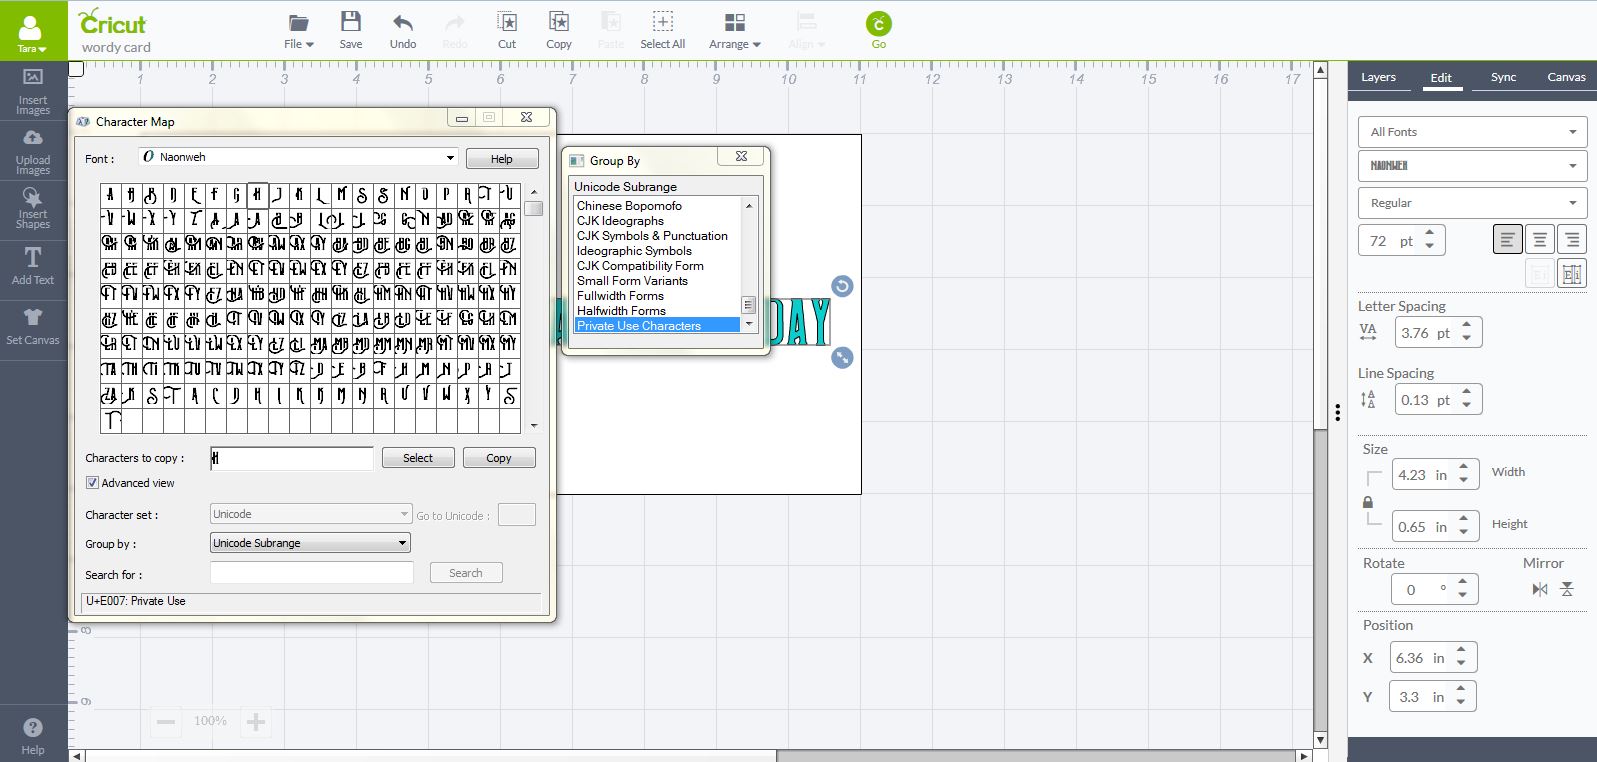
5- Once you have your font selected, we need to add the glyphs on the words. To do this we need to open up Character Maps (font book on MAC), select the font you are using.
Once selected, go to the "group by" drop down box and select " Unicode Sub range" This will open up another window. In this new window, scroll to the end and select "private use characters". This will now bring up any glyphs for the particular font you selected.
Find the Glyph you would like and click on it. Press the select button, then the copy button. this will copy the glyph for you.
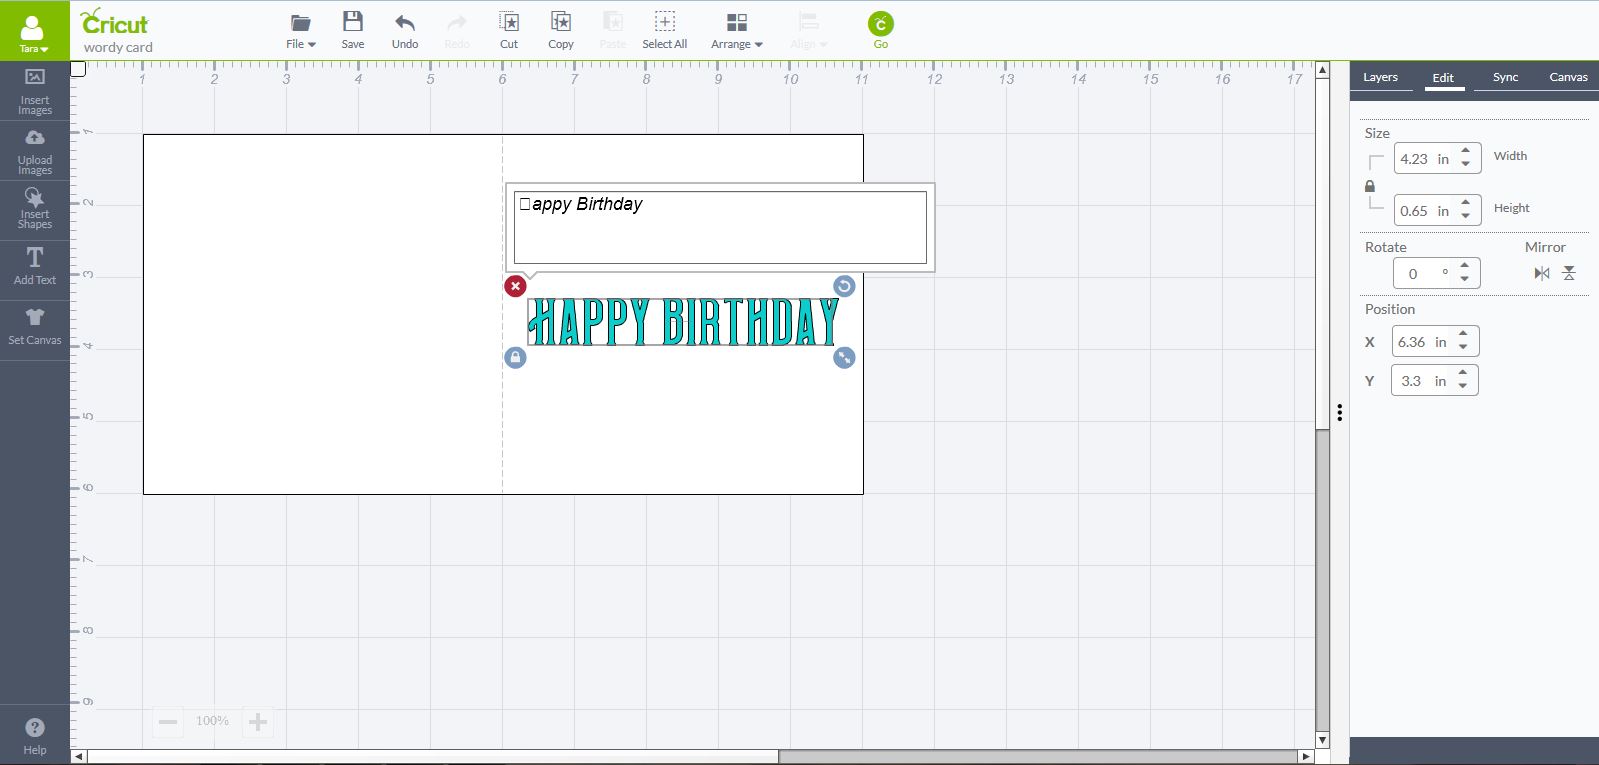
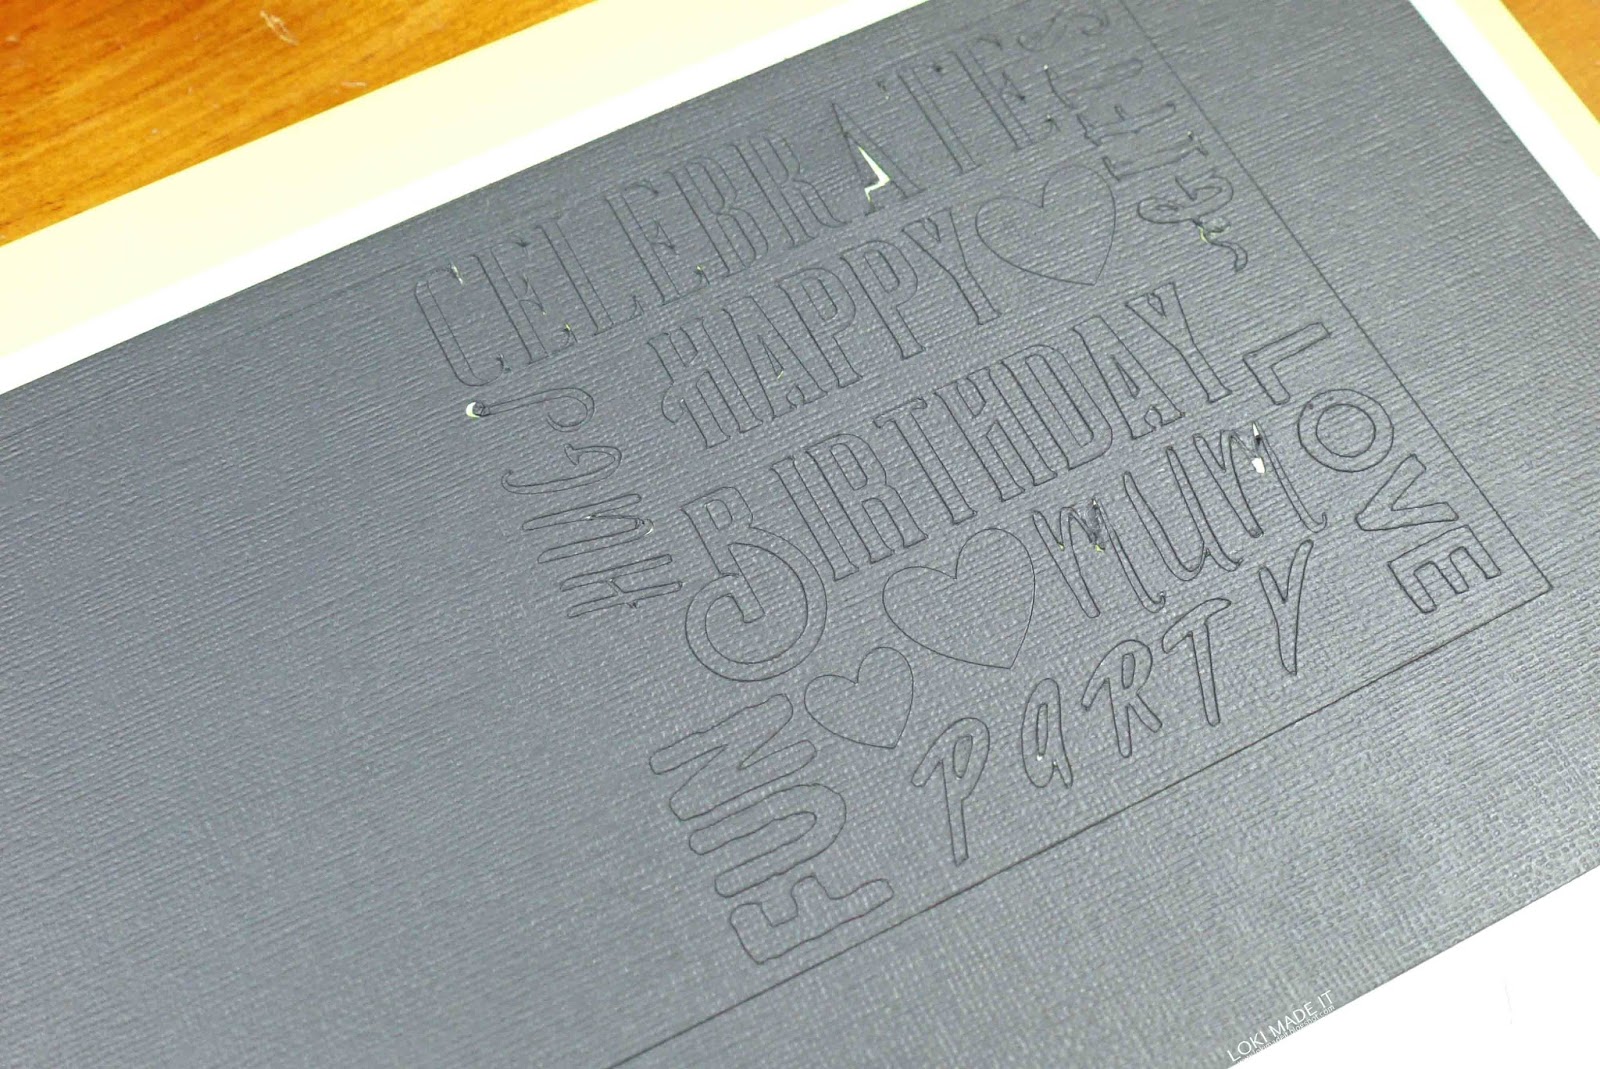
6- Double click on your text and then highlight the letter you want to replace with the glyph. use Ctrl V and paste the glyph in the text. a small square will appear in the text box but the glyph will appera on the design space.
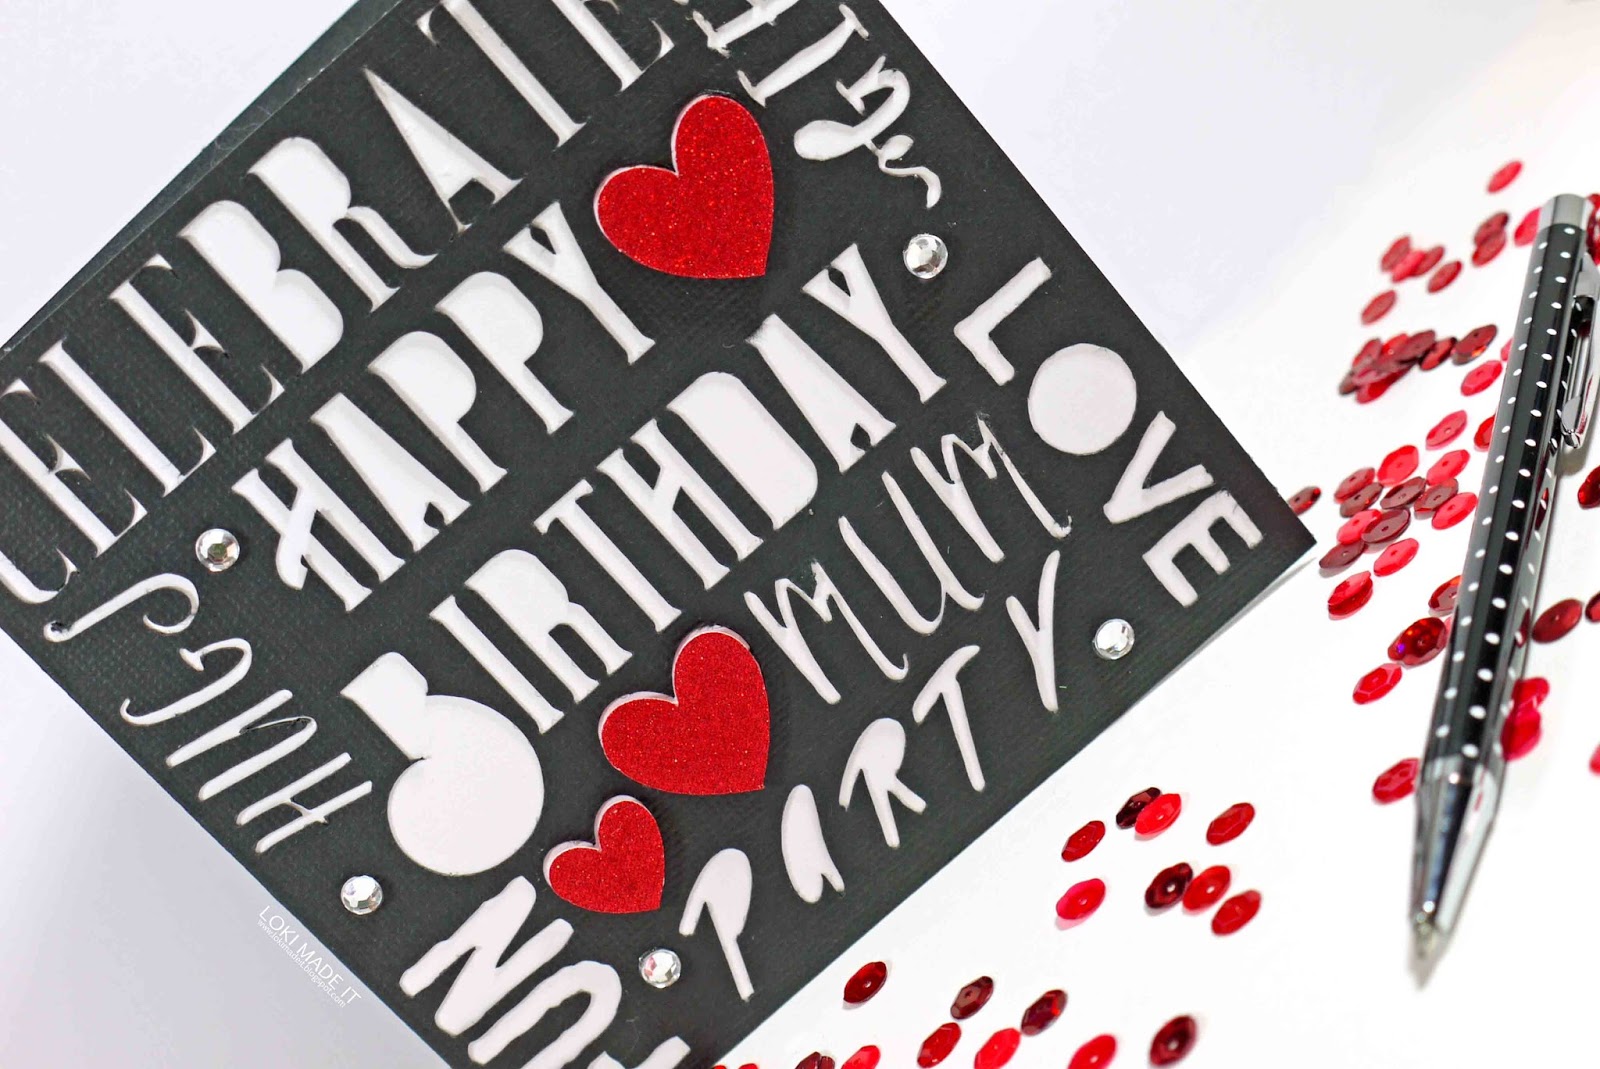
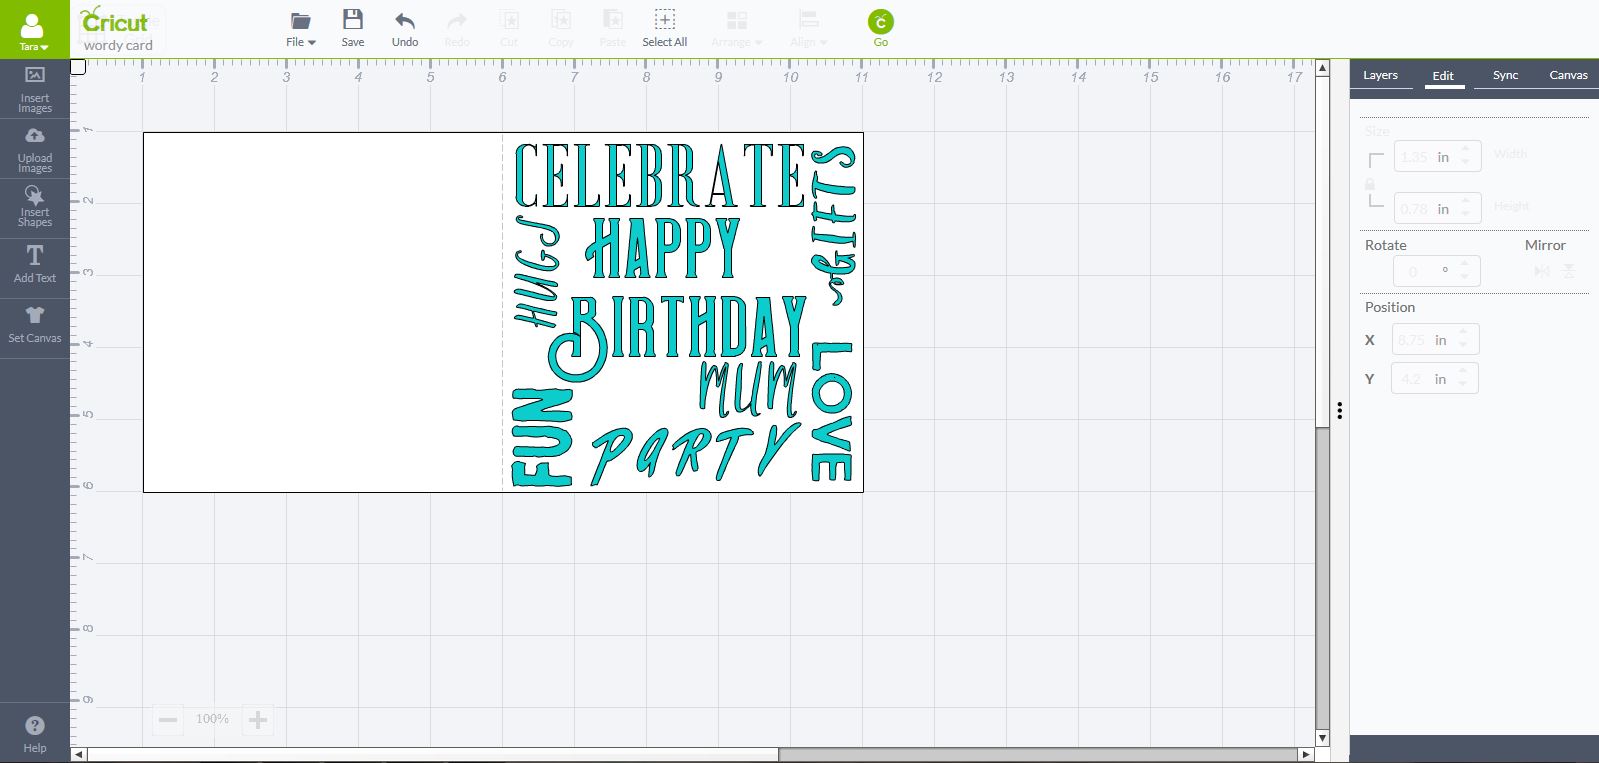
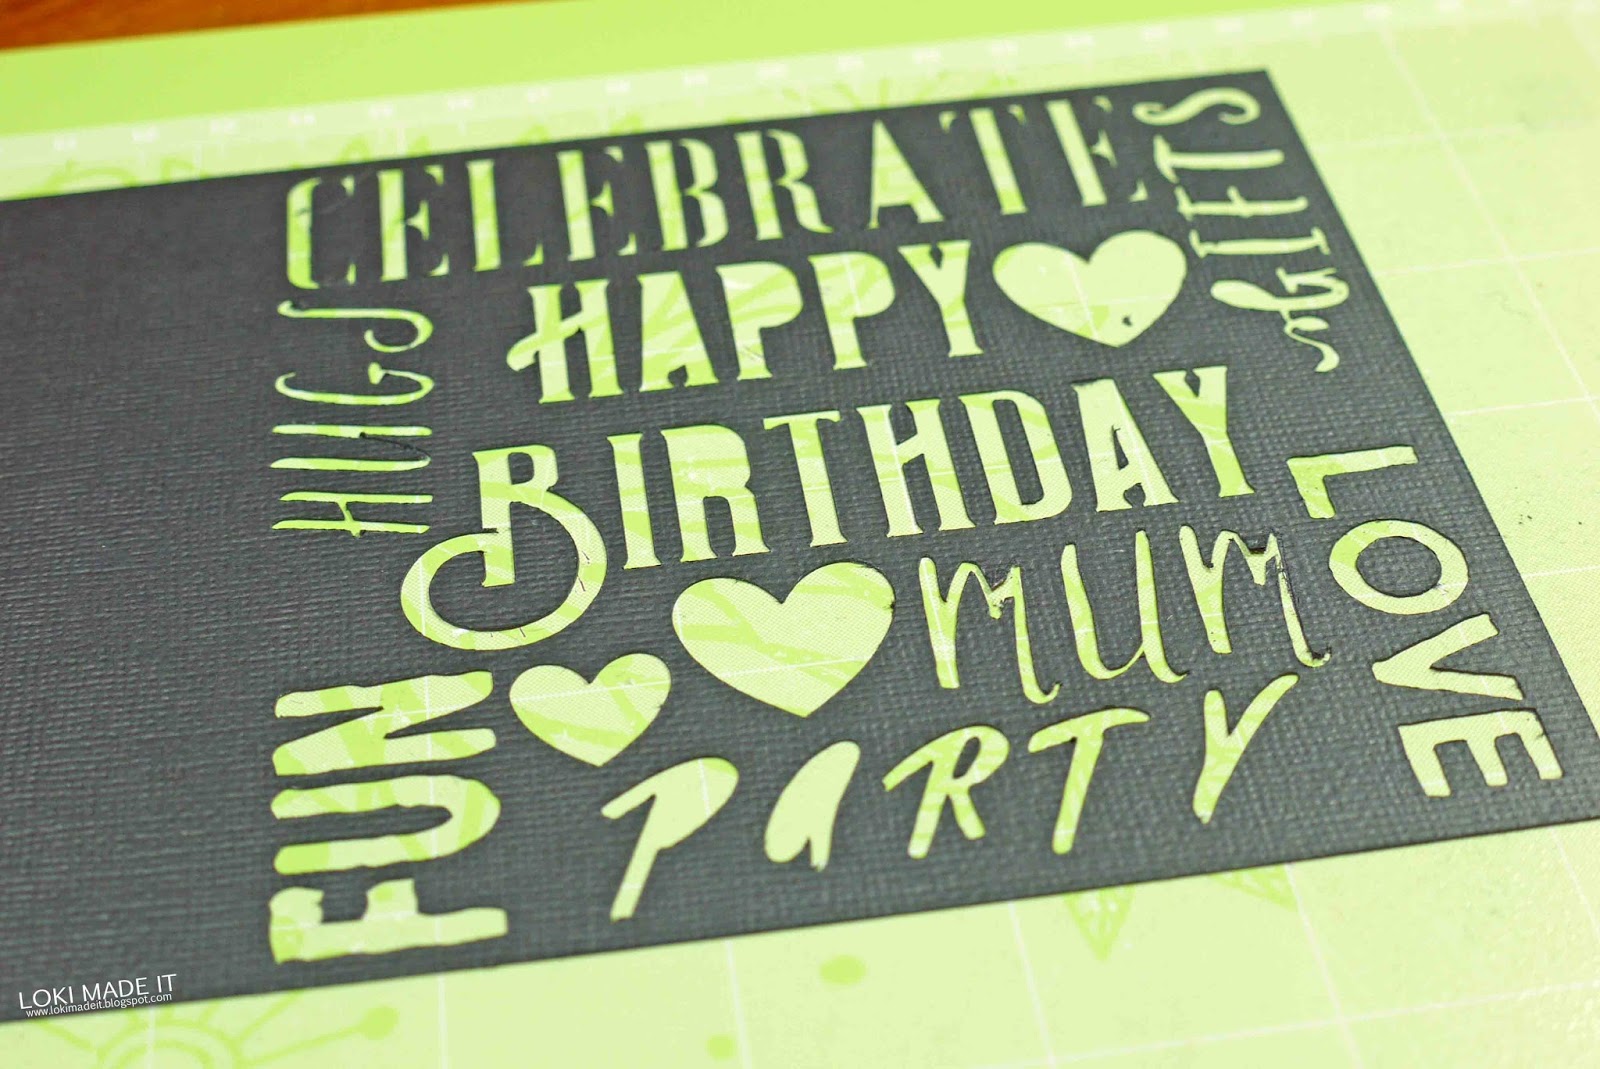
7- Continue to add more text to your card and glyphs if needed, until the card is full. make sure you use lots of different fonts to create character in your card.
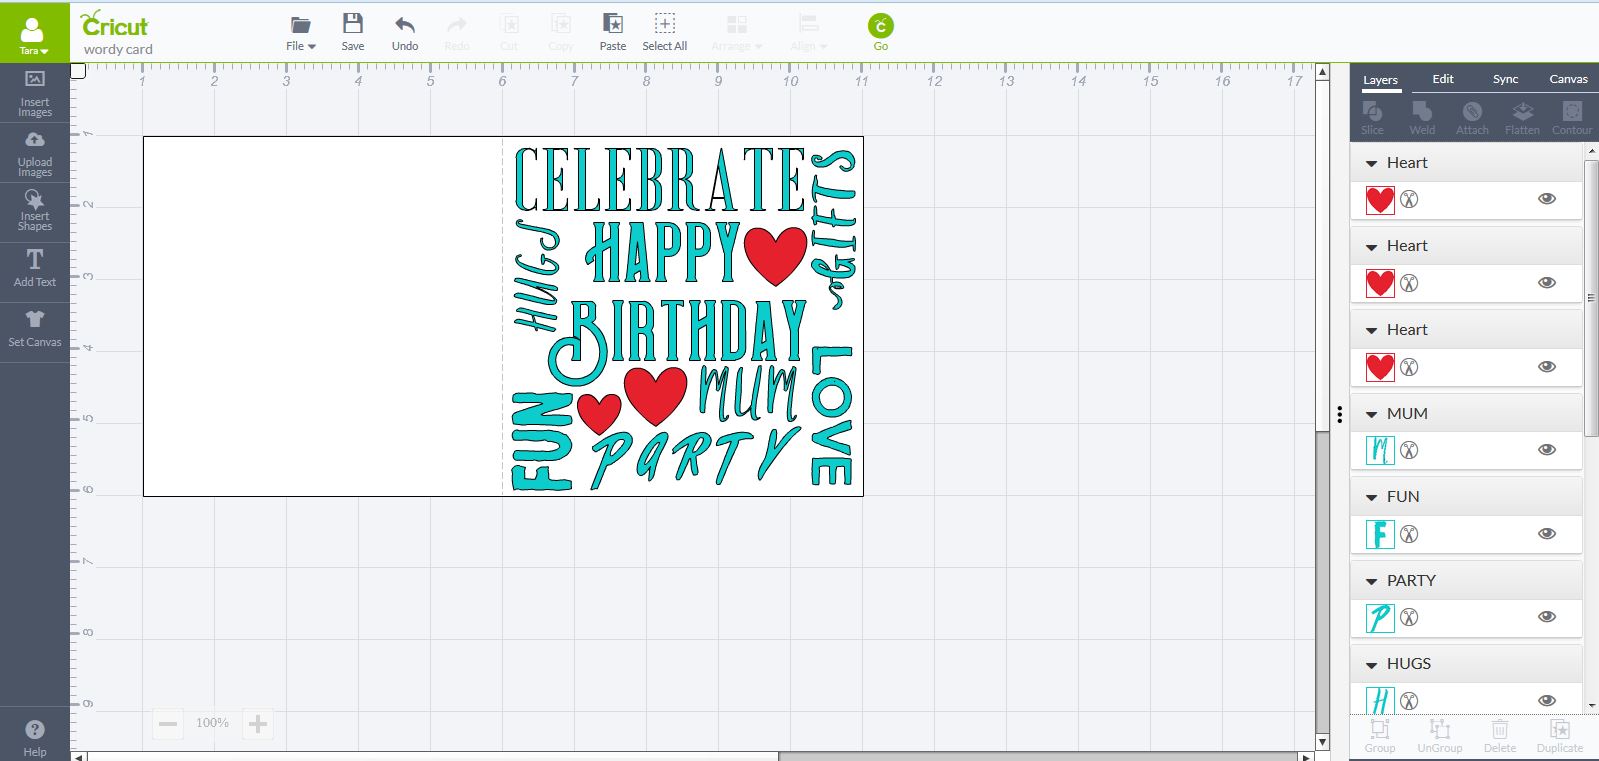
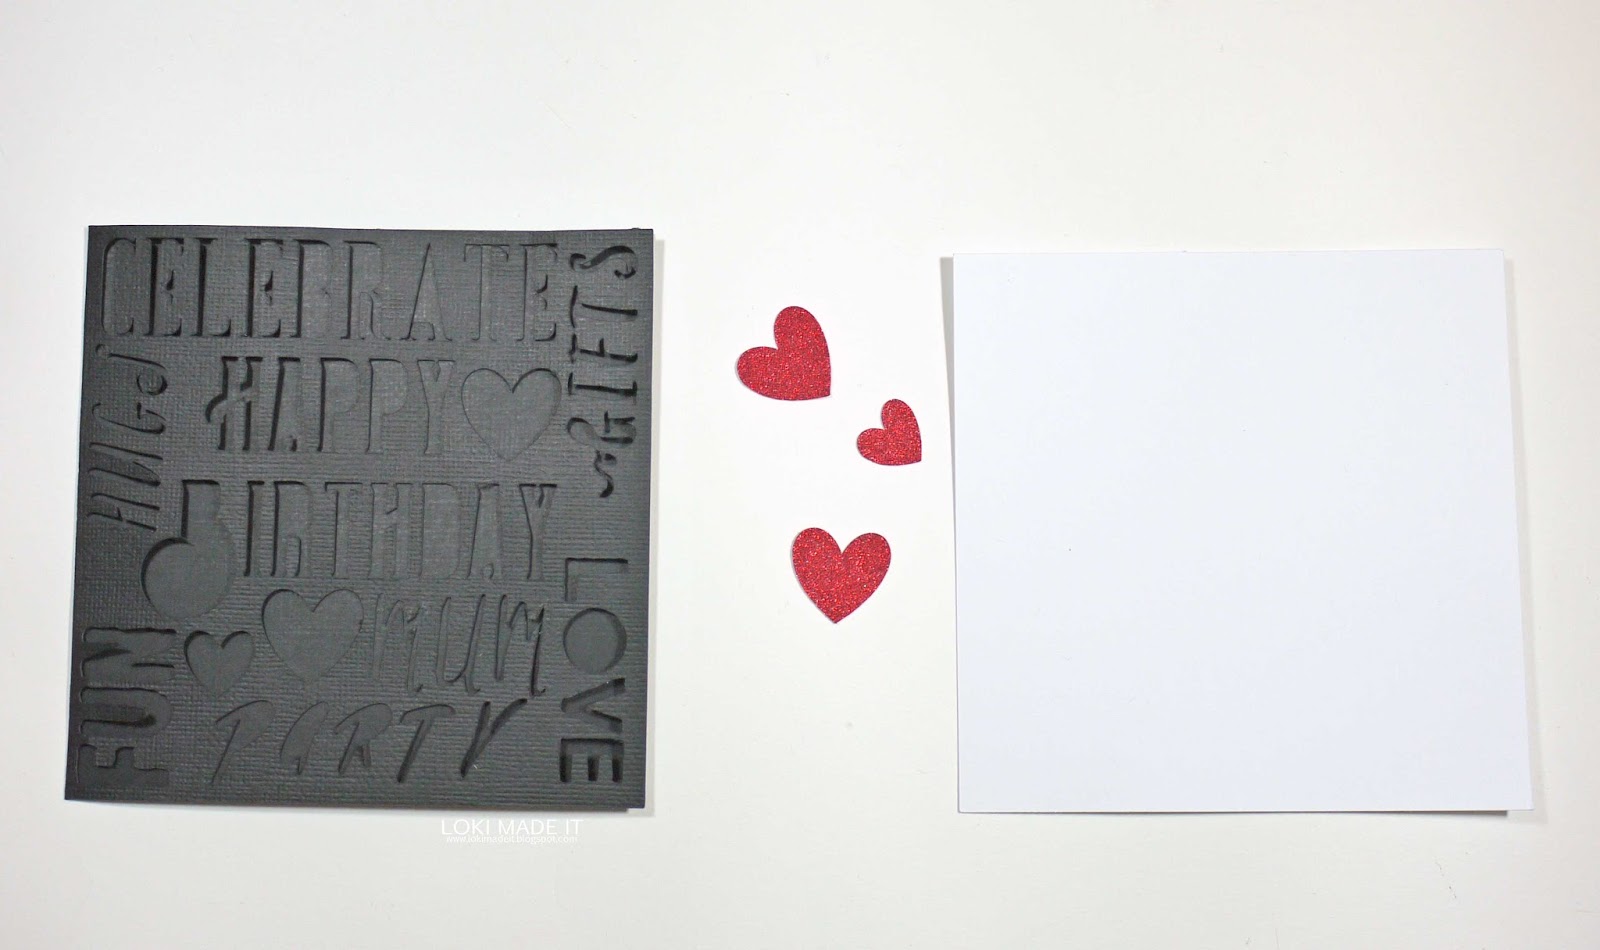
8- Where the few gaps are, we can add some hearts. Select the shape tool and add a heart. colour the heart red and resize to fit on the card. Make sure you make a copy of the heart so we can cut another one for dimension in glitter card.
9- Repeat the hearts in the other gaps as per above.
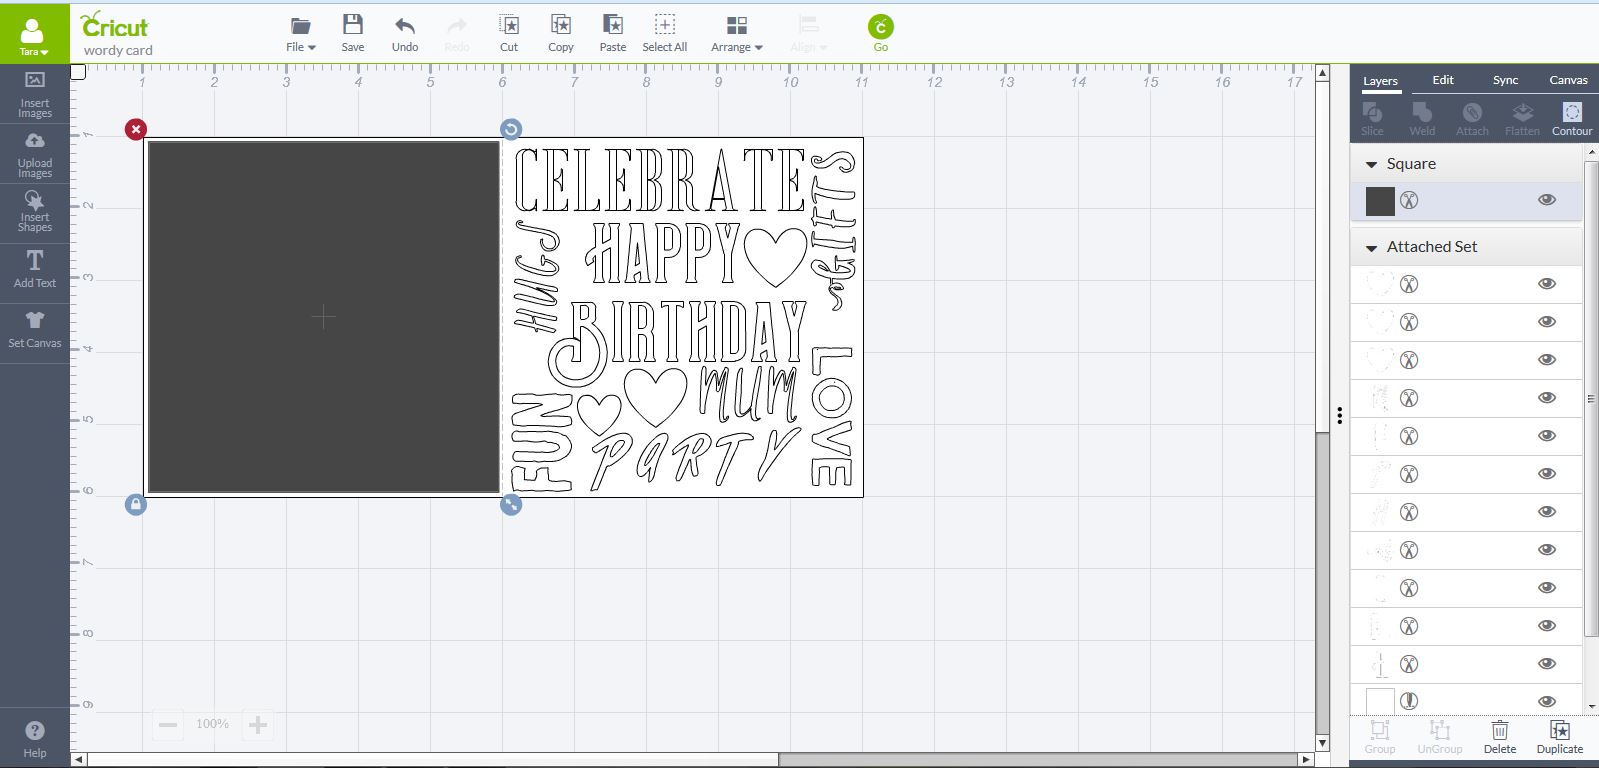
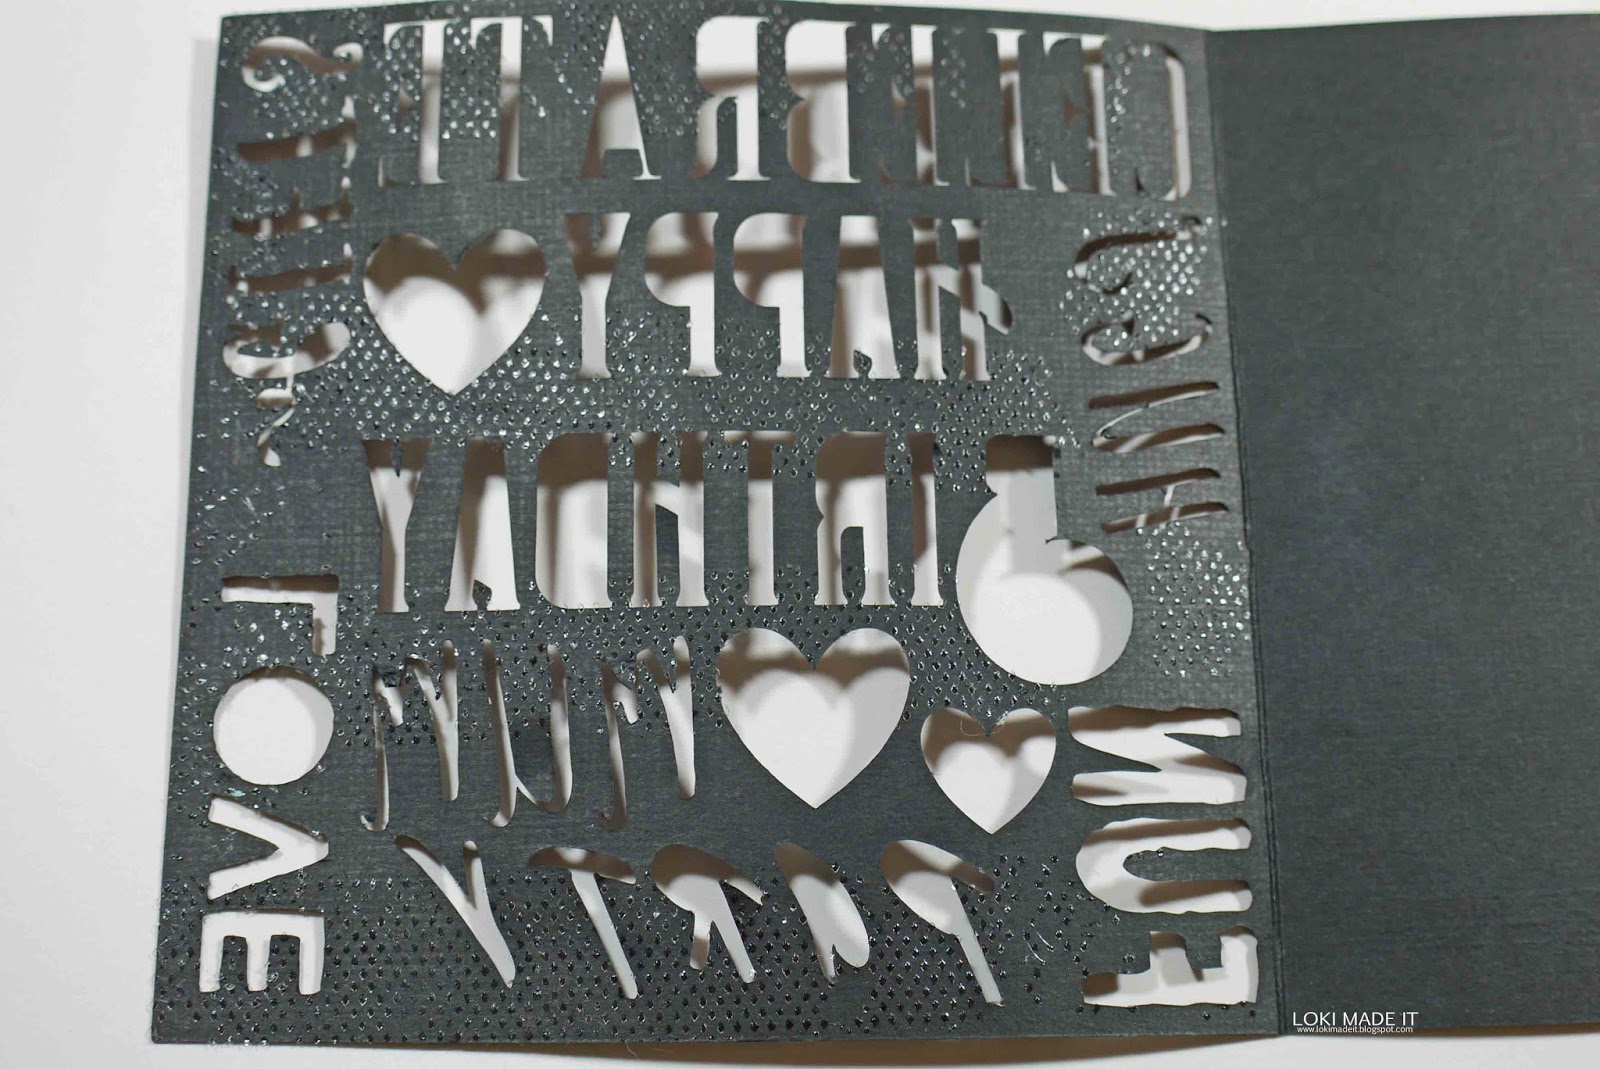
10- Highlight all the words and the card. Once everything is highlighted click on the Attach button this will hold everything in place when you go to cut your file.
11- Next select a new square and adjust to fit just inside the card. this will be the backing for the inside of the words when we cut them out.
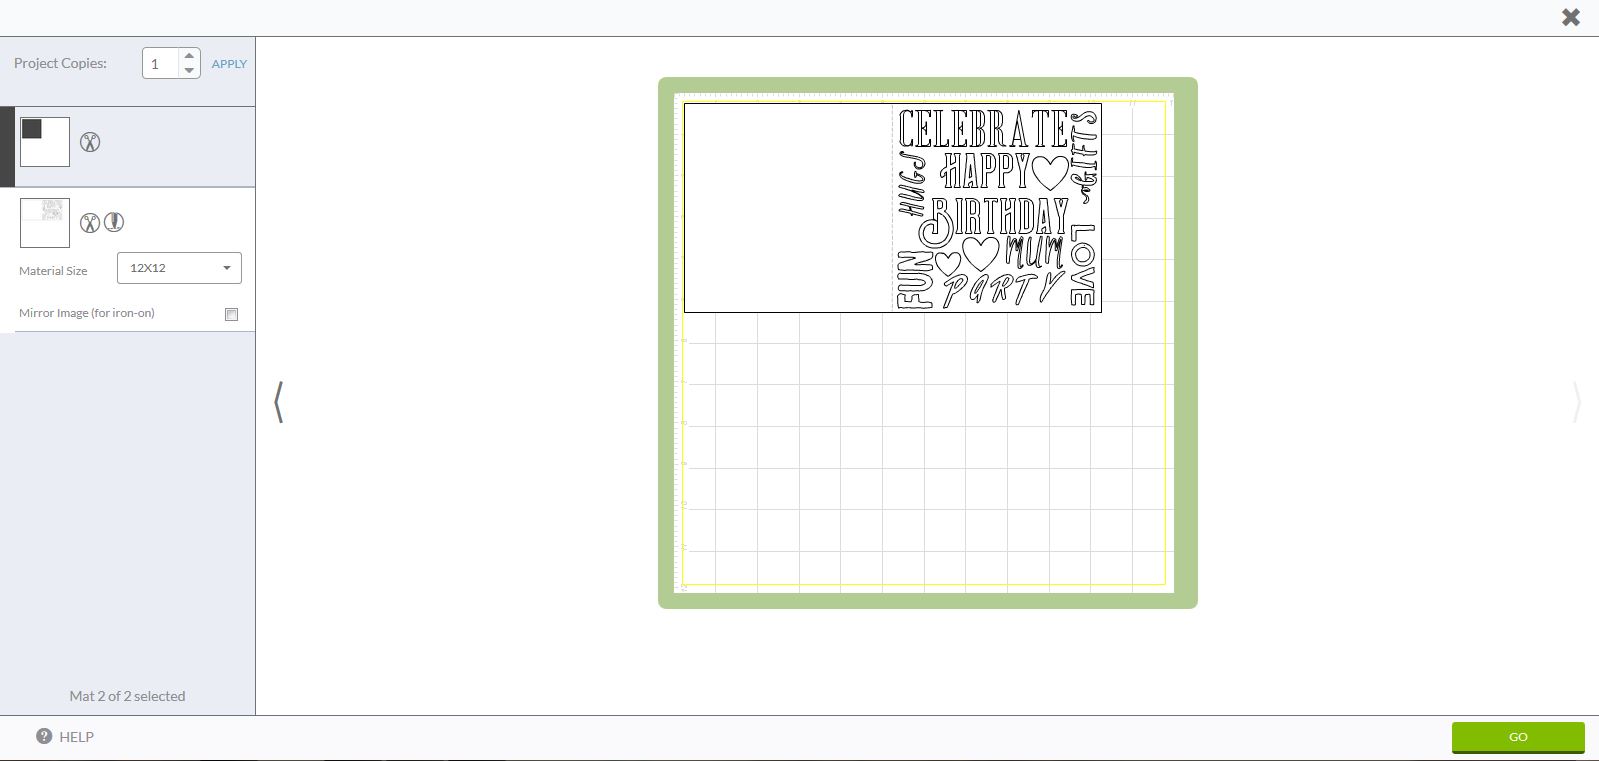
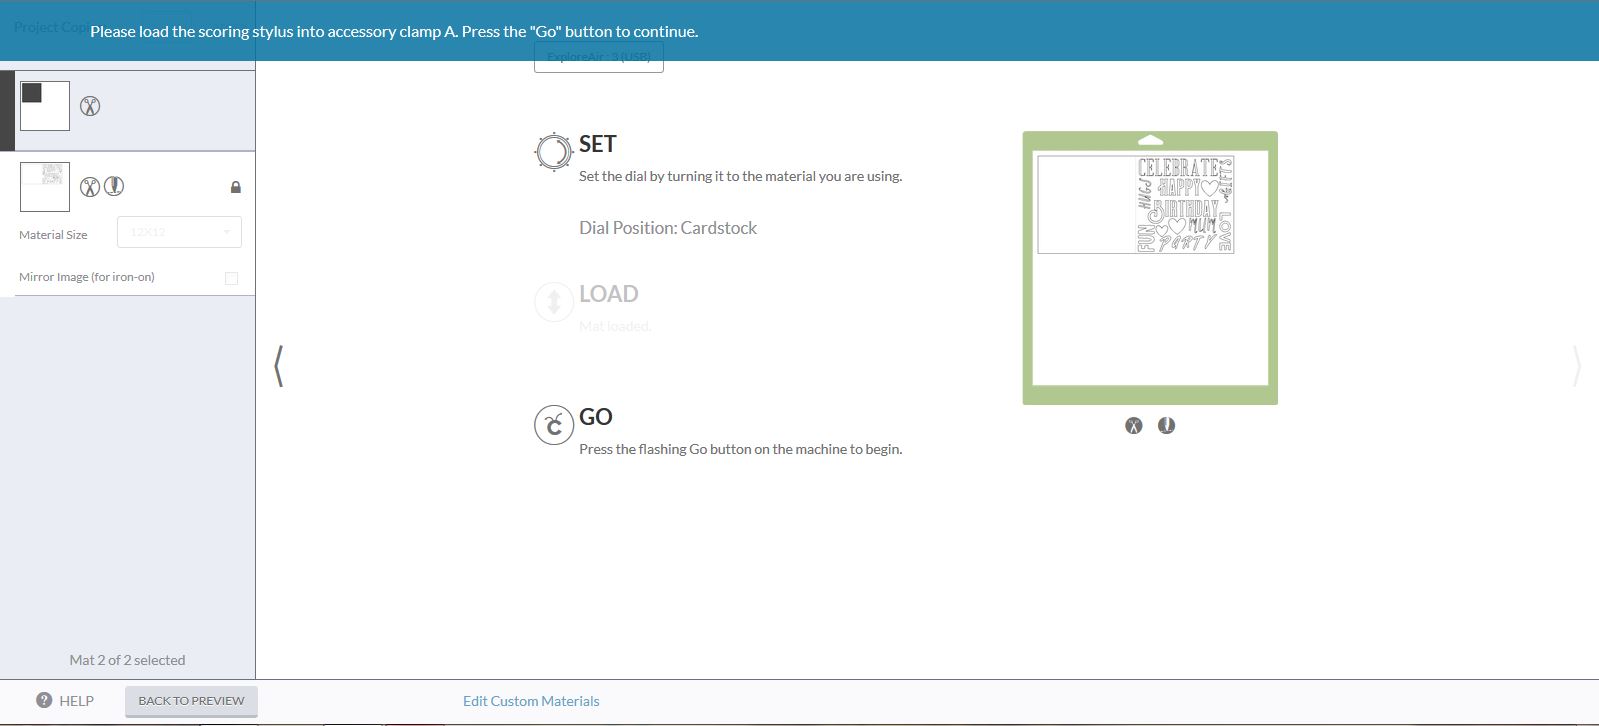
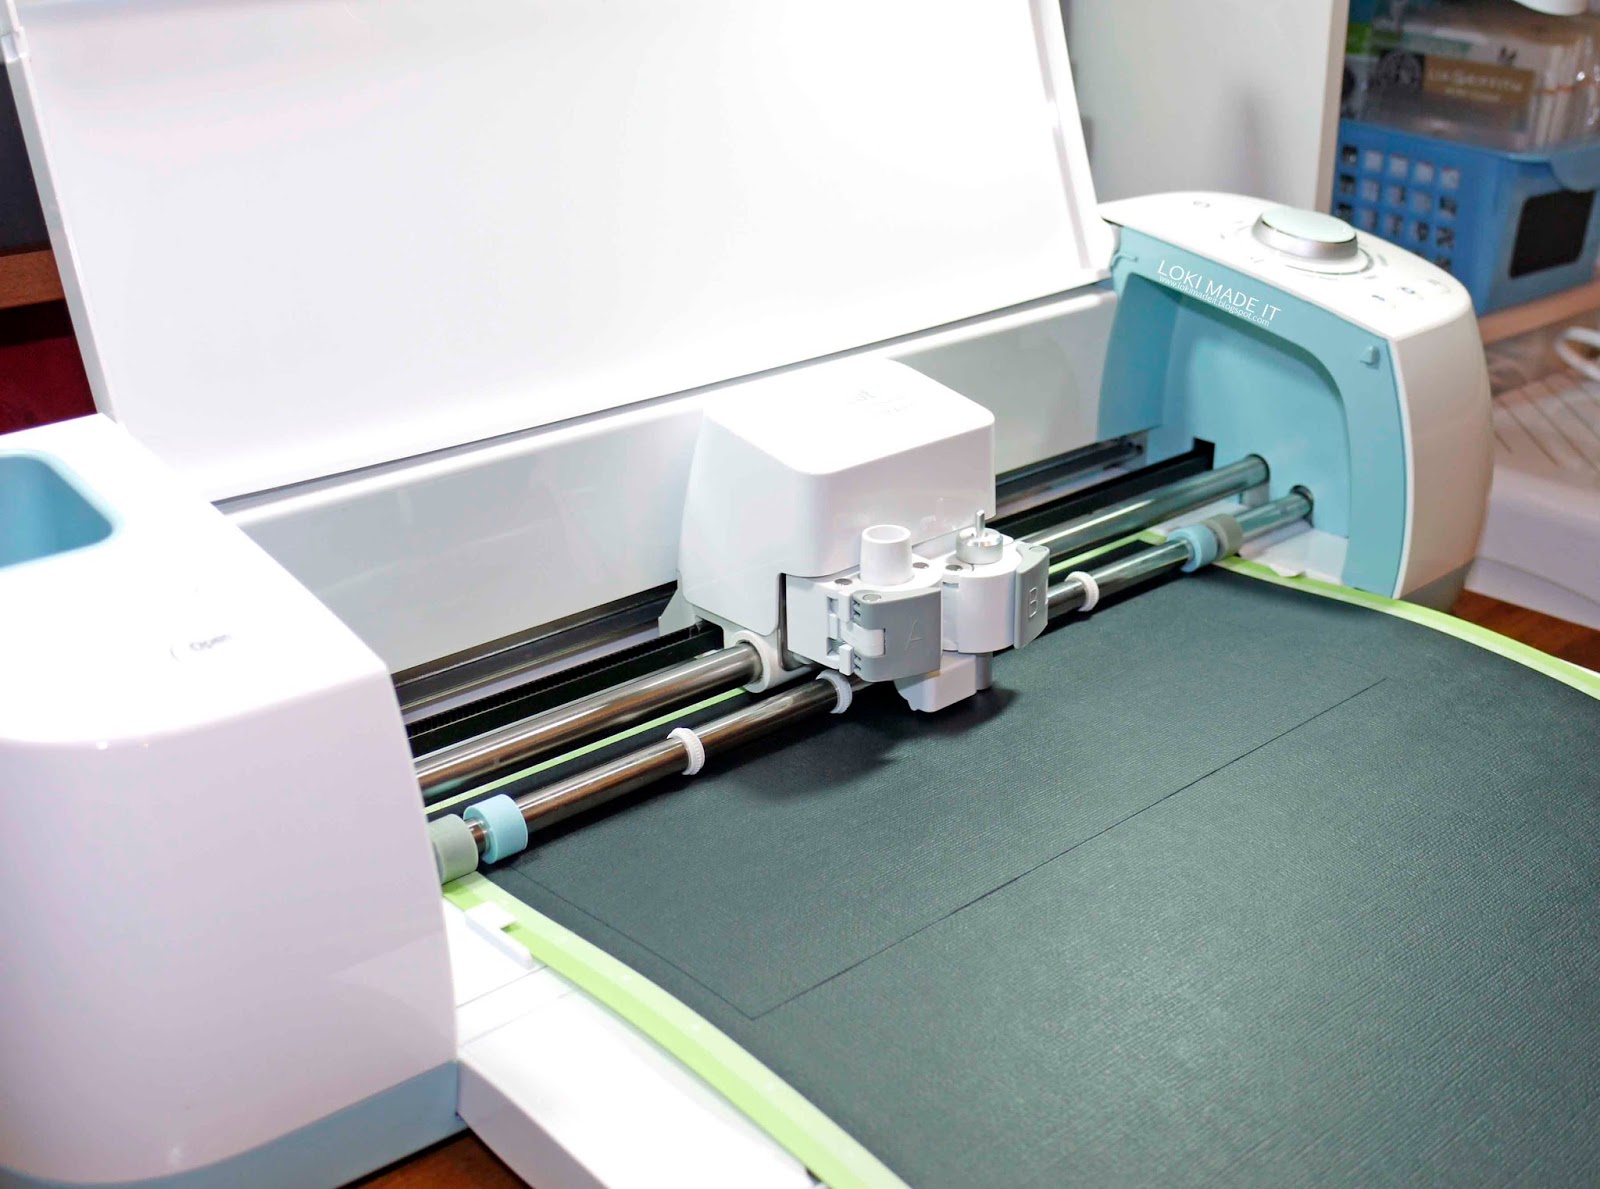
12- Click on the cricut Go button. Make sure your card is as per your design space and then click on Go.
13- Follow the prompts to cut your files.
14- Once cut, leave the card on your mat and weed the letters from the card.
15- Remove off your mat and then cut the other files. the hearts and the backing card.
16- Add glue to the inside of the card to attach the card backing.
17- Fold back over on the score line.
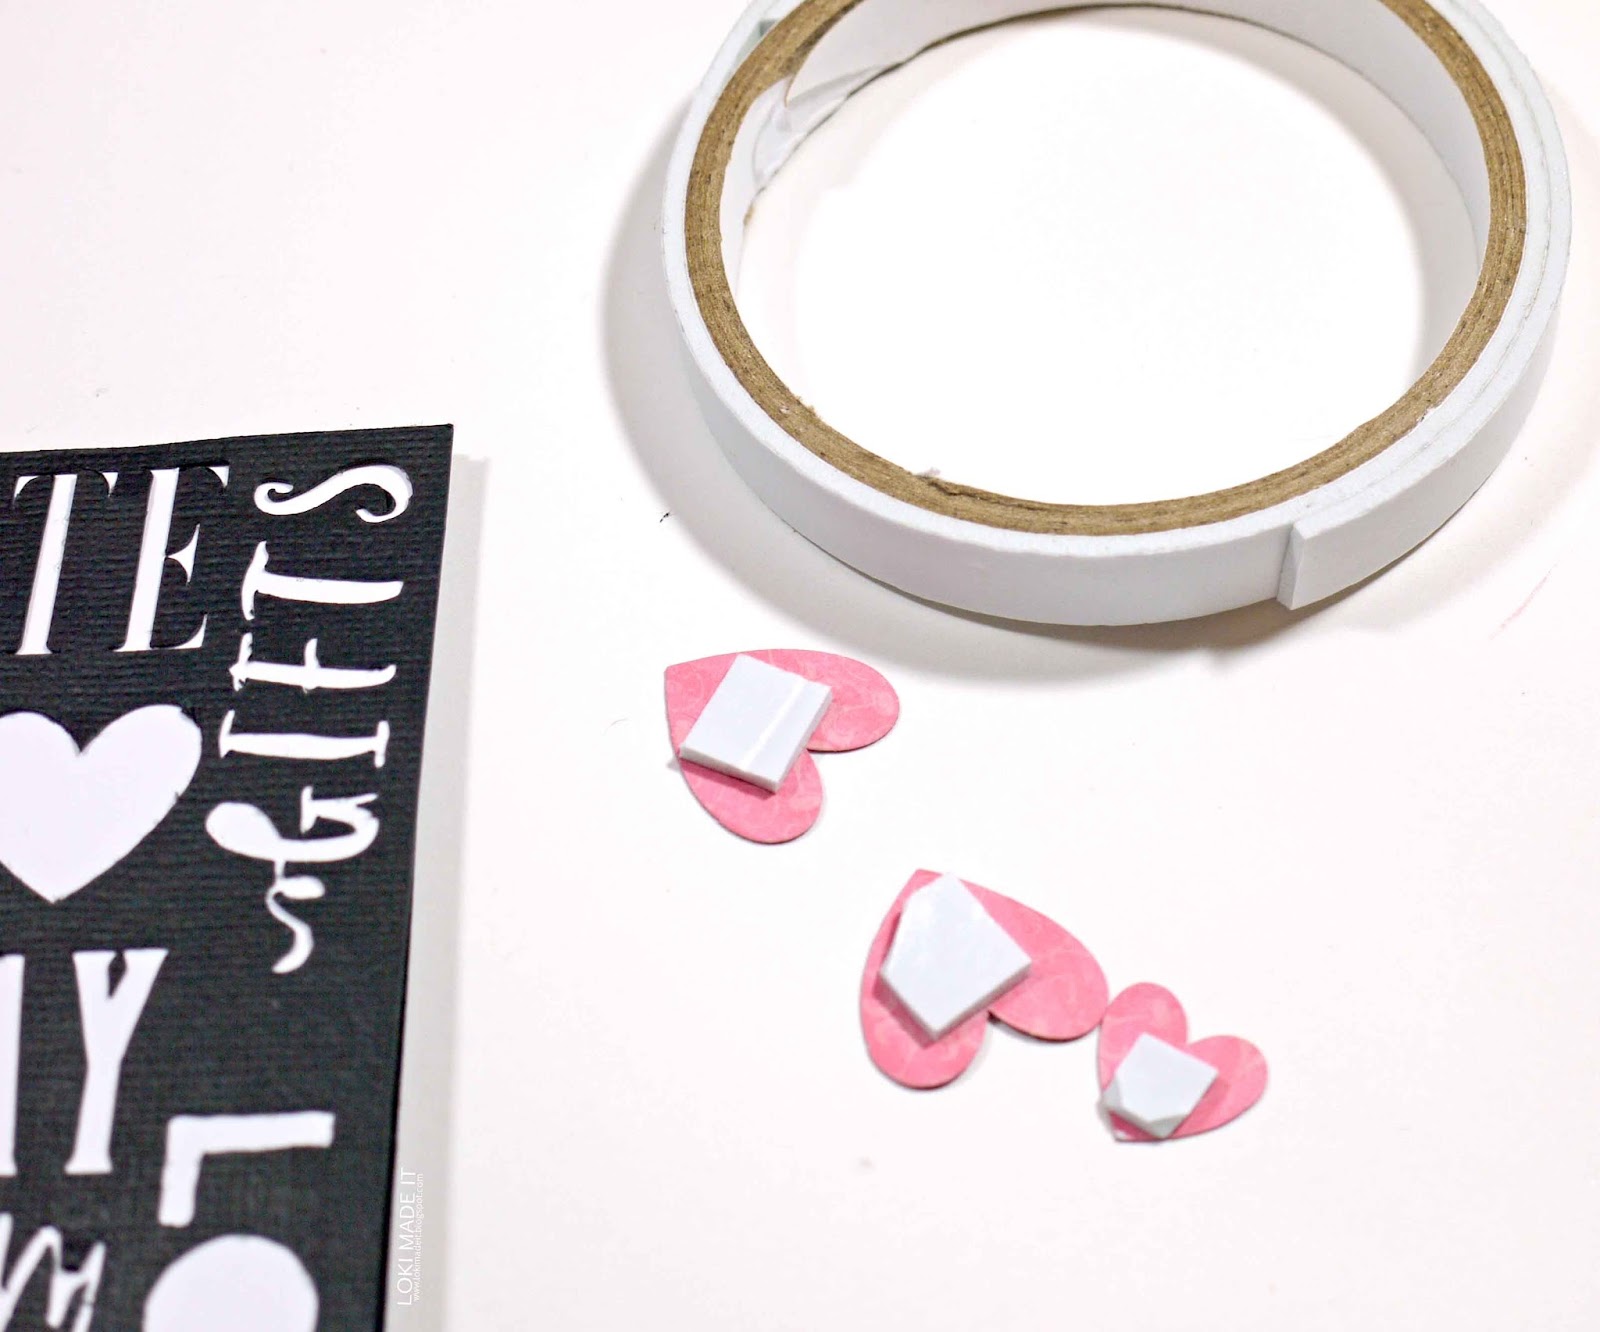
18- Place double sided 3D foam tape to the back of the glitter hearts.
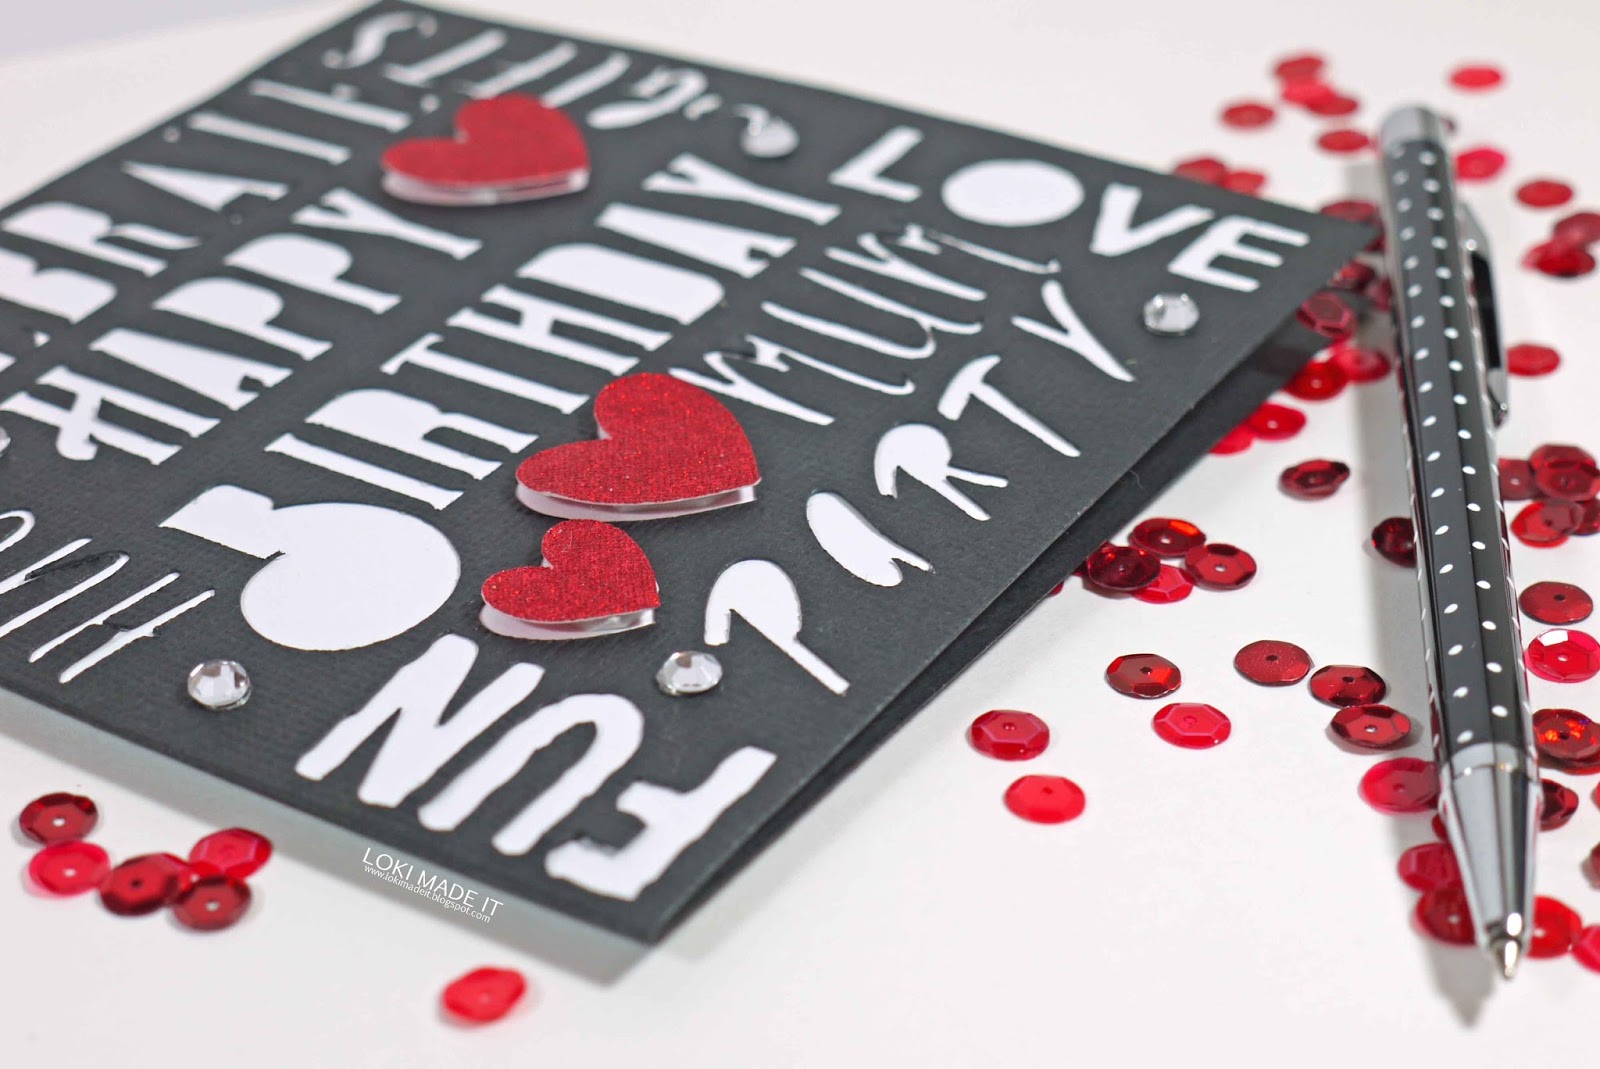
19- Add the hearts to the card.
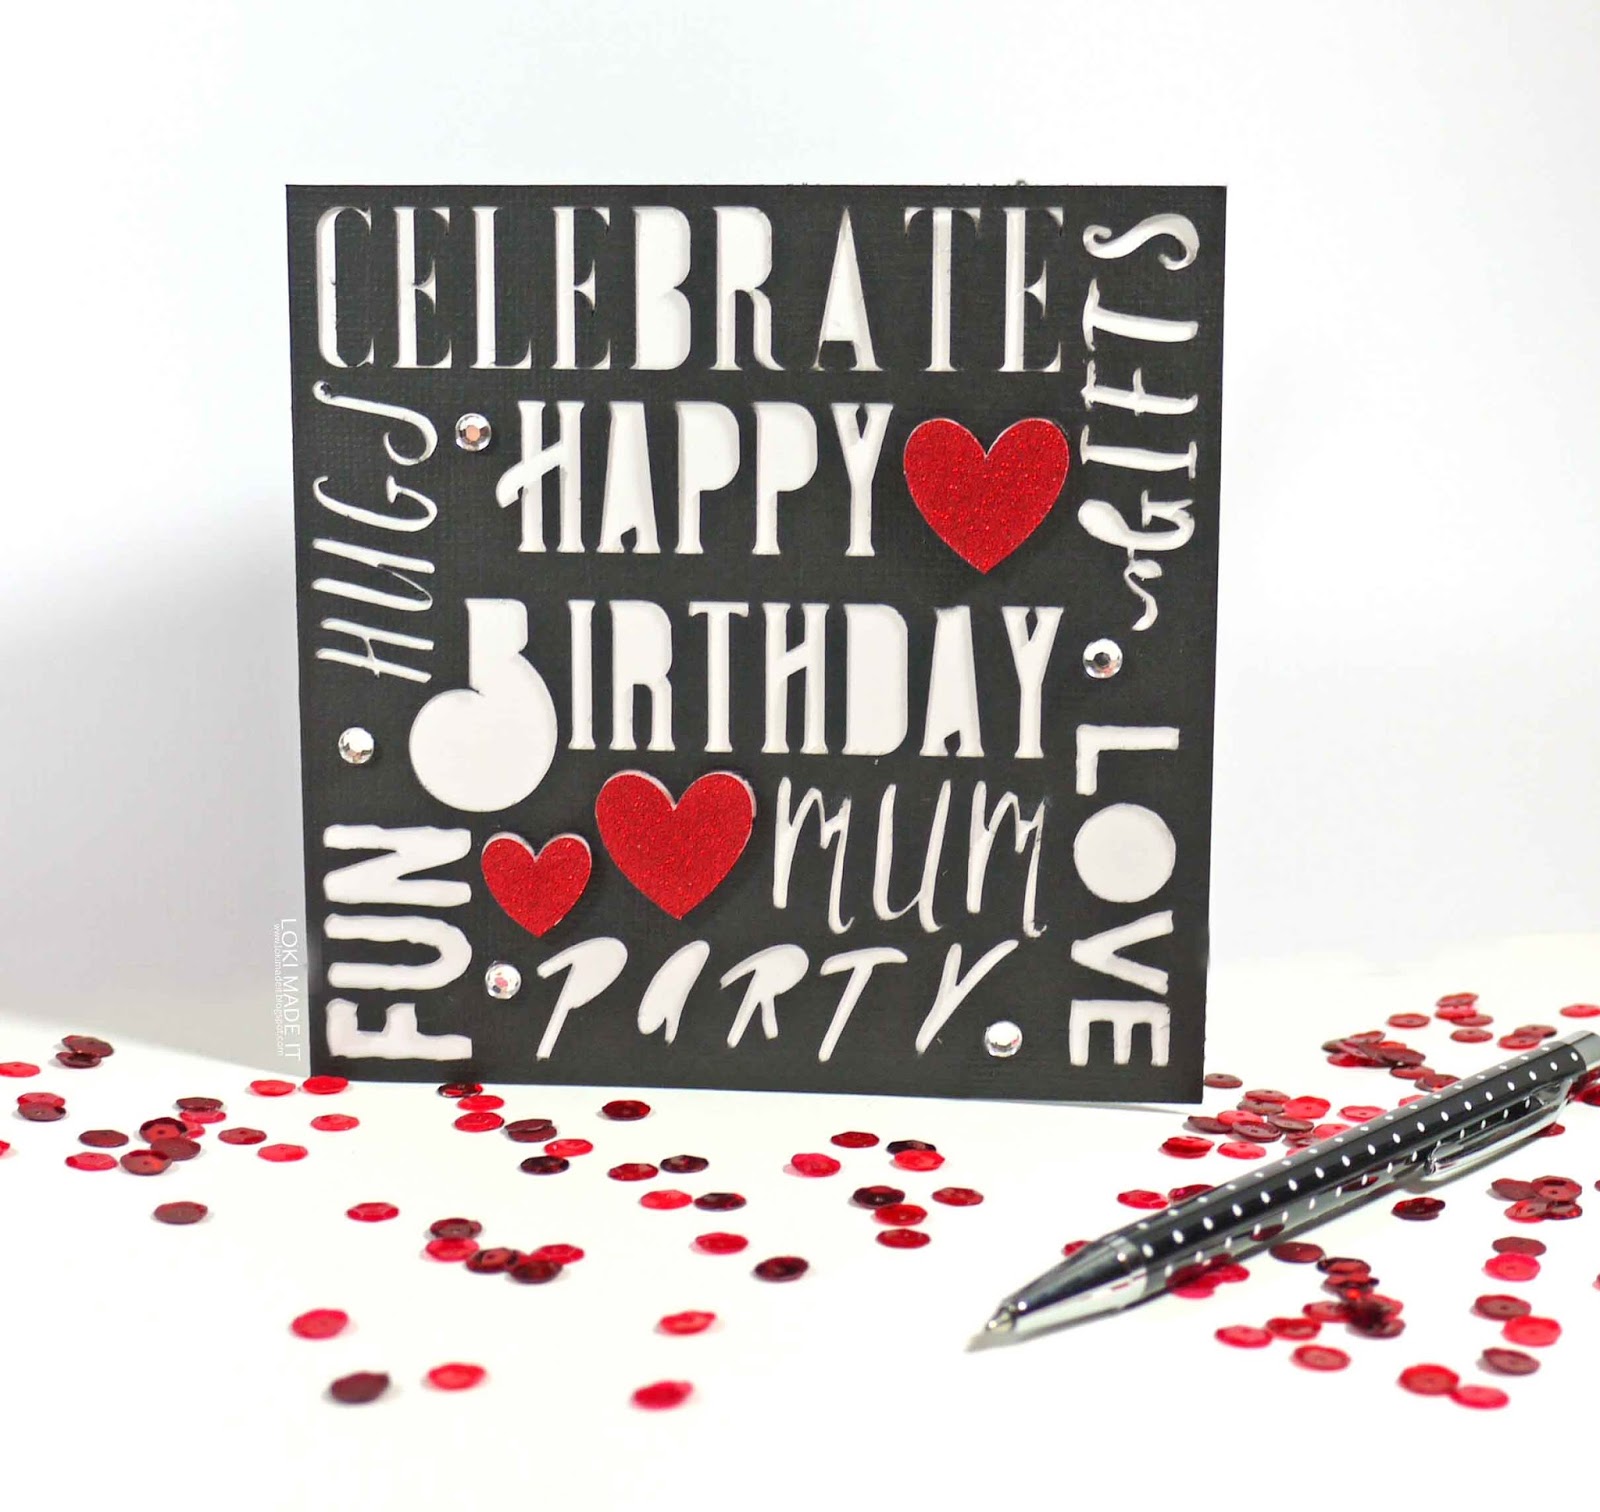
20- Finally add some clear gems. Your card is finished.
This technique can be used with any fonts you like! Its a quick and effective way to make a variety of cards using just some cards and a bundle of fonts


